Honeywell HUL900 Series Reflection Ultrasonic Cool Mist Humidifier Owner’s Manual


REFLECTION™ULTRASONIC
COOL MIST HUMIDIFIER
Owner’s Manual

If you have questions about the operation of this product, please contact us: 800-477-0457
www.HoneywellPluggedIn.com/Contact-Us
Important Safety Instructions

When using electrical appliances, basic precautions should always be followed to reduce the risk of fire, electrical shock, and injury to people, including the following:
- The humidifier should ALWAYS be placed on a firm, flat, waterproof surface at least four feet (1.2 m) away from the bedside, 12 inches (30 cm) from the wall, and out of reach of children and pets. Be sure the humidifier is in a stable position and the power cord is away from heated surfaces and out of the way to prevent the humidifier from
being overturned. - The humidifier should not be left unattended in a closed room. Doing so may result in personal injury or property damage. Leave room door partly open.
- DO NOT aim Mist Outlet directly at children, walls, or furniture.
- Before using the humidifier, extend the cord and inspect for any signs of damage. DO NOT use the unit if the cord has been damaged. DO NOT operate with power cord coiled or with twist tie in place.
- The humidifier has a polarized plug (one blade is wider than the other) as a safety feature. This plug will fit into a polarized outlet only one way. If the plug does not fit fully into the outlet, reverse the plug. If it still does not fit, contact a qualified electrician. DO NOT attempt to defeat this safety feature.
- The humidifier should ALWAYS be unplugged and emptied when not in operation or while being cleaned. Shut off and unplug the humidifier before moving. DO NOT move or tilt the humidifier while it is in operation. Plug and unplug the unit with dry hands. NEVER pull by the cord.
- DO NOT operate the humidifier without water. Turn off and unplug the unit when the Tank is empty.
- The humidifier requires regular cleaning. Refer to and follow cleaning instructions provided in the Owner’s Manual.
- DO NOT operate outdoors; this humidifier is intended for indoor residential use only.
- DO NOT cover or insert objects into any openings on the unit.
- DO NOT block intake or output vents.
- DO NOT attempt to repair or adjust any electrical or mechanical functions on this humidifier. Doing so will void your warranty.
- DO NOT place in direct sunlight, high-temperature areas, or near computers or sensitive electronic equipment.
- DO NOT touch the nebulizer while the unit is plugged in as burns could result.
- DO NOT add any essential oils or medications (e.g. Vicks VapoSteam®) into the Water Reservoir or Water Tank. Doing so could damage the humidifier and void the warranty.
- For residential use only.
How Your Humidifier Works
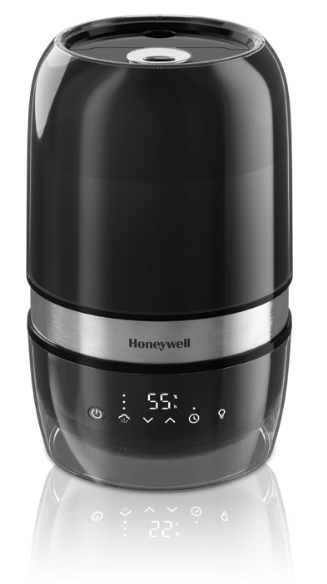
The Honeywell Reflection Cool Mist Humidifier is designed to quietly provide visible cool mist for dry air relief. This filter-free humidifier features a nebulizer that quietly vibrates the water at an ultrasonic frequency, breaking the water droplets into an ultra-fine, cool mist that you can see and feel. The mist helps reduce dry air discomforts by increasing humidity levels to help you breathe better and sleep more comfortably.

Product Description
Components

Setting Up Your Humidifier
- Remove packaging materials.
- Remove twist tie and extend the power cord.
- Place on a firm, level, and water-resistant surface, a minimum of 12 inches (30cm) from any walls.

Filling/Refilling
You have two options for filling your humidifier’s Water Tank: under the faucet at the sink, or with a pitcher of water at the humidifier.
- If filling at the sink, turn the humidifier off, then open the Tank lid to reveal the handle, remove the Tank from the Base, carry it to the sink, and fill it.
OR
If filling at the humidifier, ensure the Tank is securely seated on Base. Open the Tank lid and fill using a water pitcher.
NOTE: Fill Tank with cool water. DO NOT fill with warm or hot water. DO NOT ADD ESSENTIAL OILS, MEDICATIONS, OR INHALANT LIQUIDS, such as Vicks VapoSteam, to the Tank. Doing so could cause damage to the humidifier and void the warranty. - Close the Tank lid.
- If filled at the sink, carry the full Tank back using two hands and place it back in the Water Reservoir on the Base. For proper placement, line up the chimney and nozzle to the HONEYWELL logo.
NOTE: When taking your Tank to and from the sink, carry the Tank using two hands. Manufacturers will not accept responsibility for property damage caused by water spillage.
Water Quality and Your Humidifier
High mineral content in your water, also known as “hard water,” may cause a white mineral residue to accumulate on surfaces in the room near the humidifier. This mineral residue is commonly referred to as “White Dust.” The higher the mineral content or hardness of your water, the greater the potential that you may have white dust. “White ust” is not a result of a defect or flaw in the humidifier. It is a result of the number of minerals suspended in the water you are using. If you live in a hard water area, use distilled water to minimize the production of white dust.

Operating the Humidifier


If the Power icon turns an amber color, this indicates that the Reservoir water level is low or the Tank is not set in place. Check the water level and fill if necessary, and ensure the Tank is properly seated.
NOTE: If the Tank is refilled at the humidifier when the Power icon is amber, it will need to be reset. Either power OFF then ON or remove and replace the Tank. This will activate the water flow to the Reservoir and turn the Power icon white to indicate normal operation.

Humidity Reached Icon: Once the set humidity level is reached, the display will turn blue, the Humidity Reached icon
If there is no water in the reservoir, the display will be white and the Power icon

Auto Mode: Your humidifier is equipped with an Auto Mode that allows for effortless humidification. When first powered ON, the humidifier will start in the Auto Mode. The humidifier will automatically set the humidity output level based on the ambient relative humidity in the room. When the humidity level is low, the humidifier will add more moisture to the air at a faster rate by automatically using the Turbo Mist feature. The target humidity level in the Auto Mode is 60%. Once the humidity reaches 60%, the humidifier will stop producing mist while continuing to monitor the humidity level around the device.

Humidity Mist Level: You can control the amount of mist that you would like the humidifier to produce. To manually select a mist level, touch the Mist Control icon

Operating the Humidifier (Cont.)

Humidity Level Setting: As an alternative to using the Auto Mode, you can set your preferred humidity level manually. Select the Low, Medium, or High mist level, then use the Humidity Control arrows to set your desired humidity level. You can set the humidity level from 30% to 69%. For personal comfort, the recommended humidity level is between 40-60%.
If the humidity level in your space drops below 30%, the Display will show
If the humidity level rises above 69%, the Display will show
Adjust the humidity level up or down as desired.


Humidity Reached Icon: When the desired humidity level is reached, the Humidity Reached icon
NOTE: If you notice condensation on the walls, windows, or around the humidifier, your humidity level is too high. Lower the setting or turn off the humidifier.
Timer: The timer allows you to program the humidifier to automatically turn off after a specified time. To set the timer, press the Timer icon
NOTE: While the timer is running, the humidifier will continue to cycle ON and OFF to maintain the set humidity level. At the end of the timed cycle, the humidifier will power OFF, regardless of the humidity setting. If the humidifier is manually turned off by pressing the power button or by unplugging the humidifier, the timer will reset to OFF.


Mist Outlet: The Mist Outlet is designed to let you direct your humidification exactly where you want. Turn the Outlet a full 180 degrees to direct the mist according to your preference. It will not rotate to direct mist behind the unit to avoid white dust ingestion in the rear input vent.

Essential Oil Tray
This humidifier features an Essential Oil Tray that can be used with your favorite essential oil for added enjoyment. This device is not a diffuser – the oil does not come in contact with water and is passively evaporated into the air. Essential oils are not included.
- Press and release Tray, located in the back of the Base, to open.
- Add a few drops of essential oil to the Pad and close the tray.
- To clean the Essential Oil Tray, gently wipe residue from the Tray. Replacement essential oil Pads can be ordered through Consumer Relations; see back of this manual for contact information.

WARNING: DO NOT ADD LIQUID INHALANTS, ESSENTIAL OILS, OR ANY ADDITIVES TO THE WATER TANK. DOING SO CAN HAVE ADVERSE EFFECTS ON THE HUMIDIFIER AND VOID THE WARRANTY.
Care and Cleaning
For best results, use fresh clean water every day.
When the humidifier is not in use, it is recommended that you empty the Tank and Water Reservoir and let them air dry. To clean the Reservoir’s exterior stainless steel surface, simply wipe with a soft cloth.
To keep your humidifier running efficiently, clean it regularly. Weekly cleaning is recommended.
To properly clean your humidifier, it is recommended to follow the separate processes of Scale Removal and Disinfecting (next page). These two processes must be performed separately.
CAUTION: BEFORE MOVING THE HUMIDIFIER, TURN IT OFF, UNPLUG AND EMPTY THE TANK AND BASE.
All maintenance should be done in the kitchen or bathroom on a water-resistant surface near a faucet. DO NOT wash any components of this humidifier in the dishwasher.
Before Cleaning
1. Turn OFF and unplug the humidifier. Remove any accessories.
2. Remove the Tank from the Base. Empty water from Tank and Water Reservoir.
Prefer short video instruction?
Scan here or see HoneywellPluggedIn.com for cleaning videos:

Instructions for Scale Removal
- Pour 2 cups of undiluted, distilled white vinegar into the Water Reservoir.
- Pour 1 cup of undiluted, distilled white vinegar into the Water Tank, to cover the bottom of the Tank. Gently swish vinegar around in the Tank. Place Tank on Base.
- Allow the vinegar to remain in Water Reservoir and Tank for 20 minutes. The vinegar will loosen mineral buildup on the Nebulizer, Water Reservoir, and underside of the Tank.
- After soaking, remove the Tank and empty the vinegar from the Water Reservoir and Tank into the sink. With a soft cloth, wipe the Nebulizer, Water Reservoir, and the underside of the Tank to remove mineral buildup.
- Rinse the Water Reservoir, Tank, and underside of the Tank with water until the smell of vinegar is gone. When rinsing Reservoir, avoid getting water into any other openings on the Base.
NOTE: When the humidifier is unplugged, placing the Tank on the Base will not drain the vinegar from the Tank into the Water Reservoir. Power is required to activate the mechanism that releases water from the Tank into the Water Reservoir. The vinegar added to the Tank will need to be poured out of the Tank.
DO NOT attempt to run the unit with vinegar.

Care and Cleaning (Cont.)
Instructions for Disinfecting
Before beginning disinfection, follow Steps 1-2 in the “Before Cleaning” section (previous page).
NOTE: Bleach may stain clothes. It is recommended that you wear rubber gloves during the disinfection process to protect your hands.
- Add 1 tsp. of bleach to 1 gallon (3.8L) of water. Fill the Water Reservoir with part of the solution, about 2 cups. Pour the rest of the solution into the Tank. Close Tank lid. Gently swish the solution around in Tank. Place Tank on Base.
NOTE: DO NOT use more than 1 tsp. of bleach per gallon of water; using more bleach may result in damage to your humidifier. - Allow the bleach solution to remain in the Tank and Water Reservoir for 20 minutes.
- Carefully empty the solution from the Water Reservoir and the Tank into the sink.
- Rinse Tank and Water Reservoir with water until the smell of bleach is gone. When rinsing Water Reservoir, avoid getting water into any other openings on the Base.
NOTE: DO NOT mix vinegar and bleach solution together. Scale Removal and Disinfecting must be done separately.
End-of-Season Care and Storage
Follow the CLEANING instructions when the humidifier will not be used for at least one week or at the end of the season. Remove any accessories used with the humidifier and allow the humidifier and accessories to dry completely before storing.
DO NOT store water inside the Base, Water Reservoir, or Tank. Pack unit safely and store in a cool, dry location.

Air Filter Cleaning
It is recommended that when you clean your humidifier, you also inspect the Air Filter and clean if needed following these instructions:
- Turn OFF and unplug the humidifier.
- Remove the Air Filter door by pushing the locking tab on the right side of the door toward the center of the unit and pull gently it outward.
- Remove black Air Filter by lifting it out from the door.
- Rinse Air Filter under cold water.
- Blot Air Filter dry with a paper towel. Ensure Air The filter is completely dry before reinstalling. If it is damp, it will affect the humidity sensor.
- When returning Air Filter to door, ensure the filter is fully seated.
- Reattach the Air Filter door by placing the alignment tab to the left of the opening, then snapping the locking tab in place on the right as the door closes.

Troubleshooting
If your humidifier is not working properly, try the following solutions:
Problem |
Possible Cause | Solution |
| Power Light remains OFF after pressing the Power Recess | • Humidifier not plugged in • No power at outlet |
• Plug humidifier in • Check home circuits, fuses; test outlet |
| Power is ON and light is white but little or no mist is produced |
• Mineral deposits in Water Reservoir • Mist Level setting may be too low • Tank or Water Reservoir were washed with detergent |
• Clean Humidifier • Turn up the humidity mist level • Rinse thoroughly with clean water until there is no foam or smell of cleaning solution |
| Water overflows from Water Reservoir | • Tank may be damaged • Tank is not sitting properly on Base |
• Check the Tank for any cracks or damage, and replace if necessary • Ensure Tank is seated properly and securely on Base |
| Condensation forms around humidifiers or on windows and walls | • Mist Control is set too high for room size or pre-existing humidity level • Humidifier may be too close to wall or window |
• Decrease Mist Control to a lower setting, or open door to the room • Move humidifier away from the wall or point Mist Outlet away from wall or window |
| Humidity Level Setting arrows are not visible |
• Unit is in Auto Mode | • Press the Humidity Mist Level icon to change to a manual setting |
| Humidity displayed is unusually high | • Air filter is wet or damp | • Remove the filter and pat dry with a towel or cloth |
| The unit shut off due to no water in the tank. I refilled. The unit did not turn back on. |
• Refilling while the unit is ON. | • Turn the unit OFF then ON. This will trigger the system to check for water in the Tank. |
NOTE: Failure to keep this humidifier clean from mineral deposits normally contained in any water supply will affect the efficiency of operation of this humidifier. Customer failure to follow these instructions may void the warranty.
2 Year Limited Warranty
Read all instructions before attempting to use this product.
A. This 2-year limited warranty applies to repair or replacement of products found to be defective in material or workmanship. This warranty does not apply to damage resulting from commercial, abusive, unreasonable use, or supplemental damage. Defects that are the result of normal wear and tear will not be considered manufacturing defects under this warranty.
KAZ IS NOT LIABLE FOR INCIDENTAL OR CONSEQUENTIAL DAMAGES OF ANY NATURE. ANY IMPLIED WARRANTY OF MERCHANTABILITY OR FITNESS FOR A PARTICULAR PURPOSE ON THIS PRODUCT IS LIMITED IN DURATION TO THE DURATION OF THIS WARRANTY.
Some jurisdictions do not allow the exclusion or limitation of incidental or consequential damages or limitations on how long an implied warranty lasts, so the above limitations r exclusions may not apply to you. This warranty gives you specific legal rights, and you may also have other rights which vary from jurisdiction to jurisdiction. This warranty applies only to the original purchaser of this product from the original date of purchase.
B. At its option, KAZ will repair or replace this product if it is found to be defective in material or workmanship.
C. This warranty does not cover damage resulting from any unauthorized attempts to repair or from any use not in accordance with the instruction manual.
D. This warranty does not cover the filters, pre-filters, UV bulbs, or other accessories (if included) except for material or workmanship defects.
Call us toll-free at 1-800-477-0457 or send us a message on our Contact Us page, www.HoneywellPluggedIn.com/Contact-Us
Please be sure to specify the model number HUL900.
Note: If you experience a problem, please contact consumer relations first or see your warranty. Do not return the humidifier to the original place of purchase. Do not attempt to open the base or tamper with the power knob yourself; doing so may void your warranty and cause personal injury or damage to the product.
Compliance and Ratings
This device complies with Part 18 of the FCC rules.
Warning: Changes or modifications to this unit not expressly approved by the party responsible for compliance could void the user’s authority to operate the equipment. This equipment has been tested and found to comply with the limits for Consumer ISM equipment, pursuant to Part 18 of the FCC rules. These limits are designed to provide reasonable protection against harmful interference in a residential installation. This equipment generates, uses, and can radiate radio frequency energy, and if not installed and used in accordance with the instructions, may cause harmful interference with radio communications. However, there is no guarantee that interference will not occur in a particular installation. If this equipment does cause harmful interference to radio or television reception, which can be determined by turning the equipment off and on, the user is encouraged to try to correct the interference by one or more of the following measures:
• Reorient or relocate the receiving antenna.
• Increase the separation between equipment and receiver.
• Connect the equipment into an outlet on a circuit different from that to which the receiver is connected.
• Consult the dealer or an experienced radio TV technician for help.
Electrical Ratings
Capacity: 1.2 gallons (4.5 L) Electrical Rating:
120V, 60 Hz. 0.4A.
Contact Information
Consumer Relations
For questions, technical support or to order replacement parts, contact Consumer Relations.
Call us toll-free at 1-800-477-0457
Hours: Mon-Fri 8:00AM-6:00PM EST
www.HoneywellPluggedIn.com/Contact-Us
Please be sure to specify the model number HUL900.
© 2021 All Rights Reserved.
Manufactured by: KAZ USA, Inc.,
a Helen of Troy Company
400 Donald Lynch Blvd., Suite 300
Marlborough, MA 01752
Honeywell is a trademark of Honeywell International
Inc., used under license by Helen of Troy Limited.
Honeywell International Inc. makes no representation
or warranties with respect to this product.
Made in China

