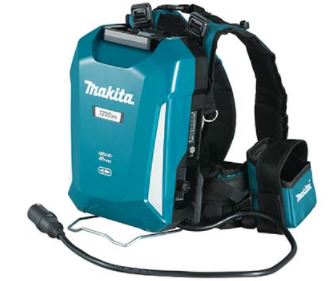
Makita PDC1200 Portable Power Pack Instruction Manual


makita PDC1200 Portable Power Pack

SPECIFICATIONS
| Model: | PDC1200 | |
| Dimensions (L x W x H) | 369 mm x 261 mm x 139 mm (14-1/2″ x 10-1/4″ x 5-1/2″) *1 | |
| Rated voltage | D.C. 36 V – 40 V max | |
| Battery capacity | 33.5 Ah | |
| Battery type | Rechargeable Lithium-ion | |
| Charging time | 360 minutes | |
| Net weight | Battery | 8.8 kg (19.4 lbs) *1 |
| Shoulder harness assembly | 1.6 kg (3.5 lbs) *2 | |
- Without shoulder harness assembly, adapters, and charger.
- Without adapter pocket
Applicable charger
WARNING: Only use the charger listed above. Use of any other chargers may cause injury and/or fire.
Intended use
The portable power pack is suitable for long working hours, since it enables the battery and the tool or machine to be separated. This unit can be used with the following tools or machines.
- 36 V (18 V x 2) battery-powered tool or machine
- 36 V – 40 Vmax battery-powered tool or machine
- Battery-powered tool or machine (direct connection to portable power pack)
About this instruction manual
The term “unit” in this instruction manual refers to portable power pack. The portable power pack consists of the battery and shoulder harness assembly.
Compatible tool or machine category
- Cordless Chain Saw *1
- Cordless Pole Saw
- Cordless Blower
- Cordless Grass Trimmer
- Cordless Multi Function Power Head
- Cordless Hedge Trimmer
- Cordless Angle Grinder
- Cordless Rotary Hammer *2
- Cordless Earth Auger
- Cordless Lawn Mower (only for connector type)
- USB Adapter
- Except for top handle chain saw (DUC252 / DUC302 / DUC352 / DUC256 / DUC306 / DUC356 / DUC406 / DUC256C / XCU02 / XCU08 / XCU09)
- Except for DHR280 / DHR281 / DHR282 / DHR283 / XRH08 / XRH10 / XRH11 The compatible category of tool or machine is subject to change without notice. Refer to the latest instruction manual for the information on the compatible category of tool or machine.
WARNING: Never use this unit with tools or machines categorized below. Using this unit with non-compatible tools or machines may cause personal injury or malfunction.
- Cordless Garden Sprayer, Battery Powered Pruning Shears, Battery Powered Wheelbarrow, Motor-Assisted Bicycle, Cordless Backpack Vacuum Cleaner, Robotic Cleaner, Cordless Fan Jacket, Cordless Heated Jacket.
NOTICE: If you use the nylon cord when you use the unit with the following models, be sure to use the tool in the following combination:
| Model | DUR364L / DUR365U / DUR366L / DUR368A / DUR368L / DUX60 / XRU07 / XRU14 / XRU09 / XRU15 / XUX01 |
| Cutting tool and cutting diameter | Nylon cutting head with cutting diameter of 350 mm (13-3/4″) |
| Nylon cord diameter | 2.0 mm (0.08″) |
The nylon cutting head is not available depending on the region of your residence.
NOTE: For DUB362 / XBU02
In a high temperature environment, the machine may stop during operation due to the protection system of the machine.
SAFETY WARNINGS
Portable power pack safety warnings
WARNING: Read all safety warnings and instructions. Failure to follow the warnings and instructions may result in electric shock, fire and/or serious injury.
- Be sure to read the instruction manual of the tool or machine before use.
- Do not pick up or carry this unit by holding only the cord. Do not pull the cord while you are wearing or using this unit.
- Before wearing or putting off the unit, remove the socket from the tool or machine.
- When you leave the tool or machine, be sure to remove the socket from the tool or machine, or remove the unit from your body.
- Be careful not to trip over the cord during operation.
- Do not use this unit on an unstable surface, or unstable high places.
- During operation, keep the cord away from obstacles. The cord caught by obstacles may cause serious injury.
- Do not insert the adapters into the charger.
- Inspect the unit including cords and harness before use. If they are damaged, ask your local Makita Authorized Service Center for repair.
- When attaching the cord to the cord holder, be sure to attach it slowly and securely.
- Always make sure that the tool or machine is switched off and the socket is removed before attempting to perform inspection or maintenance of the tool or machine.
- When using this unit with a tool equipped with a blade, be sure to keep the cord away from the blade.
- When wearing the unit, do not put on anything, such as safety harness or shoulder belt, which may interfere the emergency detachment function of the unit.
- Do not use this unit while you are climbing up in a tree.
- Do not use this unit when you are wearing cordless fan jacket or cordless heated jacket.
- Do not expose this unit to sparks.
- When using this unit without wearing it or installing the unit to the tool or machine, be sure to lay down the unit.
- Do not disassemble, repair, or modify the unit.
- Be careful not to entangle the harness or belt by the tool or machine.
- When using the unit, be careful not to cut the cords with the tool or machine.
- When you stand the unit upright using the battery stand, be sure to place the unit on the flat surface.
- Keep foreign objects such as metal chips and water away from the plug of the unit.
- Do not use the tool or machine near high-voltage power lines.
- Use the charger dedicated to the unit only. Do not use other chargers.
- Do not damage the case of the battery or place anything on the unit.
- Do not step on the unit or sit on the unit.
- Do not carry the unit by holding the battery stand or width adjustment belt.
- Store the unit indoors.
- Do not put or fix anything between the battery and battery stand.
- Do not hang anything from the battery stand.
Battery tool use and care
- Prevent unintentional starting. Ensure the switch is in the off-position before connecting to battery pack, picking up or carrying the tool or machine. Carrying the tool or machine with your finger on the switch or energizing tool or machine that have the switch on invites accidents.
- Disconnect the battery pack from the tool or machine before making any adjustments, changing accessories, or storing tool or machine. Such preventive safety measures reduce the risk of starting the tool or machine accidentally.
- Recharge only with the charger specified by the manufacturer. A charger that is suitable for one type of battery pack may create a risk of fire when used with another battery pack.
- Use tools or machines only with specifically designated battery packs. Use of any other battery packs may create a risk of injury and fire.
- When battery pack is not in use, keep it away from other metal objects, like paper clips, coins, keys, nails, screws or other small metal objects, that can make a connection from one terminal to another. Shorting the battery terminals together may cause burns or a fire.
- Under abusive conditions, liquid may be ejected from the battery; avoid contact. If contact accidentally occurs, flush with water. If liquid contacts eyes, seek medical help. Liquid ejected from the battery may cause irritation or burns.
- Do not use a battery pack, tool, or machine that is damaged or modified. Damaged or modified batteries may exhibit unpredictable behaviour resulting in fire, explosion or risk of injury.
- Do not expose a battery pack, tool, or machine to fire or excessive temperature. Exposure to fire or temperature above 130°C (265°F) may cause explosion.
- Follow all charging instructions and do not charge the battery pack, tool, or machine outside of the temperature range specified in the instructions. Charging improperly or at temperatures outside of the specified range may damage the battery and increase the risk of fire.
- Have servicing performed by a qualified repair person using only identical replacement parts. This will ensure that the safety of the product is maintained.
- Do not modify or attempt to repair the tool or machine, or the battery pack except as indicated in the instructions for use and care.
Electrical and battery safety
- Do not dispose of the battery(ies) in a fire. The cell may explode. Check with local codes for possible special disposal instructions.
- Do not open or mutilate the battery(ies). Released electrolyte is corrosive and may cause damage to the eyes or skin. It may be toxic if swallowed.
- Do not charge battery in rain, or in wet locations.
- Do not charge the battery outdoors.
- Do not handle charger, including charger plug, and charger terminals with wet hands.
Important safety instructions for battery
- Before using battery, read all instructions and cautionary markings on (1) battery charger, (2) battery, and (3) product using battery.
- Do not disassemble battery.
- If operating time has become excessively shorter, stop operating immediately. It may result in a risk of overheating, possible burns and even an explosion.
- If electrolyte gets into your eyes, rinse them out with clear water and seek medical attention right away. It may result in loss of your eyesight.
- Do not short the battery:
- Do not touch the terminals with any conductive material.
- Avoid storing battery in a container with other metal objects such as nails, coins, etc.
- Do not expose battery to water or rain. A battery short can cause a large current flow, overheating, possible burns and even a breakdown.
- Do not store and use the tool/machine and battery in locations where the temperature may reach or exceed 50 °C (122 °F).
- Do not incinerate the battery even if it is severely damaged or is completely worn out. The battery can explode in a fire.
- Be careful not to drop or strike battery.
- Do not use a damaged battery.
- The contained lithium-ion batteries are subject to the Dangerous Goods Legislation requirements. For commercial transports e.g. by third parties, forwarding agents, special requirement on packaging and labeling must be observed. For preparation of the item being shipped, consulting an expert for hazardous material is required. Please also observe possibly more detailed national regulations. Tape or mask off open contacts and pack up the battery in such a manner that it cannot move around in the packaging.
- When disposing the battery, remove it from the tool and dispose of it in a safe place. Follow your local regulations relating to disposal of battery.
- Use the battery only with the products specified by Makita. Installing the battery to non-compliant products may result in a fire, excessive heat, explosion, or leak of electrolyte.
- If the tool/machine is not used for a long period of time, the battery must be removed from the tool.
- Keep the battery away from children.
SAVE THESE INSTRUCTIONS.
CAUTION: Only use genuine Makita batteries. Use of non-genuine Makita batteries, or batteries that have been altered, may result in the battery bursting causing fires, personal injury and damage. It will also void the Makita warranty for the Makita tool and charger.
Tips for maintaining maximum battery life
- Charge the battery before completely discharged. Always stop tool/machine operation and charge the battery when you notice less tool power.
- Never recharge a fully charged battery. Overcharging shortens the battery service life.
- Charge the battery with room temperature at 10 °C – 40 °C (50 °F – 104 °F). Let a hot battery cool down before charging it.
- Charge the battery if you do not use it for a long period (more than six months).
PARTS DESCRIPTION

| 1 | Base plate | 2 | Battery | 3 | Handle | 4 | Lock button |
| 5 | Cord holder | 6 | Adapter pocket | 7 | Power button | 8 | Plug of battery |
| 9 | Plug of adapter | 10 | Adapters for 36 V (18 V x 2) (optional accessory) |
11 | Adapter for 36 V – 40 Vmax (optional accessory) | 12 | Power plug of battery charger |
| 13 | Battery charger | 14 | Socket of battery charger | 15 | Waist belt | 16 | Socket |
| 17 | Width adjustment belt | 18 | Shoulder harness assembly | 19 | Battery stand | – | – |
FUNCTIONAL DESCRIPTION
CAUTION: Always be sure that the unit is switched off before adjusting or checking function on the unit.
Charging the unit
CAUTION: After charging is complete, be sure to remove the power plug of the battery charger from the AC voltage source, and remove the socket of the battery charger and attach the cap of the battery.
NOTICE: The battery charger is intended for charging MAKITA portable power pack only. Never use it for other purposes or for other manufacturer’s batteries.
NOTICE: When the battery charger is connected to the unit, the tool or machine does not start. In this case, remove the battery charger from the unit.
NOTICE: If the temperature of the battery becomes low or high during charging, the charging may stop. In this case, wait until the battery becomes ordinary temperature by warming up or cooling down the battery, and then restart the charging.
- Remove the cap of the battery by turning it.
- Align the protrusion on the socket of the battery charger with the counterpart on the plug of the unit, and then attach the socket to the plug by turning the socket.
- Protrusion
- Socket
- Plug
- Plug the power plug of the battery charger into the proper AC voltage source.
- After the charging is complete, remove the socket of the battery charger, and then attach the cap of the battery. During charging, the main power lamp lights up in red and the indicator lamps indicate the remaining battery capacity. When the charging is complete, the main power lamp and indicator lamps go off.


Power button and battery indicator
CAUTION: Make sure that the tool or machine is turned off before turning on the unit. Otherwise, the tool or machine may start suddenly and cause an injury.
NOTE: If you turn on the tool or machine right after you turn on the unit, the tool or machine may not start. In this case, restart the tool or machine again.

- Power button
- Indicator lamp
- Main power lamp
To turn the power on, press the power button. The main power lamp lights up in green. To turn the power off, press the power button for a few seconds.
NOTE: If the unit and connected tool or machine are left unattended for 8 hours, the unit automatically turns off.
The main power lamp blinks in green under the following conditions:
- The plug of the adapter or power tool/machine is not connected to the socket of the unit. In this case, connect the plug of the adapter or power tool/machine to the socket of the unit.
- The battery is empty. In this case, charge the unit.
- The battery is overheated or the temperature of the unit is low. In this case, cool down the unit, or warm up the unit. If the main power lamp blinks in red and green alternately, turn the power off, and then turn the power on. If the main power lamp keeps blinking in red and green alternately after turning the power on, ask your local Makita Authorized Service Center for repair.
Indicating the remaining battery capacity
Press the power button on the unit to indicate the remaining battery capacity. The indicator lamps light up for approximately 5 seconds.

NOTE: Depending on the conditions of use and the ambient temperature, the indication may differ slightly from the actual capacity.
NOTE: If the tool or machine has indicator lamps for remaining battery capacity, do not refer to the indicator lamps of the tool or machine but to the indicator lamps of this unit.
NOTE: If the multiple indicator lamps blink, the battery is overheated. In this case, cool down the battery
Tool/Machine/Battery protection system
The tool or machine is equipped with a tool or machine and battery protection system. This system automatically cuts off power to the motor to extend tool or machine and battery life. The tool or machine will automatically stop during operation if the tool, machine, or battery is placed under one of the following conditions:
Overload protection
When the tool, machine, or battery is operated in a manner that causes it to draw an abnormally high current, the tool or machine automatically stops. In this situation, turn the tool or machine off and stop the application that caused the tool or machine to become overloaded. Then turn the tool or machine on to restart.
Overheat protection
When the tool, machine, or battery is overheated, the tool or machine automatically stops. In this case, let the tool or machine and battery cool before turning the tool or machine on again.
Over-discharge protection
When the battery capacity is not enough, the tool or machine stops automatically and an indicator lamp blinks when you press the power button. In this case, remove the battery from the tool or machine and charge the battery.
Low battery indication lamp of Adapter for 36 V – 40 Vmax
Optional accessory
This adapter features the indication lamp that notifies you of low or no battery capacity. When the indication lamp is blinking, the remaining battery capacity gets low. When the indication lamp lights up, the battery capacity is depleted or battery protection system is activated.
NOTE: When using the tool/machine continuously, tool/machine may automatically stop without blinking the indication lamp.
NOTE: The timing when the indication lamp blinks varies depending on the ambient temperature and battery status.

1. Low battery indication lamp
Using the adapter pocket
CAUTION: Do not use this unit with the cord fixed using the hook and loop fastener of the adapter pocket.
You can put the adapters into the adapter pocket as shown in the figure.

- Adapter
- Adapter pocket
ASSEMBLY
CAUTION: Always be sure that the unit is switched off before carrying out any work on the unit.
Assembling the unit
- Attach the battery to the base plate of the shoulder harness assembly as shown in the figure.
- Battery
- Base plate
CAUTION: Make sure that the battery is securely fixed to the base plate. Otherwise, the battery may fall when you wear the unit or use the unit, and cause an injury. If you can see the red indicator as shown in the figure, the battery is not locked completely.
CAUTION: When removing the battery, press the lock button while holding the handle firmly. Before removing the battery, set the waist belt to the lowest position.- Handle
- Lock button
- Adjust the position of the waist belt. Pull up the height adjustment lever, then adjust the position of the waist belt by sliding the base plate, and then return the lever.
- Height adjustment lever
- Base plate
- Waist belt
CAUTION: When adjusting the position of the waist belt, be sure to lay down the unit so that the battery faces downward as shown in the figure.
NOTICE: If the height adjustment lever is loose, tighten the nut of the height adjustment lever. When tightening the nut, do not tighten it excessively. Otherwise, the height adjustment lever will not move.
- Attach the adapter pocket to the waist belt with the hook and loop fastener as shown in the figure.
- Adapter pocket
NOTE: The adapter pocket can be attached on either left or right side of the waist belt.
- Adapter pocket
- Adjust the width of the shoulder harness using the width adjustment belt.
- Width adjustment belt
- Put on the unit, then lock the buckle of the waist belt, and then adjust the length of the waist belt.
- Buckle
NOTE: You can fold and fix the belt with the hook and loop fastener as shown in the figure.- Belt
- Buckle
- Adjust the length of the shoulder harness.
- Shoulder harness
NOTE: You can fold and fix the belt with the hook and loop fastener as shown in the figure.- Belt
CAUTION: When setting down the unit, place the unit on a flat and stable surface so that the unit does not fall. When setting down the unit, unlock the buckle of the waist belt, and then set down the unit slowly.
- Belt
- Shoulder harness


OPERATION
CAUTION: When wearing the unit, be sure to put shoulder harness on your both shoulders. Otherwise, the unit may fall when you wear the unit or use the unit, and cause an injury.
CAUTION: When wearing the unit, be sure to wear the unit on your back. Otherwise, the unit may fall during operation and cause an injury.
CAUTION: Always switch off the tool or machine before turning on the unit, or connecting the plug of the adapter or power tool/machine to the socket of the battery. Otherwise, the tool or machine may start suddenly and cause an injury.
NOTE: The adapter for 18 V is not available for this unit.
Connecting the unit to the tool or machine
- Remove the battery from the base plate of the shoulder harness assembly.
- Pull out the cord from either left or right side of the battery. When pulling out the cord, be sure to set the cord in the holders as shown in the figure.
- Cord
- Holder
- Attach the battery to the base plate of the shoulder harness assembly.
- Put on the unit.
- Insert the plug of the adapter or power tool/machine into the socket of the battery all the way so that the arrow mark on the plug is aligned with that on the socket.
- Plug
- Socket
- Arrow mark
NOTICE: When disconnecting the plug and socket, do not hold the cords but hold the plug and socket. Otherwise, the cords may be damaged and cause a malfunction of the unit.
NOTE: The plug and socket are disconnected if a certain load is applied.
- Install the adapters to the tool or machine in the same way as the battery cartridge.
- Adapter
NOTICE: For 36 V (18 V x 2) battery-powered tool or machine, use the adapters for 36 V (18 V x 2). For 36 V – 40 Vmax battery-powered tool or machine, use the adapter for 36 V – 40 Vmax. For direct connection type tool or machine, no adapter is required.
NOTICE: When installing adapters to the tool or machine, be sure to install the adapter equipped with 2 cords to the location shown in the figure. If you install the adapters incorrectly, the adapter equipped with 2 cords cannot be inserted all the way. In this case, do not insert the adapter forcibly. Otherwise, the tool or machine may be damaged.- Adapter with
- cords
NOTE: The direction of the cord of the adapter can be changed in the range of approximately 180 degrees.
- Adapter
- Press the power button to turn the power on. To turn the power off, press the power button for a few seconds.
- Power button


Using the cord holders
CAUTION: Attach only the cord of the battery to the cord holders. Do not attach the cord of the adapters or power tool/machine to the cord holders. Attaching the cord of the adapters or power tool/machine may invite accident and cause an injury.

You can attach the cord of the battery to the cord holders as shown in the figure.

- Cord holder
You can also attach the cord using only the cord holder of the waist belt as shown in the figure.

- Cord holder
The cord holders can be attached on either left or right side of the shoulder harness and waist belt.

- Part to be attached the cord holder.
CAUTION: Be sure to attach the cord to the shoulder harness on the left side only or right side only so that the cord does not cross the shoulder harness.
Optional accessory
CAUTION: Before operation, make sure that the hanging band is properly attached to the hanger on the tool.
You can use the hanging band for cordless grass trimmer or cordless pole saw with this unit.
Attaching the hanging band
- Attach the hooks of the hanging band to the rings of the shoulder harness or waist belt as shown in the figure. Select the type of band and the connecting method appropriate for your usage.
- Ring
- Hook


- Ring
- Hook

- Ring
- Hook

- Ring
- Hook
NOTE: If the tool is bike handle type, attach the band so that the band passes through inside of the waist belt as shown in the figure.

- Waist belt
- Band

- Hook
Detaching the tool
Push the levers on the buckle to unlock the buckle.

- Lever
NOTE: The buckle is not equipped depending on the type of band.
Emergency detachment
- Push the levers on the buckle of the waist belt to unlock the buckle.
- Buckle
- Lever
- Push the levers on the buckle of the waist belt to unlock the buckle.
- Take off the shoulder harness to release the tool and the unit.
- Shoulder harness


MAINTENANCE
CAUTION: Always be sure that the unit is switched off before attempting to perform inspection or maintenance.
NOTICE: Never use gasoline, benzine, thinner, alcohol or the like. Discoloration, deformation or cracks may result.
To maintain product SAFETY and RELIABILITY, repairs, any other maintenance or adjustment should be performed by Makita Authorized or Factory Service Centers, always using Makita replacement parts.
TROUBLESHOOTING
Before asking for repairs, conduct your own inspection first. If you find a problem that is not explained in the manual, do not attempt to dismantle the tool, machine, or unit. Instead, ask Makita Authorized Service Centers, always using Makita replacement parts for repairs.
| State of abnormality | Main power lamp | Cause | Remedy |
| The tool or machine does not start. |
– | The charger is connected to the unit. | Remove the charger from the unit. |
| The lamp lights up in green. | The adapters are not installed to the tool or machine. | Install the adapters to the tool or machine. Check that the adapters are installed securely. | |
| The tool or machine, or the cords of the adapters are overheated. | Cool down the tool or machine, unit and adapter. After cooling down, power off and then power on again. | ||
| The tool or machine, or the unit is broken. | Ask Makita Authorized Service Centers for repair. | ||
| The lamp blinks in green. | The plug of the adapter or power tool/machine and the socket of the battery are not connected. | Connect the plug and the socket. Check that the plug and socket are connected securely. | |
| The unit is overheated, or the temperature of the unit is low. | Cool down the unit, or warm up the unit. | ||
| The remaining battery capacity is not enough. | Charge the battery. | ||
| The lamp blinks in red and green alternately. |
The unit has detected an abnormality. | Turn off the unit, and then back on. | |
| The tool or machine, or the unit is broken. | Ask Makita Authorized Service Centers for repair. | ||
| The lamp does not light up. | The unit is not turned on. | Turn on the unit. | |
| The remaining battery capacity is not enough. | Charge the battery. | ||
| The unit is broken. | Ask Makita Authorized Service Centers for repair. | ||
| Charging does not start when the charger is connected. | The lamp blinks in red. | The unit is overheated, or the temperature of the unit is low. | Cool down the unit, or warm up the unit. |
| The lamp blinks in red and green alternately. |
The unit or charger has detected an abnormality. | Remove the socket of the bat- tery charger, and then connect it again. | |
| The unit or charger is broken. | Ask Makita Authorized Service Centers for repair. | ||
| The lamp does not light up. | The charger is not connected to the proper AC voltage source. | Connect the charger to the proper AC voltage source. | |
| The socket of the charger is not connected properly. |
Connect the socket of the charger properly. | ||
| The power cord of the charger is not connected to the charger properly. | Connect the power cord to the charger properly. | ||
| The unit or charger is broken. | Ask Makita Authorized Service Centers for repair. |
OPTIONAL ACCESSORIES
CAUTION: These accessories or attachments are recommended for use with your Makita tool specified in this manual. The use of any other accessories or attachments might present a risk of injury to persons. Only use accessory or attachment for its stated purpose.
If you need any assistance for more details regarding these accessories, ask your local Makita Service Center.
- Makita genuine charger
- Adapters for 36 V (18 V x 2)
- Adapter for 36 V – 40 Vmax
NOTE: Some items in the list may be included in the tool package as standard accessories. They may differ from country to country.
MAKITA LIMITED WARRANTY
Please refer to the annexed warranty sheet for the most current warranty terms applicable to this product. If annexed warranty sheet is not available, refer to the warranty details set forth at below website for your respective country.
- United States of America: www.makitatools.com
- Canada: www.makita.ca
- Other countries: www.makita.com