Pioneer VREC-DH300D Dash Camera User Guide


Pioneer VREC-DH300D Dash Camer

Information to User
This equipment has been tested and found to comply with the limits for a Class B digital device, pursuant to Part 15 of the FCC Rules. These limits are designed to provide reasonable protection against harmful interference in
a residential installation. This equipment generates, uses, and can radiate radio frequency energy and, if not installed and used in accordance with the instructions, may cause harmful interference to radio communications. However, there is no guarantee that interfer-ence will not occur in a particular installation. If this equipment does cause harmful interference to radio or television reception, which can be determined by turning the equipment off and on, the user is encouraged to try to correct the interference by one or more of the following measures:
Alteration or modifications carried out without appropriate authorization may invalidate the user’s right to operate the equipment. This device complies with part 15 of the FCC Rules. Operation
is subject to the following two conditions: (1) This device may not cause harmful interference, and (2) this device must accept any interference received, including interference that may cause unde-sired operation.
Note
This equipment has been tested and found to comply with the limits for a Class B digital device, pursuant to Part 15 of the FCC Rules. These limits are designed to provide reasonable protection against harmful interference in
a residential installation. This equipment generates, uses and can radiate radio frequency energy and, if not installed and used in accordance with the instructions, may cause harmful interference to radio communications. However, there is no guarantee that interfer-ence will not occur in a particular installation. If this equipment does cause harmful interference to ra-dio or television reception, which can be determined by turning the equipment off and on, the user is encouraged to try to correct the interference by one or more of the following measures:
Reorient or relocate the receiving antenna.
- Increase the separation between the equipment and receiver.
- Connect the equipment into an outlet on a circuit different from that to which the receiver is connected.
Consult the dealer or an
experienced radio/TV technician for help. FEDERAL COMMUNICATIONS COMMISSION SUPPLIER’S DECLARATION OF CONFORMITY Product Name: DASH CAMERA Model Number: VREC-DH300D Responsible Party Name: PIONEER ELECTRONICS (USA) INC. SERVICE SUPPORT DIVISION Address: 2050 W. 190TH STREET, SUITE 100, TORRANCE, CA 90504, U.S.A.
Phone: 1-800-421-1404
URL: https://www.pioneerelectronics.com
Products
Please contact the authorized Pioneer dealer from which you purchased this unit or an authorized Pioneer service company for aftersales service or questions you may have about the product. You may contact Pioneer directly as follows: Do not ship your unit in for repair without contacting Pioneer first. Units sent without a return authorization number will be refused.
USA & CANADA
Pioneer Electronics (USA) Inc. CUSTOMER SUPPORT DIVISION P.O. Box 1760
Long Beach, CA 90801-1760 U.S.A. 800-421-1404
For warranty information, please see the Limited Warranty sheet included with this unit.
Visit our website
U.S.: https://www.pioneerelectronics.com
Canada: https://www.pioneerelectronics.ca
- Learn about product updates (such as firmware updates) for your product.
- Register your product.
- Access owner’s manuals, spare parts information, service information, and much more
Certain country, state and provincial laws may prohibit or restrict the placement and use of this product in your vehicle. Please comply with all applicable laws and regulations regarding the use, installation and operation of this product. It is the user’s responsibility to comply with all applicable laws, rules, regulations and ordinances. There is a danger of explosion if the battery is incorrectly replaced. Replace only with the same or equivalent type.
Do not expose a battery to high or low extreme temperatures during use, storage or transportation. Do not dispose of a battery into fire or a hot oven, or crush mechanically or cut a battery, that can result in an explosion.
The graphical symbol placed on the product means direct current.
When disposing of used batteries, please comply with governmental regulations or environmental public institutions’ rules that apply in your country/area. WARNING
Batteries (battery pack or batteries installed) must not be exposed to excessive heat such as sunshine, fire or the like.
- Do not install this product in your vehicle if its location or use would obstruct the driver’s clear view of the road or the operation of any vehicle airbag. It is also the driver’s responsibility to know and comply with the laws, rules, and regulations of the driving location, including, for example, passenger privacy rights, and not to use the device in any location where its installation or use is prohibited.
- Do not use this device to make audio or video
recordings prohibited in the location where you are using this product. Always provide the notice that is required in your location that video and audio recordings (if audio is in use) are being made and obtain appropriate consent and authorization from the persons being recorded. Some states, provinces and municipalities require posting a visible written notice that occupants and conversations are being a recording Do not allow this product to come into contact with liquids. Electrical shock could result. Also, damage to the product, smoke, and overheating could result from contact with liquids.
Before using this product, be sure to read and fully understand the following safety information: Do not operate this product if doing so will divert your attention in any way from the safe operation of your vehicle. Always observe safe driving rules and follow all existing traffic regulations. If you experience difficulty in operating this product or reading the display, park your vehicle in a safe location and apply the parking brake before making the necessary adjustments. Certain functions (such as viewing of screen and certain button operations) offered by this product could be dangerous (possibly resulting in serious injury or death) and/or unlawful if used while driving
Precautions before connecting the system
- Firmly install this product so it does not fall off the inside of the front windshield. If this product is not firmly installed, it may fall off the windshield while driving and cause an accident. Periodically inspect this product.
- Pioneer recommends that only authorized service company personnel, who have special training and experience in mobile electronics, set up and install this product.
- Secure all wiring with cable clamps or electrical tape. Do not allow any bare wiring to remain exposed.
Precautions before installation
- Do not install this product where it may
- obstruct the driver’s vision,
- impair the performance of any of the vehicle’s operating systems or safety features, including airbags, hazard lamp buttons or
- impair the driver’s ability to safely operate the vehicle.
- Never install this product in front of or next to the place in the dashboard, door, or pillar from which one of your vehicle’s airbags would deploy. Please refer to your vehicle’s owner’s manual for reference to the deployment area of the frontal airbags.
- To ensure proper installation, be sure to use the supplied parts in the manner specified. If any parts are not supplied with this product, use compatible parts in the manner specified after you have the parts’ compatibility checked by your dealer. If parts other than supplied or compatible ones are used, they may damage internal parts of this product or they may work loose and the product may become detached.
- Do not install this product in places subject to high temperatures or humidity, such as:
- Places close to a heater, vent or air conditioner.— Places that may be exposed to rain, such as close

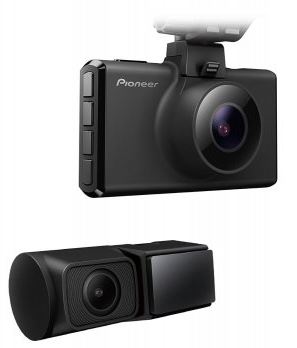
Main Unit
- Rear camera dedicated input terminal Connects the rear camera connection cable.
- Manual Record / Power Button Short press for manual recording.
- Hold down to turn the power ON/OFF Mounting Bracket Connection
- Reset Button Press this button to reset this product. Push in using narrow items, such as a ballpoint pen tip or a paperclip tip.
Lens
Speake8 System Indicator LCD microSD Card Slo
Menu / Function Button
Stops video recording, and displays the main menu screen. During menu screen display, this functions as Function Button 1. b Microphone / Function Button 2 Turns the microphone ON/OFF.
During menu screen display, this functions as Function Button 2. c Switch Screen / Function ButtonThis switches between the following each time it is pressed. Front camera video rear camera video front camera video + rear camera video thumbnail rear camera video + front camera video thumbnail return to front camera video During menu screen display, this functions as Function Button 3. mounting Bracket e Power cable connection terminal
Connects the cigarette lighter power cable. f Angle Adjustment Bolt Loosen to adjust the angle of this product. g Product Insertion Part
Rear Camera
Turn to adjust the angle of the lens
Function Buttons
During the menu screen display, the functions of the function buttons are linked to the icons displayed on the right side of the screen.

When the sensitivity adjustment screen is displayed, these increase and decrease the sensitivity
System Indicator Display
The operating status of this product is displayed with the system indicator.
| System Indicator | Menu Displayed/ During Playback | Video Recording | Recording Event | Warning |
| Lit | — | ¡ | — | — |
| A. Blinking (slow) | — | — | ¡ | — |
| B. Blinking | — | — | — | ¡ |
| Off | ¡ | — | — | — |

Inserting and Ejecting the microSD Card
Turn off the power to this product when inserting and removing the microSD card
Inserting the microSD Card
Hold the top edge of the microSD card, position the microSD card so that the label is facing the frontside of this product, and slowly insert it into the microSD card slot until it clicks.

Installation
Specified Installation Position on Front Windshield
When installing this product the inside of the front windshield, install in a vehicle and in a position that satisfies all of the following conditions if allowed by applicable law in your location:
- Install in a 7-inch/17.8 cm square in the lower corner of the windshield farthest from the driver, a 5-inch/12.7 cm square in the lower corner of the windshield nearest to the driver and outside of any airbag deployment zone, or in a
- 5- inch/12.7 cm square mounted to the center uppermost portion of the interior of the windshield. The ideal location is behind the rearview mirror out of the driver’s view as shown below.
- A position where this entire product is within 20% of the top edge of the height of the front windshield (range within 20% of the actual length, excluding parts overlapping weatherstrips, mouldings, etc. and masked parts) or are in the shadow of the rear view mirror as viewed from the driver’s seat. Note that “20%” as described above is a rough estimate. Please install the product in accordance with your location’s laws and regulations.
- A position where the lens part of this product is within the wiping range of the wiper.
- A position where the lens part of this product does not hang over the sunshade and black ceramic lines/black ceramic pattern.
- A position where this product faces in the horizontal direction to the front and side to side.
- A position where the cigarette lighter power cable can be routed without unnecessary force.

IMPORTANT
Always install this product in the specified installation position to ensure a safe field of view while driving and to achieve full performance from the product. Pioneer is not liable for any damages due to faulty or improper installation or use of the product.
Recommended Installation Position on Rear Windshield
- A position where the lens part of the rear camera is within the wiping range of the wiper.
- A position where the rear camera faces in the horizontal direction to the rear and side to side.
A position where the lens part of the rear camera and the double-sided tape do not overlap the heating wires. A position where the rear camera connection cable can be routed without unnecessary force.

Install this product
1 Clean the installation area of dirt
and oils using the included cleaning cloth.


Never touch the surface of the LCD. Use extreme care as the double-sided tape on the mounting bracket is extremely strong, and should not be reapplied once it has been applied. To ensure the installation strength of the adhesive tape, leave this product for 24 hours after application before using it. A protective film is applied to the lens when the product is purchased. Peel off this film.
3 Adjust the installation angle
Loosen the angle adjustment bolt to adjust. After adjusting, tighten the loosened bolt to secure.

- While pressing the protruding part as shown in the figure below, 2 remove the main unit.

cable and rear camera connection cable to the main unit.
install the Rear Camera
The top and bottom of the image can be set according to the mounting direction of the rear camera. and oils using the included cleaning cloth.

- Install the rear camera.
- Peel off the double-sided tape release paper from the rear camera.

- Make sure that the surface of the rear windshield is clean and dry, before attaching the rear camera.
- Use extreme care as the double-sided tape on the rear camera is extremely strong, and should not be reapplied once it has been applied.
- To ensure the installation strength of the adhesive tape, leave this product for 24 hours after application before using it.
A protective film is applied to the lens when the product is purchased. Peel off this film. Connecting the Cables
Connect the cigarette lighter power
cable and rear camera connection cable to the main unit.

Route the cigarette lighter power cable and rear camera connection cable to the passenger seat side.

Connect the cigarette lighter power cable to the vehicle accessory socket. Fully insert this into the vehicle accessory socket to make a good connection. (The location of the accessory socket will differ depending on the vehicle.)

The accessory socket will be extremely hot immediately after using the cigarette lighter. The tip of the cigarette lighter power cable may melt or short circuit if it is plugged in while the socket is hot. Wait for the socket to cool before plugging in the cigarette lighter power cable.
- Turn the vehicle engine on to display the recording screen.
- Adjust the angles of this product and of the rear camera lens so that video outside the vehicle is properly displayed. To switch between camera video from the main unit and video from the rear camera, press the switch screen button.