Epson ELPSC35 100 Inch Projector Screen Installation Guide


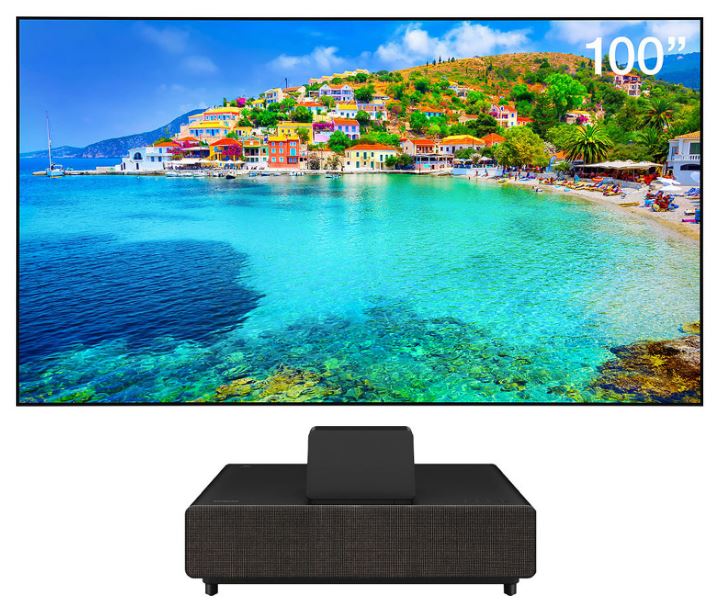
EPSON ELPSC35 100 Inch Projector Screen

Safety Precautions
For your safety, read all of the instructions in this guide before using this product. Incorrect handling that ignores instructions in this guide could damage this product or could result in personal injury or property damage. Keep this installation guide at hand for future reference.
Safety Indications
The documentation and this product use graphical symbols to show how to use this product safely.
The indications and their meaning are as follows. Make sure you understand them properly before reading the guide.
| Symbol | Explanation |
| Warning | This symbol indicates information that, if ignored, could possibly result in personal injury or even death due to incorrect handling. |
| Caution | This symbol indicates information that, if ignored, could possibly result in personal injury or physical damage due to incorrect handling. |
Installation Precautions
Epson accepts no responsibility for any accidents caused by improper installation or natural disasters.
| Warning |
| The installation work (wall mounting) should only be performed by specialists who have technical knowledge and ability. Incomplete or incorrect installation could cause the product to fall and cause personal injury or property damage. Contact the store where you purchased the product for more information. |
| Do not install the screen in a place where it might be subjected to vibration or shock. This could cause damage to the mounting surface. If this product falls, it could cause death or personal injury. |
| Do not install near any heating appliances such as stoves or burners. As the product contains plastic materials, this could cause a fire. * This product is not flame retardant. |
| Do not install in locations that are not strong enough to support the weight of this product. Otherwise, it could fall and cause an accident or injury. The installation location must be strong enough to support this product for a long time. Check the weight of this product before installation, calculate the accept- able weight, and install it securely. Reinforce the installation location if it is not strong enough. s”Specifications Table” p.6 |
| Caution |
| Do not install this product in the following locations. Installing it in the following locations can impair screen performance. · Locations that may be exposed to water or rain, such as outdoors, bathrooms/shower rooms, or locations subject to high humidity · Locations subject to a lot of moisture or dust such as near a kitchen counter or a humidifier, or locations subject to smoke or steam |
| Note the following when installing this product. If it is not installed correctly, it could fall and cause an accident or injury. · Carefully inspect the structure and material of the installation location, and install it according to the instructions in this guide. · Installation should be performed by at least two people. · Do not place it in an unstable location, such as tilted at an angle. · Be sure to use the bolts and screws specified in this guide. · Be sure to tighten the screws. Also, be sure not to loosen or remove screws accidentally while installing or removing this product. · Do not hang on the screen or apply excessive force to the screen during or after installation. · Do not disassemble or modify this product. |
| Wear commercially available cotton gloves when handling the screen fabric. Handling the screen di- rectly with bare hands may leave fingerprints or dirt on the screen fabric, which can impair performance. |
| Keep hard or sharp objects away from the screen fabric. Scratches on the screen fabric can impair performance. |
| Hold the frame by the left and right edges when moving the screen. Lifting the frame at the center of the screen can cause the frame to bend and become damaged. |
| Be careful not to trap your fingers when assembling, installing, or storing the screen. |

Usage Precautions
Do not hang on the screen or hang heavy objects on the screen. If this product falls, it could cause death or personal injury.
Note the following points when handling the screen. To project brighter, clearer images, a material has been applied to the surface of the screen fabric to improve the effects of reflection. If the surface of the fabric gets dirty or is scratched, this reflection effect will be degraded.
- Do not touch the screen surface with your bare hands.
- Do not write on the screen surface. You cannot erase accidental writings from the screen.
- When cleaning the screen surface, wipe it with a soft, dry cloth, or brush it with a soft brush.
- When cleaning the screen, be sure to move the cloth or brush left or right. Do not move them up or down or around in circles.
- Do not push the screen surface forcefully, or apply continuous force to the screen.
- Do not wipe the screen surface with a cloth dampened with water, benzine, or thinner.
- Keep hard or sharp objects away from the screen surface.
For families with young children or pets, do not allow them to play around the screen. Otherwise, it could cause injuries due to falling, colliding, trapping fingers, and so on.

Screen Fabric
The screen fabric is dried thoroughly before shipment. You may smell chemicals when you start to use the screen, but this will disappear with use. If you feel that the odor is too strong, open the windows to improve ventilation and let the screen air out for a few days.
If You Think There is a Problem with the Screen
If you think the screen is coming loose or is damaged, stop using it immediately and contact your local dealer.
Disposing of the Screen
Dispose according to your local laws and regulations. When using this product in a company, dispose of it according to your company’s rules.
See the following when separating the materials for disposal.
- Screen fabric: Polyurethane, PET
- Frame/Frame edges: Aluminum
- L-brackets/wall brackets: Steel
Package Contents
See the following list for items included with this product. In the unlikely event that there is anything missing or damaged, contact the store where you purchased this product.

| Shape | Name | Number | Application |
| M5 x 8 mm cross recessed 16 truss screws | Secures the frames and the L-brackets. | ||
| M5 x 15 mm cross re- cessed truss screws | 8 | Secures the frame edges and the L- brackets. | |
| Angle adjustment screws | 2 | Use these to adjust the angle of the screen so that it is straight. | |
| |
Springs | 100″ screen: 94 (6 are spares) 120″ screen: 112 (6 are spares) |
Place the screen fabric on the frame. |


- The customer needs to contact a specialist to determine and obtain the 8 screws needed to attach the wall brackets to the wall. We recommend the following.
M4 x 25 mm cross head wood screws
You may need different types of screws depending on the strength of the wall.
When mounting on a wall that does not support wood screws, prepare an anchor separately. - Prepare the necessary tools.
Specifications Table
| Product Name | Ultra Short Throw Screen ELPSC35 |
Ultra Short Throw Screen ELPSC36 | |
| Screen Size | Type | 100″ | 120″ |
| Size | W 2214 mm (87.2 in.) x H 1247 mm W 2657 mm (104.6 in.) x H 1496 mm (49.1 in.) (58.9 in.) | ||
| Aspect Ratio | 16:9 | ||
| Screen Type | Ultra Short Throw Ambient Light Deflecting Screen | ||
| External dimensions | W 2234mm (88.0 in.) x H 1267mm (49.9 in.) x D 30 mm (1.2 in.) |
W 2677mm (105.4 in.) x H 1516mm (59.7 in.) x D 30 mm (1.2 in.) | |
| Mass | Approx. 11 kg (24.3 lb) | Approx. 13 kg (28.7 lb) | |
| Operating temperature range | 0°C (+32°F) to +35°C (+95 °F) (Humidity 20% to 80%, no condensation) | ||
| Storage temperature range | -10°C (+14°F) to +60°C (+140 °F) (Humidity 10% to 90%, no condensation) | ||


The distance from the wall to the surface of the screen is approximately 31 mm/1.2 in.
Assembling the Screen
Assembling
Assembling the frames
- Spread out the included transparent sheet on the floor
Make sure there are no objects on the floor, and spread out the sheet on a flat surface. - Place the frame on the transparent sheet Place the frames with the sides with the screw holes facing up.
Caution
The frame pieces have sharp edges.
Be careful not to cut your fingers or hands. - Insert the L-brackets into the frames Insert the L-brackets into both of the short sides of the frames. (Four points)
- Connect the parts of the frames
- Secure the frames and the L-brackets Secure with the M5 x 8 mm screws supplied. (Four points x 4)
Do not tighten the screws completely from the start. Make sure that there are no gaps between the frames, and then tighten the screws securely. - Move the frame from the transparent sheet leaving the sheet empty.
You can easily determine the position for the brackets by placing the frame on the wall before the screen fabric is attached. s”Attach the screen to the wall” p.14


Placing the screen fabric on the frame
- Spread out the screen fabric on the transparent sheet Wear cotton gloves (not included) and roll out the screen fabric so that the paper that the screen is wrapped in is under the screen. Be careful not to step on or sit on the screen fabric.
- Place the frame on the screen fabric Place the frame so that it is in the center of the screen fabric with the side with the screw holes facing up. Carefully fold the screen fabric over the frame and check the following two points to adjust the frame position.
- The edges of the screen fabric at the four corners align with the dotted lines in the figure.
- The screw holes (two points) at the four corners are not covered by the screen fabric


- Attach the frame edges and corner guards to the frame Attach the frame edges with the frame raised slightly and the side with the screw holes facing up.
Tighten the screws while holding the frames firmly so that the corner guards do not move.- Install the angle adjustment screws Attach to the screw holes at the bottom of the frame (the edge labeled “DOWNSIDE”). (Two points)


See the User’s Guide supplied with your projector to check the screen size and projection distance when deciding where to install the screen.
- Determine the position for the brackets See the dimensions figure in the “Specifications Table”. s”Specifications Table” p.6
Install the brackets so that they do not come into contact with the springs on the back of the screen. - Attach the brackets to the wall Use a level to check that the brackets are aligned horizontally, and then secure the brackets to the wall with commercially available screws. (Two points x 4) When using a wall that does not support screws, install a commercially available anchor. The customer needs to contact a specialist to determine and obtain the necessary screws or anchors in advance. s p.4
- Move the screen Check the top and bottom of the screen first. Make sure the edge labeled “DOWNSIDE” is at the bottom back. Move the screen and place the back against the wall. Always hold the frame by the left and right edges when moving the screen.
Adjust the position so that the center point between the left and right brackets is at the center of the screen.
If the screen is upside down, the image quality will be poor. - Attach the screen to the brackets Tilt the screen approximately 15° while leaning it against the wall.
Hook the brackets into the groove at the top of the screen as you lower the screen over the brackets. * Side view of the screen - Finally, adjust the angle of the screen Turn the angle adjustment screws to the left and right until the screen is straight when viewed from the side.


If the projected image is distorted into a keystone shape, you may be able to correct the distortion by adjusting the angle of the screen using the angle adjustment screws.