Honeywell T4R Wireless Programmable Thermostat User Guide

EN User Guide
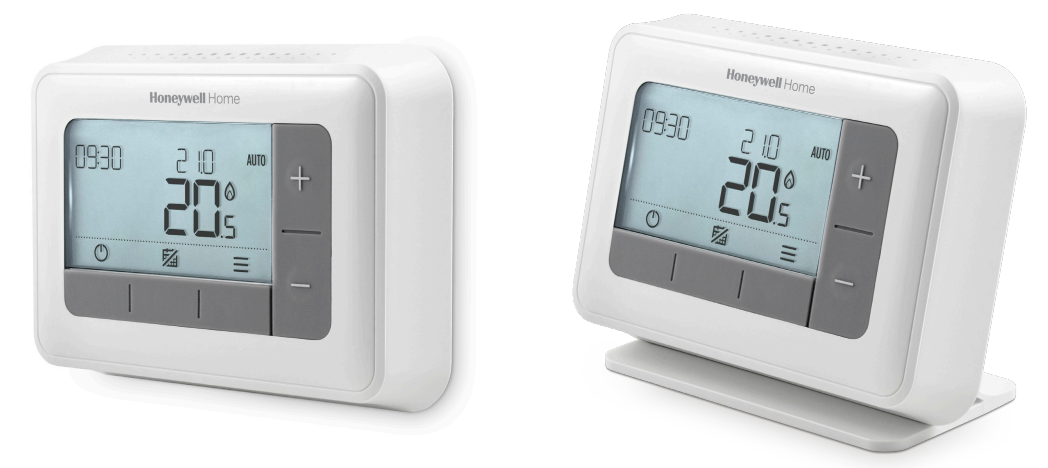


T4
Programmable Thermostat
T4M
Programmable Modulating Thermostat
T4R
Wireless Programmable Thermostat
Thermostat Interface

Schedule Override: Active until next scheduled period starts or the timed override duration has ended.
Schedule Off: Programmed schedule is turned off.
Low Battery: Power has reached approximately 10% (see Changing the Batteries).
Heat Demand: Room temperature is below setpoint – indicating there is a demand for heating (boiler activity might occur).
Wireless Signal: Thermostat (T4R only) is connected to the Receiver Box.

Menu & Navigation Icons
– Heating schedule
– Clock
– Date
– Keypad lock
– Optimisation
– OpenTherm® boiler alerts (T4M only)
– Away Mode

Confirm: Confirm a change or selection.
Timed override: Set a timed duration for the override.
Standby: Turns the heating on or off.
Home: Returns you directly back to the home screen.

Navigating the menu
- Press
- Press + or – buttons to select a menu item – the selected item will flash.
- Press
- Press + or – adjust a setting and
– press
– press
– press


Your Thermostat comes with the following default schedule. Follow the next steps to adjust the heating schedule.

| Days 1 to 5 (Mon to Fri) | Days 6 & 7 (Sat & Sun) | |||
| Period | Time | °C | Time | °C |
| P1 | 6:30 – 8:00 | 19 °C | 8:00 – 10:00 | 19 °C |
| P2 | 8:00 – 18:00 | 16 °C | 10:00 – 18:00 | 16 °C |
| P3 | 18:00 – 22:30 | 21 °C | 18:00 – 23:00 | 21 °C |
| P4 | 22:30 – 6:30 | 16 °C | 23:00 – 8:00 | 16 °C |
| Days 1 to 5 (Mon to Fri) | Days 6 & 7 (Sat & Sun) | |||
| Period | Time | °C | Time | °C |
| P1 | 6:30 – 8:00 | 19 °C | 6:30 – 10:00 | 19 °C |
| P2 | 8:00 – 12:00 | 16 °C | 10:00 – 12:00 | 16 °C |
| P3 | 12:00 – 14:00 | 21 °C | 12:00 – 14:00 | 21 °C |
| P4 | 14:00 – 18:00 | 16 °C | 14:00 – 18:00 | 16 °C |
| P5 | 18:00 – 22:30 | 21 °C | 18:00 – 23:00 | 21 °C |
| P6 | 22:30 – 6:30 | 16 °C | 23:00 – 6:30 | 16 °C |
- Press
- Press + or – to select the schedule menu
- Press + or – to select the day to be adjusted and press
- Press + or –to select the period to be adjusted and pres
- Press + or – to adjust the start time and press
- Press + or – to adjust the end time and press
- Press + or – to adjust the temperature and press
- To copy the schedule you have set, go to the day you want to copy to, press then select “YES” and press
- Repeat these steps to make adjustments to the remaining periods and days – or press


To make adjustments to the clock format or time.

- Press
- Press + or – select the Clock menu
- Press + or – to change the clock format and press
- Press + or – to adjust the time and press

To make adjustments to the date – Year/Month/Day.

- Press
- Press + or – to select the Date menu
- Press + or – to adjust year (JA) and press
- Press + or – to adjust month (MO) and press
- Press + or – to adjust day (DA) and press
You can lock the keypad to prevent unnecessary adjustments to the Thermostat.

- Press
- Press + or – to select the Keypad lock
- Press
- To unlock the keypad press and hold the Left and Right buttons for 5 sec.
- To lock the Keypad repeat step 2.


Your Thermostat has optimization functions that aim to save energy while maintaining suitable comfort levels. The Thermostat displays
- Optimum Start learns how long it takes your home to reach a set temperature and then turns the heating on a bit earlier to achieve that temperature at the programmed time.
- Delayed Start saves energy by slightly delaying the start of heating depending on the difference between the set temperature and the room temperature. The closer these temperatures are the longer it will delay the start.
- Optimum Stop saves energy by switching off a little bit earlier than the programmed time. If your home is up to temperature, you will not notice the effect on the temperature, but you should see a difference in your fuel bill.
To enable or disable an optimization function:
- Press to enter the main menu.
- Press or select the Optimisation menu
- Press or to select an option and press
– 0:9S for Optimum Stop - Press or to change the optimization function and press
Optimum Start enabled
Delayed Start enabled
Optimum Stop disabled
Optimum Stop enabled


Press
If you have a T4M Thermostat fitted to an OpenTherm® boiler, you can view alerts received form the boiler about your heating system.


- Press
- Press + or – select the OpenTherm alerts menu
- Press + or – cycle through the list of boiler alerts.
- Press
Save energy by switching the heating off for a set period of time while you are away from home – and back on again in time for your return.

- Press to enter the main menu.
- Select the Away mode by pressing
- Press + or – to select the number of days you will be away and press
- Press + or – to set the temperature while you are away and press
- Deactivate the Away mode by following the same steps.
Save energy by switching the heating off when not required – e.g. during warmer summer months, or when doors and windows are open for extended periods of time. If the temperature drops to 5°C the heating will come on to prevent the heating pipes from freezing.

- Press
- Press

Schedule Override
During normal use, your Thermostat will follow the programmed schedule – indicated by the AUTO icon in the top right of the display. There are a few ways you can override the schedule to suit your current needs.
AUTO
Set until the next programmed setpoint is reached.
Press + or – to set the new desired temperature. The programmed schedule will resume at the next programmed setpoint. To cancel press the middle button
23 H Timed Override
Can be used to boost (increase) the heating for a short period or as an Economy (decreased) setting if leaving the house for a short period.

- Press + or –to set the new desired temperature and press to activate the timer.
- Press + or – select 1 or 23 Hours and press 3. To cancel the timed override press again from the home screen.
Turn the heating schedule off and permanently follow a single (adjustable) temperature – until the schedule is turned on again.
- Press the middle button
- The word MAN will appear in the top right-hand corner.
- To return to schedule press the middle button again.
- The word AUTO will appear in the top right-hand corner.
Delete period
Turn the heating schedule off and permanently follow a single (adjustable) temperature – until the schedule is turned on again.
- Go to schedule
- Go to the period you want to delete e.g. P2*.
- Press and hold the
- You re-activate a deleted period by pressing again the button

*The first period can’t be deleted.
Changing the Batteries (T4 & T4R only)
The Thermostat is powered by batteries, although a battery icon is not shown on the display during normal use. The only time you will see the battery icon is when they get low on power.
- Replace with 2 new 1.5V LR6 AA Alkaline batteries only – which should last approximately 2 years depending on the Thermostat use.


- Pull the Thermostat off the wall bracket or table stand.
- Remove old batteries and insert new ones.
- Clip the Thermostat onto the wall bracket or table stand.


Wireless Receiver Box (T4R only)
The T4R Thermostat communicates wirelessly to the Receiver Box which is wired to the boiler. If the Thermostat loses wireless communication or becomes faulty, the boiler can be switched on or off manually using the button on the Receiver Box.
- + will flash on the Thermostat when the wireless signal is lost – The Receiver Box
- If communication is lost move the Thermostat to another location to try and restore communication.

To manually override the boiler using the Receiver Box:
1. Press the button once to switch the boiler
ON or OFF. The button LED should be
– Solid GREEN when the boiler is ON.
– Off when the boiler is OFF.

Troubleshooting
If you have difficulty with your Thermostat, try these suggestions. Most problems can be corrected quickly and easily.
| All models | |
| Screen is blank | Replace the batteries (T4 & T4R only). Check the OpenTherm boiler has power (T4M only). Contact installer. |
| Thermostat shows |
Batteries have less than 10% power and need to be replaced soon. |
| Thermostat shows |
Batteries are critically low and need to be replaced immediately – see ‘Changing the Batteries’. |
| The thermostat shows |
The boiler cycles on and off as it controls the temperature, and sometimes the If the boiler doesn’t switch on after a long period of time contact your installer. |
| Heating system does not respond to temperature adjustments. | Make sure the set temperature is higher than the actual room temperature. Check the heating system is powered on. Check the Receiver Box is powered and the Thermostat has a wireless signal (T4R only). |
| Thermostat shows, |
The temperature sensor of your Thermostat is faulty, contact your installer to repair or replace the I thermostat. |

| T4R (Wireless) Thermostat & Receiver Box only | |
| The thermostat is flashing |
Wireless signal lost – Move the Thermostat to another location to try and restore communication. |
| The thermostat is flashing |
Check Receiver Box has power by pressing the button to switch the boiler on. If Receiver Box has power then no wireless binding data is stored – Follow the binding procedure in the installation guide or contact your installer. |
| The receiver Box |
Receiver Box is in binding mode – will time out of this mode after 3 minutes. |
| T4M (OpenTherm) Thermostat only | |||
| An OpenTherm boiler can report alerts back to the Thermostat which can be useful when contacting an installer or maintenance engineer. You can view these in the ‘OpenTherm’ boiler alerts menu. | |||
| Description | ID | Error code | OT Reading |
| Service request | 1 | OISR | 0 = service not required 1 = service required |
| Low water pressure | 2 | 02WP | 0 = no WP fault 1 = WP fault |
| Gas/flame fault | 3 | 03GF | 0 = no GF fault 1 = GS fault |
| Air pressure fault | 4 | 04AF | 0 = no AP fault 1 = AP fault |
| Water Over Temperature | 5 | O5WT | 0 = no OVT fault 1 = OVT fault |
| OEM specific | 6 | 060S | Boiler manufacturer specific code |
T4
Programmable Thermostat
T4R
Wireless Programmable Thermostat
T4M
Programmable Modulating Thermostat
1180 Rolle, Switzerland
Country of origin: UK
© 2020 Resideo Technologies, Inc.
All rights reserved. The Honeywell Home trademark is used under license from Honeywell International Inc.
This product is manufactured by Resideo Technologies, Inc. and its affiliates.
200 Berkshire Place, Wharfedale Road,
Winnersh, Berkshire, RG41 5RD
http://homecomfort.resideo.com/
Tel: 0300 130 1299
32318059-001 D
