Kenmore KKTS2S Series 4-Slice Stainless Steel Silver Toaster with Dual Controls User Guide


Kenmore KKTS2S Series 4-Slice Stainless Steel Silver Toaster with Dual Controls

IMPORTANT SAFEGUARDS
When using electrical appliances, basic safety precautions should always be followed, including the following:
- Read all instructions.
- DO NOT touch hot surfaces. Use handles or knobs.
- To protect against electric shock, DO NOT immerse cord, plug, or toaster in water or other liquids.
- Close supervision is necessary when any appliance is used by or near children.
- UNPLUG from outlet when not in use and before cleaning. Allow to cool before putting on or taking off parts.
- DO NOT operate any appliance with a damaged cord or plug, or after the appliance malfunc-tions or has been dropped or damaged in any manner. Return appliance to the nearest authorized service facility for examination, repair or adjustment.
- The use of accessory attachments not recommended by the appliance manufacturer may cause injuries.
- DO NOT use outdoors.
- NEVER let the cord hang over the edge of table or counter, or touch hot surfaces.
- DO NOT place on or near a hot gas or electric burner, or in a heated oven.
- DO NOT use this appliance for anything other than its intended use.
- Oversized foods or metal utensils must not be inserted in a toaster, as they may create a fire or risk of electric shock.
- A fire may occur if the toaster is covered or touching flammable material, including curtains, draperies, walls and the like when in operation.
- DO NOT attempt to dislodge food when toaster is plugged in. NEVER use metal utensils to free food from toaster slots.
- Always attach plug to appliance first, then plug cord into the wall outlet. To disconnect, turn any control to OFF/ CANCEL , then remove plug from wall outlet. A short power supply cord (or detachable power supply cord) is to be provided to reduce risks resulting from becoming entan-gled in or tripping over a longer cord.
- The marked electrical rating of the cord should be at least as great as the electrical rating of the appliance; and
- The cord should be arranged so that it will not drape over the countertop or tabletop where it can be pulled on by children or tripped over unintentionally.
- The extension cord should be a grounding-type 3-wire cord.
- Extension cords are available and may be used if care is exercised in their use.
- To protect against electrical shock, this appliance is equipped with a cord having a 3-prong grounding-type plug for insertion into a proper grounding-type receptacle. DO NOT alter the plug for use in a 2-prong receptacle. If the plug will not fit into a receptacle, have the proper receptacle installed by a qualified electrician.
- This product is designed for HOUSEHOLD USE ONLY!
PARTS AND FEATURES
2-SLICE TOASTER

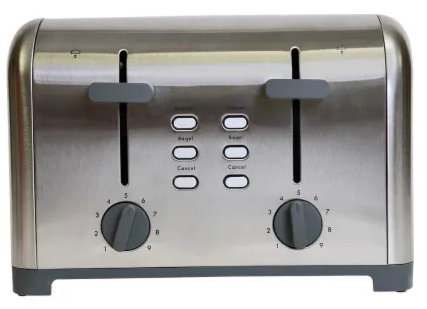
PARTS AND FEATURES
4-SLICE TOASTER

OPERATING YOUR TOASTER
- Place toaster on a dry, level, stable surface.
- Plug power cord into a standard 120V, 60Hz AC-only 3-prong electrical outlet.
- Adjust the Toast Shade Selector to the desired setting. Turn the selector left toward 1 for lighter toast or right toward 9 for darker toast. For the first time you toast, set the selector midway to 5, and adjust as desired for future toasting. On four slice models, there are two Toast Shade Selectors, one for each side of the toaster.
- Place bread slices or other item to be toasted in the slots and press down the Toast Control Lever until it clicks. The Self-Adjusting Bread Guides will automatically adjust to hold the food in place. On the four slice model, there are two Toast Control Levers, one for each side of the toaster. The green light around the Cancel button will illuminate when the Toast Control Lever clicks in the down position, and will remain illuminated until toasting is finished, or until the Cancel button is pushed. On four slice models, there are two different Cancel buttons, one for each side of the toaster.
- If the food to be toasted is frozen, press the Defrost button after you have pushed down the Toast Control Lever. The green light around the Defrost button will illuminate and will stay illumi-nated until the toasting is done, or the Cancel button is pushed. On the four slice model toaster, there are two Defrost buttons, one for each side of the toaster.
- When toasting is done, the Toast Control Lever will automatically pop up and toast can be removed from toaster. To remove toast, lift up the Toaster Control Level to its highest point with one hand, and pull out the raised toast with your other hand.
- The Bagel button will toast bagels and English muffins crisp on the inner-facing side, and soft and warm on the outside. Place the cut side of the bagel or English muffin in the toaster with the cut side toward the center of the toaster (Fig. 3). On the 4-slice model, there are two separate Bagel buttons, one for each side of the toaster. Push down the Toast Control Lever until it clicks, then press the Bagel button. The Bagel button will be illuminated to show it is in use, and will remain ON until toasting is done, or the Cancel button is pushed. To thaw and toast frozen bagels, press the Bagel button and the Defrost button, pressing either button first., level, stable surface.
CAUTION: If food becomes jammed or wedged in the toaster, the built-in Auto Power-Off function will automatically shut the power off. UNPLUG the cord and move the Toast Control Lever up and down a few times to raise the jammed food item. NEVER use metal utensils to free food.

CARE AND CLEANING
WARNING
- DO NOT immerse the toaster in water or any other liquid.
- ALWAYS UNPLUG the toaster from the electric outlet before
CRUMB TRAY

The Slide-Out Crumb Tray is located at the bottom rear of the unit.
NOTE: The 4-Slice model has 2 crumb trays.
Empty the crumb tray frequently. Crumbs will accumulate in the crumb tray and could catch fire if not emptied periodically.
- Before removing crumbs, let the toaster completely cool down. Unplug the toaster.
- For ease in cleaning, grasp the Crumb Tray Handle and pull crumb tray(s) all the way completely out of the toaster. Brush crumbs from the tray(s) and, if necessary, wipe with a clean, damp cloth.
- ALWAYS dry the tray(s) thoroughly before replacing in toaster. When replacing, be sure to push rmly so the tray is fully inserted in the bottom of the toaster.
EXTERIOR
Wipe the toaster outer surfaces with a slightly dampened soft cloth or sponge and dry with a cloth or paper towel. DO NOT use strong or abrasive cleaners, as they may scratch the surface, and NEVER spray cleaners directly onto toaster.
Any other service should be performed by a qualified service technician.
WARRANTY
KENMORE LIMITED WARRANTY
FOR TWO YEARS from the date of original sale this appliance is warranted against defects in material or workmanship when it is correctly installed, operated and maintained according to all supplied instructions. WITH PROOF OF ORIGINAL SALE a defective appliance will be replaced free of charge. The Kenmore brand name is used under license. Direct all claims for warranty service to Koolatron Corporation, call 1-800-265-8456 or email [email protected] This warranty is void if this appliance is ever used for other than private household purposes. This warranty gives you specific legal rights, and you may also have other rights which vary from state to state.