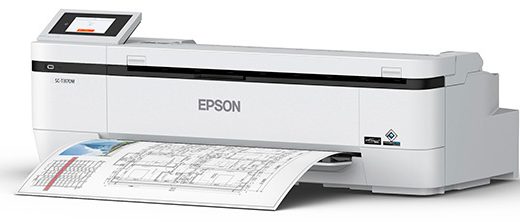
Epson T3170M 24 Inch Wireless Printer with Integrated Scanner User Guide


EPSON T3170M 24 Inch Wireless Printer with Integrated Scanner
Before using this product, make sure you read these instructions and the safety instructions in the online User’s Guide.
The illustrations show the SureColor T3170M, but the steps are the same for all models, unless otherwise specified.
Note: Availability of models varies by country.

Choose a Location for the Printer
Choose a location for the printer that is near a wall outlet where the power cord can be easily unplugged. Avoid places subject to rapid changes in temperature and humidity. Also keep the printer away from direct sunlight, strong light, or heat sources. Make sure to place the printer on a flat, stable surface with enough space on all sides (see illustrations below). The surface supporting the printer should be wider than the space between the rubber feet on the bottom of the printer and capable of supporting the weights shown below.

* 5.4 in. (137 mm) of space is required when using the document support.
Unpack
- Make sure you have these items:
- See the online User’s Guide for instructions on using the output tray and document support.
- The SureColor T5170M comes with a stand and paper basket. For the SureColor T3170M, a stand and paper basket are available as an optional accessory (part number C12C933151). See the online User’s Guide for instructions on assembling these parts.WARNING: The printer requires two people to lift and move it. Make sure to grip the printer as shown in the illustration.
- Remove the plastic sheet and all tape from the outside of the printer.
- Open the left cover.
- Remove the tape and the protective piece.
- Close the left cover.
- Open the scanner cover by pressing both buttons and lifting the cover.
- Remove the tape and close the cover. Make sure the scanner cover is securely closed.
- Raise the scanner.
- Turn and remove the protective piece.
- Press the sides of the protective piece, and then lift and remove it.
- Remove the protective film from the control panel.
- Remove the tape.
- Lower the scanner.
- Open the cut sheet cover and remove the tape inside the printer.
- Open and fold back the roll paper cover.
- Remove the tape and the protective pieces.
- Close the roll paper cover and the cut sheet cover.
- Dispose of all the tape and the protective pieces.


Install Ink Cartridges
Note:
- The printer is designed for use with Epson® cartridges only, not third-party cartridges or ink.
- The cartridges included with the printer are designed for printer setup and not for resale. After some ink is used for initializing, the rest is available for printing.
- Connect the power cord to the printer. Route the cord through the hooks on the back of the printer and plug the other end of the power cord into an outlet.
- Press the
- Select your language on the LCD screen.
- When you see a message about removing protective parts, select Done.
- Select the date, time, and unit preference.
- Follow the prompts to begin ink initialization.
Note: Select See Guide to view additional instructions. - Raise the scanner.
- Pull and lift the tab on the ink cartridge cover to open the cover.
- Gently shake one of the ink cartridges 20 times, then remove it from its packaging.
- Remove the yellow tape from the cartridge.
- Insert the cartridge into the holder for the corresponding color and push it down firmly.
- Repeat steps 9 to 11 for the remaining ink cartridges.
Note: If you install a 50-ml black ink cartridge, there will be a gap on the left side of the cartridge. This is normal. - Close the ink cartridge cover and lower the scanner.
- The printer starts initializing the ink. This takes about 19 minutes. The home screen appears when charging is complete.
Caution: Do not turn off or unplug the printer or perform any other operations during ink charging.
Note:- You may need to replace the maintenance box (part number C13S210057) soon after ink initialization. See the online User’s Guide for instructions.
- See the online User’s Guide for instructions on loading paper.


Install Software
Note: An internet connection is required to obtain the product software.
- Download and run your product’s software package. For the latest software, visit www.epson.com/support (U.S.), www.epson.ca/support (Canada), or www.latin.epson.com/support (Caribbean) and search for your product.
- Follow the instructions on the screen to run the setup program.
- When you see the Select Your Connection screen, select one of the following:
- Wireless connection
In most cases, the software installer automatically attempts to set up your wireless connection. If setup is unsuccessful, you may need to enter your network name (SSID) and password. - Direct USB connection
Make sure you have a USB 2.0 or 3.0 cable (not included).
Note: If you do not use a USB 2.0 or 3.0 cable, print speed and performance may decline. - Wired network connection
Make sure you have an Ethernet cable (not included).
- Wireless connection
Mobile Printing
Connect wirelessly from your smartphone, tablet, or computer. Print documents and photos from across the room or around the world:
- Print directly from your iOS device. Simply connect your device to the printer’s network and tap the action icon to print.
- Use Epson Print Enabler (free from Google Play™) with Android™ devices (v4.4 or later). Then connect your printer and device to the same network and tap the menu icon to print.
Product Support
User’s Guide
Windows®: Click the icon on your desktop or Apps screen to access the online User’s Guide.
Mac: Click the icon in Applications/Epson Software/Guide to access the online User’s Guide.
If you don’t have a User’s Guide icon, go to the Epson website, as described below.
Epson technical support
Visit www.epson.com/support (U.S.), www.epson.ca/support (Canada), or www.latin.epson.com/support (Caribbean) and search for your product to download software and utilities, view manuals, get FAQs and troubleshooting advice, or contact Epson. Epson provides technical support and information on the installation, configuration, and operation of professional printing products through the Epson PreferredSM Limited Warranty Plan. Dial (888) 377-6611, 6 AM to 6 PM, Pacific Time, Monday through Friday. Days and hours of support are subject to change without notice. Before you call, make sure you have your:

Recycling
Epson offers a recycling program for end of life hardware and ink cartridges. Please go to www.epson.com/recycle (U.S.) or www.epson.ca/recycle (Canada) for information on how to return your products for proper disposal.
Need Ink?
You can purchase ink from an Epson authorized reseller. To find the nearest reseller, call 800-GO-EPSON (800-463-7766).
Epson SureColor T3170M/T5170M replacement ink cartridges

EPSON and SureColor are registered trademarks and EPSON Exceed Your Vision is a registered logomark of Seiko Epson Corporation. Epson Preferred is a service mark of Epson America, Inc. Windows is a registered trademark of Microsoft Corporation in the United States and/or other countries. Mac is a trademark of Apple Inc., registered in the U.S. and other countries. Android and Google Play are trademarks of Google LLC.
General Notice: Other product names used herein are for identification purposes only and may be trademarks of their respective owners.
Epson disclaims any and all rights in those marks. This information is subject to change without notice. © 2020 Epson America, Inc., 10/20
Printed in U.S.A.