Miele WTR 860 Washer Dryer User Guide

User Guide


These short instructions are not a substitute for the operating instructions supplied with the appliance. Please read the operating instructions supplied with your washer-dryer before using it for the first time and take note of the Warning and Safety instructions, as well as the full descriptions on how to use your appliance.
Applications

It is essential to read the separate operating instructions.

You can use this washer-dryer to:
wash separately
with a maximum load of 9.0 kg,
dry separately
with a maximum load of 5.0 kg,
or
wash and dry in a continuous sequence
with a maximum load of 5.0 kg.
Operation

Touch display and sensors
The
The touch display can be scratched by pointed or sharp objects, e.g. pens.
Only touch the display with your fingers.

Takes you back a level in a menu.- Touch display
- Start/Stop sensor
Touching the Start/Stop sensor starts the selected program or cancels a program that has already started. The sensor flashes slowly as soon as it is possible for a program to be started and then lights up constantly after the program has started. - Optical interface
For service technicians.
For switching the washer-dryer on and off. The washer-dryer switches off automatically to save energy. It is switched off 15 minutes after the end of the program/Anti-crease phase, or after being switched on if no further selection is made.

Main menu

For selecting the wash program.
For selecting the drying program.
For selecting programs that include a continuous washing and drying sequence.
12 of your saved programs.
The washer-dryer can be operated remotely via the App.
Guides you step by step so that you can select the optimum washing and drying program.
Maintenance options for the TwinDos system and the Clean machine and Rinse out fluff programs.
For altering the washer-dryers electronics to suit changing requirements.


Operating the touch display
Scrolling through menus
You can scroll to the right or the left by swiping your finger across the screen.
The orange bar under the pictures shows that there are further options to choose from.
Options
Touch an option in the menu to select it.
If there are multiple options, the selected option will be highlighted in orange.
Pull-down menu
Touch the top edge of the screen in the middle and drag it down with your finger.
Separate washing

| 1 Detergent dispenser drawer | 4 Door |
| 2 Control panel | 5 Access panel for TwinDos containers |
| 3 Access to filters, pumps and emergency release |
Preparing the laundry

- Empty all pockets.
- Sort the laundry by color and by the care label. Most garments have a textile care label on the collar or side seam.
- Pre-treat stains and badly soiled areas (see “ABC of Stains” on the Miele website.).
Selecting a program
- Press the
- Touch the Washing sensor.
- Scroll to the right of the display until the program you want appears.
- Touch the sensor for that program.
The display will then change to the standard menu for the program.
There are 3 other ways to select a program:
- The Washing/Drying assistant
- Miele MobileStart

Selecting program settings
- Touch the Temperature sensor and select the temperature you want.
Selecting the spin speed
- Touch the Spin speed sensor and select the spin speed you want.
TwinDos dispensing is automatically activated for all programs in which dispensing is possible.
– Switching TwinDos on or off
- Touch the TwinDos sensor, select Off or On and confirm with OK.
- Touch the Extras sensor and select one or more Extras.
- Touch the CapDosing sensor and select the Cap you want to use.
- Touch the Stains sensor and select the type of stains in your load from the list.

You can use the Timer to set the finish time or the start time for a program.
Loading the drum
- Reach under the door grip and pull the door open.
- Unfold the laundry and load it loosely in the drum.
- Always observe the maximum recommended load for each program.
Closing the door
- Make sure that no items are caught between the door and the seal.
- Shut the door with a gentle swing.
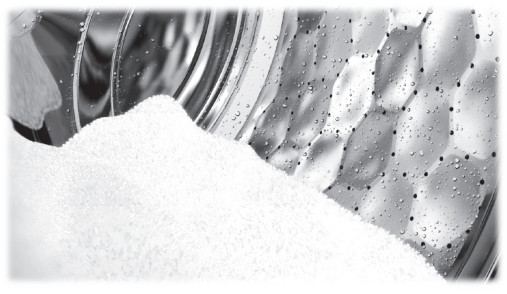
Adding detergent
Detergent can be dispensed via TwinDos, the detergent dispenser drawer, or CapDosing.
The optimum amount of UltraPhase 1 and UltraPhase 2 will be dispensed automatically according to the color mix of the load.
- Touch the TwinDos sensor in the standard menu of the program.
Detergent dispenser drawer
- Pull out the detergent drawer and add detergent to the compartments

There are different types of capsules available.
Each capsule contains the correct amount of detergent for one wash cycle.
- Touch the Cap

Starting the program
- Touch the slowly flashing Start/Stop sensor.
The door will lock and the program will start.
The program status will appear in the display.
- Touch the Start/Stop sensor.
- Pull open the door.
- Remove the laundry.
- Check the folds in the door seal for any small articles, e.g. buttons, which might be lodged there.
Note: For safety reasons, close the door. - Switch the washer-dryer off with the
- Remove any used capsules from the detergent dispenser drawer.
Leave the detergent dispenser drawer slightly open to allow it to dry.

Separate drying
Preparing the laundry
- Sort the laundry according to the type of fiber and weave, garment care label symbol, and the drying level required.
- Before drying, check the drying symbol on the care label.
Selecting a program
Switching the washer-dryer on
- Press the
Selecting a program
- Touch the Drying sensor.
- Scroll to the right of the display until the program you want appears.
- Touch the sensor for that program.
The display will then change to the standard menu for the program.

There are 3 other ways to select a program:
- Favorite programs
- The Washing/Drying assistant
- Miele MobileStart
Selecting program settings
- Touch the Spin speed sensor.
- Select the desired spin speed.
- Touch the Drying level sensor.
- Select the desired drying level.
Selecting Extras
- Touch the Extras sensor.
- Select one or more Extras.
- Confirm with the OK sensor.
Loading the drum
Opening the door
- Reach under the door grip and pull the door open.
- Load the laundry loosely in the drum.
Do not overload the drum. Overloading can cause unnecessary wear and tear of the laundry, give a disappointing drying result, and cause more creasing. - Remove foreign objects like detergent dispensing devices from the laundry.
Closing the door
- Shut the door with a gentle swing.
- Make sure that no items are caught between the door and the seal.
Tip: The maximum load size for the program selected will appear in the pulldown menu.
Starting the program
- Touch the slowly flashing Start/Stop sensor.
The door will lock and the drying program will start.
The program status will appear in the display.
The main water tap must be kept open for drying.
At the end of the program
The door remains locked during the Anticrease phase.
- Touch the Start/Stop sensor.
The door will unlock.
If you have unloaded the drum during the
Anti-crease phase, make sure you spread out the laundry to cool it down. - Pull open the door.
- Remove the laundry.
See the section “After each washing or drying program” under “Washing and drying in one continuous sequence”. - Switch the washer-dryer off.
Changing the program sequence
Canceling a program
You can cancel a program at any time after it has started.
- Touch the Start/Stop sensor.
The following will appear in the display:
Cancel the program? - Select Yes.
- Wait until the
- Pull the door open and unload the drum.

- Close the door.
- Select the required program.
- Press the Start/Stop sensor.
Interrupting a program
- Switch the washer-dryer off with the
- To continue the program, switch the washer-dryer back on with the
Making changes
It is not possible to change the program, the temperature, the spin speed, or the selected Extras after the program has started. This prevents the appliance from being operated unintentionally, e.g. by children.
Laundry can be added or removed if Add laundry is illuminated in the display.
- Touch the Add laundry sensor.
The following will appear in the display: Please wait
The program will stop and the door will unlock. - Pull open the door and add or remove items.
- Close the door.
- Touch the Start/Stop sensor.
The program will continue.
Washing and drying in one continuous sequence
Do not exceed the maximum load for the drying program.
It is very important to read the sections “Separate washing” and “Separate drying” before proceeding.
Preparing the laundry
- Sort the laundry according to the type of fiber and weave, garment care label symbol, and the drying level required.
Selecting a program
Switching the washer-dryer on
Press the
- Touch the Washing + Drying sensor.
- Scroll to the right of the display until the program you want appears.
- Touch the sensor for that program.
The display will then change to the standard menu for the program.
There are 3 other ways to select a program:
1. Favourite programs
2. The Washing/Drying assistant
3. Miele MobileStart
Loading the drum
- Open the door.
- Unfold the laundry and load it loosely in the drum.
These dispensing aids must be removed from the laundry before drying. - Close the door.
Selecting program settings
- Select the desired temperature, spin speed, and drying level.
- Select TwinDos or CapDosing if desired.
- Select further Extras or stains as required.
You can use the Timer to set the finish time or the start time for a program.
Adding detergent
- Dispense detergent via TwinDos, CapDosing, or the detergent dispenser drawer.
Program start/finish
- Touch the Start/Stop sensor.
The door will lock. The program status
will appear in the display.
The Anti-crease phase will start at the end of the program. - Touch the Start/Stop sensor.
The door will unlock.
If you have unloaded the drum during the Anti-crease phase, make sure you spread out the laundry to cool it down. - Pull the door open and unload the drum.
See “After each washing or drying program”.
After each washing or drying program
- Open the drum door fully.
- Remove the laundry.
- Check the folds in the door seal for any small articles, e.g. buttons, which might be lodged there.
- After drying, remove any fluff from around the door seal and the porthole glass.
Check that all items have been removed from the drum. Items left behind could be damaged in the next washing or drying program. - Switch the washer-dryer off.
Tip: Leave the detergent dispenser drawer slightly open to allow it to dry.
During drying, fluff is developed and can collect in the drum and suds container.
The Rinse out fluff program must not be used for rinsing laundry.
- Switch the washer-dryer on.
- Scroll through the main menu until
Maintenance appears. - Touch the Maintenance sensor.
- Select Rinse out the fluff.
Do not use detergent. - Touch the Start/Stop sensor.
Any fluff will be rinsed away within a few minutes. - If necessary, wipe any remaining fluff off the door seal and door glass.
- Switch the washer-dryer off.
Selecting Extras
- Touch the Extras sensor.
- Select one or more Extras.
Not all Extras can be combined. Extras that cannot be combined are greyed out and cannot be selected. - Confirm with the OK sensor.
- SingleWash/Dry – for the efficient washing and drying of very small loads.
- Extra quiet – washing or drying with reduced noise.
- Pre-ironing – for reducing creasing at the end of the program.
- Quick – for light soiling, with a shorter program duration.
- Water plus – more water when washing and rinsing.
- Pre-wash – for laundry with large amounts of dirt.
- Soak – for heavily soiled fabrics.
- Intensive – for hard-wearing laundry that is very heavily soiled.
- AllergoWash – where particularly high levels of hygiene are required.
- Rinse hold – If a Rinse hold is selected, the laundry remains in the water following the final rinse cycle.
- Separate rinse – for a particularly good wash result.
- Extra gentle – for gentle washing of lightly soiled fabrics.
Drying
- Gentle tumble – for delicate fabrics such as acrylics.
A spin cycle is carried out in some drying programs to reduce energy consumption.
Program chart – Washing
| Program | Load (1/1 kg) | Hans | Temperature |
| ECO 40-60 | 9.0 | Normally soiled cotton garments. A Laundry load that is intended for washing at 40°C or 60°C can be washed n the same wash cycle. |
|
| Cotton | 9.0 | Cotton, linens, or cotton mix fabrics, e.g. table linen, toweling, underwear, T-shirts, etc. | Cold to 90°C |
| Minimum iron | 4.0 | Synthetic, mixed fiber, and easy-care cotton. Reduce the spin speed for fabrics that crease easily. |
Coll to 60°C |
| QuickPower | 4.0 | Moderately soiled garments are also suitable fa washing in the Cotton program. A special saturation process and wash rhythm ensure that the laundry is cleaned particularly)), quickly, and thoroughly. |
40°C to 60°C |
| Delicates | 3.0 | Delicate garments are made from synthetic fiber, mixed fiber, rayon, and viscose. For items that crease easily. deselect the spin. | Cold to 60°C |
| Shirts | 2.0 | Shirts and blouses are made of cotton and mixed fiber. Turn shirts and blouses inside out. do up buttons and turn collars and cuffs inwards. |
Cod to 60°C |
| Woolens |
2.0 | Machne-viewable hand-washable wool or wool blend fabric. If the care label does not specify a temperature, wash using the cold setting. Reduce the spin speed for items that crease easily |
Cold to 40°C |
| Denim | 3.0 | Items made of denim. | Cold to 60°C |
| Outerwear | 2.5 | Performance outerwear (e.g. jackets and trousers) made from membrane fabric such as Gore-Tex®. SYMPATEX®, WINDSTOPPER® etc. | Cad to 40°C |

An explanation of further programs can be found in the “Washing: Programme chart” in the operating instructions.
| Program | Load* (in kg) | Items | Drying levels |
| ECO 40-60 | 5.0 | For cotton fabrics. | |
| Cotton | 5.0 | Cotton, linens, or cotton mix fabrics, e.g. table linen, toweling, underwear, T-shirts, etc. | |
| Minimum iron | 4.0 | For minimum iron, items are made of cotton, synthetic, or mixed fiber. | |
| QuickPower | 4.0 | Garments suitable for the Cottons program. | |
| Delicates | 1.5 | Delicate items with the |
|
| Shirts | 1.0 | Shirts and blouses are made of cotton and mixed fibers. | |
| Woolens |
2.0 | For woolen garments and fabric containing wool blends. Wool and wool blend fabrics and woolen garments are only fluffed up, they are not dried completely. | |
| Denim | 3.0 | All denim garments, e.g. jeans, jackets, skirts, shirts. | |
| Freshen up | 1.0 | Clean, dry garments and garments that have been worn briefly and are not soiled. | |
| Steam care | 2.0 | Reduces the amount of creasing in damp, freshly washed, and spun cotton or linen garments. | |
| Outerwear | 2.5 | Outerwear is suitable for drying in a tumble dryer. | |
| Proofing | 2.5 | For thermally fixing textiles that are suitable for tumble drying and have been treated with a proofing agent. | |
| Express 20 | 3.5 | Garments suitable for the Cottons program. |


* Weight of dry laundry
A = Extra dry; B = Normal plus; C = Normal; D = Hand iron; E = Machine iron; F = Timed drying
An explanation of further programs can be found in the “Drying: Programme chart” in the operating instructions.
Problem-solving guide
To switch off the fault message, switch the washer-dryer off with the
| Problem/Fault message | Possible cause and remedy |
| The display remains dark and the Start/Stop sensor indicator light does not come on. | There is no power to the machine. • Check whether the mains plug is plugged in and switched on. • Check whether the circuit breaker has tripped. |
| You are asked to enter a code. | Access via a code has been activated. • Enter the code and confirm the entry. Deactivate the code if you do not wish this message to appear in the display the next time the machine is switched on. |
| The display is dark. | The display has switched off automatically to save energy (Standby mode). • Touch the Start/Stop sensor. This switches Standby off. |
| The following appears in the display: Door will not lock. Call Miele. or The door lock has jammed. Call Miele. |
The door is not closed properly. The door lock could not engage. • Close the door again. • Start the program again. If the fault message appears again, contact Miele. The door will not open. The door lock has jammed. • Call Miele. |
| The program has been canceled and the following fault message appears in the display: |
The water outlet is blocked or restricted. The drain hose has been fixed too high. • Clean the filters and the drain pump. • Check whether the maximum delivery height of 1 m has been exceeded. |
| The program has been canceled and the following fault message appears in the display: |
The water inlet is blocked or restricted. canceled and the following • Check whether the tap is turned on properly. • Check whether the inlet hose is kinked. If the fault message appears again, contact Miele. |
| The program has been canceled and the following fault message appears in the display: |
The water protection system has reacted. • Turn off the tap. • Call Miele. |
| The program has been canceled and the following fault message appears in the display: |
There is a fault. • Restart the program. If the fault message appears again, contact Miele. |
| The following appears in the display: Check load |
There is very little or no laundry in the drum. • In the future use a timed drying program for drying only a few individual items. A machine overload was detected. • In the future adhere to the maximum load limit for each program. |
| The following appears in the display: Start the “Rinse out fluff” program in the “Maintenance” menu |
The Rinse out fluff program has not been used for a long time. • Start the Rinse out fluff program. |
| The following appears in the display: Hygiene info |
No drying program or no wash program using a temperature above 60°C has been run for a long time. • Start the Clean machine program. |
| The following appears in the display: Use “TwinDos” or carry out “TwinDos” Maintenance in the “Maintenance” menu. |
TwinDos or automatic dispensing via a compartment 1/2 has not been used for a long time. • Use TwinDos for one of your next loads. • Carry out the TwinDos maintenance program. |
| The following appears in the display: “TwinDos” Maintenance for compartment 1 must be started in the “Maintenance” menu. |
TwinDos or automatic dispensing via compartment 1/2 has not been used for a long time. • Carry out the TwinDos maintenance program immediately as described in “Cleaning and care – Maintenance programs” in the operating instructions. |
| At the end of the program or after a program cancellation the following appears in the display: Extra cooling |
For safety reasons, the door cannot be opened if the the temperature in the drum exceeds 55°C during washing or 70°C during drying. • Wait until the temperature in the drum has decreased and the message has gone out in the display. |
| The laundry feels damp after drying. | Warm laundry can feel damp. • Spread the laundry out to cool it down. |
| The laundry is too damp or too dry after a drying cycle. | The desired residual moisture level is between two drying levels. • Change the level of drying as described in “Settings – Drying levels”. |
