Miele TX0917 Drawer Instruction Manual


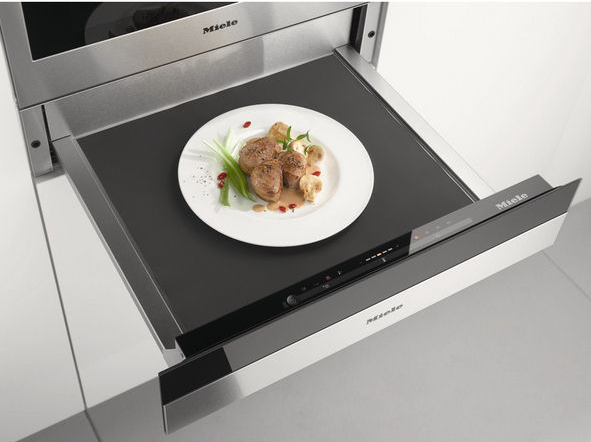
Miele TX0917 Drawer

Safety instructions for installation
WARNING:
Risk of damage from incorrect installation.
Incorrect installation can cause damage to the drawer and/or the combination appliance. The appliance must only be installed by a qualified person.
- The socket and on-off switch should be easily accessible after the drawer has been installed.
- The drawer may only be built in in combination with those appliances quoted by Miele as being suitable. Miele cannot guarantee trouble-free operation if the appliance is operated in combination with appliances other than those quoted by Miele as being suitable.
- The base on which the drawer and the combination appliance are fitted must be fixed in place and must support the weight of both appliances.
- When building in the combination appliance, it is essential to follow the instructions given in the operating and installation instructions supplied with the combination appliance.
- When installing the drawer, the following should be noted:
- The contents of the dishes must be visible. This is to avoid scalding from hot food spilling over.
- There must be enough space for the drawer to be pulled out fully.
Installation
Installation notes
The drawer can be used in combination with the following Miele built-in appliances:
- all ovens with an appliance front width of 595 mm
- all steam ovens with an appliance front width of 595 mm
- all coffee machines with an appliance front width of 595 mm
- all microwaves with an appliance front width of 595 mm
- the Dialog oven with an appliance front width of 595 mm
The combination appliance is placed on top of the drawer without the need for an interim shelf.
The drawer is available in 3 models, which differ in height. The building-in dimensions for the drawer must be added to the building-in dimensions for the combination appliance to establish the niche size required.
Installation dimensions ESW 7010, ESW 7110
All dimensions are given in mm.
Combination appliance for niches with a height of 450 mm
The furniture housing unit must not have a back panel fitted behind the building-in niche.

The furniture housing unit must not have a back panel fitted behind the building-in niche.


A
- ESW 70×0: 22 mm
- ESW 71×0: 23.3 mm
Connections and ventilation

- View from the front
- Mains connection cable, L = 2000 mm
- No connections permitted in this area
- Ventilation cut-out, min. 1800 mm2
Installation dimensions ESW 7020, ESW 7120
All dimensions are given in mm.
Combination appliance for niches with a height of 450 mm
The furniture housing unit must not have a back panel fitted behind the building-in niche.

The furniture housing unit must not have a back panel fitted behind the building-in niche.


A
- ESW 70×0: 22 mm
- ESW 71×0: 23.3 mm
Connections and ventilation

- View from the front
- Mains connection cable, L = 2000 mm
- No connections permitted in this area
- Ventilation cut-out, min. 1800 mm2
Installation dimensions ESW 7030
All dimensions are given in mm.
Combination appliance for niches with a height of 450 mm
The furniture housing unit must not have a back panel fitted behind the building-in niche.

The furniture housing unit must not have a back panel fitted behind the building-in niche.


A ESW 7030: 22 mm
Connections and ventilation

- View from the front
- Mains connection cable, L = 2000 mm
- No connections permitted in this area
- Ventilation cut-out, min. 1800 mm2
Installation
Check that the base on which the drawer will sit is clean and level (use a spirit level). This is important for the appliance to function correctly.
- Push the drawer into the housing unit until the drawer front is flush with the housing unit and make sure that it is correctly aligned in the unit.
- Open the drawer, and use the 2 screws supplied to secure it to the side walls of the housing unit.
- When installing the combination appliance, protect the top edge of the front panel from abrasive marks.
- Install the combination appliance in accordance with the operating and installation instructions supplied with it.

Electrical connection
All electrical work should be carried out by a suitably qualified and competent person in strict accordance with current local and national safety regulations. Connection should be made via a switched socket. This will make it easier for service technicians should the appliance need to be repaired. The electrical socket must be easily accessible after installation.
WARNING
Danger of injury.
Miele cannot be held liable for unauthorized installation, maintenance and repair work as this can be dangerous to users.
Miele cannot be held liable for damage or injury caused by incorrect installation, maintenance or repair work, or by an inadequate or faulty earthing system (e.g. electric shock).
If the plug is removed from the connection cable or if the cable is supplied without a plug, the appliance must be connected to the electrical supply by a suitably qualified electrician.
If the switched socket is not accessible after installation, or if the appliance is to be hard-wired, an additional means of disconnection must be provided for all poles. When switched off, there must be an all-pole contact gap of at least 3 mm in the switch (including switch, fuses and relays). Connection data is shown on the data plate. It must match the mains electrical supply.
After installation ensure that all electrical components are shielded and cannot be accessed by users.
Total power rating
See data plate
Connection data
The connection data is quoted on the data plate. Please ensure these match the household mains supply.
Residual current device
For extra safety, it is advisable to protect the drawer with a suitable residual current device (RCD) with a trip range of 30 mA.
Disconnecting from the mains
There is a risk of electric shock if the appliance is connected to the mains supply during repair or service work. After disconnection, ensure the appliance cannot be switched back on by mistake.
To disconnect the appliance from the mains power supply, do one of the following depending on installation:
Safety fuses
Completely remove fuses.
Automatic circuit breakers
- Press the (red) test button until the middle (black) button springs out.
Built-in circuit breakers - Circuit breakers at least type B or C:
Switch the lever from 1 (on) to 0 (off).
Residual current device (RCD) - Switch the main switch from 1 (on) to 0 (off) or press the test button
Replacing the mains connection cable
If the mains cable needs to be replaced it must be replaced with a special connection cable, type H 05 VV-F (PVCinsulated), available from your Miele dealer.