Motorola XTS 5000 Digital Portable Radio User Manual


motorola XTS 5000 Digital Portable Radio
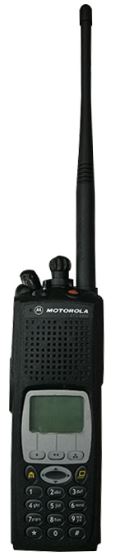

The Motorola XTS 5000 Series Portable Radio is one of three vendor portable radios currently approved for use on the Alaska Land Mobile Radio (ALMR) Communications System. Others can be found at www.alaskalandmobileradio.org/radios.htm.
XTS 5000 Functional Controls


Display indication when the XTS 5000 is turned on the radio will revert to the last channel selected before it was powered down.
NOTE: All available status symbols are shown for illustration purposes only. Not all status symbols will be displayed at one time during normal operation.

“dot soft keys” (i.e. the 1, 2 or 3 dot Menu Select Buttons) select the function shown over them on the display. As you change programming modes, the function of these soft keys changes to the function displayed above them.
Normal Operation:
When powered up with the ON/OFF Volume Knob, the XTS 5000 should be on your “Home Zone/Channel” (the last zone/channel selected when the radio was powered down). If the required Home Zone is not displayed:
- 1. Press the Single Dot
2. Press the left or right arrow on the 4-way Navigation Button
3. Press the Home Button
4. Press the Push-To-Talk (PTT) button and wait for the Talk Permit Tones (3 quick beeps) before speaking


During an incident, dispatch or the Communications Unit Leader (COML) will assign a Command (CMD) or Tactical (TAC) channel for the incident. A typical assignment would be “Command 2 (CMD 2) or North Tactical 2 (NTAC 2).” To select a Command or Tactical channel in the Incident Command (IC) Zone rotate the 16- Position Select Knob until the desired channel is displayed. If you are assigned a channel away from your Home Channel, follow procedures 1 through 3 above to select the proper assigned zone and channel. Command Channel: When dispatched to an incident, acknowledge your arrival at the scene to dispatch or the assigned COML on the IC HAIL Channel for that region. Dispatch or the COML will assign you to the appropriate Command Channel. TAC Channel: Communications between agency/unit first responders should be on the assigned Tactical channels or day-to-day channels.
Scanning Use and Review: Place the Three Position toggle switch in the A position. To review the zones and channels (modes) programmed to scan, press the “3 dot”


NOTE: You can scan multiple zones and channels outside of the normal zone or the zone you are assigned. During an active incident, this may cause you to miss a call. Use of the scan function is NOT recommended on the ALMR System.
Scanning Programming:
To program a zone, or channels (modes) within a zone, for scanning, press the “2 dot”


NOTE: If you turn on the Scan function and you receive a low tone, and the display indicates “EMPTY LIST,” you have no channels programmed for scan. Turn off the scan switch and program a scan list.
Emergency Button:
When depressed, the Top Orange Button will send an emergency alert to the Dispatch Center that your channel/talkgroup is assigned to along with your subscriber unit number. You will be called immediately by Dispatch and asked the nature of your emergency. If you have hit this button accidentally you must cancel it by holding it for two seconds, or until the beeping goes away. You will still need to transmit the nature of the emergency, or the error, to the Dispatcher so he/she can clear the alarm. The Emergency button is to be used for EMERGENCIES only.
IMPORTANT: ALMR radios are NOT equipped with GPS. This means if you hit the Emergency button (aside from lots of bells) no one knows your location or what your emergency is. If you can move and talk, notify dispatch with a voice call and the nature of your emergency.
Signal Strength and Coverage
There is a signal strength indicator on the display. If you are out of range the indicator bars will drop to none and the radio will emit a long, repeating beep. Move your location or try your vehicle radio.
Tone Mute Button: On the menu above there is a MUTE selection. When pressed, this brings up the option to turn on/off the beep tone when any button is pressed. Top Side Purple Button: This button turns the Display Lamp on/off. Side Button #1: Used when someone is privately calling your radio and to monitor a conventional/simplex channel. To monitor the channel, press and hold the side button #1 as long as you want to monitor the channel. bDirect operation: The CONV (conventional) channels operate in Conventional/Simplex mode. That is, local unit to local unit without going through the repeaters. This mode can be used for local operations like traffic control or training, without tying up a repeater frequency. Channel 8 in the State and Regional IC Zones is a conventional/simplex channel. Press the Side Button 2 briefly to display the current site with which your radio is affiliated. The radio will display the repeater site you are affiliated with for approximately two seconds. The radio will then display the Received Signal Strength Indicator (RSSI) and a number between 0 and 120 (any number above 60 is considered good). After approximately two seconds, the radio will return to normal operation.’ To force the radio to affiliate with a different repeater site, press and hold the SITE button (side button #2) until SCANNING appears in the display. The radio will attempt to affiliate with a different repeater site. The radio may affiliate with a different site, or it may re-affiliate with the same site. Press SITE button (side button #2) to confirm which site you are now affiliated with. If you need to affiliate with a different site, repeat these actions until you affiliate with an adequate site.
Appendix

Removing the Microphone connector plate to attach the external Speaker / Microphone
NOTE: Always turn the radio off first before performing any maintenance.
Insert a flat blade screwdriver into the area between the bottom of the cover and the slot below the connector. Hold the top of the cover with your thumb while you pry the bottom of the cover away from the radio with the screwdriver. Ensure you put the cover somewhere where you can find it!
Attach the Battery

- With the radio turned off, insert the top edge of the battery into the radio’s frame as shown.
- Rotate the battery toward the radio and press down until the battery clicks into place
Remove the Battery
- With the radio turned off, press the release button on the bottom of the battery until the battery releases from the radio.
- Remove the battery from the radio .


Remember – your radio is your lifeline. Know it well