Frigidaire EC300W-FA Refurbished Evaporative Air Cooler Owner’s Manual


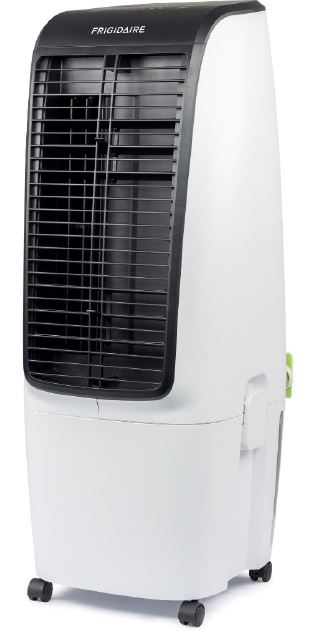
FRIGIDAIRE EC300W-FA Refurbished Evaporative Air Cooler

SPECIFICATIONS
| SPECIFICATIONS | |||||
| MODEL NO | EC300W-FA | ||||
| RATED VOLTAGE | 120 V~ | ||||
| RATED FREQUENCY | 60 Hz | ||||
| RATED POWER | 110W | ||||
| NOISE | ≤60dB | ||||
| AIRFLOW | 600 CFM | ||||
| COVERAGE | 350 square feet | ||||
| DIMENSIONS | 15.37”×13.46”×35.33” | ||||
| NET WEIGHT | 17.64 lbs. | ||||
| WARRANTY | 1 Year Manufacturer’s Warranty | ||||
REGISTER YOUR PRODUCT ONLINE
Register Your Frigidaire Product Online Today!
Take advantage of all the benefits product registration has to offer:
Service and Support
Diagnose troubleshooting and service issues faster and more accurately
Recall Notifications
Stay up to date on safety, system updates and recall notifications
Special Promotions
Opt-in for NewAir promotions and offers. Registering your product information online is safe & secure and takes less than 2 minutes to complete: newair.com/register
Alternatively, we recommend you attach a copy of your sales receipt below and record the following information, which can be found on the manufacturer’s nameplate on the back of the unit. You will need this information if it becomes necessary to contact the manufacturer for service inquiries.
SAFETY INFORMATION & WARNINGS
In order to use the product safely and to avoid any danger caused by wrong operation, please pay close attention to the warnings and instructions in this manual.
- • This appliance can only be used by children ages 8 and up. Children should not play with the appliance. Cleaning and user maintenance should not be done by children without supervision.
• This appliance is not intended for use by persons (including children) with reduced physical, sensory or mental capabilities, or lack of experience and knowledge, unless they are under constant supervision or given instruction concerning use of the appliance by a person responsible for their safety.
• If the supply cord is damaged, it must be replaced by the manufacturer or similarly qualified persons in order to avoid hazards.
• If the product experiences any type of failure, please notify the manufacturer. Do not disassemble or replace the parts. Disassembly or modification without permission will affect both the safety and warranty of the product.
• Do not touch the power cord plug with wet hands. There is a risk of electrocution.
• Never insert wooden sticks, metal sticks, or other objects into the inlet or outlet. It may cause leakage, short circuit, or damage to the product.
• Do not spray insecticides and flammable sprays around the product. It may cause damage to the product.
• Do not pull the cord when removing the power plug. It may cause power cord damage, electric shock and other hazards.
• If you notice an unpleasant smell or hear abnormal noises during use, immediately stop using product and unplug from the power source.
• Do not use an exposed or damaged power cord. It may cause electric shock, short circuit, or fire. - • The water level of the tank should never exceed the maximum level line and should not be lower than the minimum level line (observable within the tank) when the evaporative cooling function is turned on.
• After water is filled, do not tilt while placing or moving to prevent splashing.
• If you know the product will be stored for a while, turn it off and disconnect the power plug from the outlet.
• Only use standard power outlets for this unit. The
power voltage must match the voltage on the
nameplate of the unit. Please confirm the voltage
before plugging the unit into the wall.
• During evaporative cooling mode, do not attempt to install the air filter or cooling pad. This may cause water to spray out of the air outlet.
• The appliance is only for household and indoor use.
• This appliance has a polarized plug (one prong is wider than the other). To reduce the risk of electric shock, this plug is intended to fit in a polarized outlet in only one way. If the plug does not fit both ways, please contact a qualified electrician. Do not attempt to tamper with this safety feature in any way.
• Warning: Always disconnect the power plug from the outlet before servicing or cleaning the appliance.
• Warning: To reduce the risk of fire or electric shock, do not use this fan with any solid-state speed control device.
Safety Warnings and Precautions:
This product contains a lithium button/coin cell battery. If a new or used lithium button/coin cell battery is swallowed or enters the body, it can cause severe internal burns and can lead to death in as little as 2 hours. Always completely secure the battery compartment. If the battery compartment does not close securely, stop using the product, remove the batteries, and keep it away from children. If you think batteries might have been swallowed or placed inside any part of the body, seek immediate medical attention.
PARTS LIST

- Top loading reservoir
- Top cover
- Left cover
- Water pump side lever (raised)
- Water pump side lever (lowered)
- Water tank latch
- Water tank
- Casters
- Remote control receiver
- Horizontal louver
- Front cover
- Vertical louver
- Back cover
- Right cover
- Power cord storage
- Water gauge
- Remote control
- Dustproof filter
- Cooling pad
- Power cord
FEATURES
- 2 in 1 Evaporative cooler and fan
- Timing function: 1H, 2H, 4H, 8H
- Remote control
- Water can be added from the top or by accessing the lower tank
- Water pump protection
- Four fan speed levels: High, Medium, Low, and Silent
- Four modes: Normal, Natural, and Sleep
- Touch button control with LED display
- Automatic horizontal swinging, manual vertical swinging
- Universal roller design; easy to move
- Air dry function
- Smart memory for unexpected power outage
- Automatic shut off after 15 hours of continuous operation
- Power and shutdown button sound reminder
- Included ice packs (Do not break open or modify ice packs in any way—ice packs already contain a freezing gel and do not need to be opened. Place ice packs in the freezer overnight prior to use, for maximum cooling effect. Frozen ice packs should be placed directly into the water tank, out of the way of the water tank, to prevent obstruction or damage.)
OPERATING INSTRUCTIONS
After removing the product from the box, remove the stopper as shown in Fig. 1, then slide the side lever to the bottom so that the pump extends down into the tank to allow for evaporative cooling operation.

FILLING THE WATER TANK
If you want to use the evaporative cooling function, you need to add water to the tank. Water can be filled from the top or the bottom:
- From the top: First open the top loading reservoir, and thenslowly pour water into the tank (Fig. 3 & 4). Once full, return the cover to its original position. Make sure to check the water level indicator in front of the unit so as to not fill water beyond maximum level.
- Accessing the water tank (bottom): Before adding water to the water tank, first slide the side lever to the top to raise the water pump to the top of the tank:
- Undo the latches on both sides (Fig. 5)
- Lift the top half of the unit and slowly pour water into the tank (Fig. 6).
- After adding water:
- Place the top half of the unit back on top of the water tank
- Fasten the side latches
- Slide the side lever down to move the tank to the bottom.

Add included ice packs to the water tank. (Do not break open or modify ice packs in any way—ice packs already contain a freezing gel and do not need to be opened. Place ice packs in the freezer overnight prior to use, for maximum cooling effect. Frozen ice packs should be placed directly into the water tank, out of the way of the water tank, to prevent obstruction or damage.)

- When filling the water tank, please note the level indicator in front of the unit (Fig. 7)
- Do not fill the water beyond the maximum water level (Fig. 7).
- Please remember to use clean tap water.
- Tip: It is normal if the device has a slight odor or the water in the tank has a slight discoloration when it is used for the first time.

USING THE REMOTE CONTROL
The EC300W-FA is equipped with a remote control. A CR2032 3V coin-type replacement battery may be included for your convenience.

Pull on the back bottom of the remote control to separate the battery compartment. Insert the included 3V CR2032 battery.
Please point to the EC300W-FA receiver when using the remote control.
If the battery voltage is low, please open the battery cover as shown in Fig.6 and replace with a new battery (CR2032). Please note the positive pole and the negative pole of the battery; then insert the battery compartment back into the remote control.
CAUTION:
This product contains a lithium button/coin cell battery. If a new or used lithium button/coin cell battery is swallowed or enters the body, it can cause severe internal burns and can lead to death in as little as 2 hours. Always completely secure the battery compartment. If the battery compartment does not close securely, stop using the product, remove the batteries, and keep it away from children. If you think batteries might have been swallowed or placed inside any part of the body, seek immediate medical attention.
- The cells shall be disposed of properly, including keeping them away from children; and
- Even used cells may cause injury.
CONTROL & DISPLAY PANELS

FAN SPEED BUTTON
The fan speed can be changed by pressing the Fan Speed button. The sequence scrolls through: Silent → Low → Medium → High.
EVAPORATIVE COOLING BUTTON
Before activating evaporative cooling, make sure you slide the side lever down to lower the water pump into the water tank. After doing so, press this button to turn On/Off evaporative cooling. Press this button once to activate evaporative cooling, and by doing so, the pump turns on. Press this button again to turn off evaporative cooling, and so on.
OSCILLATION BUTTON
With the power on, press this button to turn on the oscillation function that oscillates the blades from the left to the right.
TIMER BUTTON
When you press this button, the timer cycles in the following sequence: 1H → 2H → 4H → 8H → Off
MODE BUTTON
Press this button to switch between Normal, Nature, and Sleep mode (Nature and Sleep modes are unavailable at Silent fan speed):
- Normal Mode: Steady fan speed
- Nature Mode: Variable fan speed
- Sleep Mode: Imitates Nature Mode, but fan speed will decrease every 30 minutes
LOW WATER LEVEL ALERT
If the unit detects no water continuously one minute after evaporative cooling is turned on, evaporative cooling will turn off and the unit will beep for 10 seconds, indicating there is no water in the tank.
SEPARATE POWER-OFF FUNCTION
If the water pump is raised from the tank, the evaporative cooling mode will turn off immediately. You will not be able to use evaporative cooling while the pump is raised from the tank, but other functions can still be used.
AIR DRY FUNCTION
- If you’re ready to store the unit and want to dry the cooling pad and air filter after using the evaporative cooling function, you can press and hold the “fan speed” button for 3 seconds to start the air dry function.
- When air dry function starts, the fan will run at high speed for 20 minutes. The high-speed LED will continuously blink every 0.5 seconds for 20 minutes until the unit turns off automatically once the air dry function is finished.
- When using the dry function, all other buttons stop working except the “On/Off” button. If you turn off the unit before the 20-minute drying cycle has completed, you’ll need to re-run the air dry program again.
POWER FAILURE MEMORY FUNCTION
In the event of a power outage, the unit will beep 10 times when turned on, and will pause for 30 seconds before resuming the last mode it was in.
AUTOMATIC SHUT-OFF FUNCTION
For your safety, the unit will automatically turn off after 15 hours of continuous operation when the timer function is not being used.
CLEANING AND MAINTENANCE
- Do not use chemical agents for cleaning.
- Always unplug the power cord before cleaning the device to prevent possible electrocution.
- If dust accumulates on the outer surface of the unit, please wipe with a damp soft cloth. Use water and a soap mixture to clean the exterior.
- Remove the cooling pad from the unit and check to make sure the cooling pad is in good condition. If the pad is cracked, it will need to be replaced. Wipe the interior clean with a damp soft cloth.
- Rinse the cooling pad completely with clean water. Use a soft cloth to dry.
- For more thorough cleaning, use a mixture of water with a couple of teaspoons of distilled white vinegar or lemon juice.
- Do not use gasoline, thinner, or any substance that may damage the unit
- Change water in the water tank regularly. Wipe the tank clean and use your diluted vinegar solution to remove any hard water stains in the tank.
- Make sure the tank is completely dry and free of any leftover vinegar residue before using the unit again.
PRODUCT STORAGE
If the product will be stored for an extended period of time, disassemble the unit to access the water tank, drain the water, and then reassemble the unit. Activate the Air Dry function to fully dry the cooling pad. Once complete, unplug the power cord, pack the unit properly to prevent dust, and place in a dry and well-ventilated place.
TROUBLESHOOTING
| Problem | Possible Causes | Solution |
| The unit does not cool. | There is insufficient water in the tank. | Check the water level in the tank and make sure there is enough water. |
| The water pump is not lowered all the way to the bottom. | Check the water pump to make sure it is lowered all the way to the bottom, then press the evaporative cooling button. | |
| The evaporative cooling button was not pressed. | Press the evaporative cooling button. | |
| The pump is defective. | Contact customer service if there is an issue with the water pump. | |
| The unit does not cool on high speed. | The cooling pad is not sufficiently saturated with water. | The cooling pad will be fully soaked after the unit runs for 10 minutes. |
| The empty tank indicator turns on when there is still enough water
in the tank. |
There is an issue with the water pump’s sensor. | Clean the water pump by wiping it down with a damp cloth or try rinsing it with a water and vinegar solution. |
| The water tank is leaking. | The water tank is damaged. | Contact customer service if there is an issue with the water tank. |