NEC ME-Series MultiSync Option Board Installation Guide
ME-Series MultiSync Option Board
Installation Guide
Safety Precautions and Maintenance
FOR OPTIMUM PERFORMANCE, PLEASE NOTE THE FOLLOWING WHEN SETTING UP AND USING THE LCD COLOR MONITOR:
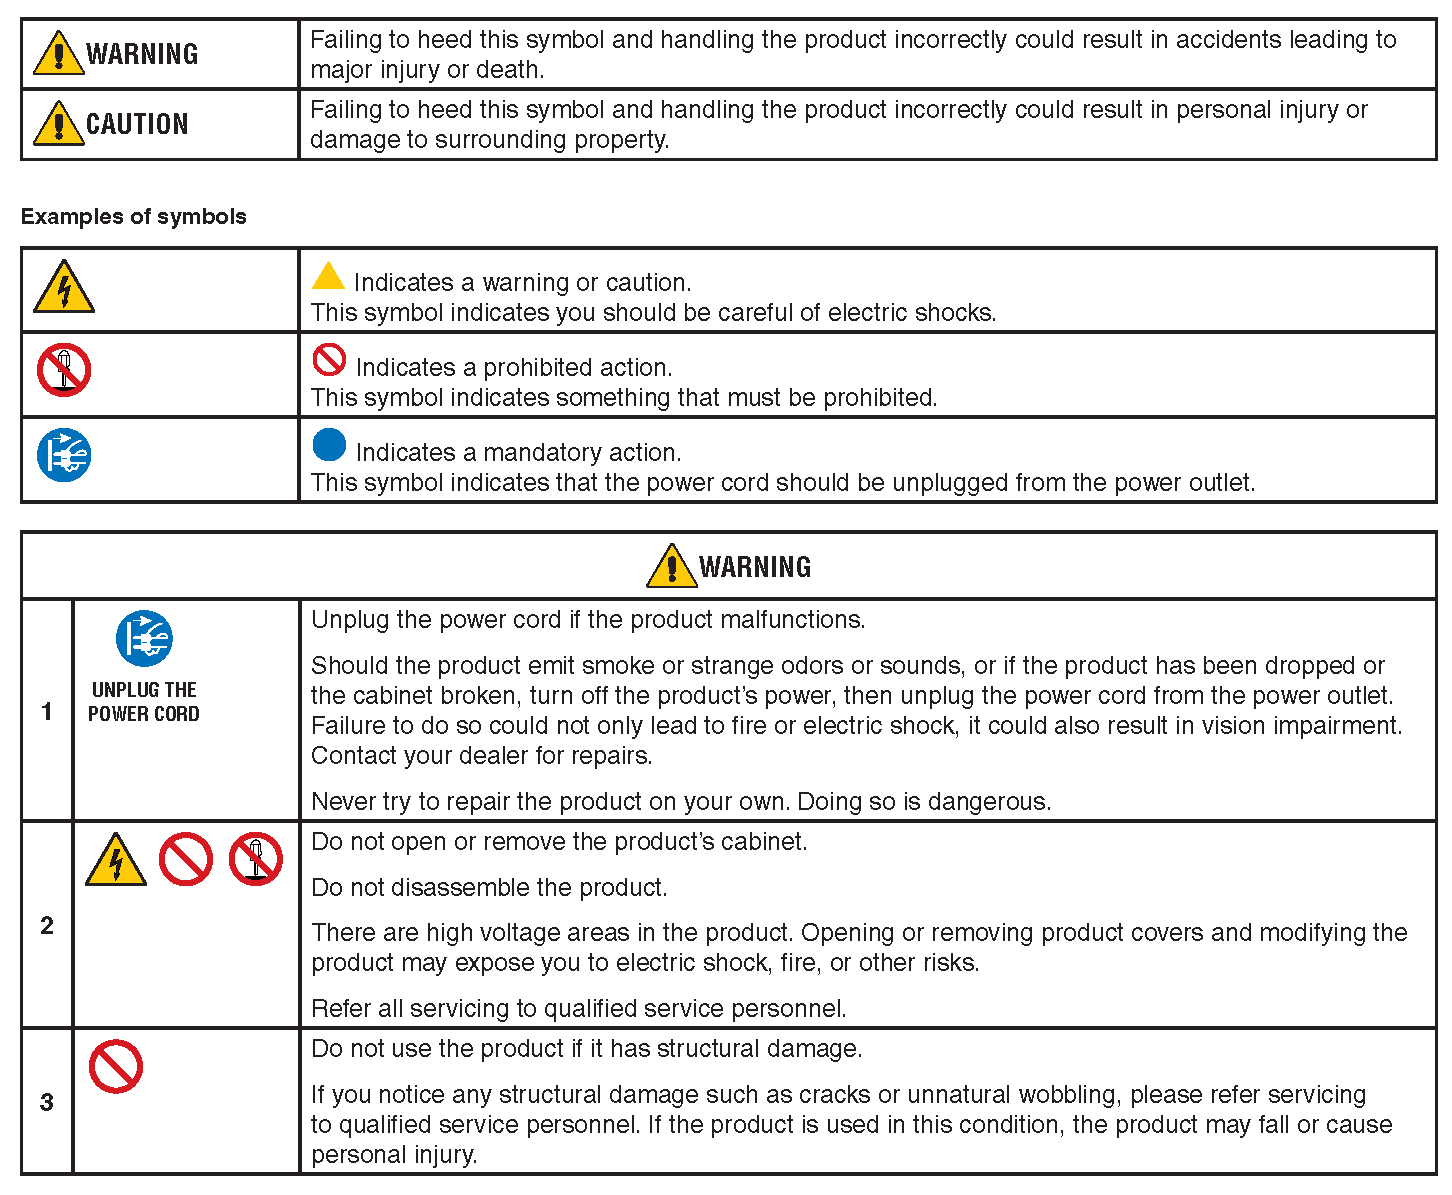
About the Symbols
To ensure safe and proper use of the product, this manual uses a number of symbols to prevent injury to you and others as well as damage to property. The symbols and their meanings are described below. Be sure to understand them thoroughly before reading this manual.


Power Cord Table

- Please use this power cord under 125 V power supply.
NOTE:
This product can only be serviced in the country where it was purchased
MultiSync is a trademark or registered trademark of NEC Display Solutions, Ltd. in Japan and other countries.
Intel and the Intel logo are trademarks of Intel Corporation or its subsidiaries.
All other brands and product names are trademarks or registered trademarks of their respective owners.
Installing an Option Board
You can install Option Boards that are compatible with Intel® Smart Display Module Small (Intel® SDM-S) and Intel® Smart Display Module Large (Intel® SDM-L) specifications.
- Turn off the main power switch.
- Place the monitor face down on a flat even surface that is larger than the monitor screen. Use a sturdy table that can easily support the weight of the monitor.
NOTE:
To avoid scratching the LCD panel, always place a soft cloth, such as a blanket that is larger than the monitor’s screen area, on the table before laying the monitor face down. Make sure there is nothing on the table that can damage the monitor.
3. Remove the SLOT COVER (1) and (2) and then the OPTION COVER (1) (Figure 1).
When using Intel® SDM-L type option board, slide the CENTER RAIL to the right and remove it. Reverse the process to re-attach it (Figure 1-1).
4. Attach the included OPTION COVER b with the removed screws (Figure 2).

5. Insert the Option Board into the monitor and affix it in place with the removed screws (Figure 2).
(Recommended fasten force: 50 – 80 N•cm).
6. To close the opening of the slot you did not use, reattach the SLOT COVER (1) or (2) with the removed screws (See Figure 1). When attaching the SLOT COVER (1) or (2) , use the holes (A) shown below in the SLOT COVER (Figure 3).

NOTE:
Unless your monitor is purchased as part of a special bundle package, no Option Boards will be in the box or installed in the monitor. These are optional accessories available for separate purchase. Please contact your supplier for a list of Option Boards available for your monitor.
Make sure the board is inserted into the slot in the correct orientation.
Do not apply excessive force to manipulate the Option Board before attaching it with screws.
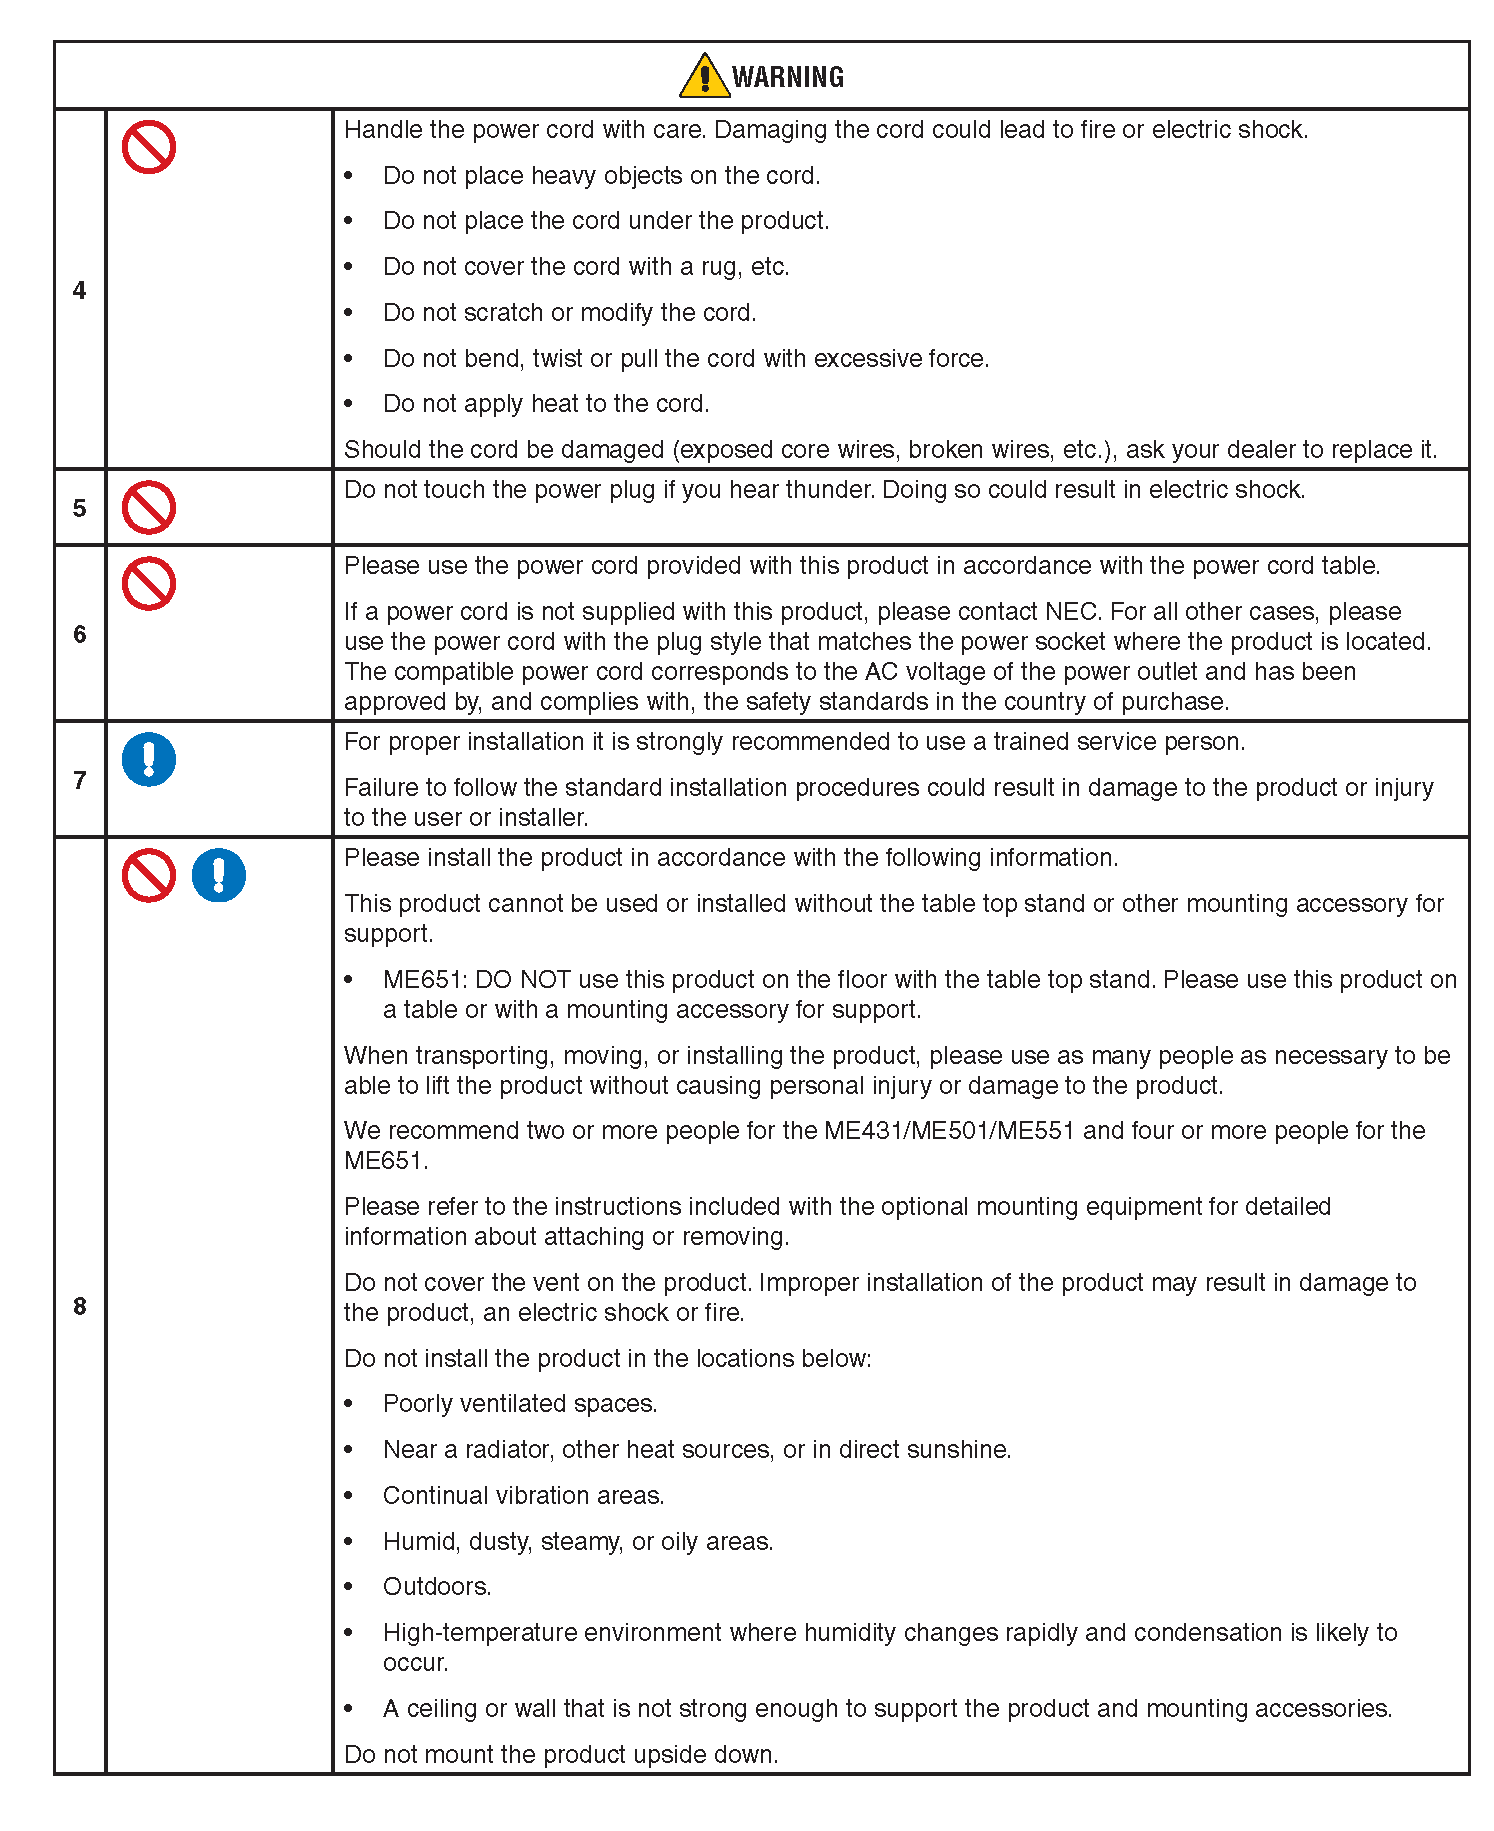
WARNI NG: Please refer to “WARNING 14”.