Bosch GAS 35 M AFC Professional Wet/Dry Vacuum Cleaner Instruction Manual


GAS 35 M AFC Professional


Safety information for vacuum cleaners
Read all the safety information and instructions. Failure to observe the safety information and follow instructions may result in electric shock, fire and/or serious injury.
Save all warnings and instructions for future reference.
experience and knowledge.
Otherwise, there is a risk of operating errors and injuries.

WARNING
Never vacuum material that contains asbestos. Asbestos is a carcinogenic substance.
WARNING
Only use the vacuum cleaner if you have been adequately informed about the use of the equipment, the substances to be vacuumed, and how to dispose of these safely.
Thorough instruction on how to use the equipment prevents accidental misuse and injuries.
WARNING
The vacuum cleaner is suitable for vacuuming dry substances, and can also be used to vacuum liquids when taking appropriate measures. The penetration of liquids increases the risk of an electric shock.
WARNING
Only use the socket for the purpose stipulated in the operating manual.
WARNING
If you notice a foam or water leak, switch off the vacuum cleaner im- mediately and empty the container. Otherwise, the vacuum cleaner can become damaged.
Do not use the vacuum cleaner if you discover any damage.
Do not open the vacuum cleaner yourself. It should be repaired exclusively by a qualified professional using only genuine spare parts.
Damaged vacuum cleaners, cables, and plugs increase the risk of electric shock.
cleaner. This safety measure prevents the vacuum cleaner from being started accidentally.
WARNING
The dust extractor contains dust particles that pose a risk to health.
Emptying and maintenance procedures, including the disposal of dust containers, should only be carried out by professionals. Suitable protective equipment is required.
Do not operate the vacuum cleaner unless the complete filter system is correctly inserted.
Otherwise, you are putting your health at risk.
Products sold in GB only:
Your product is fitted with a BS 1363/A approved electric plug with an internal fuse (ASTA approved to BS 1362).
If the plug is not suitable for your socket outlets, it should be cut off and an appropriate plug fitted in its place by an authorized customer service agent. The replacement plug
should have the same fuse rating as the original plug.
The severed plug must be disposed of to avoid a possible shock hazard and should never be inserted into the main socket elsewhere.
Symbols
The following symbols may provide you with important information pertaining to the use of your dust extractor.
Please take note of the symbols and their meaning. Knowing what these symbols mean will help you to use your extractor more effectively and safely.
Symbols and their meaning
WARNING! Read all the safety and general instructions. Failure to observe the safety information and follow instructions may result in electric shock, fire, and/or serious injury.

Dust extractor from dust class M in accordance with IEC/EN 60335-2-69 for the dry extraction of harmful dust with an exposure limit of ≥ 0.1 mg/m3

WARNING! The dust extractor contains dust particles that pose a risk to health.
Emptying and maintenance procedures, including the disposal of dust containers, should only be carried out by professionals.
Suitable protective equipment is required.
Do not operate the dust extractor without the complete filter system.
Otherwise, you are putting your health at risk.
max. 1L-Boxx
max. 15 kg
Only attach a maximum of one L-Boxx.
The weight of the L-Boxx along with its contents must not exceed 15 kg.


Do not hang the dust extractor on a crane hook, e.g. in order to transport it. The dust extractor is not suitable for moving with a crane.
There is a risk of injury and damage if you do this.
Do not sit or stand on the dust extractor. The dust extractor may tip over and become damaged if you do this. This poses a risk of injury.


Automatic start/stop
Extracting dust that accumulates from working power tools
The dust extractor switches on automatically and off again with a time delay

0 Switching off
Vacuuming
Vacuuming up dust deposits

15 Volume flow monitoring for a hose diameter of 15 mm
22 Volume flow monitoring for a hose diameter of 22 mm
35 Volume flow monitoring for a hose diameter of 35 mm


Min./max.
Continuous regulation of suction power:
– Maximum suction power for applications with a high level of dust generation
– Reduced suction power for applications with a low level of dust generation, and also to regulate the suction between the connected power tool and the surface of the workpiece, for example (e.g. when sanding)
Permitted connected load of the connected power tool (country-specific)
AFC Automatic filter cleaning


Product Description and Specifications
Read all the safety and general instructions. Failure to observe the safety and general instructions may result in electric shock, fire, and/or serious injury.
Please observe the illustrations at the beginning of this operating manual.
Intended Use
The tool is intended for collecting, vacuuming, conveying, and separating wood chips as well as non-flammable dry dust types, non-flammable liquids, and a mixture of water and air. The dust extraction capability of the dust extractor has been tested and corresponds to dust class M. It is suitable for the increased demands in professional use, e.g. in trade, industry, and workshops.
Dust extractors from dust class M in accordance with IEC/EN 60335-2-69 may only be used to vacuum and extract harmful dust with an exposure limit of ≥ 0.1 mg/m3.
Only use the dust extractor if you can fully evaluate all functions and carry them out without restrictions, or if you have received corresponding instructions.
Product features
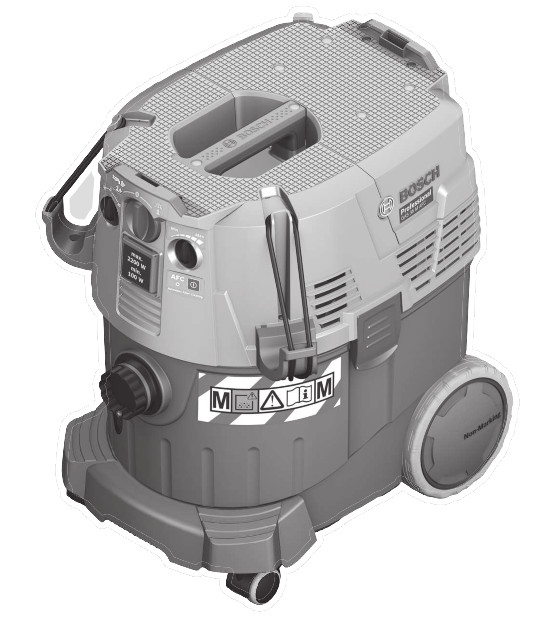
The numbering of the product features refers to the representation of the vacuum cleaner on the graphic pages.
| (1) Container (2) Sealing plug for extraction connection (3) Hose adapter (4) Holder for vacuum hose (5) Socket for power tool (6) Volume flow controller (7) Mode selector switch (8) Suction power regulator (9) AFC button (10) Carrying handle (11) L-Boxx holder (12) Top part of vacuum cleaner (13) Catch for top part of vacuum cleaner (14) Wheel (15) Castor brake (16) Castor (17) Cable holder (18) Closing flap for filter cover (19) Holder for suction tubes |
(20) Holder for crevice nozzle/curved nozzle (21) Holder for floor nozzle (22) Dust extraction adapter (23) Curved nozzle (24) Vacuum hose (25) Disposal bag (26) Flat-pleated filter (PES) (27) Crevice nozzle (28) Rubber lip (29) Brush inserts (30) Floor nozzle (31) Suction tube (32) Adapter for vacuum hose holder (33) Snap fastener (34) False air intake (35) Control LED (36) Filter cover (37) Fill level sensors |
Technical data
| Wet/dry dust extractor | GAS 35 M AFC | ||
| Schummer | 3 601 JC3 1.. | 3 601 JC3 170 | |
| Nennspannung | V | 220−240 | 110 |
| Nennaufnahmeleistung | W | 1200 | 1000 |
| Frequenz | Hz | 50–60 | 50–60 |
| Behältervolumen (Brutto) | l | 35 | 35 |
| Nettovolumen (Flüssigkeit) | l | 19 | 19 |
| Staubbeutelvolumen | l | 19 | 19 |
Max. vacuum A)
| – Sauger | hPa | 230 | 211 |
| – Turbine | hPa | 254 | 242 |
Max. volume flow rate A)
| – Sauger | l/s m3/s |
36 0,036 |
31 0,031 |
| – Turbine | l/s m3/s |
74 0,074 |
71 0,071 |
| max. Saugleistung | W | 1380 | 1150 |
| Fläche Faltenfilter | m2 | 0,615 | 0,615 |
| Staubklasse | M | M | |
| Gewicht entsprechend EPTA-Procedure 01:2014 | kg | 12,4 | 12,4 |
| Schutzklasse | /I | /I | |
| Schutz | IPX4 | IPX4 |
A) Measured using a vacuum hose 3 m long and 35 mm in diameter
The specifications apply to a rated voltage [U] of 230 V. These specifications may vary at different voltages and in country-specific models.
Automatic start/stop
| Rated voltage | Maximum power | Minimum power |
| 230 V | 2200 W | 100 W |
Permitted connected load of the connected power tool.
These values can differ from other country-specific models. Please take note of the information on the socket of the dust extractor.
Noise/Vibration Information
Noise emission values were determined according to EN 60335-2-69.
Typically the A-weighted sound pressure level of the dust extractor is 70 dB(A). Uncertainty K = 3 dB. The noise level when working can exceed 80 dB(A).
Wear hearing protection
Total vibration values ah (triax vector sum) and uncertainty K determined according to EN 60335-2-69: ah<2,5 m/s 2 , K = 1,5 m/s2.
Assembly

Fitting the holder for the vacuum hose (see figure A)
– Slide the holder (4) for the vacuum hose firmly into the corresponding adapters (32) from above until they click into place.
Fitting the Vacuum Hose (see figure B)
– Attach the vacuum hose (24) to the hose adapter (3) and turn it clockwise as far as it will go.
Note: The friction generated by the dust in the vacuum hose and accessory during extraction causes an electrostatic charge that the user may experience as static discharge (depending on environmental factors and their physiological state).
Bosch generally recommends using an anti-static vacuum hose (accessory) to vacuum up fine dust and dry materials.
Fitting the vacuuming accessories (see figure C)
The vacuum hose (24) is equipped with a clip system that can be used to connect vacuuming accessories (dust extraction adapter (22), curved nozzle (23)).
Fitting the dust extraction adapter
– Push the dust extraction adapter (22) onto the vacuum hose (24) until you hear both snap fasteners (33) on the vacuum hose engage.
– To remove the adapter, press the snap fasteners (33) inwards and pull apart the components.
Fitting the nozzles and tubes
– Push the curved nozzle (23) onto the vacuum hose (24) until you hear both snap fasteners (33) on the vacuum hose engage.
– Then attach the required extraction accessory (floor nozzle, crevice nozzle, suction tube, etc.) firmly to the curved nozzle (23).
– To remove the accessory, press the snap fasteners (33) inwards and pull apart the components.
Inserting/removing the disposal bag or dust bag (dry extraction) (see figures D1–D2)
A disposal bag (25) or dust bag must be used for the dry extraction of dust class M materials.
Insofar as materials with or without an exposure limit of ≥ 1 mg/m 3 (dust class L materials) are extracted, these can be sucked straight into the container.
Note: If using a paper filter bag, you must make sure that automatic filter cleaning (AFC) is switched off; you should also do the same if using a fleece filter bag (see “Automatic
filter cleaning (see figure H)”, page 23).
WARNING
The vacuum cleaner contains dust particles that pose a risk to health.
Emptying and maintenance procedures, including the disposal of dust collectors, should only be carried out by professionals. Suitable protective equipment is required.
Do not operate the vacuum cleaner without the complete filter system. Otherwise, you are putting your health at risk.
Inserting the disposal bag
– Open the catches (13) and remove the top part of the vacuum cleaner (12).
– Insert the disposal bag (25) into the container (1) with the inlet facing forwards.
– Pull the inlet over the connection flange and all the way into the recess of the connection flange.
– Make sure that the disposal bag (25) touches all the inside walls of the container (1).
– Fold the rest of the disposal bag (25) over the edge of the container (1).
– Put the top part of the vacuum cleaner (12) on and close the catches (13).
Removing and sealing the disposal bag
– Open the catches (13) and remove the top part of the vacuum cleaner (12).
– Pull the full disposal bag (25) backward out of the connection flange.
– Carefully take the disposal bag (25) out of the container (1) without damaging it.
When doing so, make sure that the disposal bag does not scrape against the connection flange or other sharp objects.
– Remove the adhesive strip cover and tape up the disposal bag.
Then tie up the disposal bag (25) below the inlet using the adhesive strip cover that has been removed.
Changing/inserting the dust bag (accessory)
– Open the catches (13) and remove the top part of the vacuum cleaner (12).
– Pull the full dust bag backward out of the connection flange. Close the opening in the dust bag by turning down the top. Take the closed dust bag out of the container (1).
– Place the new dust bag over the vacuum cleaner’s connection flange. Make sure that the entire length of the dust bag touches the inside wall of the container (1).
– Put the top part of the vacuum cleaner (12) on and close the catches (13).
Fitting the rubber lip (wet extraction) (see figure E)
Note: The requirements for the degree of penetration (dust class M) have only been verified for dry extraction.
– Use a suitable tool to lift the brush inserts (29) out of the floor nozzle (30).
– Place the rubber lips (28) in the floor nozzle (30).
Note: The textured side of the rubber lips must be facing outwards.
Attaching the L-Boxx (see figure F)
– Click the L-Boxx onto the adapters (11).
You can attach an L-Boxx to the top part of the dust extractor for transporting the extractor and to provide space-saving storage for extractor accessories and/or the power tool.
Operation
Start-up
The dust extractor may be used for vacuuming and extracting the following materials:
– Dust with an exposure limit of ≥ 0.1 mg/m3
The dust extractor must categorically not be used in potentially explosive areas.
To ensure optimum suction power, you must always fully unwind the vacuum hose (24) from the top part of the dust extractor (12).
Dry vacuuming
Vacuuming up dust deposits
– Adjust the volume flow controller (6) to suit the hose diameter used.
– To switch on the dust extractor, set the mode selector switch (7) to the “extraction” symbol.
– To switch off the dust extractor, set the mode selector switch (7) to the “switch off” symbol.
The dust extractor is fitted with airflow monitoring. In the “vacuuming” operating mode, the volume flow monitoring is fixed to a value of 20 m/s, irrespective of the setting of the volume flow controller (6).
If the value falls below this, e.g. due to the accumulated dirt in the vacuum hose, a full dust bag, or a clogged flat-pleated filter, an audible alarm signal will sound. In this case, switch off the dust extractor and check it as described in the “Rectifying faults” section.
Extracting dust that accumulates from working power tools (see figure G)
Be aware of the corresponding national regulations.
The dust extractor has an electric socket with a protective earth contact (5), which can be used to connect an external power tool. Observe the maximum permitted load of the
connected power tool.
In order for sufficient dust transport to be ensured at the extraction point, the volume flow must not fall below the minimum specified for the connected power tool.
| Hose diameter | Volume flow setting |
| 35 mm | 57.9 m3/h |
| 22 mm | 41.2 m3/h |
| 15 mm | 12.7 m3/h |
– Adjust the volume flow controller (6) to suit the hose diameter used.
– Fit the extraction adapter (22) (see “Fitting the dust extraction adapter”, page 21).
– Insert the extraction adapter (22) into the dust extraction outlet of the power tool.
Note: When working with power tools that have a low air feed into the vacuum hose (e.g. jigsaws, sanders, etc.), the false air intake (34) of the dust extraction adapter (22) must be opened. This will ensure that the automatic filter cleaning function works correctly.
To do this, turn the ring above the false air intake (34) until the opening is at its maximum size.
– To activate the automatic start/stop function of the dust extractor, set the operating mode selector switch (7) to the “automatic start/stop” symbol. In this operating mode, the volume flow is electronically monitored according to the setting of the volume flow controller (6).
Sufficient dust transport is ensured when the setting is correctly selected.
– To activate the dust extractor, switch on the power tool that is plugged into the electric socket (5). The dust extractor will start automatically.
– To stop dust extraction, switch the power tool off.
The automatic start/stop run-on function will run for up to 15 seconds longer in order to extract the remaining dust from the vacuum hose.
– To switch off the dust extractor, set the mode selector switch (7) to the “switch off” symbol.
If the acoustic warning signal sounds, the dust extractor must be checked as described in the “Rectifying faults” section.
Wet-vacuuming
Do not use the vacuum cleaner to vacuum combustible or explosive liquids, such as petrol, oil, alcohol, or solvents. Do not vacuum hot or burning dust. Do not operate the vacuum cleaner in areas subject to explosion hazards. Dust, vapors, and liquids can ignite or explode.
Note: The requirements for the degree of penetration (dust class M) have only been verified for dry extraction.
Steps to Take before Wet Vacuuming
– Remove the disposal bag (25) or dust bag if necessary.
Note: Use a wet filter bag (accessory), which separates liquid from solids, to make disposal easier when vacuuming water-solid mixtures.
– Fit the rubber lip (28) in the floor nozzle (30) (see “Fitting the rubber lip (wet extraction) (see figure E)”, page 21).
– Switch off the automatic filter cleaning (AFC) (see “Automatic filter cleaning (see figure H)”, page 23).
Vacuuming up liquids
– To switch on the dust extractor, set the mode selector switch (7) to the “extraction” symbol.
The dust extractor is equipped with fill-level sensors (37).
The dust extractor shuts down if the maximum fill level has been reached. Set the mode selector switch (7) to the “switch off” symbol.
Note: When extracting non-conductive liquids (e.g. drilling emulsion, oils, and fats), the dust extractor will not switch off when the container is full. The fill level must be constantly monitored and the container emptied in good time.
If the acoustic warning signal sounds during wet extraction, the operating reliability of the dust extractor is not affected.
No measures to rectify the fault are necessary.
– To switch off the dust extractor, set the mode selector switch (7) to the “switch off” symbol.
– To transport the dust extractor, screw the sealing plug (2) onto the hose adapter (3).
– Empty the container (1).
To prevent mold growth after wet extraction:
– Remove the flat-pleated filter (26) and leave this to dry thoroughly.
– Remove the top part of the dust extractor (12), open the filter cover (36), and leave both elements to dry thoroughly.
Automatic filter cleaning (see figure H)
When automatic filter cleaning (AFC) is active, the flat pleated filter (26) is cleaned every 15 seconds using blasts of air (pulsating noise).
The filter cleaning function should be used regularly, and at the very latest when the suction power is no longer sufficient.
Regular use of the filter cleaning function will increase the service life of the filter.
In order to achieve an optimum filter service life, deactivate the automatic filter cleaning function only in exceptional cases, e.g. when vacuuming pure liquids or using a paper filter bag.
A flat-pleated filter with surface dirt is still fully functional. It is not necessary to clean the flat-pleated filter manually by shaking or blowing it out; this may even damage the filter.
Note: The automatic filter cleaning function is switched on by default when the dust extractor leaves the factory.
It is only possible to switch the automatic filter function on or off when the tool is switched on.
– Deactivating AFC
Press the AFC button (9).
The control LED (35) will go out.
– Activating AFC
Press the AFC button (9).
The control LED (35) will light up green.
Maintenance and service
Maintenance and cleaning
In order to avoid safety hazards, if the power supply cord needs to be replaced, this must be done by Bosch or by an after-sales service center that is authorized to repair Bosch
power tools.
For the user to carry out maintenance, the dust extractor needs to be disassembled, cleaned, and maintained as far as this is possible without endangering maintenance personnel
or other persons. Before disassembly, the dust extractor should be cleaned to prevent any potential hazards. The room in which the dust extractor is disassembled should be well ventilated. Wear personal protective equipment while carrying out maintenance. After completing maintenance, the maintenance area should be cleaned.
An inspection regarding the dust extraction capability must be carried out at least once a year by the manufacturer or someone who has been trained, e.g. to check for filter dam-
age, that the vacuum cleaner is tight, and that the control unit is functioning correctly.
Class M dust extractors that have been in dirty environments should have their exteriors, as well as all their components, cleaned or treated with sealant. When performing maintenance and repair work, all dirty parts that cannot be cleaned satisfactorily must be disposed of. Such parts must be disposed of in impermeable bags in accordance with the valid provisions for disposing of such waste.
Removing/changing the flat-pleated filter (see figures I1–I2)
Suction power is dependent on the condition of the filter.
Therefore, the filter should be cleaned regularly.
If the flat-pleated filter (26) becomes damaged, replace it immediately.
– Pull-on the closing flap (18) and open the filter cover (36).
– Hold the flat-pleated filter (26) by the supports and take it out from above.
– Use a damp cloth to remove any dust and dirt that accrues around the closing edge of the filter cover (36) when removing the flat-pleated filter (26).
PES and PTFE flat-pleated filters can be rinsed out under running water.
– Insert the cleaned (or a new) flat-pleated filter (26), ensuring that it is positioned correctly and securely.
– Close the filter cover (36) again (must audibly click into place).
Cleaning the container
– Wipe the container (1) from time to time using a non-abrasive off-the-shelf cleaning product and leave it to dry.
Cleaning the fill-level sensors (see figure J)
Make sure that the fill level sensors are cleaned (37) occasionally.
– Open the catches (13) and remove the top part of the dust extractor (12).
– Clean the fill-level sensors (37) using a soft cloth.
– Put the top part of the vacuum cleaner (12) on and close the catches (13).
Storage and transport (see figure K)
– Wrap the power cable around the cable holder (17).
– Insert the accessory into the holders provided for it: Suction tubes (31) into the holders (19), crevice nozzle (27) into the holder (20), floor nozzle (30) into the holder (21).
– Open the elastic bands of the vacuum hose holder (4) and wrap the vacuum hose (24) around the top part of the dust extractor in the holder (4).
Hook the elastic bands back in.
– Click the L-Boxx onto the holders (11).
– Before transporting the dust extractor, remove any full disposal bags/dust bags and empty any liquids that have been absorbed, in order to avoid placing unnecessary strain on the back and prevent injury.
Only ever carry the dust extractor by the carrying handle (10).
– To transport the dust extractor, screw the sealing plug (2) onto the hose adapter (3).
– Store the dust extractor in a dry room and secure it so that it cannot be used by unauthorized persons.
– Put the castor brake (15) down to hold the castor (16) in place.
Rectifying faults
Problem |
Corrective measures |
| The suction turbine will not switch on. | — Check the mains cable, mains plug, fuse, socket and fill level sensors (37). |
| The mode selector switch (7) is set to “automatic start/stop”. — Set the mode selector switch (7) to the “vacuuming” symbol or switch on the power tool plugged into the electric socket (5). | |
| The suction turbine switches off. | — Empty the container (1). |
| The suction turbine will not switch on again after emptying the container. | — Switch the dust extractor off and wait five seconds before switching it back on. |
| — Clean the fill-level sensors (37) and the space between the fill-level sensors (37) using a brush. | |
| The suction power is decreasing. | — Remove any blockages from the vacuum nozzle, suction tube (31), vacuum hose (24), or flat-pleated filter (26). |
| — Change the disposal bag (25) or dust bag. | |
| — Make sure the filter cover (36) is engaged correctly. | |
| — Place the top part of the dust extractor (12) on correctly and close the catches (13). | |
| —Change the flat-pleated filter (26). | |
| Dust is escaping when vacuuming | — Check that the flat-pleated filter (26) has been fitted correctly. |
| Automatic switch-off (wet extraction) is not working. | – Clean the fill-level sensors (37) and the space between the fill-level sensors (37) using a brush. |
| Automatic switch-off will not work in the presence of non-conductive liquids or foaming. – Check the fill level regularly. | |
| Acoustic warning signal sounds. | Suction power setting is too low. – Set the suction power regulator (8) to a higher setting. |
| Hose diameter setting is wrong. – Set the volume flow controller (6) to the correct vacuum hose diameter. | |
| Vacuum hose (24) is blocked or twisted. – Remove blockage or untwist hose. | |
| Disposal bag/dust bag full. – Change the disposal bag (25) or dust bag. | |
| Flat-pleated filter (26) is dirty. – Clean or change the flat-pleated filter if required. | |
| The airflow supplied by the connected power tool is insufficient. – Open the false air intake (34) on the extraction adapter (22): Turn the ring on the extraction adapter until the false air intake is fully open. – Open the false air intake on the power tool if there is one. | |
| Malfunction of the monitoring electronics. – Contact an authorised Bosch after-sales service centre. | |
| The automatic filter cleaning function is not working. | – Activate the automatic filter cleaning function (press the AFC button (9)). |
| – Connect the vacuum hose (24). | |
| The automatic filter cleaning function will not switch off. | – Contact an authorised Bosch after-sales service centre. |
| The automatic filter cleaning function will not switch on. | – Contact an authorised Bosch after-sales service centre. |
Accessories
| Accessory number | |
| Paper filter bag (dry) | 2 607 432 035 |
| Fleece filter bag (dry) | 2 607 432 037 |
| Wet filter bag (wet) | 2 607 432 039 |
| Disposal bag (PE) (dry/wet) | 2 607 432 043 |
After-Sales Service and Application Service
Our after-sales service responds to your questions concerning maintenance and repair of your product as well as spare parts.
You can find explosion drawings and information on spare parts at: www.bosch-pt.com
The Bosch product use advice team will be happy to help you with any questions about our products and their accessories.
In all correspondence and spare parts orders, please always include the 10‑digit article number given on the nameplate of the product.
Great Britain
Robert Bosch Ltd. (B.S.C.)
P.O. Box 98
Broadwater Park
North Orbital Road
Denham Uxbridge
UB 9 5HJ
At www.bosch-pt.co.uk you can order spare parts or arrange
the collection of a product in need of servicing or repair.
Tel. Service: (0344) 7360109
E-Mail:
You can find further service addresses at: www.bosch-pt.com/serviceaddresses
Disposal
The vacuum cleaner, its accessories, and packaging should be recycled in an environmentally friendly manner.

EU Declaration of Conformity
Wet/dry dust extractor Article number
We declare under our sole responsibility that the stated products comply with all applicable provisions of the directives and regulations listed below and are in conformity with the following standards.
Technical file at: *
GAS 35 M AFC
3 601 JC3 1..
2006/42/EC
2014/30/EU
2011/65/EU
EN 60335-1:2012+A11:2014+A13:2017
+A1:2019+A2:2019+A14:2019
EN 60335-2-69:2012
EN 55014-1:2017+A11:2020
EN 55014-2:2015
EN IEC 61000-3-2:2019
EN 61000-3-3:2013+A1:2019
EN IEC 63000:2018
* Robert Bosch Power Tools GmbH (PT/ECS)
70538 Stuttgart
GERMANY

Henk Becker Helmut Heinzelmann
Chairman of Head of Product Certification
Executive Management
Robert Bosch Power Tools GmbH, 70538 Stuttgart, GERMANY Stuttgart, 07.08.2020

| Wet/dry dust extractor GAS 35 M AFC |
Article number 3 601 JC3 160 3 601 JC3 170 |
We declare under our sole responsibility that the stated products comply with all applicable provisions of the regulations listed below and are in conformity with the following
standards.
Technical file at: Robert Bosch Ltd. (PT/SOP-GB), Broadwater Park, North Orbital Road, Uxbridge UB9 5HJ, United Kingdom
The Supply of Machinery (Safety) Regulations 2008
The Electromagnetic Compatibility Regulations 2016
The Restriction of the Use of Certain Hazardous Substances in
Electrical and Electronic Equipment Regulations 2012
EN 60335-1:2012+A11:2014+A13:2017
+A1:2019+A2:2019+A14:2019
EN 60335-2-69:2012
EN 55014-1:2017+A11:2020
EN 55014-2:2015
EN IEC 61000-3-2:2019
EN 61000-3-3:2013+A1:2019
EN IEC 63000:2018
Robert Bosch Power Tools GmbH, 70538 Stuttgart, Germany represented (in terms of the above regulations) by
Robert Bosch Limited, Broadwater Park, North Orbital Road,
Uxbridge UB9 5HJ, United Kingdom

Vonjy Rajakoba
Managing Director – Bosch UK

Martin Sibley
Head of Sales Operations and Aftersales
Robert Bosch Ltd. Broadwater Park, North Orbital Road, Uxbridge UB9 5HJ, United Kingdom, as authorized representative acting on behalf of Robert Bosch Power Tools GmbH, 70538 Stuttgart, Germany

Robert Bosch Power Tools GmbH
70538 Stuttgart
GERMANY
www.bosch-pt.com
1 609 92A 6R4 (2021.09) PS / 305
