Bosch PUE611BB5E Induction Hob User Manual


BOSCH PUE611BB5E Induction Hob

Safety
- Observe the following safety instructions.
General information
- Read this instruction manual carefully.
- Keep the instructions, the appliance pass and the product information safe for future reference or for the next owner.
- Do not connect the appliance if it has been damaged in transit
Intended use
Only a licensed professional may connect ap-pliances without plugs. Damage caused by in-correct connection is not covered under the warranty.
The appliance can only be used safely if it is correctly installed according to the safety in-structions. The installer is responsible for en-suring that the appliance works perfectly at its installation location.
Only use this appliance:
- To prepare meals and drinks.
- Under supervision. Never leave the appliance unattended when cooking for short periods.
- In private households and in enclosed spaces in a domestic environment.
- Up to an altitude of max. 4000 m above sea level.
Do not use the appliance:
- With an external timer or a separate remote control. This does not apply if operation with appliances included in EN 50615 is switched off.
If you wear an active implantable medical device (e.g. a pacemaker or defibrillator), check with your doctor that it complies with Council Directive 90/385/EEC of 20th June 1990, EN 45502-2-1 and EN 45502-2-2, and that it has been chosen, implanted and programmed in accordance with VDE-AR-E 2750-10. If these conditions are satisfied, and if, in addition, non-metal cooking utensils and cookware with non-metal handles are used, it is safe to use this induction hob as intended. If these conditions are satisfied, and if, in ad-dition, non-metal cooking utensils and cook-ware with non-metal handles are used, it is safe to use this induction hob as intended.
Restriction on user group
This appliance may be used by children aged 8 or over and by people who have reduced physical, sensory or mental abilities or inadequate experience and/or knowledge, provided that they are supervised or have been instructed on how to use the appliance safely and have understood the resulting dangers. Children must not play with the appliance. Children must not perform cleaning or user maintenance unless they are at least 15 years old and are being supervised.
Keep children under the age of 8 years away from the appliance and power cable.
Safe use
WARNING ‒ Risk of fire!
Leaving fat or oil cooking on an unattended hob can be dangerous and may lead to fires.
- Never leave hot oil or fat unattended.
- Never attempt to extinguish a fire using water; instead, switch off the appliance and then cover with a lid or a fire blanket. The cooking surface becomes very hot.
- Never place flammable objects on the cooking surface or in its immediate vicinity.
- Never place objects on the cooking surface.
- Do not keep combustible objects or aero-sol cans in drawers directly underneath the hob.
Hob covers can cause accidents, for example due to overheating, catching fire or materials shattering.
- Do not use hob covers.
After every use, switch off the hob using the main switch. - Do not wait until the hob turns off automatically as there are no longer any pots and pans on it.
Food may catch fire.
- The cooking process must be monitored. A short process must be monitored continuously.
WARNING ‒ Risk of burns!
The appliance and its parts that can be touched become hot during use, particularly the hob surround, if fitted.
- Caution should be exercised here in order to avoid touching heating elements.
- Young children under 8 years of age must be kept away from the appliance.
Hob protective grilles may cause accidents.
- Never use hob protective grilles.
The appliance becomes hot during operation.
- Allow the appliance to cool down before cleaning.
Metal objects on the hob quickly become very hot.
- Never place metal objects (such as knives, forks, spoons and lids) on the hob.
WARNING ‒ Risk of electric shock!
Incorrect repairs are dangerous.
- Repairs to the appliance should only be carried out by trained specialist staff.
- Only use genuine spare parts when repairing the appliance.
- If the power cord of this appliance is dam-aged, it must be replaced with a special connection cable, which is available from the manufacturer or his Customer Service.
If the appliance or the power cord is dam-aged, this is dangerous.
- Never operate a damaged appliance.
- If the surface is cracked, you must switch off the appliance in order to prevent a possible electrical shock. To do this, switch off the appliance via the fuse in the fuse box rather than at the main switch.
- Never pull on the power cord to unplug the appliance. Always unplug the appliance at the mains.
- If the appliance or the power cable is dam-aged, immediately switch off the fuse in the fuse box.
- Call customer services.
An ingress of moisture can cause an electric shock. - Do not use steam- or high-pressure cleaners to clean the appliance.
The insulation on cables of electrical appliances may melt if it touches hot parts of the appliance.
- Never bring electrical appliance cables into contact with hot parts of the appliance.
If metallic objects come into contact with the fan that is located on the underside of the hob, this may cause an electric shock.
- Do not store long, pointed metallic objects in the drawers below the hob.
WARNING ‒ Risk of injury!
Saucepans may suddenly jump due to liquid between the saucepan base and the hotplate.
- Always keep hotplates and saucepan bases dry.
- Never use icy-cold cookware that has been in the freezer.
When cooking in a bain marie, the hob and cooking container could shatter due to over-heating.
- The cooking container in the bain marie must not directly touch the bottom of the water-filled pot.
- Only use heat-resistant cookware.
An appliance with a cracked or broken sur-face can cause cuts.
- Do not use the appliance if it has a cracked or broken surface.
WARNING ‒ Risk of suffocation!
Children may put packaging material over their heads or wrap themselves up in it and suffocate.
- Keep packaging material away from children.
- Do not let children play with packaging material.
Children may breathe in or swallow small parts, causing them to suffocate.
- Keep small parts away from children.
- Do not let children play with small parts.
Avoiding material damage
This is where you can find the most common causes of damage and tips on how to avoid them.
| Damage | Cause | Measure |
| Stains | Unsupervised cooking process. | Monitor the cooking process. |
| Stains, blisters | Spilled food, especially food with a high sugar content. | Remove immediately with a glass scraper. |
| Stains, blisters or fractures in the glass | Defective cookware, cookware with melted enamel or cookware with copper or aluminium base. | Use suitable cookware that is in a good condition. |
| Stains, discoloration | Unsuitable cleaning methods. | Only use cleaning agents that are suitable for glass ceramic, and only clean the hob when it is cold. |
| Blisters or fractures in the glass | Knocks or falling cookware, cooking accessories or other hard or pointed objects. | When cooking, do not hit the glass or let objects fall onto the hob. |
| Scratches, discoloration | Rough cookware bases or moving the cookware on the hob. | Check the cookware. Lift the cookware when moving it. |
| Scratches | Salt, sugar or sand. | Do not use the hob as a work surface or storage space. |
| Damage to the appliance | Cooking with frozen cookware. | Never use frozen cookware. |
| Damage to the cookware or the appliance | Cooking without contents. | Never place or heat empty cookware on a hot cooking zone. |
| Glass damage | Melted material on the hot cooking zone or hot pot lid on the glass. | Do not place greaseproof paper or aluminum foil nor plastic containers or pot lids on the hob. |
| Overheating | Hot cookware on the control panel or on the frame. | Never place hot cookware on these areas. |
ATTENTION!
A fan is located on the underside of this hob.
- If a drawer is located on the underside of the hob, do not store any small or pointed objects, paper or tea towels in it. These objects may be sucked in and damage the fan or impair the cooling.
- There must be a clearance of at least 2 cm between the contents of the drawer and the fan entry point.
Environmental protection and saving energy
Disposing of packaging
The packaging materials are environmentally compatible and can be recycled.
- Sort the individual components by type and dispose of them separately.
Saving energy
If you follow these instructions, your appliance will use less energy.
Select the cooking zone to match the size of your pan. Centre the cookware on the hob.
Use cookware whose base diameter is the same diameter as the hotplate.
Tip: Cookware manufacturers often give the upper diameter of the saucepan. It is often larger than the base diameter.
- Unsuitable cookware or incompletely covered cooking zones consume a lot of energy.
Cover saucepans with suitable lids.
- Cooking without a lid consumes considerably more energy.
Lift lids as infrequently as possible.
- When you lift the lid, a lot of energy escapes.
Use a glass lid.
- You can see into the pan through a glass lid without having to lift it.
Use pots and pans with flat bases.
- Uneven bases increase energy consumption.
Use cookware suited to the quantity of food.
- Large items of cookware containing little food need more energy to heat up.
Cook with only a little water.
- The more water that is contained in cookware, the more energy is required to heat it up.
Turn down to a lower power level early on. Use a suit-able ongoing power level.
- If you use an ongoing power level that is too high, you will waste energy.
Suitable cookware
Cookware that is suitable for induction cooking must have a ferromagnetic base, i.e. it must be attracted by a magnet. The base must also match the size of the cooking zone. If cookware is not detected on a cooking zone, place this on the cooking zone with the next smallest diameter.
Size and characteristics of the cookware
To correctly detect the cookware, take the size and the material of the cookware into consideration. All cook-ware bases must be perfectly flat and smooth.
You can use Cookware test to check whether your cookware is suitable. You can find more information about this under “Cookware test”.
| Cookware | Materials | Properties |
| Recommended cookware | Stainless steel cookware in a sandwich design that distributes the heat well. | This cookware distributes the heat evenly, heats up quickly, and ensures that it can be detected easily. |
| Ferromagnetic cookware made of enameled steel, cast iron or special induction cookware made of stainless steel. | This cookware heats up quickly and ensures that it can be detected easily. | |
| Suitable | The base is not fully ferromagnetic. | If the ferromagnetic area is smaller than the base of the cookware, only the area that is ferromagnetic heats up. As a result, the heat is not distributed evenly. |
| Cookware bases with aluminum content. | These reduce the ferromagnetic area, which means that less power is emitted to the cookware. This cookware may not be sufficiently detected or may not be detected at all, and therefore does not heat sufficiently. | |
| Not suitable | Cookware made from normal thin steel, glass, clay, copper or aluminum. |


Notes
- Do not use adapter plates between the hob and the cookware.
- Do not heat up empty cookware and do not use cookware with a thin base, as this may become very hot.
Familiarizing yourself with your appliance
Cooking with induction
In comparison to conventional hobs, induction techno-logy brings with it a series of changes and has a number of benefits such as time savings when cooking and frying, energy savings as well as greater ease of cleaning and care. It also offers improved heat control as the heat is generated directly in the cookware.
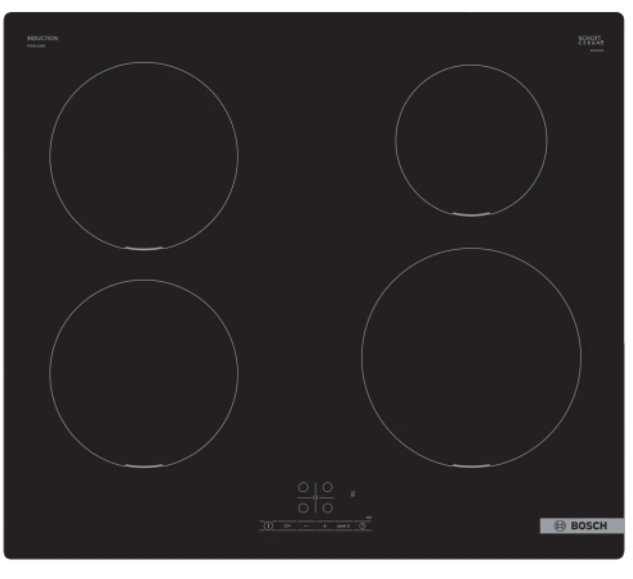
Control panel
Individual details, such as color and shape, may deviate from the figure.

Touch fields

Touch fields and displays
Touch a symbol to activate the function it represents. ¡ Always keep the control panel clean and dry. Moisture impairs the function.
- Do not place any cookware near the indicators or sensors. The electronics may overheat.
Distribution of the cooking zones
The specified power has been measured with the standard pots, which are described in IEC/EN 60335-2-6. The power may vary depending on the size of the cookware or cookware material.

| Area | Highest power level | |
| 18 cm diameter | Power level 9 PowerBoost |
1800 W 3100 W |
| 14.5 cm diameter | Power level 9 PowerBoost |
1400 W 2200 W |
| 21 cm diameter | Power level 9 PowerBoost |
2200 W 3700 W |
Cooking zone
Before you start cooking, check whether the size of the cookware fits the cooking zone that you want to use for cooking:
| Area | Cooking zone type |
| O | Single-circuit cooking zone |
Residual heat indicator
The hob has a residual heat indicator for each cooking zone. Do not touch the cooking zone if the residual heat indicator is lit.
| Display | Meaning |
| H | The cooking zone is hot. |
| h | The cooking zone is warm. |
Basic operation
Switching the hob on and off
Switch the hob on and off using the main switch . If all of the cooking zones are switched off for longer than 20 seconds, the hob is automatically switched off.
Restart
If you switch the appliance on within four seconds of switching it off, the hob operates with the settings that were previously set.
Setting the cooking zones
To choose the required selectable power level, touch or
Each power level has an intermediate level. This is marked with a dot.
- 1 – Lowest power level
- 9 – Highest power level
Selecting the cooking zone and power setting
- Touch to select the cooking zone.
- Within the next 10 seconds, select the required power level
- Touch to call up power level ,Touch to call up power level
- The power level has been set.
Note
If no cookware is placed on the cooking zone or the pot is not suitable, the selected power level flashes. After a certain period of time, the cooking zone switches itself off. Quick start
- If you place cookware on the hob before you switch it on, the cookware is detected when you switch on and the corresponding cooking zone is selected automatically.
- Select the power level in the next 20 seconds, or the hob switches itself off.
Changing the power level and switching off the cooking zone
- Select the cooking zone.
- Touch or until the required power level ap-pears. To switch off the cooking zone, set .
Switching off the cooking zone quickly
Touch and hold the symbol for the cooking zone for three seconds. The cooking zone switches itself off.
Cooking recommendations
The table shows which power level suitable for which food. The cooking time may vary depending on the type, weight, thickness and quality of the food. To preheat, set power level 8–9.
| Melting | ||
| Butter, honey, gelatine | 1 – 2 | – |
| Heating and keeping warm | ||
| 1 Without lid 2 Preheat to power level 8 – 8. |
||
Defrosting and heating

Time-setting options
Your hob has various functions for setting the cooking time:
- Switch-off timer
- Timer
Switch-off timer
Allows you to programme a cooking time for a hotplate and its automatic switch-off once the set time has elapsed.
Programming the cooking time
- Select the cooking zone and the required power level.
- Touch .
- The display lights up in the cooking zone.
- Use or to select the cooking time.
- The time begins to count down.
Note: You can automatically set the same cooking time for all cooking zones. You can find more information about this under “Basic settings”
Changing or deleting the cooking time
- Select the cooking zone.
- Touch time button
- To change the cooking time, touch or or set it
Timer
Enables the activation of a timer of 0–99 minutes. This function can be used independently of the cooking zones and other settings. It does not automatically switch off the hotplates.
Setting the kitchen timer
- Select the hotplate and touch twice. a beside lights up.
- Use or to select the required time. a The time counts down.
Changing or deleting the timer duration
- Touch repeatedly until the display beside lights up.
- To change the cooking time, touch or set it.
Power Boost
Allows larger volumes of water to be heated more quickly than with the power level.
You can then activate this function for a cooking zone, provided no other cooking zone in the same group is in use (see illustration). Otherwise and flash in the power level display.
Press Boost to switch on or off.
Childproof lock
- The hob is equipped with a childproof lock. This pre-vents children from switching on the hob.
- To switch the function on, switch the hob off. Touch for four seconds to switch on or off. If you want to activate the childproof lock automatically every time the hob is switched off, you can find further information under Basic settings.
Basic settings
You can configure the basic settings for your appliance to meet your needs.
Overview of the basic settings


To go to the basic settings
Requirement: The hob must be switched off.
- To switch on the hob, touch .
- Within the next 10 seconds, press and hold for second

The first four displays provide the product information. Touch or to view the individual displays.
- Touch to access the basic and light up alternately as well as as a preset value.
- Touch repeatedly until the desired setting appear
- Use or to select the required
- Touch and hold for four
The settings are saved.
Exiting the basic settings
To exit the basic settings and and switch off the hob, touch .
Cookware test
The quality of the cookware has a major influence on the speed and the result of the cooking process.
You can use this function to test the quality of the cook-ware.
Before the test, ensure that the size of the cookware base corresponds to the size of the cooking zone be-ing used.
Access is via the basic settings.
Carrying out Cookware test
- At room temperature, place the cookware with approx. 200 ml water in the centre of the cooking zone that best fits the base of the cookware in terms of size.
- Call up the basic settings and select c12
- Touch or . The display flashes in the cooking zones.
- The function has been activate After 20 seconds, the result appears in the cooking zone displays.
Checking the result
You can see what the result means for the quality and speed of the cooking process in the following table.
Result
- The cookware is not suitable for the cooking zone and therefore does not heat up.
- The cookware is taking longer to heat up than expected and cooking is not progressing as well as it ought to.
- The cookware is heating up correctly and cooking is progressing well.
Note: If you have any unfavorable results, reposition the cookware on a smaller cooking zone, if available.
Touch or to activate the function.
Cleaning and servicing
To keep your appliance working efficiently for a long time, it is important to clean and maintain it carefully.
Cleaning products
You can obtain suitable cleaning products and glass scrapers from customer service, a retailer or the online shop www.bosch-home.com.
ATTENTION
Unsuitable cleaning products may damage the sur-faces of the appliance
- Never use unsuitable cleaning products.
- Do not use cleaning products while the hob is still hot. This may cause marks on the surface.
Unsuitable cleaning products
- Undiluted detergent
- Detergent intended for dishwashers
- Abrasive cleaning products
- Aggressive cleaning products such as oven spray or stain remover Abrasive sponges
- High-pressure or steam jet cleaners
Cleaning the hob
Clean the hob after every use to stop cooking residues from getting burnt on.
Requirement: The hob must be cold. Do not allow the hob to cool down if it has sugar stains, plastic or aluminum foil on it.
- Remove heavy soiling using a glass scraper.
- Clean the hob with a cleaning agent for glass ceramic.
- Follow the cleaning instructions on the packaging of the cleaning agent.
Tip: You can achieve good cleaning results using a special sponge for glass ceramic
Cleaning the hob surround
If the hob frame is dirty or stained after use, clean this.
Note: Do not use a glass scraper.
- Clean the hob frame with hot soapy water and a soft cloth.
- Wash new sponge cloths thoroughly before use.
- Dry with a soft cloth.
Troubleshooting
You can rectify minor faults on your appliance yourself. Read the troubleshooting information before contacting after-sales service. This will avoid unnecessary costs.
WARNING ‒ Risk of injury
Improper repairs are dangerous.
- Repairs to the appliance should only be carried out by trained specialist staff.
- If the appliance is defective, call Customer Service.
WARNING ‒ Risk of electric shock
- Repairs to the appliance should only be carried out by trained specialist staff.
- Only use genuine spare parts when repairing the appliance.
- If the power cord of this appliance is damaged, it must be replaced with a special connection cable, which is available from the manufacturer or his Customer Service.
Warnings
Notes
If appears in the displays, press and hold the sensor for the respective cooking zone and read the fault code. If the fault code is not listed in the table, disconnect the hob from the power supply and wait 30 seconds before reconnecting it.
- If this display appears again, contact the technical after-sales service and specify the exact fault cIf an error occurs, the appliance does not switch to standby mode.
- In order to protect the appliance’s electronic parts from overheating or surge currents, the hob may temporarily reduce the power level.
Information on the Display Panel
| Fault | Cause and troubleshooting |
| No displays light up. | The power supply has been disconnected. Use other electrical appliances to check whether there has been a power failure. |
| Fault | Cause and troubleshooting |
| No displays light up. | The appliance has not been connected as shown in the circuit diagram. Connect the appliance in accordance with the circuit diagram. |
| Electronics fault If you are unable to rectify the fault, inform the technical after-sales service. | |
| The displays flash. | The control panel is wet or an object is covering it. Dry the control panel or remove the object. |
| The “-” display flashes in the cooking zone displays. | A fault has occurred in the electronics To acknowledge the fault, briefly cover the control panel with your hand. |
| F2, F4 | The electronics have overheated and one or all of the cooking zones have been switched off. Wait until the electronics have cooled down sufficiently. Then touch any button on the control panel. |
| F5 + power level and audible signal | There is hot cookware in the vicinity of the control panel. This may cause the electronics to overheat. Remove the cookware. The fault display goes out shortly afterwards. You can continue to cook. |
| F5 and signal tone | There is hot cookware in the vicinity of the control panel. The cooking zone has been switched off to protect the electronics. Remove the cookware. Wait a few seconds. Touch any button. When the fault display goes out, you can continue cooking. |
| F1 / F6 | The cooking zone has overheated and has been switched off to protect the work surface. Wait until the electronics have cooled down sufficiently before switching the cooking zone back on. |
| F8 | The cooking zone has been operating continuously for an extended period. Individual safety switch-off is switched on. Touch any button to switch off the display so that you can set the cooking zone again. |
| E 9000 / E 9010 | The operating voltage is incorrect and outside of the normal operating range. Contact your energy supplier. |
| U400 | The hob is not connected correctly. Disconnect the hob from the mains. Connect the hob in accordance with the circuit diagram. |
| dE | Demo mode is activated. Disconnect the hob from the mains. Wait for 30 seconds and connect the hob. Touch any sensor in the next three minutes. Demo mode is deactivated. |
Normal Noises From Your Appliance
An induction hob may sometimes cause noises or vibrations, such as buzzing, crackling, hissing noises, fan noises or rhythmic noises.
Disposal
Find out here how to dispose of old appliances correctly.
Disposing of Old Appliance
Valuable raw materials can be reused by recycling.
- Unplug the appliance from the mains.
- Cut through the power cord.
- Dispose of the appliance in an environmentally friendly manner.
Information about current disposal methods are available from your specialist dealer or local authority.
This appliance is labelled in accordance with European Directive 2012/19/EU concerning used electrical and electronic appliances
(waste electrical and electronic equipment – WEEE).
The guideline determines the frame-work for the return and recycling of used appliances as applicable throughout the EU.
Customer Service
If you have any queries on use, are unable to rectify faults on the appliance yourself or if your appliance needs to be repaired, contact Customer Service. Function-relevant genuine spare parts according to the corresponding Ecodesign Order can be obtained from Customer Service for a period of at least 10 years from the date on which your appliance was placed on the market within the European Economic Area.
Note: Under the terms of the manufacturer’s warranty the use of Customer Service is free of charge.
Detailed information on the warranty period and terms of warranty in your country is available from our after-sales service, your retailer or on our website.
If you contact Customer Service, you will require the product number (E-Nr.) and the production number (FD) of your appliance.
The contact details for Customer Service can be found in the enclosed Customer Service directory or on our website.
Product number (E-Nr.) and production number (FD)
You can find the product number (E-Nr.) and the pro-duction number (FD) on the appliance’s rating plate. The rating plate can be found:
- on the appliance certificate.
- on the lower section of the hob.
The product number (E no.) can also be found on the glass ceramic. You can also display the customer service index (KI) and the production number (FD) in the basic settings.
Make a note of your appliance’s details and the Customer Service telephone number to find them again quickly.
Test Dishes
These recommended settings are intended for test in-stitutes to facilitate the testing of our appliances. The tests were carried out using our cookware sets for in-duction hobs. If required, these accessory sets can be purchased at a later point from specialist retailers, or through our technical after-sales service or our online shop.
Melting the Chocolate Coating
Ingredients: 150 g dark chocolate (55% cocoa).
- 16 cm saucepan without lid
- Boiling: Power level 1.
Heating and keeping lentil stew warm
Recipe in accordance with DIN 44550
Initial temperature 20°C
Heating up without stirring
- 16 cm saucepan with lid, amount: 450 g
- Heating up: Duration 1 min. 30 sec., power level 9
- Simmering: Power level 1.
- 22 cm saucepan with lid, amount: 800 g
- Heating up: Duration 2 min. 30 sec., power level 9
- Simmering: Power level 1.
Heating and keeping lentil stew warm
E. g.: Lentil diameter 5–7 mm. Initial temperature 20 °C Stir after heating for 1 minute
- 16 cm saucepan with lid, amount: 500 g
- Heating up: Duration approx. 1 min. 30 sec., power level 9
- Simmering: Power level 1.
- 22 cm saucepan with lid, amount: 1 kg
- Heating up: Duration approx. 2 min. 30 sec., power level 9
- Simmering: Power level 1.
Béchamel sauce
Milk temperature: 7°C
- 16 cm saucepan without lid, ingredients: 40 g butter, 40 g flour, 0.5 l milk with 3.5% fat content and a pinch of salt
Preparing Béchamel sauce
- Melt the butter, stir in the flour and salt, and heat up the mixture.
- Heating up: Duration 6 min., power level 2
- Add the milk to the roux and bring to the boil, stir-ring continuously.
- Heating up: Duration 6 min. 30 sec., power level 7.
- Once the Béchamel sauce comes to the boil, leave it on the cooking zone for a further two minutes.
- Simmering: Power level 2
Cooking rice pudding with the lid on
Milk temperature: 7°C
- Heat the milk without a lid until it starts to rise up. Stir after heating for 10 minutes.
- Set the recommended power level and add rice, sugar and salt to the milk.
The cooking time, including heating up, is approx. 45 minutes.
- 16 cm saucepan, ingredients: 190 g short-grain rice, 90 g sugar, 750 ml milk with 3.5% fat content and 1 g salt
- Heating up: Duration approx. 5 min. 30 sec., power level 8.
- Simmering: Power level 3
- 22 cm saucepan, ingredients: 250 g short-grain rice, 120 g sugar, 1 l milk with 3.5% fat content and 1.5 g salt
- Heating up: Duration approx. 5 min. 30 sec., power level 8.
- Simmering: Power level 3, stir after 10 minutes
Cooking rice pudding without a lid
Milk temperature: 7°C
- Add the ingredients to the milk and heat the mixture up while stirring continuously.
- Once the milk has reached approx. 90 °C, select the recommended power level and leave it to simmer on a low heat for approx. 50 minutes.
- 16 cm saucepan without lid, ingredients: 190 g short-grain rice, 90 g sugar, 750 ml milk with 3.5%fat content and 1 g salt
- Heating up: Duration approx. 5 min. 30 sec., power level 8.
- Simmering: Power level 3
- 22 cm saucepan without lid, ingredients: 250 g short-grain rice, 120 g sugar, 1 l milk with 3.5% fat content and 1.5 g salt
- Heating up: Duration approx. 5 min. 30 sec., power level 8.
- Simmering: Power level 2.
- 16 cm saucepan without lid, ingredients: 190 g short-grain rice, 90 g sugar, 750 ml milk with 3.5%fat content and 1 g salt
Cooking rice
Recipe in accordance with DIN 44550
Water temperature: 20 °C
- 16 cm saucepan with lid, ingredients: 125 g long-grain rice, 300 g water and a pinch of salt.
- Heating up: Duration approx. 2 min. 30 sec., power level 9
- Simmering: Power level 2
- 22 cm saucepan with lid, ingredients: 250g long-grain rice, 600 g water and a pinch of salt
- Heating up: Duration approx. 2 min. 30 sec., power level 9
- Simmering: Power level 2.
Deep-fat frying frozen chips
- Pot dia. 22 cm without lid: ingredients: 2 l sunflower oil. For each frying time: 200 g frozen chips, 1 cm thick.
- Heating up: Power level 9, until the oil temperature reaches 180°C.
- Simmering: Power level 9
Robert Bosch Hausgeräte GmbH Carl-Wery-Straße 34
81739 München
GERMANY
www.bosch-home.com