Electrolux EFEP916DSE 90cm UltimateTaste 900 Dual Fuel Freestanding Cooker User Guide


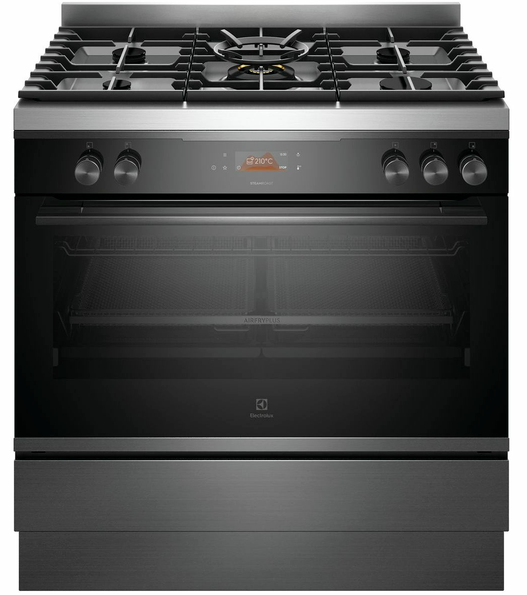
Electrolux EFEP916DSE 90cm UltimateTaste 900 Dual Fuel Freestanding Cooker

Welcome
Dear Customer,
Thank you for purchasing an Electrolux oven. The product you have chosen was designed to enhance your life with its smart features and intuitive cooking functions. Follow this guide to start enjoying cooking great tasting food with your new oven.
Before you start, please make sure:
- Your oven has been correctly installed by a qualified person.
- Your oven has power and is switched on.
- You’ve removed all relevant packaging.
Register your oven
Protect your investment and enjoy peace of mind
Stay updated on better living services, safety notices and shop for accessories.
- Open the camera App on your smartphone and point at the QR code to scan. Product Registration QR code is located on the front of your appliance or inside the door rim*.
- Tap the notification or link to open the registration form.
- Complete your details and enjoy peace of mind.

Setting up your oven’s accessories
Attach the telescopic slides to the side racks
Pyro-proof slides
Obtain left hand side rack and left hand slide – see image to identify.
The unshaded wires indicate the wire the slide can be mounted on. Fit slide rear clips to the rear of wire at an angle as shown below.
Push slide front clip over wire until secured.

Fix the pyro-proof side racks:
- Insert the rear peg into the rear access hole ensuring the peg is fully inserted.
- Then, locate the front screw hole and insert the screw.
- Tighten with the Allen key.

Fit oven shelves
- Locate detents on the side wires of the shelf as indicated in the diagram to the right.
- Align shelves evenly on both oven sides and slide shelf between guide rails.
- Ensure the shelf is fully inserted, does not interfere with oven door closure.

Fit the shelf/tray to the telescopic slides
- Push the shelf or tray along the top of the telescopic slide to the back post, as shown in the diagram to the right..
- Drop the front of the shelf or tray onto the telescopic slide ensuring it sits behind the front post, as shown in the diagram to the right.
- When fully inserted, the shelf or tray should not obstruct the closed oven door.


Oven controls
First of all, familiarise yourself with your oven’s control panel.

- On/off button (Press and hold)
- Favourite button
- Menu button
- Touch screen display 5 Fast heat up button 6 Light button
Next, familiarise yourself with the touch screen display.

- Timer
- Smart Food Probe Sensor temperature
- Heating function
- Oven temperature
- Time of day
- Start/stop
Initial oven setup
The first time you use your oven, there will be an initial set up required. Follow the steps as prompted in the display to select your preferred options.

Conditioning your oven
Ready, set, cook!
Pre-heat the oven for best results
Always pre-heat your oven to the desired temperature before cooking to maintain a consistent temperature for the entire cooking time. For best baking results, we recommend that you pre-heat your oven for approximately 30 minutes.
Oven shelf locations
The oven has five positions for shelves (as shown in the diagram). As a general guide we suggest giving maximum space above and below the shelves. Eg. When cooking with one shelf, position at 2 or 3. When cooking with two shelves, position them at 2 and 4.
This can vary depending on food being cooked and function used. We have offered a shelf position guide to use. However, to increase base browning simply lower the shelf position. To increase top browning, raise the shelf position. See full user manual for additional tips.

Brief overview of common oven features and functions
Note: Oven functions marked with * may not apply to all models.
- Fast heat up
This function can be used to shorten the pre-heating time of the oven to the set temperature for some cooking functions. - Smart Food Probe Sensor
The Smart Food Probe Sensor measures the core temperature of food and allows you to enjoy perfectly cooked meal every time. - Traditional Bake
Use to bake a single tray of biscuits, scones, muffins, cakes, slices, casseroles, baked puddings, roasts and delicate egg dishes. Shelf guide: position 3. - Fan Cooking
Use when cooking on multiple shelves at the same time and when reheating foods and full meals. The Smart Food Probe Sensor can be used with this function. Shelf guide: position 3. - Pizza
Pizza setting is ideal for cooking and browning the base of foods such as pizza, quiche, and pies. Place in the middle of the oven and select the desired temperature. Shelf guide: position 1. - Cook From Frozen
This function can be used to give frozen convenience foods crispy textures, such as fries, potato wedges or spring rolls. Shelf guide: position 3, 4 or 5. - Pastry
The Pastry function is used to brown the bases of pizzas, pies and pastries. Cook in the lower half of the oven when you are using only one shelf. Shelf guide: position 1. - Left Grill
Use this setting when only half side of the upper heating element is needed for the grilling of the food. Shelf guide: position 4 or 5. - Roast
Great for roasting meats, poultry and fish, this function provides even cooking throughout and enhanced browning. - Full Grill
Full Grill allows you to take full advantage of the large grill dish area and cooks faster than the Grill function. Shelf guide: position 4 or 5. - SteamBake
Adding steam to your baking program can lift your baking skills to a whole new level. Shelf guide: position 3. - Fan Grill
This setting is ideal for roasting large cuts of meat and there is no need to turn food. Use Fan Grill with the oven door closed.
Shelf guide: position 2. - AirFryPlus*
Using the dedicated tray with this function delivers great tasting foods that are crisper with juicy centres. Shelf guide: AirFryPlus Tray position 3 and catch tray position 1. - Keep Warm
A low temperature oven setting that keeps food at an ideal serving temperature without cooking it further. If the oven is too hot, this function will not be available. Shelf guide: position 3. - Slow Cooking
Use this mode for slow cooking meats and poultry to enjoy tender, succulent slow-cooked roasts. Shelf guide: position 3. - Defrost
Thaw your food before you cook it or use the Defrost function to raise yeast dough, and even dry fruit and herbs. Shelf guide: position 3. - Dough Proving
Bakers will love the dough proving function. It prevents dough from drying out and retains elasticity. Shelf guide: position 2. - Pyrolytic Cleaning*
Pyro cleans by burning off accumulated spatters, dirt and grease off the oven liner, at high temperature; producing ash to be wiped out of the oven cavity. Note: the oven will lock when this function is enabled.
Steam Assisted Cooking
Steam works in harmony with traditional oven heat to enhance flavours and textures in your cooking. So you can now take all your favourite recipes – and plenty of new ones – to a delicious new level. From the most succulent meats to bakery-quality bread at home, with steam it’s simple to enjoy great results, every time.
Experience steam assisted cooking with SteamBake
With SteamBake, you can create bakery-style bread in your own home. The added steam allows dough to rise more effectively than conventional heating. The steam helps to create an exquisitely soft centre, while the combination of hot air delivers deliciously glossy crusts. Follow these simple steps to learn how to use your oven’s SteamBake function.
Before you start, you will need these accessories:

Step 1
Add 200ml of water into the cavity of the oven. Fill the cavity well with water only when the oven is cold.
Step 2
Select SteamBake function and set the desired temperature.
Press Start to start the heating process.
Step 3
When the oven reaches the set temperature, place the baking tray on the recommended oven shelf position.
Now wait for your bread to be baked and you will enjoy perfectly baked bread.
Remove the food when cooking

Cleaning after steam cooking
Note: Use this function after cooking with steam heating to remove residual water from the water tank. Make sure the oven is turned off and is completely cool. Remove the remaining water from the cavity embossment and use a dry cloth to wipe clean. If required, make a solution of water (85%), white vinegar (10%), and dishwashing detergent (5%), and spray liberally onto the door, side walls and back wall of the oven cavity.

AirFryPlus
The mesh design of the AirFryPlus tray allows super-heated air to crisp the surface of food to deliver a mouth-watering fried taste and texture without the need for excessive oil. Steam is added during the cooking process to help retain moisture inside the food, whilst the outside becomes deliciously crisp and golden. Follow these simple steps to learn how to use your oven’s AirFryPlus function.
Before you start, you will need these accessories:

Step 1
When preparing food on the AirFryPlus tray, you may like to stack the AirFryPlus tray onto a catchment tray to catch any crumbs or over a sink to prevent mess.
If required, you can choose to spray some oil on the AirFryPlus tray to prevent food from sticking.
Step 2
Add 200ml of water into the cavity of the oven. Fill the cavity well with water only when the oven is cold.
Step 3
Turn on the oven.
Select AirFryPlus function.
Set your desired temperature and press Start.
Note: For best results, pre-heat to the set temperature before placing the food in the oven.
Step 4
When the oven reaches the set temperature, place AirFryPlus tray onto the recommended shelf position. A double oven tray should be placed on the bottom shelf (position 1) to catch any fat or crumbs dropping from the AirFryPlus tray during cooking. Remove the food when cooking is completed. Turn off the oven and allow it to cool.


Cleaning of the AirFryPlus Tray
The AirFryPlus Tray is dishwasher safe Wipe the tray to get rid of food crumbs or residues before putting into your dishwasher.
Hand washing of the AirFryPlus Tray
Clean the AirFryPlus tray after each use. Wash the tray in the sink with warm soapy water and a dish brush or scourer.