Dell Peripheral Manager User Guide


Notes, Cautions, and Warnings
NOTE: A NOTE indicates important information that helps you make better use of your computer.
CAUTION: A CAUTION indicates potential damage to hardware or loss of data if instructions are not followed.
WARNING: A WARNING indicates a potential for property damage, personal injury, or death.
Overview
Dell Peripheral Manager supports the following:
- Pair/unpair devices through RF dongle or Bluetooth.
- Assign shortcuts to customizable action buttons.
- View advanced device information, such as firmware version and battery status.
- Upgrade software and device(s) using latest updates.
Dell Peripheral Manager is compatible with the following Dell peripheral devices:
- Dell MS3220
- Dell MS3320W
- Dell MS5120W
- Dell MS5320W
- Dell KM7120W (KB7120W, MS5320W)
- Dell KM7321W (KB7221W + MS5320W)
- Dell KM5221W (KB3121W + MS3121W)
- Dell MS7421W
- Dell WB7022
Download and installation
When you connect the device to your computer for the first time, Dell Peripheral Manager is downloaded and installed automatically through the Windows Update process.

NOTE: If Dell Peripheral Manager does not appear within a few minutes, you can manually install the software by checking for updates.

You can also download the Dell Peripheral Manager application from www.dell.com/support/drivers.
You can also view the online Dell Peripheral Manager Usage and Troubleshooting guide here: https://www.dell.com/support/kbdoc/000128900/
User interface
Dell Peripheral Manager user interface opens automatically when the device is connected to an active USB port on your computer for the first time. You can also Click Dell > Dell Peripheral Manager to open the user interface.
The Dell Universal dongle that is shipped with the wireless device is pre-paired for use with it. You can access the device in the Dell Peripheral Manager window after connecting the dongle to an active USB port on your computer.

Device status pane
- Device Status
- Unpairing a device
- Assign Action on a highlighted key
- Software update
- Pairing a device
General Features
Device Status
You can view the following details on the Device Status:

- Battery life indicator
- Connectivity indicators
- Bluetooth pairing history
- Firmware version
- Unpair device
NOTE: You can move the pointer over the RF connectivity indicator to view the dongle version.
Software updates
The Software Update feature is used for upgrading:
- The software running on the peripheral device.
- The Dell Peripheral Manager application itself.
Click UPDATE AVAILABLE in the main window to view a list of available updates.

NOTE: Software update for RF devices requires active user input.

Features – Keyboard and Mouse
DPI setting
You can view or change the DPI setting under Mouse Settings section to achieve higher or lower mouse sensitivity. Please click on the drop-down box under DPI setting to change it. After changing the setting, please move the mouse to apply the new DPI value to the mouse.

DPI Setting
Primary Mouse Button
You can view or change the Primary Mouse Button setting under Mouse
Settings section. Please click on the drop-down box to change.
Assign Actions
Programmable actions can be assigned to buttons or keys using the highlighted key.
For example, the CTRL+A keystroke (Select All action in Windows) can be assigned to the F10 key. As a result, you can press the F10 key instead of CTRL+A.

The user interface is simple and intuitive.
- • The orange-bordered buttons represent those for which we can assign custom-programmable actions.
- • An orange “flag” at the bottom-right corner of a button indicates that a custom action is assigned.
Actions can be customized in the following way:
- In the right pane, click a button and assign the action directly.
Pairing a device
Using the Dell Peripheral Manager, you can pair additional devices to the dongle through RF. The application also provides on-screen instructions for pairing additional devices to your computer through Bluetooth.
Click on the + sign on the viewing panel. A dialog box appears for connecting a new device.

The on-screen instructions provide simple procedures for pairing the new device using both RF and Bluetooth options.

Unpairing a device
The Unpair Device dialog box appears when you click Unpair.

CAUTION: The device will be no longer usable after unpairing. You will need an additional device to pair with an input device again.
For example, ensure that a backup mouse or other device such as touchscreen or track pad is available.
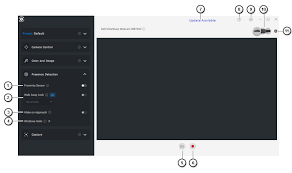
When there are no Dell devices connected, the Dell Peripheral Manager window is displayed as shown in the following image.

Features – Webcam
Configuring Webcam
You can configure the Dell Webcam using the Dell Peripheral Manager software. The application provides on-screen instructions and walkthrough tutorial to personalize the webcam experience along the way.
Live camera feed is shown on the viewable panel when the Dell webcam is connected to the computer.
Following settings can be configured for the webcam.
You can select a preset that suits your style depending on how you want the image to appear on the camera from the options provided. You can also create a custom preset.

- Selected Preset
- Add new preset
Camera Control
You can adjust AI Auto-framing, Field of view, Zoom, Autofocus, Priority settings and Camera switch from the Camera Control section of the user interface.

- AI Auto-framing
- Field of view (FOV)
- Zoom
- Autofocus
- Priority – Exposure or Frame Rate
- Prioritize External Webcam
Color and Image
It is possible to adjust the automatic correction for optimal image quality at various lighting conditions using HDR (High Dynamic Range). Other settings like Auto White Balance, Brightness, Sharpness, Contrast, Saturation and Anti-Flicker Settings for the Dell Webcam makes it easier to get an image of your choice. The user interface is simple and intuitive to achieve this.

Presence Detection
Your camera comes equipped with a proximity sensor that detects your presence when you are in the field of view of the sensor.
- It can respond to your presence by waking up your screen when you are in the field of view (Wake on Approach)
- It can lock the screen when you walk way (Walk Away Lock). The timing for Walk Away Lock can be configured using the drop-down box under the Walk Away Lock setting.
- These settings are enabled when the proximity sensor is enabled in the user interface
- The Walk Away Lock setting can be temporarily disabled for a certain period by using the “Snooze” option in the user interface.

- Proximity Sensor
- Walk Away Lock
Snooze for Walk Away Lock - Timer for Walk Away Lock
- Wake on Approach
- Windows Hello
Capture
The Dell Webcam’s Capture settings can be tweaked to achieve the best recording experience desired by adjusting the Frames per second and resolution. The location to store the recorded files is also configurable by changing the media file’s location folder.

- Resolution
- Frames per second
- Countdown for capture
- Framing Grid
- Media Files location
FAQ related to webcam
In case you are experiencing issues with your webcam please check to see if it is one of the following and try the workaround suggested.
- Question: Why DPM does not show 4KUHD option in the user interface?
Possible causes: In order for the webcam to output 4K resolution, USB 3.0 is required. If USB 3.0 connection is not detected then you can experience this issue. Check that USB ports on your system or monitor or hub connected to webcam is USB 3.0. - Question: Why does DPM cannot detect camera when connected via docking station?
Possible causes: It is possible that the docking station is not delivering sufficient power via USB. The firmware on the dock may be outdated. Please check to make sure that the dock firmware is updated to the latest version and the USB port can support full USB 3.0 power. - Question: Why does DPM does not show Presence Detection features?
Possible causes: Please note that this feature is only supported on Dell systems. Check that your system BIOS and drivers are updated to the latest versions from Dell Support site. - Question: Why is the Internal webcam or other webcam connected to my system is disabled?
Possible causes: In order to support Windows Hello facial recognition feature using the external webcam, Dell Peripheral Manager software may have disabled the internal webcam or other non-Dell webcams. To use other webcams please check the feature “Prioritize External Webcam” under “Camera Control” in DPM application to disable/enable this feature. - Question: Why is there a countdown and my computer is locked shortly after that?
Possible causes: Your webcam is equipped with a presence detection sensor called proximity sensor. If the sensor does not detect human presence in its field of view for a specified period of time it can lock the system. This feature is the “Walk Away Lock”. It can be controlled under “Proximity Detection” in Dell Peripheral Manager application. If Proximity Detection feature is enabled, do not cover the lens of the webcam or else the webcam will not be able to detect human presence.
Certain models of Dell system are equipped with a built-in proximity sensor. If you have one of those systems, we recommend to disable this feature under Dell Peripheral Manager application to avoid conflicting behavior. - Question: Why am I not able to install Dell Peripheral Manager application on my system. E.g., ARM-based Microsoft Surface Pro?
Possible causes: Please note that the Dell Peripheral Manager application is only supported under Windows 10 64-bit Operating System. It is not supported on ARM-based PC due to its underlying technology that uses windows drivers - Question: Why is my system does not Wake On Approach(WOA) even when I am in the field of view of the ProximitySensor?
Possible causes: If the user has not left the Field Of View(FOV) for more than 20 seconds before appearing in FOVthen Wake on Approach is not triggered.
Also, Wake On Approach will not work on S3 systems withbattery mode, or if BIOS did not enable USB Wake up, or ifsystem is in hibernate or shutdown mode. - Question: Why am I not able to see the webcam feed after aquick hot-plug of the camera. I have to unplug and re-plugwebcam to recover?
Possible cause: When the webcam is removed andconnected too quickly, the Microsoft frame server is using thewebcam resources and locks the device. Once in this state noother application is able to access webcam for 5 to 10minutes. Please wait at least ten seconds after unplugging thewebcam before re-plugging it to the system.