Bosch BDS3210 Drive System Display Mount Owner’s Manual


Bosch BDS3210 Drive System Display Mount

Introduction
This manual contains many DANGER, WARNING, and CAUTION indicators concerning the consequences of failure to use, assemble, maintain, store, inspect and dispose of a Bosch-equipped eBike in a safe manner.
- The combination of the safety alert symbol and the word DANGER indicates a hazardous situation that, if not avoided, will result in death or serious injury.
- The combination of the safety alert symbol and the word WARNING indicates a hazardous situation that, if not avoided, could result in death or serious injury.
- The combination of the safety alert symbol and the word CAUTION indicates a hazardous situation that, if not avoided, could result in minor or moderate injury.
General Warnings
Read all safety warnings and all instructions. Failure to follow the warnings and instructions may result in death or serious injury. Save all safety warnings and instructions for future reference.
The term battery pack used in these operating instructions refers to all original Bosch eBike battery packs.
WARNING
- This manual contains important safety, performance and service information. Read it before you take the first ride on your new bicycle, and keep it for reference. The manual can also be found online at www.bosch-ebike.com.
- This manual is intended to be read together with the separate user manual provided with your bicycle. Be sure to read all provided documents including labels on the product before your first ride.
- Read ALL accompanying manuals before riding the bike for the first time. Your Bosch Drive System comes with additional manuals and documents provided by the manufacturer of the bicycle and other components. Failure to read and understand safety information can result in death or serious injury.
- Take responsibility for your own SAFETY. If you have any questions or do not understand something, consult with your dealer or the bicycle or component manufacturer.
- Some eBike accessories may present a choking hazard to small children. Keep these accessories away from children.
- The Bosch Drive System adds weight to your bicycle which you may not be used to lifting. Avoid injury, and use proper lifting techniques.
Safety instructions
Save all safety warnings and instructions for future reference.
- The contact surfaces of the display holder may become very hot (> 140 °F). Allow the contact surfaces to adjust to the ambient temperature before you touch them. This is particularly important when using a SmartphoneGrip.
- Keep swallowable small parts away from small children. There is a risk of serious injury.
- Never short-circuit the pins. The display holder may be irreparably damaged and must then be replaced.
- Ensure that the contacts are free of dirt. By doing this, you prevent malfunctions or damage.
- After a fall, check the display holder for sharp edges. Replace it if required.
- Do not stand your bicycle upside down on its saddle and handlebars if the onboard computer or its holder protrudes from the handlebars. This may irreparably damage the onboard computer or the holder. Also, remove the onboard computer before placing the bicycle on a wall mount to ensure that the onboard computer does not fall off or become damaged.
- Observe all national regulations which set out the approved use of eBikes.
- Read and observe the safety warnings and instructions in all operating instructions of the eBike system and your eBike.
Product description and specifications
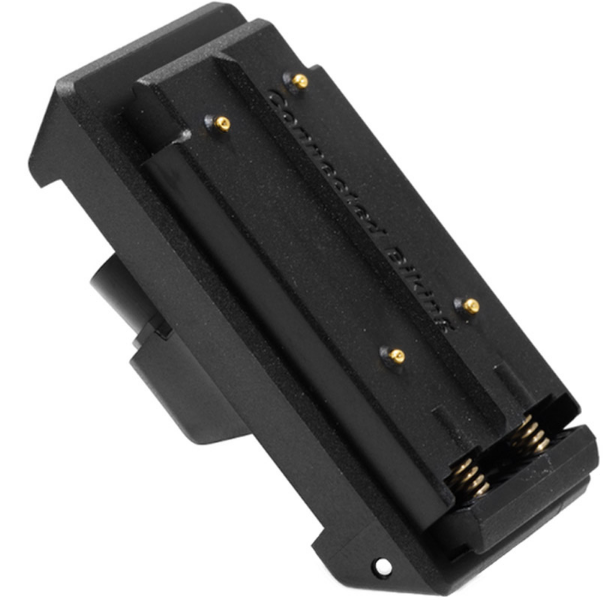
Product Features Display Mount

- Display mount
- Adapter tray
- Clamp for holder
- Clamp screw
- Round rubber spacer
- 1-arm socket
- Screw for adjusting tilt
- Removal blocker
- Snap-in hook
- Connection cables
- Fastening screws for display mount
Intended use
The display holder is intended to establish the mechanical and electrical connection to a display or onboard computer. Only original Bosch eBike components can be connected to the display holder. A display holder is not required for an eBike system to function.
Installation positions (see figure A)

The 1-arm socket can be mounted at three different positions on the handlebars:
- In front of the handlebars ➀
- Over the stem ➁
- In the triangle between the stem and handlebar ➂
Note: In order to ensure clean cable routing, the appropriate display mount must be used for each of the three different positions: The BDS3210 display mount for in front of the handlebars (electrical connections at the rear); the BDS3250 display mount for over the stem or in the triangle between the stem and handlebar (electrical connections at the front). If you want to change the installation position and you have the correct display mount (1), you must first remove the 1-arm socket (6) and re-mount it afterwards.
Technical data

Fitting
bicycle retailer will help you to select the correct components.
Mounting the display mount (see figure B)

(1) Display mount (2) Adapter tray (10) Connection cables (11) Fastening screw for display mount Insert the display mount (1) into the adapter tray (2). Ensure that it is in the required installation position. Secure the display mount (1) from below using the screws (11). When doing so, be aware of the torque specified on the adapter tray (2). Connect the connection cables that come out of the drive unit and the operating unit. It does not matter which cable is connected to which connection for the functions to work. When connecting the cables, ensure that the markings on the connector and on the cable match.
Securing on the handlebars (see figure C)

(3) Clamp for holder (4) Clamp screw (5) Round rubber spacer (6) 1-arm socket (7) Screw for adjusting tilt Note: The display holder must only be secured in the cylindrical area of the handlebars and not in the tapered area. To clamp a display in the center, the handlebars must have a cylindrical area of at least 90 mm in width. Open the clamp and bring the 1-arm socket (6), together with the round rubber spacer (5), into the required position. Gently tighten the clamp screw (4) so that the 1-arm socket (6) can still move. Adjust the tilt for the display mount by loosening and tightening the screw (7). Preferably adjust the tilt without the display or on-board computer. In the connection between the 1-arm socket (6) and the adapter tray, there are interlocking teeth, which means that it is only possible to align the adapter tray in predefined positions. Before tightening the screw (7), make sure that the teeth engage in one another correctly. In addition, be aware of the torque specified on the 1-arm socket (6). Bring the 1-arm socket (6) into its final position and tighten the clamp screw (4). Be aware of the torque specified on the 1-arm socket (6) here too. Thanks to the round rubber spacer (5), it is possible to move the 1-arm socket (6) in all directions.
Removal blocker
A device attached to the display holder can be secured using the removal blocker (8). Usage is described in the operating instructions for the respective device.
Maintenance and cleaning
The display holder must not be cleaned with pressurized water. Use a soft cloth dampened only with water for cleaning. Do not use cleaning products of any kind. Only have repairs performed by a certified bicycle dealer.
After-sales service and advice on using products
If you have any questions about the eBike system and its components, contact an authorized bicycle dealer. For contact details of authorized bike dealerships, please visit www.bosch-ebike.com.
Disposal
Please return Bosch eBike components that are no longer usable to an authorized bicycle dealer. Do not dispose of eBikes and their components with household waste.