Makita SK10GD Rechargeable Green Multi Line Laser Instruction Manual


makita SK10GD Rechargeable Green Multi Line Laser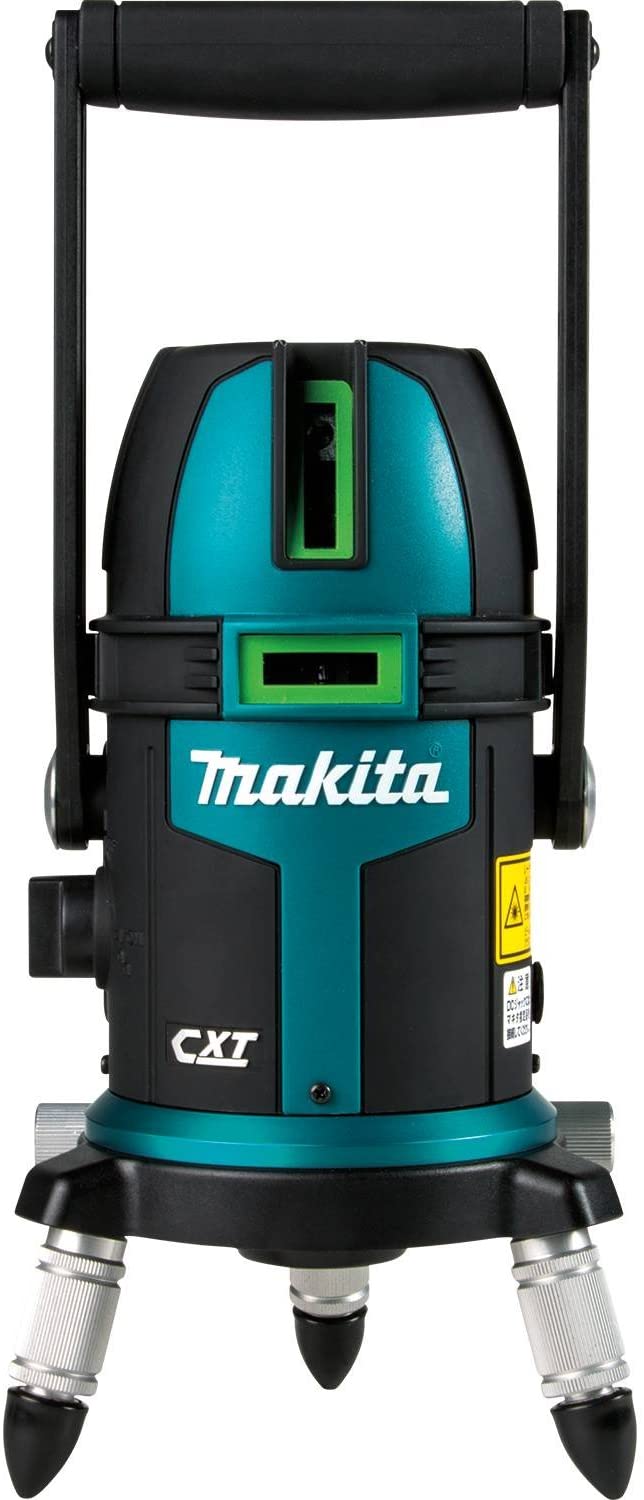

SPECFICATION
| SK40GD | SK20GD | SK10GD | ||
| Laser source | Line beam: Green semiconductor laser Lower dot beam: Red semiconductor laser | |||
| Laser wavelength | 510 to 530 nm (lower dot beam 650 to 660 nm) | |||
| Laser output | Each 1 mW or less (CLASS 2 LASER PRODUCT) IEC 60825-1:2014 | |||
| Laser line emission angle | Vertical 130°±10% 180° vertical line 230°±10% Horizontal 120°±10% |
Vertical 130°±10% Horizontal 120°±10% |
Vertical 130°±10% Horizontal 120°±10% | |
| Laser dot diameter | 1.5 mm / 1 m (lower dot beam) | |||
| Laser beam selection | Horizontal line / 2-vertical line / 2-vertical line + horizontal line / 4-vertical line + horizontal line |
Horizontal line / 2-vertical line / 2-vertical line + horizontal line | Horizontal line / Vertical line / Vertical line + horizontal line | |
| Brightness selection | 2 modes (constant pulse) Eco mode/ Normal mode | |||
| Indication method | Automatic vertical line indication by gimbal mechanism | |||
| Vertical line indication range | ±4° (alarm given by light off outside range) | |||
| Horizontal fine-adjustment range |
Entire circumference | |||
| Control method | Magnet damper method | |||
| Accuracy | Emitted laser | ±1 mm / 10 m *(Before shipment from factory) | ||
| 2-vertical line | 90°±0.01° | |||
| Power supply | Makita battery cartridge | |||
| Rated Voltage | D.C.10.8V – 12Vmax | |||
| Operating time (when BL1016 is used) Normal mode: Eco mode: |
At 4-vertical line/ horizontal line A pprox. 6 h Approx. 12 h |
At 2-vertical line/ horizontal line A pprox. 9 h Approx. 16 h |
At Vertical line/ horizontal line Approx. 12 h Approx. 20 h | |
| Operating temperature range | -10°C to +40°C (14°F to 104°F) | |||
| ESD protective measures | Level: 2 (IEC61000-4-2) | |||
| Dimensions | 98 mm (dia.) x 223 mm (height) (excluding protrusions) | |||
| Battery cartridge | BL1016, BL1021B, BL1041B | |||
| Net weight | 1.4 kg – 1.5 kg (with BL 1016 battery cartridge) | |||
| Tripod screw | W 5/8″ | |||
NOTE: Use the product in the following operating environment.
- Indoor use
- Altitude: up to 2000m
- Humidity: Maximum relative humidity 80% temperature rise to 31°C (87.8°F) decreasing linearly to 50% relative humidity at 40°C (104°F)
- Pollution degree 3
Due to our continuing program of research and development, the specifications herein are subject to change without Specification values varying according to operating environment conditions, and other Specifications and battery cartridges may differ from country to The weight may differ depending on the battery cartridge. The lightest and heaviest combinations, according to EPTA-Procedure 01/2014, are shown in the table
Symbols
The definitions below describe the level of severity for each signal word and the meaning of each symbol used in this manual. Please read the manual and pay attention to these symbols.
- Read the instruction manual.
- DANGER: This indicates the risk of death or frequent serious injury.
- WARNING: This indicates the risk of serious injury.
- CAUTION: This indicates the risk of light injury.
- NOTE
- This indicates the risk of malfunction or damage to property.
- This indicates the risk of electric shock.
- This indicates the risk of fire.
- Laser warning
Only for EU countries Due to the presence of hazardous components in the equipment, waste electrical and electronic equipment, accumulators and batteries may have a negative impact on the environment and human health. Do not dispose of electrical and electronic appliances or batteries with household waste! In accordance with the European Directive on waste electrical and electronic equipment and on accumulators and batteries and waste accumulators and batteries, as well as their adaptation to national law, waste electrical equipment, batteries, and accumulators should be stored separately and delivered to a separate collection point for municipal waste, operating in accordance with the regulations on environmental protection. This is indicated by the symbol of the crossed-out wheeled bin placed on the equipment.
Intended use
The measuring tool is intended for leveling jobs with the use of horizontal lines, vertical lines, and plumb point.
Laser Beam Related Safety Standards
This product complies with the following standards:
- IEC 60825-1:2014
- LASER RADIATION
- DO NOT STARE INTO THE BEAM
- CLASS 2 LASER PRODUCT
- MAXIMUM OUTPUT POWER: P=1 mW Wavelength: λ=510 ~ 530nm / 650 ~ 660nm Pulse: 40 to 100μs/ 5 kHz (λ=510 ~ 530 nm)
CAUTION
Use of controls or adjustments or performance of procedures other than those specified herein may result in hazardous radiation exposure.
Safety Declaration
This product complies with the following standards:
- EN61326-1: Electrical equipment for measurement, control, and laboratory use – EMC requirements
- IEC61010-1:2010 (3rd Edition) Safety requirements for electrical equipment for measurement, control, and laboratory use
- The usage conditions of this product for compliance with this standard are as follows.
CAUTION – When installing the BL1041B battery cartridge (This caution is an explanation for labels used on this product.)Before installing the battery on this product and placing it on a floor or table, attach the stand and check the product does not fall over.
- FCC Part15 Subpart B: Federal Communications Commission (FCC), Equipment authorization of unintentional radiators
- ICES003: Canada ICE regulations
Noise Related Safety Standards
- FCC Part15 SubpartB/ICES 003
CAUTION
Changes or modifications not expressly approved by the party responsible for compliance could void the user’s authority to operate the equipment.
NOTE
- This equipment has been tested and found to comply with the limits for a Class B digital device, pursuant to part 15 of the FCC Rules.
- These limits are designed to provide reasonable protection against harmful interference in a residential installation.
- This equipment generates, uses, and can radiate radio frequency energy and, if not installed and used in accordance with the instructions, may cause harmful interference to radio communications.
- However, there is no guarantee that interference will not occur in a particular installation.
- If this equipment does cause harmful interference to radio or television reception, which can be determined by turning the equipment off and on, the user is encouraged to try to correct the interference by one or more of the following measures:
- Reorient or relocate the receiving antenna.
- Increase the separation between the equipment and receiver.
- Connect the equipment into an outlet on a circuit different from that to which the receiver is connected.
- Consult the dealer or an experienced radio/TV technician for help.
- If the equipment is used in a manner not specified by the manufacturer, the protection provided by the equipment may be impaired.
Safety Warnings
WARNING
Read all safety warnings, instructions, illustrations and specifications provided with the product. Failure to follow all instructions listed below may result in electric shock, fire and/or serious injury. Save all warnings and instructions for future reference
WARNING – Laser safety
- Do not look directly into the laser beam on optical instruments.
- Directly looking at the laser beam by telescopic optics, magnifying glass or similar instruments is dangerous.
- Do not stare directly at the laser beam.
- Avoid locating the path of the laser beam at eye height.
- Do not enter the path of the laser beam.
- Do not place reflective objects in the path of the laser beam.
- Do not point the laser beam at other persons.
Continuously looking at laser beams may damage your eyes. If your eyes might be impaired, immediately seek treatment by a physician. Max. the output power of built-in laser/wavelength × number of lasers SK40GD: P=30 mW / λ=520 nm (Typ.) × 5
- SK20GD: P=30 mW / λ=520 nm (Typ.) × 3
- SK10GD: P=30 mW / λ=520 nm (Typ.) × 2
- SK40GD,SK20GD,SK10GD common:P=6 mW / λ=650 nm (typ.) × 1
WARNING – Work area safety
- Keep the work area clean and well-lit. Cluttered or dark areas invite accidents.
- Do not operate the product in explosive atmospheres, such as in the presence of flammable liquids, gases, or dust. Products create sparks that may ignite dust or fumes.
- Keep children and bystanders away while operating the product. Distractions can cause you to lose control.
WARNING – Electrical safety
- Avoid body contact with earthed or grounded surfaces such as pipes, radiators, ranges, and refrigerators. There is an increased risk of electric shock if your body is earthed or grounded.
- Do not expose the product to rain or wet conditions. Water entering the product will increase the risk of electric shock.
- Do not short-circuit terminals on the product.
- Do not hold the power supply cable by your mouth. Doing so might cause an electric shock.
WARNING – Storage
Properly store the charging tool when it is not in use. Store it in a safe location out of the reach of children and in a dry location under lock and key.
WARNING – Battery product use and care
- Recharge only with the charger specified by the manufacturer. A charger that is suitable for one type of battery pack may create a risk of fire when used with another battery pack.
- Use the product only with specifically designated battery packs. The use of any other battery packs may create a risk of injury and fire.
- When battery pack is not in use, keep it away from other metal objects, like paper clips, coins, keys, nails, screws, or other small metal objects, that can make a connection from one terminal to another. Shorting the battery terminals together may cause burns or a fire.
- Under abusive conditions, liquid may be ejected from the battery; avoid contact. If contact accidentally occurs, flush with water. If liquid contacts the eyes, additionally seek medical help. Liquid ejected from the battery may cause irritation or burns.
- Do not use a battery pack or product that is damaged or modified. Damaged or modified batteries may exhibit unpredictable behavior resulting in fire, explosion, or risk of injury.
- Do not expose a battery pack or product to fire or excessive temperature. Exposure to fire or temperature above 130 °C may cause explosion.
- Follow all charging instructions and do not charge the battery pack or product outside the temperature range specified in the instructions. Charging improperly or at temperatures outside the specified range may damage the battery and increase the risk of fire.
- Use Makita battery cartridges only with products specified by Makita.
WARNING – Maintenance
- Have the product serviced by a qualified repair person using only identical replacement parts. This will ensure that the safety of the product is maintained.
- Never service damaged battery packs. Service of battery packs should only be performed by the manufacturer or authorized service providers.
- Follow instruction for changing accessories.
- Do not disassemble, repair, modify or retrofit this product, charger or battery. Doing so might cause ignition or abnormal operation, which may result in injury.
- Inspect this product for damaged parts. If this product is operating abnormally or malfunctioning, immediately stop use. Continued use of this product in this condition might lead to smoke emission, ignition, electric shock, or injury.
<Examples of Abnormalities and Malfunction>
x Power cable and power plug are abnormally hot.
x The power cable has deep scratches or is deformed.
x Power turns ON and OFF when the power cable is moved.
x There is a burning smell.
x There is a tingling feeling of electricity.
If you sense a malfunction, such as this product not functioning even after turning the power switch ON, immediately remove the battery and ask the store of purchase or a Makita authorized service center for inspection and repair. - This product complies with the relevant safety standards. Do not modify or retrofit it.
- If repair is performed by a person without specialist knowledge and repair skills, not only will the performance of this product not be fully demonstrated but this might also result in accident or injury.
WARNING – Additional safety
Use the correct accessories. Use only accessories recommended in this User’s Manual and in Makita catalogs. Do not use other accessories since this might result in malfunction, accident or injury.
PRECAUTIONS
- Check the accuracy of the product each time before starting your work. For details, see”CHECKING THE ACCURACY”.
- Avoid heavy shakes or impacts on the product.
The product is designed in an impact-resistant structure. However excessive impact may cause degradation in performance. After heavy impact, an accuracy check should be carried out. - Before moving this product, lock this product by turning the power OFF. After work is finished, turn the power switch OFF. Then the product is locked internally.
- If there is an apparent abnormality, do not use this product.
Immediately stop work, and contact the store of purchase or the nearest Makita sales office. - If the laser is not emitted after turning the power ON, lightly shake this product a few times.
If the laser is not emitted even after shaking this product lightly a few times, immediately stop work, and contact the store of purchase or the nearest Makita sales office. - When the power is turned ON, the product emits the laser beam in the same model that was turned OFF last time. Operate the switch by keeping the laser beam away from your eyes.
- In a dark area, reflections may be seen beside the regular laser lines.
- Do not use the product if condensation is found on it.
Do not turn the power ON. Leave the product until condensation naturally disappears. - Do not use the laser receiver near the point the laser lines cross each other. The laser receiver does not detect near such a point.
- When transporting this product, put it in its case.
- When storing, put the product in its case. The storage area should be away from heat, moisture, vibration, and dust.
- Clean the glass at the exit opening of the laser beam using a soft cloth to keep performance.
- When the product is dirty, wipe it clean with a soft, dry cloth. If the dirt is stubborn, use a cloth moistened with water and wrung firmly. Then, wipe off any water again with a soft, dry cloth. Do not use alcohol, benzene, paint thinner, or other volatile solvents. (Doing so might cause discoloring, deformation, alteration, or other abnormalities.)
- Do not wash the product. It may cause malfunction.
- Never modify or retrofit this product. Disassembly, modification, or retrofitting of this product may cause malfunction or an electric shock.
- When this product is not used for a long time, remove the battery.
- With regards to safety education, the user must fully understand the nature and danger of laser beams.
- The product is not intended for use by persons including children with reduced physical, sensory or mental capabilities, or lack of experience and knowledge. Young children should be supervised to ensure that they do not play with the product.
Important safety instructions for battery cartridge
- Before using the battery cartridge, read all instructions and cautionary markings on (1) battery charger, (2) battery, and (3) product using the battery.
- Do not disassemble or tamper with the battery cartridge. It may result in a fire, excessive heat, or explosion.
- If the operating time has become excessively shorter, stop operating immediately. It may result in a risk of overheating, possible burns, and even an explosion.
- If electrolyte gets into your eyes, rinse them out with clear water and seek medical attention right away. It may result in loss of your eyesight.
- Do not short the battery cartridge:
- Do not touch the terminals with any conductive material.
- Avoid storing battery cartridges in a container with other metal objects such as nails, coins, etc.
- Do not expose the battery cartridge to water or rain. A battery short can cause a large current flow, overheating, possible burns, and even a breakdown.
- Do not store the tool and battery cartridge in locations where the temperature may reach or exceed 50 °C (122 °F).
- Do not incinerate the battery cartridge even if it is severely damaged or is completely worn out. The battery cartridge can explode in a fire.
- Do not nail, cut, crush, throw, drop the battery cartridge, or hit against
- a hard object on the battery cartridge. Such conduct may result in a fire, excessive heat, or explosion.
- Do not use a damaged battery.
- The contained lithium-ion batteries are subject to the Dangerous Goods Legislation requirements.
- For commercial transports e.g. by third parties, forwarding agents, special requirements on packaging and labeling must be observed.
- For the preparation of the item being shipped, consulting an expert for hazardous material is required.
- Please also observe possibly more detailed national regulations.
- Tape or mask off open contacts and pack up the battery in such a manner that it cannot move around in the packaging.
- When disposing of the battery cartridge, remove it from the tool and dispose of it in a safe place. Follow your local regulations relating to the disposal of batteries.
- Use the batteries only with the products specified by Makita. Installing the batteries to non-compliant products may result in a fire, excessive heat, explosion, or leak of electrolyte.
- If the tool is not used for a long period of time, the battery must be removed from the tool.
- During and after use, the battery cartridge may take on heat which can cause burns or low-temperature burns. Pay attention to the handling of hot battery cartridges.
- Do not touch the terminal of the tool immediately after use as it may get hot enough to cause burns.
- Do not allow chips, dust, or soil stuck into the terminals, holes, and grooves of the battery cartridge. It may result in poor performance or breakdown of the tool or battery cartridge.
- Unless the tool supports the use of near high-voltage electrical power lines, do not use the battery cartridge near high-voltage electrical power lines. It may result in a malfunction or breakdown of the tool or battery cartridge.
- Keep the battery away from children.
SAVE THESE INSTRUCTIONS
CAUTION
Only use genuine Makita batteries
Use of non-genuine Makita batteries, or batteries that have been altered, may result in the battery bursting causing fires, personal injury and damage. It will also void the Makita warranty for the Makita tool and charger.
Tips for maintaining maximum battery life
- Charge the battery cartridge before completely discharged. Always stop tool operation and charge the battery cartridge when you notice less tool power.
- Never recharge a fully charged battery cartridge.
Overcharging shortens the battery service life. - Charge the battery cartridge at room temperature at 10 °C – 40 °C (50 °F -104 °F). Let a hot battery cartridge cool down before charging it.
- When not using the battery cartridge, remove it from the tool or the charger.
NAMES OF PARTS


- Operation panel
- Circular level
- Vertical laser beam exit window
- SK40GD: 4 parts
- SK20GD: 2 parts
- SK10GD: 1 part
- Horizontal laser beam exit window
- Rotation fine adjustment knob
- Adjustment screw leg
- Rubber foot cap
- Lower laser beam exit port (base)
- External tripod mounting screw hole (base)
- Power switch
- Battery (optional accessory)
- Handle
- Stand
- Caution label
Optional Accessories
For details of options, either refer to the catalog or inquire at the store of purchase or a Makita sales office.
CAUTION: These accessories or attachments are recommended for use with your Makita tool specified in this manual. The use of any other accessories or attachments might present a risk of injury to persons. Only use accessory or attachment for its stated purpose.If you need any assistance for more details regarding these accessories, ask your local Makita Service Center.
- Makita genuine battery and charger
- Laser Receiver LDG-5
- ADP09
- Tripod
NOTE: Some items in the list may be included in the tool package as standard accessories. They may differ from country to country.
Installing or removing the battery cartridge
- Red-colored section
- Button

CAUTION
- Always be sure that the tool is switched off and the battery cartridge is removed before adjusting or checking the function of the tool.
- Always switch off the tool before installing or removing the battery cartridge.
- Hold the tool and the battery cartridge firmly when installing or removing the battery cartridge. Failure to hold the tool and the battery cartridge firmly may cause them to slip off your hands and result in damage to the tool and battery cartridge and a personal injury.
- Red-colored section
- Button
To remove the battery cartridge, slide it from the tool while sliding the button on the front of the cartridge. To install the battery cartridge, align the tongue on the battery cartridge with the groove in the housing and slip it into place. Insert it all the way until it locks in place with a little click. If you can see the red indicator on the upper side of the button, it is not locked completely.
CAUTION
- Always install the battery cartridge fully until the red indicator cannot be seen. If not, it may accidentally fall out of the tool, causing injury to you or someone around you.
- Do not install the battery cartridge forcibly. If the cartridge does not slide in easily, it is not being inserted correctly.
Battery Protection System
Operation panel


The battery is provided with a protection system for automatically turning output OFF to extend the life of the battery. This occurs due to the battery protection system and is not a malfunction.
- If the battery is about to run out during the use of the product, the battery indicator on the operation panel lights. If use is continued in this state, the laser beam will go out.
- The battery indicator may indicate different remaining capacity from actual capacity depending on conditions of use, air temperature, and other factors.
NOTE: To ensure prolonged battery use
- Do not recharge fully charged batteries.
- Charge batteries within an ambient temperature range of 10°C to 40°C (50°F to 104°F).
- We recommend inserting batteries that have heated up immediately after use, for example, into the charger and allowing them to cool down before charging them.
Using the Multi-Line Laser


- Installing the Multi-Line Laser
- Set this product on a level surface. Turn the adjustment screw leg so that the bubble in the circular level comes to the center of the red circle. Circular level
- When using the tripod, first set down the tripod. Then mount the line laser on it. Extend or retract the legs of the tripod so that the bubble in the level comes to the center of the red circle.
- WARNING Before installing the battery on this product and placing it on a floor or table, attach the stand and check the product does not fall over.
- Operating the power switch
- Power switch
- [Power ON] Turn the power switch to the “I/ON” side. The laser beam is emitted.
- [Power OFF]
- Turn the power switch to the “O/OFF” side. The power turns OFF, and the pendulum inside is locked. After turning the power OFF, disconnect the battery.
- Brightness selection
- Select the brightness of the emitted line beam by the brightness selection switch on the operation panel.
- Brightness selection switch
- Normal: This is the optimum mode when using the receiver.
- Eco: Battery life lasts longer in this mode.
- Brightness indicator
- [Loopback switch system]
- Normal Eco
- LED out Green LED lit
- Line beam mode selection
- Select the line beam emission mode by the line selection switch on the operation panel. Line selection switch SK40GD
- [Loopback switch system]
- SK20GD [Loopback switch system]
- SK10GD [Loopback switch system]
- NOTE: The height of the horizontal line beam can be easily adjusted by using the tripod (optional accessory).


It can be fine-adjusted from either side by turning the fine-adjustment knob.
Fine-adjustment knob
Fine-adjustment mechanism The stand prevents the product from toppling over. When using ceiling/wall mounts (optional accessory), remove the stand.

NOTE: Do not hold the stand to lift the product, or to attach or remove the battery. The product may fall.

NOTE: About the rubber foot caps Use the rubber caps to prevent the floor from being scratched or when the floor is slippery. Rubber caps are supplied as standard. These can be removed before use on uneven surfaces such as concrete floors.
CHECKING THE ACCURACY
Should the line laser exceed the permissible difference during the checking, contact the store of purchase or a Makita authorized service center.
- Checking the horizontal line
- Place the line laser near the center of a room with approx. 5 m walls.
- Adjust the line laser so that the bubble in the level comes to the center of the red circle.
- Mark A at the position of the horizontal laser line on the wall.
- Turn the line laser by 180°and mark B at the position of the horizontal laser line.
- Move the line laser to the position 1m away from the wall and adjust the bubble in the level.
- Mark B’ at the position of the horizontal laser line.
- Turn the line laser by 180°and mark A’ at the position of the horizontal laser line. The result is normal if the difference between A-A’ and B-B’ is within 1 mm.
- Rotate the line laser horizontally and measure the maximum difference in the horizontal laser line with A’. The result is normal if the deviation at point A’ is within 1 mm.
- Checking the plumbing point and vertical line
- Set the “plumb” on the wall approx. 3 m above the floor.
- Place the line laser 3 to 5 m away from the wall.
- Adjust the attitude so that the bubble in the level comes to the center of the red circle.
- Set the laser beam mode to either the “vertical line” or “2-vertical line”.
- Rotate the line laser observing the plumbing point on the ceiling.
The result is normal if the plumbing point moves only within the width of the laser line. - Rotate the line laser horizontally and align the vertical laser line with the “plumb” string. Alignment can be adjusted using the rotation fine adjustment knob. The result is normal if the vertical laser line and “plumb” string are aligned.
- Checking the 180°vertical line
- Emit the vertical line beam.
- Mark A near the center of the vertical laser line on the right wall, and mark B near the center of the “90°vertical laser line” on the front wall.
Mark C is near the center of the “180°vertical laser line” on the left wall. - Turn the line laser by 180°keeping it in its original position, align the “right side vertical line” with point C on the left wall, and mark D near the center of the “left side vertical line” on the right wall.
- The result is normal if the difference between points A and D is within 1 mm.
- Checking the 90°vertical line\
- Emit all vertical line beams.
- Mark A near the center of the vertical line on the right wall, and mark B near the center of the “90°vertical line” on the front wall.
Mark C is near the center of the “180°vertical line” on the left wall. - Turn the line laser by 90°keeping it in its original position, align the “right side vertical line” with “B on the front,” and mark C’ near the center of the “90°vertical line” on the left wall.
- The result is normal if the difference between C and C’ is within 1 mm.
- [SK20GD]
- Make a mark on the floor near the center of a room with 4 to 6 m walls.
- Emit all vertical line beams.
- Mark B and C near the center of the vertical line on the front and left wall. C B
- Align the vertical line on the front with C, and mark D near the center of the rear wall.
- Likewise, mark A and B’.
- The result is normal if the difference between B and B’ is within 3 mm.


MAINTENANCE
CAUTION
- Always be sure that the tool is switched off and the battery cartridge is removed before attempting to perform inspection or maintenance.
- To maintain product SAFETY and RELIABILITY, repairs, and maintenance, or adjustment should be performed by Makita Authorized or Factory Service Centers, always using Makita replacement parts.