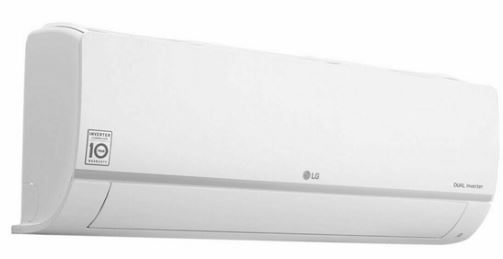
LG PC24SK Wall Mounted Air Conditioner Owner’s Manual


LG PC24SK Wall Mounted Air Conditioner

Read this owner’s manual thoroughly before operating the appliance and keep it handy for reference at all times. obtain the original manual from www.lg.com.
OPERATION
Notes for Operation
Suggestions for Energy Saving
- Do not over-cool the space. This may be harmful for your health and may consume more electricity.
- Block sunlight with blinds or curtains while you are operating the air conditioner.
- Keep doors or windows closed tightly while you are operating the air conditioner.
- Adjust the direction of the air flow vertically or horizontally to circulate indoor air.
- Speed up the fan to cool or warm indoor air quickly, within a short period of time.
- Open windows regularly for ventilation. The indoor air quality may deteriorate if the air conditioner is used for long durations.
- Clean the air filter once every 2 weeks. Dust and impurities collected in the air filter may block the air flow or reduce the unit performance.
Parts and Functions
Indoor Unit

- Air Filter
- Air Intake
- Front Cover
- Air Outlet
- Air Deflector (Horizontal Vane)
- Air Deflector (Vertical Louver)
- On/Off Button
- Display
- Signal Receiver
Outdoor Unit

- Air Intake Vents
- Air Outlet Vents
- Base Plate
- Power Supply Cable
- Drain Hose
- Refrigerant Pipes
NOTE
- The number and location of operation lamps may vary according to the model of the air conditioner.
- The feature may be changed according to the type of model.
Wireless Remote Control Inserting Batteries
If the display screen of the remote control begins to fade, replace the batteries. Insert AAA (1.5 V) batteries before using the remote control.
- Remove the battery cover.
- Insert the new batteries and make sure that the + and – terminals of the batteries are installed correctly.


Installing the Remote Control Holder
To protect the remote control, install the holder where there is no direct sunlight.
- Choose a safe and easily accessible location.
- Fix the holder by fastening 2 screws firmly with a screwdriver.

Operating Method
Point the remote control towards the signal receiver at the right side of the air conditioner to operate it.

NOTE
- The remote control may operate other electronic devices if it is directed towards them. Make sure to point the remote control towards the air conditioner signal receiver.
- For proper operation, use a soft cloth to clean the signal transmitter and receiver.
- In case of a function not provided in the product, no buzzer sound occurs from the product when a button for such function on the remote control is pressed except for Air Flow Direction ( SWING ), Energy Display (kW [3 s]), Air Purification function (

Setting the Current Time
- Insert batteries.
- The icon below blinks at the bottom of the display screen.
- The icon below blinks at the bottom of the display screen.
- Press the button to select the minutes.
- Press the SET/CANCEL button to finish.

NOTE
- The On/Off Timer is available after setting the current time.
Using the °C/°F Conversion Function (Optional)
This function changes unit between °C and °F
- Press and hold button for about 5 seconds.
Operating the Air Conditioner without the Remote Control
You can use the ON/OFF button of the indoor unit to operate the air conditioner when the remote control is unavailable.
- Open the front cover (Type2) or horizontal vane (Type1).
- Press the ON/OFF button.
Type1

Type2

NOTE
- The stepping motor may be broken, if the horizontal vane opens rapidly.
- The fan speed is set to high.
- The feature may be changed according to the type of model.
- The temperature cannot be altered when using this emergency ON/OFF button.
- For cooling & heating models, the temperature is set from 22 °C to 24 °C
Using Wireless Remote Control
You can operate the air conditioner more conveniently with the remote control.

NOTE
- buttons may be changed according to the type of model.
- When connected to the Multi Outdoor unit, the Energy Display, Energy Control, Silent, and Smart Diagnosis functions may not be supported.


NOTE
- Some functions may not be supported, depending on the model.
- buttons may be changed according to the type of model.
- Press the SET/CANCEL button to operate the selected FUNC.