Sharp DR-I470 Pro Internet DAB+ Radio User Manual


Important safety instructions
Please, read these safety instructions and respect the following warnings before the appliance is operated:
- The exclamation point within an equilateral triangle is intended to alert the user to the presence of important operating and maintenance (servicing) instructions in the literature accompanying the appliance.
- Use only the power supply listed in the user manual.
- This symbol means that the product should be disposed of in an environmentally friendly manner and not with general household waste.
- AC voltage
- DC voltage
- Class II equipment
- For indoor use only
- Energy efficiency marking with level VI
- The polarity of d.c. power connector

In order to prevent fire always keep candles and other open flames away from this product.
Warning:
- Always follow basic safety precautions when using this appliance, especially when children are present.
- Children should be supervised to ensure that they do not play with the appliance.
- Do not damage the power cord, place heavy objects on it, stretch or bend it. Do not attach extension cables. Damage to the power cord may cause fi re or electric shock.
- If the supply cord is damaged, it must be replaced by the manufacturer, a service agent or similarly qualied persons in order to avoid a hazard.
- Ensure that the unit is plugged into an AC 100-240V 50/60Hz power outlet. Using higher voltage may cause the unit to malfunction or catch fi re.
- If the power plug does not fi t into the socket, do not force it.
- Turn off the unit before unplugging it from power source to completely switch it off .
- Do not disconnect or connect the power cord with wet hands. This may cause an electric shock.
- If the unit is not going to be used for a long period time, disconnect the power supply.
- Ensure that the mains plug is always easily accessible.
- This product does not contain any parts that are serviceable by the user. In case of a fault, contact the manufacturer or authorized service department. Exposing the internal parts inside the device may endanger your life. The manufacturer’s guarantee does not extend to faults caused by repairs carried out by unauthorized third parties.
- Do not use this product immediately after unpacking. Wait until it warms up to room temperature before using it.
- Ensure this product is used in moderate climates only (not in tropical/subtropical climates).
- Place product on a fl at, stable surface that is not subject to vibrations.
- Ensure the product and its parts is not overhanging the edge of the supporting furniture.
- To reduce the risk of fire, electric shock or damage to this product, do not expose it to direct sunlight, dust, rain and moisture. Never expose it to dripping or splashing and do not place objects filled with liquids on or near the product.
- Do not place objects fi lled with liquids, such as vases, on the apparatus.
- Do not install near any heat sources such as radiators, heat registers, stoves, or other apparatus (including amplifiers) that produce heat.
- Do not place the product where the humidity is high and ventilation is poor.
Ensure a minimum distance of 5 cm around the apparatus for sufficient ventilation. Do not block any ventilation openings of this product. Always ensure that the ventilation openings are not covered with items such as newspapers, tablecloths, curtains, etc. - NEVER let anyone, especially children, pushes anything into holes, slots or any other openings in the unit’s casing as this could result in a fatal electric shock.
- Storms are dangerous for all-electric appliances. If the mains or aerial wiring is struck by lightning, the appliance might get damaged, even if it is turned off. You should disconnect all the cables and connectors of the appliance before a storm.
Maintenance
- Unplug the power cable from the power source before cleaning the appliance.
- Use a soft and clean rag to clean the outside of the unit. Never clean it with chemicals or detergent.
Power Adapter
- To disconnect the unit from the mains supply, unplug the lead from the mains socket.
- Only use the supplied mains adaptor as failure to do this may result in safety risk and/or damage to the unit.
Batteries
- Observe the correct polarity when inserting the batteries.
- Do not expose batteries to high temperatures and do not place them on locations where the temperature might increase quickly, e.g. near the fi re or on the direct sunshine.
- Do not expose batteries to excessive radiant heat, do not throw them into the fi re, do not disassemble them and do not try to recharge un-rechargeable batteries. They could leak or explode.
- Never use different batteries together or mix new and old ones.
- When the Remote Control is not to be used for a long time (more than a month), remove the battery from the Remote Control to prevent it from leaking.
- If the batteries leak, wipe away the leakage inside the battery compartment and replace the batteries with new ones.
- Do not use any batteries other than those specified.
Do not ingest battery, chemical burn hazard - If the battery is swallowed, it can cause severe internal burns in just 2 hours and lead to death. Keep new and used batteries away from children. If the battery compartment does not close securely, stop using the product and keep it away from children. If you think batteries might have been swallowed or placed inside any part of the body, seek immediate medical attention.
Disposal of this equipment and Batteries
- Do not dispose of this product or its batteries as unsorted municipal waste. Return it to a designated collection point for the recycling of WEEE in accordance with local law. By doing so, you will help to conserve resources and protect the environment.
- Most of the EU countries regulate the disposal of batteries by law. Contact your retailer or local authorities for more information.
- The shown above appears on electrical and electronic equipment (or the packaging) to remind users of this.
- Users are requested to use existing return facilities for used equipment and batteries.
CE Statement:
- Hereby, UMC Poland sp. z o.o. declares that this audio device is
in compliance with the essential requirements and other relevant provisions of RED Directive 2014/53/EU. The full text of the EU declaration of conformity is available by following the
link http://www.sharpconsumer.EU/documents-of-conformity
What is included in the box
- 1 x Main unit
- 1 x Remote control
- 1 x Power adaptor
- 1 x User Manual
- 1x UK AC plug for power adapter
- 1x EU AC plug for power adapter
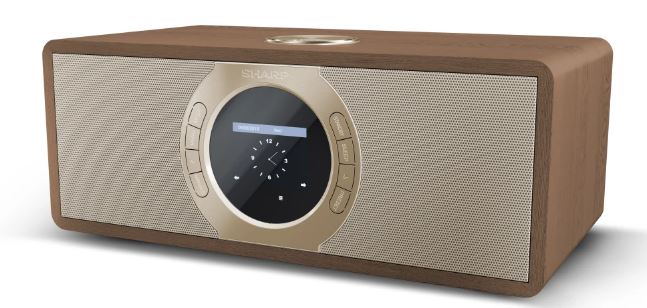
Panels & Controls

- MODE – Press to change the modes: DAB/DAB+, FM, Internet Radio, Bluetooth, AUX IN.
It can also can be set with another function by setting from the <Key> menu in CONFIGURATION: Alarm, Dimmer, Equaliser, Local Radio, Mode, Preset, Sleep Timer, Timer.
NOTES: The default function for this button is Mode changing. - STANDBY – Press this button to turn on the unit or enter standby mode.
- MENU – Enter the MENU Setting Interface
- SLEEP – Press repeatedly to set your desired sleep time.
- ◄ – When in setting screen, press to go to the previous selection. When listening to a radio, short press to decrease the frequency in 0.05MHz increments.
- ► – When in setting screen, press to go to the next selection.When listening to a radio, short press to increase the frequency in 0.05MHz increments.
- DIMMER – Press to set the backlight level.
- PRESET – When in Internet radio playback, press this button to switch to the Radio Station/Music sceen.
- DISPLAY SCREEN – To show the information.
Rear Panel - Volume Knob/ Select Knob/ OK button – When playback, rotate the knob to adjust the playing volume.When setting the menu, Rotate the knob to select the options; press down to confi rm your selection.
- FM Antenna – To receive the FM signal.
- Earphone jack – 3.5mm Earphone jack.
- AUX IN jack – Connect the 3.5mm audio cable to enjoy the external audio music.
- DC Power input – DC 12V

Remote Control

- STANDBY – Press the STANDBY button on remote control to wake up the unit or switch to the standby mode.
- SOURCE – Press the SOURCE button to change the playback modes: DAB/DAB+, FM, AUX IN, Bluetooth, Internet Radio.
Notes: This button can be used as another function by setting from the <Key> item in the CONFIGURATION: Alarm, Dimmer, Equaliser, Local Radio, Mode, Preset, Sleep Timer, Timer. - MENU – Press the MENU button on the remote control or on the front panel to enter the menu playback, press the DIRECTION buttons or rotate the Select Knob to browse the menu: Internet Radio, FM, DAB/DAB+, Spotify, Information Center, AUX, Bluetooth, Confi guration, Local Radio.
- UP /
- OK /
- LEFT /
- DOWN / 17. RIGHT – Scroll the UP and DOWN button or rotate the Select Knob to browse scroll through the choices, thenpress down the OK button to confi rm your selection.
- VOL- / 18. VOL+ – To adjust the volume, you can press the VOL+ and VOL- buttons, or rotate the Volume Knob directly. 10. PREVIOUS / 19. NEXT – When playing a music, press the PREVIOUS or NEXT button to skip to the previous or next track. When listening to a radio, press the PREVIOUS or NEXT button to skip to the previous or next favor station.
- PLAY/PAUSE – Press the
- PLAY/PAUSE button to pause the playback,
- ALARM – Press the ALARM button to view and created the alarm options.
- SLEEP – Press the SLEEP button repeatedly to choose your desired sleep time.
- NUMBER/LETTER – When setting the menu, type numbers or letters.
- WPS – WPS Settings
- MUTE – Press the MUTE button to mute the sound, press again or press the VOL+/- buttons remote control or rotate the Volume Knob on the top panel to resume.
- INFO – Press the INFO button to check the station information.
- EQ – Press the EQ button repeatedly to choose different sound fields: Normal, Flat, Jazz, Rock, Soundtracks, Classical, Pop, News, My EQ.
- FAV – Long press the FAV button to save station. Short press the FAV button to view your favourite stations that have been saved.
- DIMMER – Press the DIMMER button to select the backlight level
Fitting or replacing the remote control batteries
- Push the catch on the battery cover in the direction of the embossed arrow on the rear of the remote.
- While pushing the catch, open the battery cover.
- Fit two batteries observing polarity +,- as shown.When replacing the batteries, use only the same type of battery supplied.
- Re-fi t the battery cover and clip it in place.
Starting Up Your Internet Radio
Plug the power adapter into the DC IN Jack. Then “ Welcome” will be shown on the screen. Ensure the antenna is extended as far as possible. This will enable you to get the best signal you can. After the Welcome screen, if this is the first time of using your radio, you will be able to select the language by scrolling with the Select Knob and confirm your selection by pressing down the OK button. After language setting, the screen will display “Enable Check Network when Power On?”. You can choose “YES” or “ NO” to decide whether the unit check network when power on or not.
Manual WIFI Set-up
After the above setting, the screen will show ”Would you like to configure Network now?”.
- if you select “YES”, your radio will begin to scan for nearby networks to connect to.After scanning, you need to choose the network you want to connect.Then type letters/numbers by scrolling with the Select Knob or pressing the NUMBER/LETTER buttons until the correct digit is displayed and click the RIGHT button to go to the next digit. Once finished, press down the OK button to confirm.
- If you select “NO” then you can set this up later in configuration settings.
Wireless Network (WPS PBC)
When at the “Would you like to configure network now?” stage, if you select “YES(WPS)” your radio will begin to search for WiFi connections.
While this has been selected, you will have 120 seconds to click the WPS button on your WiFi modem. This will connect your WiFi to your radio without manually writing in the passcode.
WIFI Connection Complete!
Once your WIFI is completed by manually entering your WIFI password pr via WPS, you will be taken to the main menu screen and the WIFI signal will appear in white at the top left. Your internet radio is now set up!
Configuration
Use the LEFT/RIGHT buttons or rotate the Select Knob to choose
<Confi guration> on the main menu display screen, press down the OK button to enter the configuration settings.
Time Display
Set the time display type: Analog or Digital.
Manage my media
Set the function to Enable or Disable.
MediaU QR code is available in Confi guration > Manage my mediaU > Enable.
Network
- Wireless Network Configuration
- On the Network settings, you can set up a WIFI connection by selecting Wireless Network Configuration. The radio will then start searching for available WIFI connections.
- Find your WIFI connection and select it with OK button. To type letters/numbers, use the Select Knob or press the LETTER/NUMBER buttons until the correct digit is displayed. Then press the RIGHT button to go to the next digit. Press LEFT button if you want to go back to the previous digit. Once finished, press down the OK button to confirm.
- Once your WIFI is connected, the main menu screen will show and the WIFI signal will appear in white at the top left corner.
- Wireless Network (WPS PBC)
- Select this option to search for the WIFI connection. Whilst this has been selected you will have 120 seconds to click the WPS button on your WIFI modem. This will connect your WIFI to your radio without manually writing in the passcode.
- Manual Configuration
- You can manually set the wireless data: DHCP, Enter SSID and Manage.
- Check Network when Power On
- Set it Enable or Disable.
Date & Time
- Set Date and Time
- Manual Setup or Auto Detect
There is the option to manually set the time and date instead of using auto-detect to set this up. Rotate the Select Knob or press the digit buttons to input your desired digit of the month. Once you have got the correct digit, click RIGHT button to go to the day setting. Continues this process with the year, the hour and the minutes. Once the manual set up is complete, press down the OK button to enter. To cancel the format of the date and time, you can alter these settings under the “Date & Time” function. - Set Time Format: To set the time format, 12Hour or 24 Hour.
- Set Date Format: YYYY/MM/DD, DD/MM/YYYY, MM/DD/YYYY
Alarm
- Setting Alarm 1/ Alarm 2
- To set an alarm on your radio, go to “Configuration” settings and scroll through to select “Alarm” or click ALARM button on the remote directly.
- After entering the Alarm setting screen, select “Alarm 1(Turn Off )” or “ Alarm 2(Turn Off )” and choose “Turn On” to activate the alarm.
- Select “Repeat” to choose the regularity of your alarm by pressing down the OK button. You can choose between Everyday, Once or select individual days for the alarm to sound. Once you have made your selection, press the LEFT button to go back to the other alarm settings.
- Select “Time” and turn the Select Knob to highlight the alarm hour. Once you have found the desired hours, press RIGHT button to change the minutes.
- Once the minutes are at the correct value, press RIGHT button to change “AM” or “PM”,then press the OK button to confi rm and go back to alarm settings.
- Now scroll down and select “Sound” by pressing OK button. You can now choose between Beep, melody, Internet Radio, FM, or DAB/DAB+.
- If you are setting your alarm sound as Internet Radio, FM or DAB/DAB+ then you will now be taken through your preset favourite stations. Select your chosen alarm station by pressing down the OK button.
- The alarm symbol will show on the main display screen.
- How to cancel your alarm
- To cancel your alarm, select “Alarm” in Configuration settings or with the ALARM button and select the alarm you wish to turn off .
- Once the alarm is selected, you will have the option to turn off or on. Highlight the “Turn Off option and press the OK button to confirm.
- NOTE: Change the alarm volume by going to “ Alarm Volume” setting in the Alarm setting screen.
- How to turn off your alarm when sounding
When your alarm is sounding, press the ALARM or STANDBY button on the remote control to stop the alarm . If you have set an alarm to sound everyday or more than once, the alarm icon will still remain on display screen. - How to put your alarm on SNOOZE
When your alarm is sounding, press any button except STANDBY or ALARM to stop the sound and put into SNOOZE mode. The SNOOZE function will make the radio sound again after 5 minutes. - Nap Alarm
- After selecting the “Alarm” option in Configuration settings, or the ALARM button on the remote control to select the “NAP Alarm(Turn Off )”.
- Choose how many minutes you would like to have the nap alarm on with the option of : Turn Off , 5 Minutes, 10 Minutes, 20 Minutes, 30 Minutes,60 Minutes, 90 Minutes, 120 Minutes.
- Alarm Volume
- Change the alarm volume by rotating the Volume Knob or the LEFT /RIGHT buttons to change.
- Once the correct sound volume has been chosen, press the OK button to confi rm.
Timer - In “Configuration” settings, select the option for “Timer” and a screen with 00:00 will display.
- To go up in seconds, click the RIGHT button. To go down in seconds, click the LEFT button. Press and hold the LEFT/RIGHT buttons to move through the timer quickly.
- Once you have chosen the correct timer amount, confi rm it by pressing the OK button.
Language
Select your chosen language within the list.
Dimmer - To set the brightness of your radio, go to “Configuration” settings and select “Dimmer” . You can choose “Power Saving” or “Turn On” mode.
Select “Power Saving” mode to change one of your brightness levels with the choice of up to 20 levels. When there is no activity of the radio for 15 seconds, this lower brightness level will set until a button is clicked and the “Turn On” setting will activate. - Select “Turn On” mode to be the brightness for when the radio is active and in use.
- Alternatively, you can alter two brightness settings by pressing DIMMER button on the remote control on front panel directly.
Display
Choose the display to be Color or Monochrome.
Power Management
Select this to configure the radio to go into Standby mode automatically after a set time of inactivity or if there is no WIFI signal. You can select
5/15/30 minutes to go into Standby mode, or you can select “Turn Off ” to ignore this function.
Sleep Timer
- To set a sleep timer, go to “Configuration” settings and select “Sleep Timer”, You can choose Turn Off , 15, 30, 60, 90, 120, 150, 180 minutes.
- Alternatively, you can repeatedly press the SLEEP button on the remote control to switch between sleep times on the top right of the display screen. There is an option between 15, 30, 60, 90, 120, 150, 180 minutes.
- Once Sleep Timer has been selected, the timer amount and a sleep image will show on the top right of the display screen.
Internet Radio
- Set the internet radio: Buff er and Sound Quality.
- Buff er: Configure the buff er time of the music playback: 2/4/8 seconds.
- Sound Quality: Adjust the sound quality as you prefer: High/Low.
Weather
- Set location: Choose and enter your location.
- Temperature Unit: Choose your preferred temperature “Celsius” or “Fahrenheit”.
- Show on Standby: Choose “Off ” or “On” to deactivate or activate the weather forecast display on the standby screen. When you activate the weather forecast display , it will display on the Standby screen every 10 seconds.
FM Setup
- Mode: You can set “Mono” or “Stereo” mode.
- Threshold: Select threshold settings (seek threshold/Stereo threshold).
- (Threshold is to set to the auto-switching between mono and stereo mo-des. When in a week reception place, the system will switch to the mono mode automatically to reduce the background noise of the station, so that to be more clearly listening.)
- Local Radio Setup
Manually set up your location for Local radio rather than allowing the radio to Auto Detect. - Key
In this setting interface, you can select “Alarm”, “Dimmer”, “Equaliser”,
“Local Radio”, “Mode”, “Preset”, “Sleep Timer” and “Timer” to confirm the function of the MODE button on the front panel and the remote control. - Equalizer
Default EQ is normal. You may change it to Flat, Jazz, Rock, Soundtracks, Classical, Pop, News or my EQ. - Resume when power on
Turn on the function for the radio to resume when powered on. Instead, the screen will remain in main menu. - Software Update
Will show here if a software update is available for the radio. If one is available, please select for the update to initiate. - Reset to Default
Select this option to reset your radio and revert all of the settings and presets made. Confirm that you would like to reset the unit and its settings by selecting “YES”.
Internet Radio
Use the LEFT/RIGHT buttons or rotate the Select Knob to choose
<Internet Radio> in the Menu screen, press down the OK button to enter, and there will be multiple options:
My Favorite: Your favorite stations will be saved here for easy listening. You can press the FAV button directly to view your favorite station’s list.
Radio Station/Music: Select this option to browse internet radio stations in the categories of : Global Top 20, Genre, Country/Location, and Highlight. Find stations under relevant categories and select
your chosen internet station by pressing the OK button.
Local Radio: The radio is automatically set up to detect your country’s, Top 10 stations, All stations, plus a variety of genres into categories in alphabetical order. Select the category that you wish to listen to with the OK button and continue browsing until your desired station.
Sleep Radio: Choose from multiple relaxation sounds.
History: Browse through recently listened to stations.
Service: Search Radio Station, Add new Radio Station or App.
- You can use the NUMBER/LETER buttons to search radio station.
- To add a new radio station, use the NUMBER/LETER buttons to highlight the chosen character and click the RIGHT button to move to the next character. To go back to the previous character, press the LEFT button to highlight it. Press down the OK button to search for the internet station.
Save your favorite Internet Radio stations
When you have found your desired station, press and hold the FAV button to go to the “Add to My Favorite” setting screen. Rotate the Select Dial or press the UP/DOWN buttons to choose the preset number and press the OK button to confi rm your option.
FM Radio
The range of FM frequency is from 87.5MHz to 108.00MHz. Extended the antenna to fi nd the strongest signal for each station.
Use the LEFT/RIGHT buttons or rotate the Select Dial to choose <FM > on the Menu screen, then press down the OK button to enter FM screen.
Tuning Station
Press the UP/DOWN buttons on the remote control or on the LEFT/RIGHT buttons on the front panel to adjust the frequency up or down a step of 0.05MHz.
Long press the LEFT/RIGHT buttons on the remote control to skip to the previous or next station of the strongest reception. Once a station has been found, it stops scanning automatically.
Press down the OK button, “Auto Scan” will be shown on the screen. If you choose“YES”,the radio will begin to search stations from low to high frequency. And it will save the stations it found automatically.
Store Station
To save your favorite station, you should listen to this station first, long press the FAV button on the remote control, then use the UP/DOWN buttons or rotate the Select Knob to choose the digit you want to save. Then press down the OK button to confirm the preset.
Recall A Stored Station
- Press the PREVIOUS/NEXT buttons on the remote control to skip to the previous or next preset station.
- Or you can press the FAV button to select the stored station, press the OK button to listen.
DAB/DAB+
Use the LEFT/RIGHT buttons or rotate the Select Knob to choose <DAB/DAB+> on the Menu screen, press down the OK button to enter DAB/DAB+ mode.
On first time using of DAB on your radio, it will begin scanning for DAB stations and will show “Scanning” on the display screen. It will display how many stations have been found as the search continues.
Once all of the available stations have been found, the radio screen will display the choice of available stations. Using the Select Knob to scroll through and highlight chosen station. Select the station by pressing down the OK button.
When you have selected a station, the screen will display a station list and begin to play.
To choose previous or next station, press the UP or DOWN button to scroll accordingly.
When on your chosen station, press the INFO button to show the information on the station. The screen will scroll through information automatically and display genre, MHZ, song playing, KHz and Kbps.
To go back to the list to scroll through manually, press the LEFT button to go back to the list.
Pre-setting your favorite DAB/DAB+ stations
When you have found your desired station, hold down the FAV button for a few seconds to go to the “ Add to My Favorite” screen. Rotate the Select Knob to choose the preset number and press the OK button to confirm.
Alternatively, when you are on the list screen of DAB stations you are
able to highlight the chosen station and hold down FAV button to follow the guidance above.
To view your preset favorite stations, press the FAV button, and use the UP or DOWN button to scroll through the preset list.
Information Center
Use the LEFT/RIGHT buttons or rotate the Select Knob to choose
<Information Center> on the Menu screen, press down the OK button to enter the information Center screen.
Weather Information: To select the weather information for the desired place, first select the continent by using the Select Knob to scroll and the OK button to confirm. Following this, then the country, followed by the town/city.
Once you choose a chosen town/city, the following information will be displayed: current temperature, weather symbol image, and approximate temperature range for the next 5 days.
Financial Information: Select from a range of stock market index’s from around the world. Use the
Select Knob to scroll and the OK button to confirm.
System Information: View system version and wireless information and Spotify version. If wireless information is selected, information such as WIFI’s signal strength can be found.
Spotify Connect
The product is compatible with Spotify Connect, allowing it to act as wireless speakers controlled by the Spotify App available for iOS, Android smart devices, and a desktop client for PCs. To enter Spotify Connect mode, press the MENU button to enter main menu screen, rotate the Select Knob to cycle through the item until the Spotify logo is highlighted and briefl y press the Select Knob to select.
NOTES: A Spotify Premium account is required to use Spotify Connect.
NOTES: Ensure the product has the <Keep Network Connected> option turned On. This will enable Spotify streaming to the unit when in
Sleep or a non-network mode such as DAB/DAB+, FM and Aux-In.
When Spotify Connect mode is selected, before a connection with a Spotify App is established, the message <Waiting for Users> is displayed.
NOTES: It may take up to 10 seconds for album
artwork to be reproduced on the display.
How to use Spotify Connect
Listen out loud with Spotify Connect
- Connect your Sharp DR-I470 device to your wifi network.
- Open up the Spotify app on your phone, tablet or laptop using the same wifi network.
- Play a song and select Devices Available.
- Select your Sharp DR-I470 and start listening.
For more information on how to set up and use Spotify Connect please visit: www.spotify.com/connect
The Spotify Software is subject to third party licenses found here: https://www.spotify.com/connect/third-party-licenses
To establish a connection between the Spotify App and the radio, the devices must be connected to the same WiFi network.
To expand the displayed artwork on the unit, press the MENU button in briefl y. Press again to return to the standard display.
NOTES: Once a connection has been established, the Spotify account is linked to both the App and the unit, allowing DR-I470 to be connected to.
Controlling Spotify from DR-I470, you can change volume, play or pause the audio, and jump forwards and backwards through your playlist using the remote control.
Changes made by the remote are reflected on the Spotify Connect App and the unit.
As long as the Spotify App is connected to the radio on the same network, and <Keep network connected> has been selected, you can usually power on the radio when you start playing from the Spotify App.
Aux Operation
AUX-IN
Use the LEFT/RIGHT buttons or rotate the Select Knob to choose <AUX> on the Menu screen, press down the OK button to enter the AUX mode.
Plug an AUX cable into your radio and connect cable via AUX-IN port on the back of the radio. Begin playing audio from your device and this should play on the radio when in AUX mode.
Line Out (Headphone)
On the rear panel of the radio, the Headphone jack allows for listening to the audio from your radio. Begin playing audio from the Internet Radio, Media Center, AUX or Bluetooth setting.
Bluetooth
Use the LEFT/RIGHT buttons or rotate the Select Knob to choose
<Bluetooth> on the Menu screen, press down the OK button to enter the Bluetooth mode.
- Go to your device settings to connect your device to the radio via Bluetooth.
- Select the name “SHARP DR-I470” in the found list from your device. Once successfully connected, The radio will sound “Connected”, and “Bluetooth Connected” will appear on the display.
- Select your chosen audio on your device and play.
- Now you can enjoy the music in your device.
- To disconnect between each other, switch to another playback mode, or turn off the Bluetooth function in your device.
AirMusic Control – SHARP Smart Control App
Once the user downloads and installs the SHARP Smart Control app on their mobile device, the app serves for the remote managing of the device. Please note, the DR-I470 radio and the mobile device with the SHARP Smart Control app need to be connected to the same network, otherwise the two devices won’t be able to connect with each other. Open the app and there will be displayed list of available devices.
Click on the appropriate to connect.
NOTES: the device will automatically adjust language of the DR-I470 radio to the language set in the mobile device with SHARP Smart Control app.
SHARP Smart Control App QR code is available in: Internet Radio > Service > App The app lets user control the device via mobile phone:
Choose appropriate tab to manage the radio.
- Press icon to display side tab. Select Settings to enter more options (change device name, check software updates, scan for other devices or display more information)
- Press


- Turn off the device
- OK button
- Mode button (change the playback mode)
- Menu button
- Display favorite stations
- Key button (same function as the MODE button on the device)
- Sleep timer
- Alarm
- Dimmer
- Previous
- Play/Pause
- Next
- Numeric buttons
- Equalizer settings
- Mute
- Volume +
- Volume –
- Direction buttons
- Back to app main menu
- Press
- Press
Press - Press
- Press


Troubleshooting
This product does not contain any parts that are serviceable by the user. In case of a fault, contact the manufacturer or authorised service department. Exposing the internal parts inside the device may endanger your life. The manufacturer’s guarantee does not extend to faults caused by repairs carried out by unauthorized third parties.
No Sound Cause
- Volume not turned up.
Solution - Adjust the main volume knob.
No sound from Bluetooth connection Solution - Check whether external device requires password“0000″ to start with.
WiFi not connecting Solution - Ensure WIFI mode is selected in settings and the correct passcode is being entered for the WIFI modem.
Static Sound Cause - Signal reception too low.
Solution - Adjust the antenna or move the unit to a stronger signal location.
Sound is distorted Cause - Volume is too high
Solution - Reduce the volume
Desired station not found Cause - Weak signal
Solution - Use the Manual Tune function.
NO DAB functions Cause - No DAB coverage in your area.
- Poor reception
Solution - Adjust the position of the aerial.
The display is blank. Cause - This may occur if the broadcaster changes the label of a service or removes a label while tuned.
Solution - The radio will try to retune.
- Perform a scan.
NO Power Cause - The adaptor is not connected to the wall outlet.
Solution - Make sure the adaptor is plugged.
Technical specification
| Model | DR-I470 Pro | ||
| Output Power | 2x7W (RMS) | ||
| Power Consumption (max.) | 28W | ||
| Power Consumption (standard) | 8W | ||
| Power Consumption Standby | <1W | ||
| FM Frequency | 87.5-108MHz | ||
| DAB+ Frequency | 174.928-239.200MHz | ||
| Bluetooth | |||
| Version | V2.1+ EDR | ||
| Frequency bands | 2402 MHz ~ 2480 MHz | ||
| Maximum power transmitted | 4dBm | ||
| Power Adapter | |||
| Model name: | FJ-SW1202000N | ||
| Input: | AC 100-240V ~ 50/60Hz, 0.6A Max | ||
| Output: | DC 12V ⎓2000mA | ||
| Manufacturer: | SHENZHEN FU JIA APPLIANCE CO., LTD B1,Xujing chang Industrial Park, Haoye Road, Fuyong 518103 Shenzhen, China | ||
| WIFI | |||
| Wifi connection: | 802.11 b/g/n; STA/AP/AP Client | ||