Bosch MUZ5MM1 Universal Multimixer Attachment User Manual


BOSCH MUZ5MM1 Universal Multimixer Attachment

Safety
Observe the following safety instructions.
General information
- Read this instruction manual carefully.
- Observe the instructions for the base unit.
Intended use
Only use the accessories:
- with a kitchen machine from the same series MUMS2, MUMS4,
- MUM5.
- With genuine parts and accessories.
- For cutting up, chopping, mixing, puréeing, and emulsifying liquid or semi-solid food.
- For cutting up, shredding, and grating food.
Safety instructions
WARNING ‒ Risk of cutting!
- The cutting discs have sharp blades and edges.
- Only take hold of the cutting discs by the edge.
- Never touch the sharp blades and edges with bare hands.
WARNING ‒ Risk of injury!
- Rotating drives, tools or accessory parts may cause injury.
- Do not reach into the filling shaft.
- Only use the pusher to push down ingredients.
- Improper use may cause injuries.
- Never assemble the accessories on the base unit.
- Only attach and remove accessories once the drive has stopped and the appliance has been unplugged.
- The accessories should only be used in the intended operating position.
Avoiding material damage
ATTENTION!
- Improper use may cause material damage.
- Do not process food that contains hard components, e.g. bones, gristle, or stones.
- Do not insert objects into the filling shaft or housing, e.g. wooden spoons.
- Before use, check the filling shaft and housing for foreign objects.
- Do not apply great force with the pusher.
Unpacking and checking
Find out here what you need to note when unpacking the appliance.
Unpacking the accessories and parts
- Take the accessories out of the packaging.
- Take all other parts and the accompanying documents out of the packaging and place them to hand.
- Remove any packaging material.
- Remove any stickers or film.
Contents of package
- After unpacking all parts, check for any damage in transit and the completeness of the delivery.
- Universal mixer
- Universal blade
- Cutting discs
- Disc holder
- Accompanying documents
Cleaning the accessories before using them for the first time
- Clean all parts that come into contact with food before using it for the first time. → “Cleaning and servicing”,
- Put the cleaned and dried parts out ready for use.
Familiarising yourself with the accessories
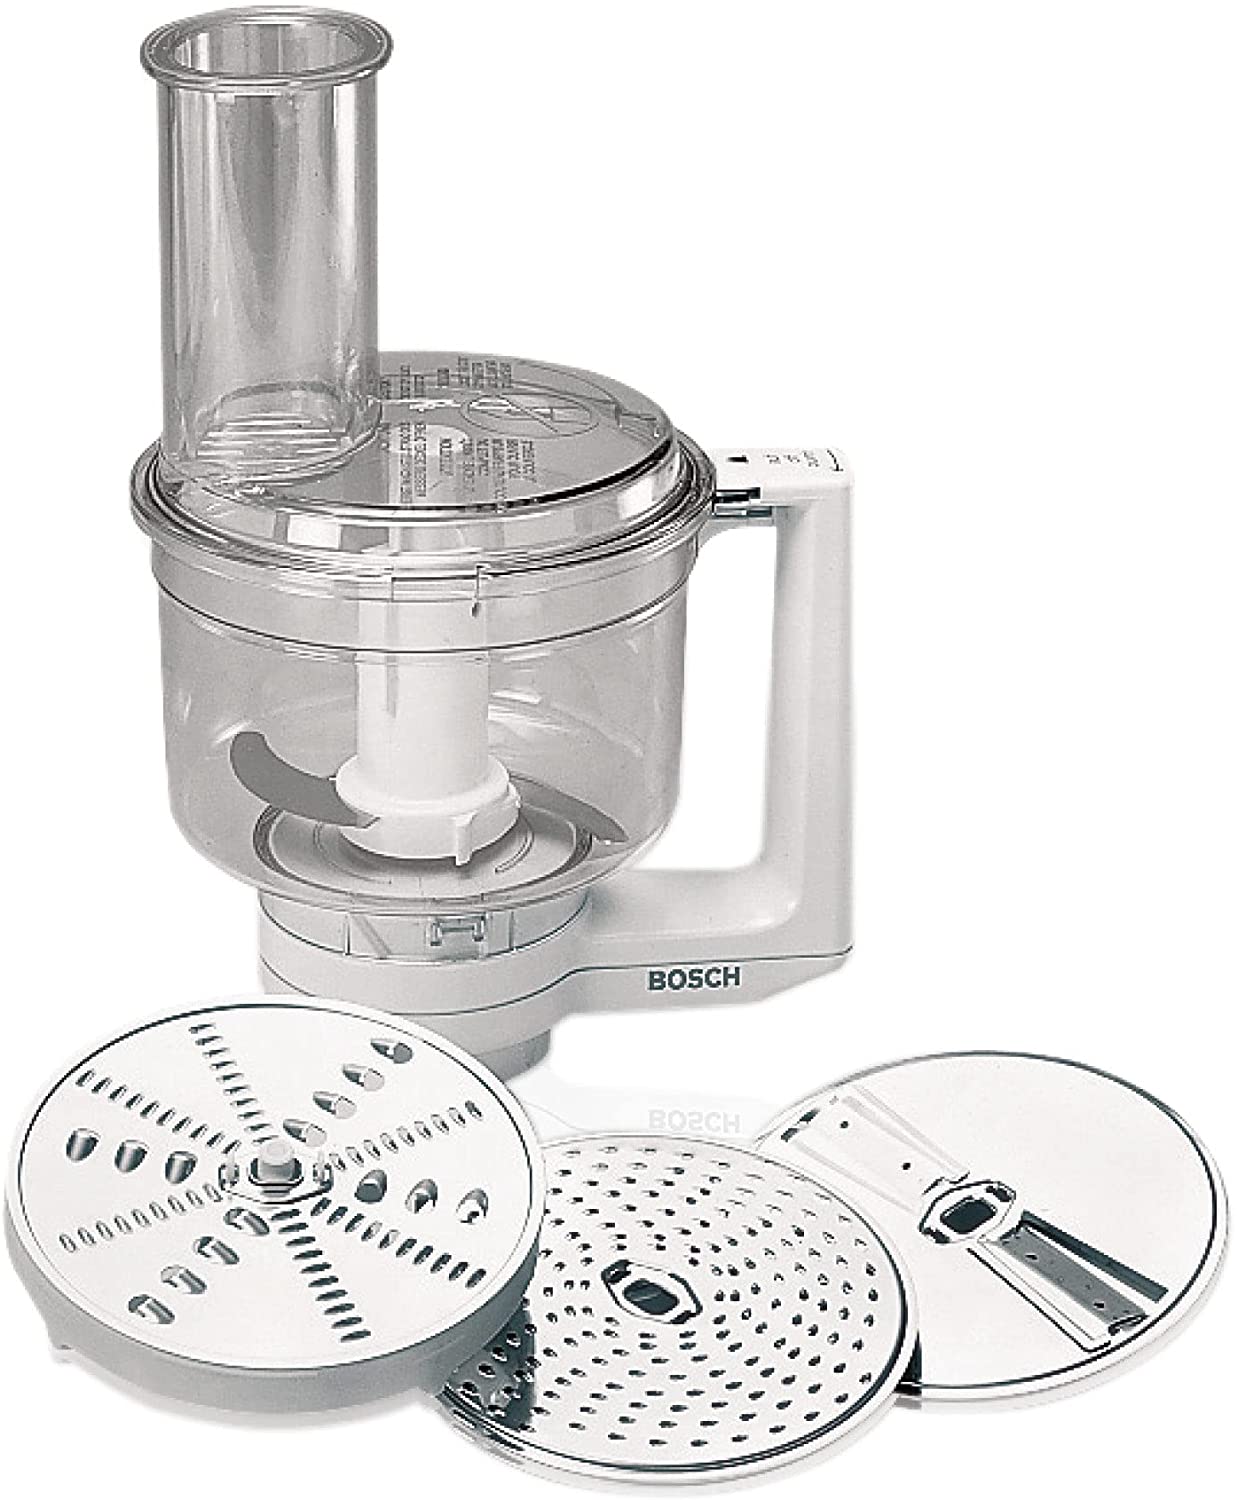
Components
You can find an overview of the parts of your accessories here.
- Base with handle
- Container
- Lid with integrated filling shaft
- Pusher and measuring jug
- Universal blade
- Blade guard
- Reversible cutting disc, thick/thin
- Reversible shredding disc, coarse/fine
- Fine grating disc
- Disc holder
Symbols
You can find an overview of the symbols used on your accessories here.

Overview of cutting discs
You can find an overview of the cutting discs and their purposes here.
Designation
- Reversible cutting disc, thick/thin
- Reversibleshreddingdisc,coarse/fine
- Fine grating disc
Use
- Cutting food into thick or thin slices, e.g. fruit and vegetables. Marking: ¡ 1 = thick slices ¡ 3 = thin slices Note: Not suitable for processing hard cheese, bread, rolls or chocolate. Tip: Only cut up cooked potatoes once they have cooled down.
- Shredding food coarsely or finely, e.g. fruit, vegetables, or cheese as Gouda or Edam. Marking: ¡ 2 = coarse side ¡ 4 = fine side Note: Not suitable for processing nuts or hard cheese, e.g. Parmesan. Tip: Shred soft cheese with the coarse side only.
- Shredding food medium-fine, e.g. raw potatoes or hard cheese such as Parmesan.
- Not suitable for processing soft cheese and cheese slices.
Overload protection
The overload protection system prevents the motor and other components from being damaged through being overloaded. If the disc holder is overloaded or blocked, its shaft will break at the predetermined breaking point. Note: Spare parts with a predetermined breaking point are not covered by our warranty obligations. A new disc holder is available from customer service under order number 00088256.
Lid catch
The Multi Mixer can only be fitted on the appliance and operated if it has been fully assembled and properly closed with the lid. The lid cannot be opened if the Multi Mixer is still attached to the food processor.
Basic operation
Overview of base units
This accessory can be used with different base units. You can prepare your kitchen machine as shown.
- Kitchen machine from the MUMS4 or MUM5 series
- Kitchen machine from the MUMS2 series
Using the universal blade
- Place the container on the base.
- Observe the recesses on the base.
- Rotate the container anticlockwise until it engages.
- Take the universal blade out of the blade guard and place the universal blade in the container.
- Add the food to the container.
- Place the lid on the container.
- Markings and must match up.
- Rotate the lid anticlockwise until it engages.
- Markings and must match up.
- Place the Multi Mixer on the drive 3 as shown.
- Markings and must match up.
- Push the Multi Mixer down and rotate anticlockwise until it engages.
Insert the pusher into the filling shaft. - Insert mains plug.
- Set the rotary switch to the recommended speed.
- Process the ingredients until you achieve the required result.
- Set the rotary switch to.
- Wait until the appliance stops.
- Unplug the mains plug.
- Rotate the Multi Mixer clockwise and remove.
- Rotate the lid clockwise and remove.
- Take the universal blade out of the container.
- Empty the container.
- Clean all parts immediately after use so that residues do not dry on.
- Using the cutting discs
- Place the container on the base.
- Observe the recesses on the base.
- Rotate the container anticlockwise until it engages.
- Take hold of the required cutting disc by the edge and fit onto the disc holder with the side you require facing up.
- Insert the disc holder with the cutting disc into the container.
- Place the lid on the container.
- Markings and must match up.
- Rotate the lid anticlockwise until it engages.
- Markings and must match up.
- Place the Multi Mixer on the drive 3 as shown.
- Markings and must match up.
- Push the Multi Mixer down and rotate anticlockwise until it engages.
- Insert mains plug.
- Set the rotary switch to the recommended speed.
- Insert the food into the filling shaft and press down with the pusher, applying light pressure.
- Stop processing when all food has been processed. the food in the container almost reaches the disc holder.
- Set the rotary switch to Wait until the appliance stops.
- Unplug the mains plug.
- Rotate the Multi Mixer clockwise and remove.
- Rotate the lid clockwise and remove.
- Take the disc holder with the cutting disc out of the container.
- Empty the container.
- Clean all parts immediately after use so that residues do not dry on.
Cleaning and servicing
Cleaning products
Find out here what cleaning agents are suitable for your accessories.
ATTENTION!
- Using unsuitable cleaning agents or incorrect cleaning may damage the accessories.
- Do not use cleaning agents containing alcohol or spirits.
- Do not use sharp, pointed, or metal objects.
- Do not use abrasive cloths or cleaning agents.
Overview of cleaning
- Clean the individual parts as indicated in the table. → Fig. 38
- When processing food such as carrots, plastic parts may become discolored. Remove discoloration with a soft cloth and a few drops of cooking oil.
Application examples
You can find application examples that have been specially developed for your accessory here.
Application examples for the universal blade
Observe the comments and figures in the table.
Application examples for the cutting discs
Sample recipe
You can find a sample recipe that has been specially developed for your appliance here. Note: Your model is equipped with a 4- or 7-level rotary switch depending on the features of the appliance. The recommended speeds for the 4-level rotary switch are always shown in brackets in these instructions for use. The ingredient quantities and processing times are tailored to the type of appliance. The appliance type can be found on the rating plate.

Honey cake with apples Basic recipe:
- 3 eggs
- 60 g butter
- 100 g plain white flour
- 60 g ground walnuts
- 1 tsp cinnamon
- 2 tbsp vanilla sugar
- 1 tsp baking powder
- 1 apple
- Separate the eggs and whisk the egg whites until stiff.
- Beat the egg yolk with the sugar. Add the softened butter and 115 g of the prepared honey-apple mixture.
- Mix the rest of the ingredients in a separate bowl, add to the moist ingredients and stir in.
- Carefully fold in the beaten egg whites with a spatula.
- Line a rectangular loaf tin (35 cm x 11 cm) with greaseproof paper and add the prepared mixture.
- Peel the apple and cut it into slices. Arrange the slices of apple on the cake.
- Preheat the oven to 180 °C and bake the cake for 30 minutes.
