Beko BUFR2715WH 28-Inch Upright Freezer User Manual


beko BUFR2715WH 28-Inch Upright Freezer

Congratulations on the purchase of your new Beko Freezer! This freezer has been manufactured in modern facilities with the utmost care and meticulous quality controls. We are so confident in the quality of this product that we back it with two-year parts and labor warranty, and five years on the sealed system! Please read this entire user manual before using your product, to ensure you understand all of its features and benefits and know how to operate it properly. This manual should be kept in an easily accessible location and passed on to any future owners. This guide will help you use the product quickly and safely.
Please read the user guide carefully before installing and operating the product.
- Always observe the applicable safety instructions.
- Please read any other documents provided with the product.
- Keep in mind that this user guide may apply to several product models. Please note the various symbols used throughout this manual and what they represent.
- Important in useful tips.
- Risk of life and prope.
- Risk of electric shock.
- The product is made of rec materials, in accordance with the National E Legislation.
| Fill this out and keep for future reference Model | |
| Serial No | |
| Date of Purchase | |
| Original Purchaser | |
| Dealer | |
| City | |
| State | |
| Zip Code | |
| Country | |

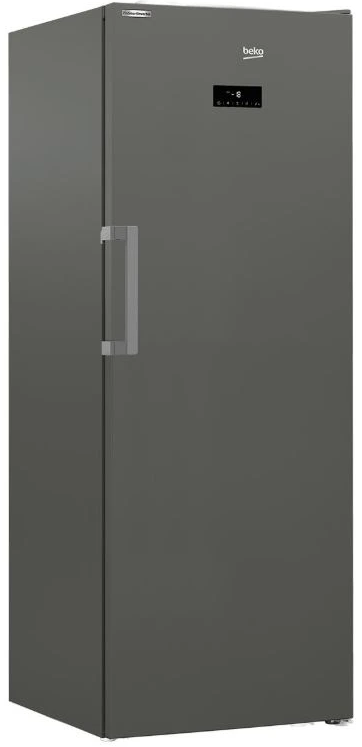
Your Freezer

- Icebox / Ice maker compartment
- Control Panel
- Door shelf
- Drawers
- Adjustable front feet
Figures in this user manual are given as an example and may not match the product exactly. If the relevant parts are not available in the product you purchased, the figure applies to other models.
Important instructions for safety and environment
This section contains safety instructions that will help protect you from the risk of personal injury or property damage. Failure to follow these instructions shall void any warranty.
WARNING:
- Keep ventilation openings, in the appliance enclosure or in the built-in structure, clear of obstruction.
- Do not use mechanical devices or other means to accelerate the defrosting process, other than those recommended by the manufacturer.
- Do not damage the refrigerant circuit.
- Do not use electrical appliances inside the food storage compartments of the appliance, unless they are of the type recommended by the manufacturer.
General safety
- The product can be used by children at and above 8 years old and by persons whose physical, sensory or mental capabilities were not fully developed or who lack experience and knowledge provided that they are supervised or trained on the safe usage of the product and the risks it brings out. Children must not play with the product. Cleaning and maintenance should not be performed by children unless they are supervised.
- Unplug the product if a failure occurs while it is in use.
- If the product has a failure, it should not be operated unless it is repaired by the Authorized Service Agent. There is the risk of electric shock!
- Connect the product to a grounded outlet protected by a fuse complying with the values in the rating plate. Have the grounding installation made by a qualified electrician. Our company shall not be liable for any damages that may arise when the product is used without grounding in accordance with the local regulations. Do not tuck the power cord under the product.
- Do not put heavy items on the power cord. The power cord should not be bent, crushed, and come into contact with any heat source.
- Never wash the product by spreading or pouring water onto it! There is the risk of electric shock!
- Never touch the plug with wet hands!Never unplug by pulling on the cable, always pull out by grabbing the plug.
- Do not plug the freezer into a loose wall receptacle.
- Never connect your freezer to electricity-saving systems. Such systems are harmful for the product.
- Unplug the product during maintenance, cleaning and repairing procedures.
- Always have the installation and repairing procedures carried out by the Authorized Service Agent. The Manufacturer shall not be held liable for damages that may arise from procedures carried out by unauthorized persons.
- Do not put bottled and canned liquid beverages in the freezer compartment. They may burst!

Important instructions for safety and environment
- Never use steam and steam-assisted cleaning materials to clean or defrost the freezer. Steam will cause short circuit or electric shock since it would get into contact with the electrical parts in the freezer!
- Never use the parts on your freezers such as the door and drawer as a means of support or step. This will cause the product to tip over or parts of it get damaged.
- Do not damage the cooling circuit with drilling or cutting tools.The refrigerant that might blow out when the gas channels of the evaporator, pipe extensions or surface coatings are punctured may cause skin irritations and eye injuries.
- Do not cover or block the ventilation holes on the freezer with any material.
- Do not use gaseous sprays near the product since there is the risk of fire or explosion!
- Flammable items or products that contain flammable gases (e.g. spray), as well as explosive materials, should never be kept in the appliance.
- Do not place containers filled with liquid on top of the product. Spilling water on an electrical component may cause electric shocks or risk of fire.
- Do not store products (vaccines, heat-sensitive medicines, scientific materials and etc.) that require precise temperature control in the freezer.
- If you will not operate the product for a long period of time, unplug and unload the food in it.
- If the product is equipped with blue light, do not look at the blue light with optical tools.
- Do not overload the product. It may fall when the door is opened, and cause injury or damage. Similar problems may occur in case of putting things on top of the product.
- Pay attention not to have your hand or any part of your body get caught by the moving parts inside the product.
HCA warning
- If your product’s cooling system contains R600a:
This gas is flammable. Therefore, pay attention to not damaging the cooling system and piping during usage and transportation. In the event of damage, keep your product away from potential fire sources that can cause the product catch a fire and ventilate the room in which the unit is placed.
- You can identify the type of gas used in your product by referring to the model/serial tag located on the left wall of the upper compartment.
- WARNING: Never dispose the product in fire.
For products with a water dispenser
- Pressure for cold water inlet shall be maximum 90 psi(620 kPa). If your water pressure exceeds 80 psi (550 kPa), use a pressure limiting valve in your mains system. If you do not know how to check your water pressure, ask for the help of a professional plumber.
- If there is risk of water hammer effect in your installation, always use water hammer prevention equipment in your installation. Consult professional plumbers if you are not sure if there is a water hammer effect in your installation.
- Do not install on the hot water inlet. Take precautions against of the risk of freezing of the hoses. Normal operating water temperatures should be between 33°F (0.6°C) minimum and 100°F (38°C) maximum.
- Use only potable water.
Intended use
- This product has been designed for domestic use. It is not suitable for commercial use and it must not be used out of its intended use.
- Product must be used only for storing food.
- The manufacturer waives any responsibility arisen from incorrect usage or transportation.
Children’s safety
- Children must be supervised to prevent them from tampering with the product.
- DANGER: Risk of child entrapment. Before you throw away your old freezer or freezer:
- Take off the doors.
- Leave the shelves in place so that children may not easily climb inside.
Package information
- Packaging materials of the product are manufactured from recyclable materials in accordance with our National Environment Regulations. Do not dispose of the packaging materials together with the domestic or other wastes. Take them to the packaging material collection points designated by the local authorities.
- Contact qualified personnel for disposal.
Installation

| A | B | C | D | E | F | G |
| 75 5 /16”(1912 mm) | 73 7/16”(1865 mm) | 75 7/16” (1915 mm) | 31 5/8” ( 803 mm) | 1 1/4” (31 mm) | 9/16” (14 mm) | 11/16” (17mm) |

| H | I | J | K | L | M |
| 31 7/8”(809 mm) | 55 5/8”(1413 mm) | 29 5/16” (744 mm) | 1 3/16” ( 29 mm) | 31 5/8” (803 mm) | 27 9/16” (700mm) |
Before Installation
- Before installing, be sure the opening measurements are sufficient to receive the product and that the appropriate electrical and plumbing connections are present.
- Refer to the nearest Authorized Service Agent for installation of the product. To make the product ready for use, make sure that the electricity installation is appropriate before calling the Authorized Service Agent. If not, call a qualified electrician to have any necessary arrangements carried out.
- Place the product on an even floor surface to prevent jolts.
- Install the product at least 12’’(30cm) away from heat sources such as hobs, heater cores and stoves and at least 2’’(5 cm)away from electrical ovens.
- Product must not be subjected to direct sun light and kept in humid places.
- Appropriate air ventilation must be provided around your product in order to achieve an efficient operation. If the product is to be placed in a recess in the wall, pay attention to leave at least 2’’(5 cm) distance with the ceiling and side walls.
- Do not install the product in places where the temperature falls below 23 °F (-5°C).
Installing the plastic wedges
Plastic wedges supplied with the product are used to create the distance for the air circulation between the product and the rear wall.
- To install the wedges, remove the screws on the product and use the screws supplied together with the wedges.
- Insert the 2 plastic wedges onto the rear ventilation cover as illustrated in the figure.

Adjusting the feet
After moving the freezer into place, we recommend lowering the feet to secure the product in place. You can also adjust the feet if the product is not balanced. Twist the feet in the desired direction according to the illustration below. Adjusting the feet can also be used to align the doors.

Electrical connection
WARNING:
- Do not make connections via extension cables or multi-plugs.
- Damaged power cable must be replaced by the Authorized Service Agent.
If two coolers are to be installed side by side, there should be at least 1 5/8” (4 cm ) distance between them.
- Our company shall not be liable for any damages that will arise when the product is used without grounding and electrical connection in accordance with the national regulations.
- Power cable plug must be within easy reach after installation.
- Do not extension cords or cordless multiple outlets between your product and the wall outlet.
Hot Surface Warning!
Side walls of your product is equipped with refrigerant pipes to improve the cooling system. Refrigerant with high temperatures may flow through these areas, resulting in hot surfaces on the side walls. This is normal and does not need any servicing. Please pay attention while touching these areas.
Connecting the water hose to the freezer
- Remove the valve channel cover (A) from the water inlet valve.
- Connect the water line (C) to the inlet valve (B) and tighten by hand to secure it. It is not necessary to use pliers, but if there is a leak, you may tighten slightly with a pair of pliers.

Preparation
Things to be done for energy saving
Connecting the product to electric energy-saving systems is risky as it may cause damage on the product.
- Do not leave the doors of your freezer open for a long time.
- Do not put hot food or drinks in your freezer.
- Do not overload the freezer, cooling capacity will fall when the air circulation inside is hindered.
- In order to store the maximum amount of food in the freezer compartment, the cinematic, available in the freezer compartment and easily removable by hand, shall be taken out. Net volume and energy consumption values declared on the power data plate of your freezer are measured and tested by removing the icematic. Do not remove the shelves inside the freezer compartment and on the door of the freezer compartment shall not be removed and they shall always be used they provide ease of use and efficiency in energy consumption.
- Airflow should not be blocked by placing foods on the sides of the freezer compartment fan. A minimum distance of 1 1/4”(3 cm) shall be provided on the sides of the protective fan cover.
- The baskets/drawers that are provided with the chill compartment must always be in use for low energy consumption and for better storage conditions.
- Food contact with the temperature sensor in the freezer compartment may increase the energy consumption of the appliance. Thus any contact with the sensor(s) must be avoided.
- Depending on the features of your product, thawing frozen food in the freezer compartment will both provide energy savings and preserve the food quality.
- Do not allow contact of the food with the freezer compartment temperature sensor shown in the figure below.

Initial use
Before starting to use your freezer, ensure that all preparations are made in accordance with the instructions in sections “Instructions for safety and environment” and “Installation”.
- Run the product without putting any food for 6 hours and do not open its door unless certainly required.
- You will hear a noise when the compressor starts up. The liquids and gases sealed within the refrigeration system may also give rise to noise, even if the compressor is not running and this is quite normal.
- Front edges of the product may feel warm. This is normal. These areas are designed to be warm to avoid condensation.
- In some models, the instrument panel automatically turns off 5 minutes after the door has closed. It will be reactivated when the door has opened or pressed on any key.
Operating the product
Indicator panel

On/Off Indicator:
This icon come on when the freezer is turned off. All the other icons turn off.
Economic Usage Indicator:
This icon comes on when the Freezer Compartment is set to -18°C 0 °F which is the most economical set value. Economic Usage Indicator turns off when the Quick Freezer or Quick Freeze function is selected.
Temperature Setting Indicator:
Indicates the temperature set for the Freezer Compartment.
Power Failure / High temperature / Error status indicator:
This indicator illuminates in the case of a power failure, high temperature, or error codes. If the temperature in the compartment rises to a critical level for frozen food, the highest temperature reached will flash in the display, along with this indicator. The indicator can be cleared by pressing the “Alarm Off” key. If an “E” and a number(s) appear with this indicator, it is an error code and should be addressed by an authorized technician.
Eco Extra Indicator:
This icon lights up when the Eco Extra function is activated.
Key Lock Indicator:
This icon lights up when the Key Lock mode is activated.
Key Lock Mode:
Press and hold this key to activate “Key Lock.” When activated none of the display keys will functin, and the “Key Lock” icon will be illuminated. Press and hold this key again for 3 seconds to exit the Key Lock mode.
Alarm Off
In case of a power failure, high-temperature warning, or error code, you may silence the audible alarm by pressing this key. In the case of a high-temperature warning, the food should be checked to ensure it has not defrosted. In the case of an error code, an authorized technician should inspect the product
Eco Extra Function:
Press the Eco Extra key for 3 seconds to activate Eco Extra Function when going on holiday for instance. The freezer will start operating in the most economic mode at around 6 hours later and the economic usage indicator will turn on when the function is active.
Freezer Set Function:
This function allows you to change the Freezer compartment temperature setting. Press this key to set the temperature of the freezer compartment to 0 °F ,-2 °F , -4 °F, -5 °F, -7 °F, -9 °F and -11
°F(-18°C, -19°C, -20°C, -21°C, -22°C, -23 °C and -24°C), respectively. To change the temperature scale between Fahrenheit and Celsius, press and hold this key for 3 seconds, until the display indicates the change.0 °F ,-2 °F , -4 °F, -5 °F, -7 °F, -9 °F and -11 °F(-18°C, -19°C, -20°C, -21°C, -22°C, -23 °C and -24°C).
Quick Freeze Function:
Press this key to activate the Quick Freeze function. This will drop the temperature down to -16ºF (-26ºC) for 25 hours. After this time it will return to the previously set temperature. When activated the Quick Freeze icon (snowflake) will be illuminated. It can be manually canceled by pressing the Quick Freeze key again.
On/Off Function:
This function allows you to make the Freezer turn off when pressed for 3 seconds.The freezer could be turned on by pressing On/Off key for 3 seconds again .
Energy Saving Indicator :
If the product doors are kept closed for 1 minute energy saving function is automatically activated and energy saving symbol is illuminated. When energy saving function is activated, all symbols on the display other than energy saving symbol will turn off. When the Energy Saving function is activated, if any key is pressed or the door is opened, energy saving function will be canceled and the symbols on display will return to normal. Energy saving function is activated during delivery from factory and cannot be canceled.
Quick Freeze Indicator :
This icon comes on when the Quick Freeze function is on.
Operating the product
| Temperature Setting | Explanations |
| 0 °F(-18°C) | This is the normally recommended setting. |
| -4 °F (-20 °C) -7 °F (-22°C ) or -11 °F (-24°C ) |
These settings are recommended when the ambient temperature exceeds 86 °F (30°C). |
| Quick Freeze | Use when you wish to freeze your food in a short time. Your freezer will return to its previous mode when the process is over. |
| 0 °F(-18°C )or colder |
Use these settings if you think that your freezer compartment is not cold enough because of the hot ambient conditions or frequent opening and closing of the door. |
Recommendations for preserving the frozen food
The compartment shall be set to 0 °F (-18°C) at least.
- Put packages in the freezer as quickly as possible after purchase without allowing the to thaw.
- Check whether the “Use By” and “Best Before” dates on the packaging are expired or not before freezing it.
- Ensure that the package of the food is not damaged.
Deep-freeze information
- It is possible to preserve food for a long time at 0ºF (-18ºC) or lower temperatures.
- Boil vegetables and drain their water before freezing to ensure optimal freezing conditions. After draining the water, puth them in air-tight packages before placing them in the freezer.
- Foods such as bananas, tomatoes, lettuce, celery, boild eggs, and potatoes are not suitable for freezing. They will not be spoiled so that they present a health risk, but their nutritional value and taste will be negatively affected.
Door open
warning (This feature is optional)
An audio warning signal will be given when the door of your product is left open for at least 1 minute. This warning will be muted when the door is closed or any of the display keys (if any) are pressed.
Door open warning is given to user both visually and acoustically. If the warning continues for 10 minutes, interior lights will be turned off.
Changing the door opening direction
Door opening direction of your freezer can be changed according to the place you are using it.If this is necessary, please call your nearest Authorized Service.
Maintenance and cleaning
The life of the product is extended and common problems are reduced if it is cleaned regularly.
WARNING: Unplug the product before cleaning it.
- Never use gasoline, benzene or similar substances for cleaning purposes.
- Never use any sharp and abrasive tools, soap, household cleaners, detergent and wax polish for cleaning.
- Dissolve one teaspoon of baking soda in 1 pint of water. Soak a cloth with the solution and wring it thoroughly. Wipe the interior of the freezer with this cloth and dry thoroughly.
- Make sure that no water enters the lamp housing and other electrical items.
- If you will not use the freezer for a long period of time, unplug it, remove all food inside, clean it and leave the door ajar.
- Check regularly that the door gaskets are clean. If not, clean them.
- To remove door and body shelves, remove all of its contents.
- Remove the door shelves by pulling them up. After cleaning, slide them from top to bottom to install.
- Never use cleaning agents or water that contain chlorine to clean the outer surfaces and chromium-coated parts of the product. Chlorine causes corrosion on such metal surfaces
Avoiding bad odors
Materials that may cause odor are not used in the production of our freezers. However, due to inappropriate food preserving conditions and not cleaning the inner surface of the freezer as required can bring forth the problem of odor . Pay attention to following to avoid this problem:
- Keeping the freezer clean is important. Food residuals, stains, etc. can cause odor . Therefore, clean the freezer with baking soda dissolved in water every 15 days. Never use detergents or soap.
- Keep the food in closed containers. Microorganisms spreading out from uncovered containers can cause unpleasant odors.
- Never keep the food that is past its expiration date or has spoiled in the freezer.
Protecting the plastic surfaces
Do not put liquid oils or oil-cooked meals in your freezer in unsealed containers as they damage the plastic surfaces of the freezer. If oil is spilled or smeared onto the plastic surfaces, clean and rinse the relevant part of the surface at once with warm water.
Troubleshooting
Check this list before contacting a servicer. Doing so will save you time and money. This list includes frequent complaints that are not related to faulty workmanship or materials. Certain features mentioned herein may not apply to your product.
The freezer is not working
- The power plug is not fully seated. >>> Plug it in outlet completely into the socket.
- The fuse connected to the socket powering the product or the main fuse is blown. >>> Be sure the unit is turned on. A single red light in the display means the product is plugged in but not turned on. Press and hold the Power key for three seconds to turn the unit on.
Compressor is not working
- In case of sudden power failure or pulling the power plug off and putting back on, the gas pressure in the product’s cooling system is not balanced, which triggers the compressor thermic safeguard. The product will restart after approximately 6 minutes. If the product does not restart after this period, contact a servicer.
- Defrosting is active. >>> This is normal for a fully-automatic defrosting product. The defrosting is carried out periodically.
- The product is not plugged in. >>> Make sure the power cord is plugged in.
- The temperature setting is incorrect. >>> Select the appropriate temperature setting.
- The power is out. >>> The product will continue to operate normally once the power is restored.
The freezer’s operating noise is increasing while in use
The product’s operating performance may vary depending on the ambient temperature variations. This is normal and not a malfunction.
The freezer runs too often or for too long
- The new product may be larger than the previous one. Larger products will run for longer periods.
- The room temperature may be high. >>> The product will normally run for long periods in higher room temperature.
- The product may have been recently plugged in or a new food item is placed inside. >>> The product will take longer to reach the set temperature when recently plugged in or a new food item is placed inside. This is normal.
- Large quantities of hot food may have been recently placed into the product. >>> Do not place hot food into the product.
- The doors were opened frequently or kept open for long periods. >>> The warm air moving inside will cause the product to run longer. Do not open the doors too frequently.
- The freezer door may be ajar. >>> Check that the doors are fully closed.
- The product may be set to a temperature too low. >>> Set the temperature to a higher degree and wait for the product to reach the adjusted temperature.
- The freezer door washer may be dirty, worn out, broken or not properly settled. >>> Clean or replace the washer. Damaged / torn door washer will cause the product to run for longer periods to preserve the current temperature.
Shaking or noise
- The ground is not level or firm. >>> If the product is shaking when moved slowly, adjust the feet to balance the product. Also make sure the ground is sufficiently firm to bear the product.
- Any items placed on the product may cause noise. >>> Remove any items placed on the product.
The product is making noise of liquid flowing, spraying etc
The product’s operating principles involve liquid and gas flows. >>> This is normal and not a malfunction.
There is sound of wind blowing coming from the product
The product uses a fan for the cooling process. This is normal and not a malfunction.
There is condensation on the product’s internal walls
- Hot or humid weather will increase icing and condensation. This is normal and not a malfunction.
- The doors were opened frequently or kept open for long periods. >>> Do not open the doors too frequently; if open, close the door.
- The door may be ajar. >>> Fully close the door.
There is condensation on the product’s exterior or between the doors
The ambient weather may be humid, this is quite normal in humid weather. >>> The condensation will dissipate when the humidity is reduced.
The interior smells bad
- The product is not cleaned regularly. >>> Clean the interior regularly using sponge, warm water and carbonated water.
- Certain containers and packaging materials may cause odor. >>> Use containers and packaging materials free of odor.
- The foods were placed in unsealed containers. >>> Keep the foods in sealed containers. Micro-organisms may spread out of unsealed food items and cause bad odor. Remove any expired or spoiled foods from the product.
The door is not closing
- Food packages may be blocking the door. >>> Relocate any items blocking the doors.
- The product is not standing in full upright position on the ground. >>> Adjust the stands to balance the product.
- The ground is not level or firm. >>> Make sure the ground is level and sufficiently firm to bear the product.
The vegetable bin is jammed
The food items may be obstructing with the upper section of the drawer. >>> Reorganize the food items in the drawer.
If The Surface Of The Product Is Hot
High temperatures may be observed between the two doors, on the side panels and at the rear grill while the product is operating. This is normal and does not require service maintenance! Be careful when touching these areas.
WARNING:
If the problem persists after following the instructions in this section, contact your vendor or an Authorized Service. Do not try to repair the product.
WARNING:
- This product can expose you to chemicals including Nickel (Metallic) which is known to the State of California to cause cancer.
- For more information go to www.P65Warnings.ca.gov
- Note: Nickel is a component in all stainless steel and some other metal components.
BEKO US RESIDENTIAL PRODUCT WARRANTY
The warranties provided by Beko in these statements only apply to Beko appliances sold to the original purchaser or homeowner in the US (Including Alaska, Hawaii, Puerto Rico and the US Virgin Islands) and The Cayman Islands The factory warranty applies only to products purchased through an authorized dealer or authorized reseller. Go to www.bekoappliances.com/where-to-buy for a list of authorized dealers. Products purchased through non-authorized dealers and wholesalers will not be covered under the manufactures warranty
The warranty is not transferable. To obtain warranty service, please contact your dealer or contact us at https://www.bekoappliances.com/support/beforecallcenter/ You will need your product model number, serial number, retailer name and address, where purchased and purchase date / installation date. This warranty gives you specific legal rights, and you may also have other rights which vary from state to state. Also, please make sure you register your product for warranty at: https://www.bekoappliances.com/product-registration.
2 year (*) full warranty from date of first Installation (All Beko Products)
Beko will repair or replace at no cost to the consumer any defective parts if used under normal household conditions (Warranty is void if the product is used commercially e.g., bed + breakfast, nursing home etc.). Service must also be performed by an authorized Beko service agency. (Cosmetic defects must be reported within 10 business days from installation). 1 year warranty on the accessories is for the parts only and does not include labor.
3rd thru 5th year (*, **) Sealed System Warranty on refrigerators Parts Only
Beko will provide (No Charge) any compressor, evaporator, condenser and filter Dryer to the consumer if material defects or workmanship have caused the damage or failure of these components.
(Trip and Labor charges are the responsibility of the consumer)
3rd thru 10th year (*, **) ProSmart™ Inverter Motor on Dishwashers – Part Only
Beko will provide (No Charge) a ProSmart Inverter Main Wash Motor if material defects or workmanship have caused the damage or failure of this component. (Trip and Labor charges are the responsibility of the consumer)
Disclaimers of warranties and exclusions:
Warranty does not cover service costs by an authorized service agent to correct installation, electrical problems or educational instruction on the use of the electric and gas ranges. The warranty also does not cover defects or damage caused by an act of God (such as storms, floods, fires, mudslides, etc.), damage cause by use of the electric and gas ranges for purposes other than those for which it was designed, misuse, abuse, accident, alteration, improper installation, maintenance, travel fees, service calls outside normal service hours, pick up and delivery, any food loss due to product failure, unauthorized service work or work.
This product is fully tested and went through official quality assurance inspections before leaving the original manufacturing site. Warranty terms for this Beko household appliance is not valid if the product is altered, tampered, modified, additional parts assembled, fixed and re-packed by an authorized distributor, servicer, a third party retailer, reseller or by any other unauthorized person(s).
TO THE EXTENT PERMITTED BY LAW, THIS WARRANTY IS IN LIEU OF ALL OTHER EXPRESSED AND IMPLIED WARRANTIES, INCLUDING THE IMPLIED WARRANTIES OF MERCHANTABILITY AND FITNESS FOR A PARTICULAR PURPOSE. BEKO UNDERTAKES NO RESPONSIBILITY FOR THE QUALITY OF THIS PRODUCT EXCEPT AS OTHERWISE PROVIDED IN THIS WARRANTY STATEMENT.
BEKO ASSUMES NO RESPONSIBILITY THAT THE PRODUCT WILL BE FIT FOR ANY PARTICULAR PURPOSE FOR WHICH YOU MAY BE BUYING THIS PRODUCT, EXCEPT AS OTHERWISE PROVIDED IN THIS WARRANTY STATEMENT.
Beko does not assume any responsibility for incidental or consequential damages. Such damages include, but are not limited to, loss of profits, loss of savings or revenue, loss of use of the electric and gas ranges or any associated equipment, cost of capital, cost of any substitute equipment, facilities or services, downtime, the claims of third parties, and injury to property. Some states do not allow the exclusion or limitation of incidental or consequential damages, so the above limitations or exclusion may not apply to you. (*) Installation date shall refer to either purchase date or 5 business days after delivery of the product to the home, whichever is later. (**) Parts replaced will assume the identity of the original parts + their original warranty. No Other Warranties. This Warranty Statement is the complete and exclusive warranty from the manufacturer. No employee of Beko or any other party is authorized to make any warranty statements in addition to those made in this Warranty Statement.
Please keep this warranty card, user manual and your sales slip for future reference.
HOW TO CONTACT BEKO
Please contact Beko US at 1 (888) 352-2356 and select option 2 for customer service
HOW TO GET SERVICE
Please contact you authorized Beko dealer or visit www.bekoappliances.com to locate and get information for the closest authorized Beko service center.