LG 13U70Q Series 13U70Q-G 13-Inch Lightweight Laptop Instruction Manual


LG 13U70Q Series 13U70Q-G 13-Inch Lightweight Laptop

Precautions before Product Use
Any malfunction in the built-in solid-state drive (SSD) may result in loss of stored data. You must back up all critical user data to an external storage device (USB HDD, memory card, etc.). If you shut the system down before it is completely loaded, the product ma is not shut down properly. Shut down the system after it is completely loaded. (It takes about one or two minutes to completely load the system and may vary depending on the conditions.) For more information on how to use the product, refer to the LG Easy Guide. The screen and menu configurations may differ from this manual depending on the status of the Windows and software updates. Also, the version of Windows may differ depending on the model.
Checking the Components
The components shown below are provided when you purchase the product. Check the components before use.
- Some of its components may look different in shape and color from the pictures in certain models.
- When cleaning the product, use a cleaning agent dedicated to the PC. If you use thinner, benzene, alcohol or another similar agent, the product may be damaged or deformed.

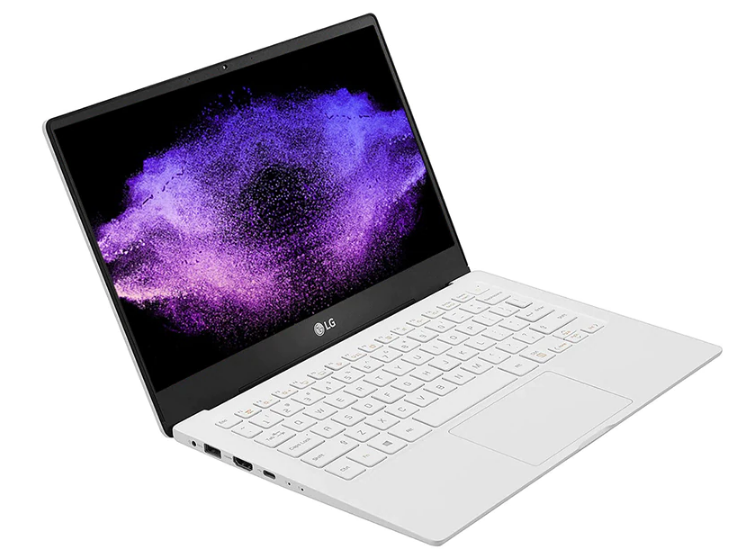
Product Tour
The actual product may differ in shape and color from the product images included in this simple owner’s manual.

- Webcam Operation Status Lamp
- Keyboard
- Webcam
- Touchpad
- Built-in Microphone
- Power Button
Left

Right

| 1 | Power Port |
| 2 | USB Port (USB 3.2 Gen 2×1 1) |
| 3 | HDMI Port |
| 4 | USB-C™ Port 2 (USB 3.2 Gen 2×1 1 / Can connect to a LAN adapter) |
- The names of USB versions have changed from USB 3.0 (or USB 3.1 Gen 1) and USB 3.1 (or USB 3.1 Gen 2) to USB 3.2 Gen 1×1 and USB 3.2 Gen 2×1. Devices that are not authorized with USB may not operate normally when connected to the USB port. The transmission speed of a USB port may differ depending on the type of storage device (NVMe™, SSD, HDD, etc.) in the system and the connected USB device.
- The USB-C™ port provides Quick Charging and Always-On Charging functions for devices that support USB PD (Power Delivery).
- The 4-pole ear microphone port supports US type 4-pole standards and the European 4-pole ear microphone may not work properly. When using ear microphone (or Bluetooth headset), audio input and output are directed to the connected device and the microphone and speaker on PC do not work. The 4-pole ear microphone port does not support an external microphone.
Connecting LAN Adapter
Connect the LAN adapter to the USB-C™ port on the PC.
- The USB-C™ port can be used without having to differentiate between the top and bottom surfaces.
- Connect the network cable (LAN) to the LAN adapter.
- Check if you can connect to the internet properly.
Power Connection
The AC adapter is used to power and charge the PC.- Do not use any other AC adapter than the one that was provided when you purchased this product.
- The power cable and AC adapter may differ depending on your country or region. 1 Connect an end of the cable to the AC adapter and the other end to a power outlet.
- The AC adapter can be used from 100 V to 240 V. 2 Connect the AC adapter to the PC.
- Ensure that the power jack linked to the AC adapter and product is connected firmly.

Important Safety Precautions
Check the following ‘Important Safety Precautions’ to prevent unexpected danger or damage in advance. ‘Important Safety Precautions’ is divided into ‘Warning’ and ‘Caution.’ WARNING: Noncompliance with the instruction may cause serious physical damage or fatal injuries. ! CAUTION: Noncompliance with the instruction may cause minor damage to the body or the machine.
While Using the Product


Guide on Battery Usage

Troubleshooting
| Symptom | Cause and Solution |
| Some of the Windows functions do not work normally or are not supported. | • Depending on the product, some of the Windows functions may not be supported, and you may need to purchase a separate hardware, driver, or software to use the functions. Also, you may need to update the BIOS additionally. The Auto Update function of Windows is always activated. Updating Windows may incur Internet usage fees as well as additional system requirements for the storage device or the hardware. For more information, refer to the website https://www.microsoft.com. |
| Part of LG Software is not installed. | • The UWP app provided by LG Electronics can be installed only through the Microsoft Store. Access Microsoft Store and search for the app to install it. For more information on the app, refer to LG Easy Guide. |
| Symptom | Cause and Solution | Symptom | Cause and Solution | ||
| The screen color does not display properly. | • Check if the Reader Mode is turned on. If the Reader Mode is on, press the [ ] icon on the bottom right of the taskbar to turn it off. • Using the Reader Mode and the Night light at the same time can cause color distortion. Set the Reader mode to [Off] or set the Night light to [Turn off now]. – Turning off the Windows 10 Night mode: Right-click the Start button [ ] and select [Settings] > [System] > [Display] > [Night light settings] > [Turn off now]. – Turning off the Windows 11 Night mode: Press the Start button [ ] and select Settings [ ] > [System] > [Display] > [Night light] > [Off]. • If the screen still does not properly display, contact the LG Electronics service center. – Reader mode controls the brightness and color of the LCD screen to look like printed paper and protect the user from eyestrain. |
Screen brightness changes while the battery mode is in use. | This product has a Vari-Bright™ function that extends battery life by adjusting screen brightness according to the user’s environment. If you do not want to use the Vari-Bright™ function, change the settings as follows. • Windows 10: Press the Start button [ ] to run [AMD Radeon Software]. Turn off the function or change the settings in [Vari-Bright] in the [ ] > [Display] tab. • Windows 11: Press the Start button [ ] and run [All apps] > [AMD Radeon Software]. Turn off the function or change the settings in [Vari-Bright] in the [ ] > [Display] tab. – The [AMD Radeon Software] app will be automatically installed when connected to Internet. The app name and settings screen may vary depending on the version of the graphics driver. |
||
| The power does not turn on. | • Check if the power cord is connected. • After disconnecting the power cord and reconnecting it, press the power button of the product. |
||||
| The system stops during use or does not properly turn off. | • Press the power button for approximately 4 seconds to reset the system. • Release the power button and wait until the system restarts automatically after the power is turned off (when the adapter is connected). Or press the power button after the power is turned off and wait until the system restarts. (when the battery is used) – Caution: Unsaved data may be lost. Pressing the power button while the PC is in use may cause damage to the hard disk or a system error. • After resetting the system, run “Setup Defaults” in the system setup. (For more information on how to run “Setup Defaults,” refer to “Restoring the Factory Default Settings” under “Setup and Upgrade” in the LG Easy Guide.) |
||||
| The touchpad is not functioning properly. | • Windows 10: Press the start button [ ] to (or after pressing the start button in the LG Software category) start [LG Control Center]. Select [System Settings] and set [Touchpad] to [Enable]. • Windows 11: Press the Start button [ ], run [All apps] > [LG Software] > [LG Control Center] and set [System Settings] > [Touchpad] to [Enable]. • If the touchpad does not function properly, the touchpad is either in the Touchpad Off (disabled) state or Touchpad Auto (disabled when the mouse is connected) state. – For more information on the touchpad setting, refer to LG Easy Guide. |
||||
| Symptom | Cause and Solution | Symptom | Cause and Solution | ||
| You selected the wrong display language for Windows. | • Refer to [Restoring the System] in LG Easy Guide to initialize the PC and set the language again. • All data will be lost during the initialization, so you must back up all critical data in advance. |
The wireless network is not connected. | • Press [Fn] + [F6] to check if the wireless network device is turned off. – Press [Fn] + [F6] to set airplane mode to [OFF]. Click the Wi-Fi [ ] icon on the right side of the taskbar and check if AP displays properly. • Every time you press [Fn] + [F6], the wireless network and airplane mode turns on or off. • You may not be able to connect to a secure wireless network. Ask the wireless network administrator. • Reinstall the wireless LAN driver. |
||
| Some websites do not work normally or are not displayed. (Internet Explorer) | Windows 11 does not support Internet Explorer. Configuring Compatibility View • In Internet Explorer, click the [ ] icon and then select the [Compatibility View Settings] menu. – Internet Explorer does not support the Compatibility View button in the address input box. • When the Compatibility View Settings screen appears, type the website address and click [Add]. • Click [Close] to close the Compatibility View Settings screen. Disabling Enhanced Protected Mode • Run Internet Explorer on the desktop and click the [ ] icon to go to the [Internet Options] > [Advanced] tab. • After clearing [Enable Enhanced Protected Mode] from the settings list, click [OK]. • Restart the PC and then run Internet Explorer again. • After accessing the website you want to use, check whether plug-ins such as Active X are properly installed. – Enhanced Protected Mode (EPM) in Internet Explorer is a function that protects the user’s data safely from the hackers who exploit security vulnerabilities in the browser. Enable the EPM unless there is a problem with Active X or other plug-ins in the website you want to use. |
||||
| A certain site or program does not run. | • Windows 10: Press the Start button [ ] and select [Windows System] > [Control Panel]. Select [View by] > [Small icons] > [User Accounts] > [Change User Account Control settings] > [Never notify] > [OK]. • Windows 11: Press the Start button [ ] and then select [All apps] > [Windows Tools] > [Control Panel]. Select [View by] > [Small icons] > [User Accounts] > [Change User Account Control settings] > [Never notify] > [OK]. – LG Electronics and Microsoft recommend using User Account Control. |
||||
| I want to reinstall the driver. | • Windows 10: Press the Start button [ ] and select [Windows System] > [Control Panel] > [View by] > [Small icons] > [Programs and Features]. Then remove the driver to be reinstalled. Press the Start button [ ], select [LG Software] and run [LG Update Center]. Then, use the [Required Update] or [All List] menu to reinstall the drivers. • Windows 11: Press the Start button [ ] and then select Settings [ ] > [Apps] > [Apps & features]. Then remove the driver to be reinstalled. Press the Start button [ ], run [All apps] > [LG Software] > [LG Update Center] and reinstall the drivers through the [Required Update] or [All List] menu. |
||||
|
| |||||
|
EN |
Symptom | Cause and Solution |
| An error message appears. | • Check if the system is infected with a virus or malicious code. |