Sharp HT-SB107 2.0 Compact Soundbar User Manual


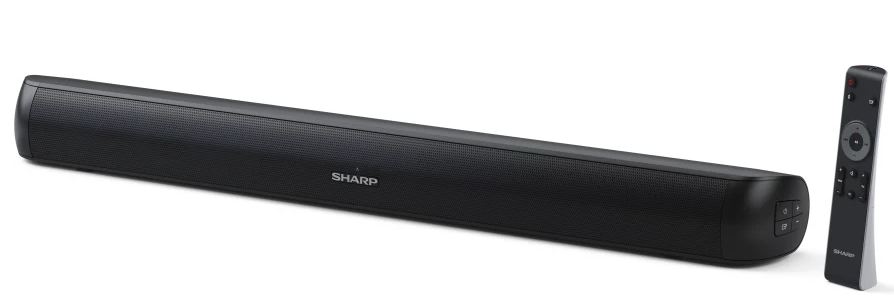
SHARP HT-SB107 2.0 Compact Soundbar

Trademarks:

The Bluetooth® word mark and logos are registered trademarks owned by Bluetooth SIG,. Inc.

The terms HDMI, HDMI High-Definition Multimedia Interface, and the HDMI Logo are trademarks or registered trademarks of HDMI Licensing Administrator, Inc.
Important safety instructions
CAUTION
RISK OF ELECTRIC SHOCK DO NOT OPEN

- The lightning flash with arrowhead symbol, within an equilateral triangle, is intended to alert the user to the presence of uninsulated “dangerous voltage” within the product’s enclosure that may be of sufficient magnitude as to constitute a risk of electric shock to persons.
- The exclamation point within an equilateral triangle is intended to alert the user to the presence of important operating and maintenance (servicing) instructions in the literature accompanying the appliance.
- Only use the power supply stated in the user manual.
- This symbol means that the product should be disposed of in an environmentally friendly manner and not with general household waste. AC voltage
- DC voltage
- Class II equipment
- Polarity of d.c. power connector
In order to prevent fi re always keep candles and other open fl ames away from this product.
Warning:
- Always follow basic safety precautions when using this appliance, especially when children are present.
- Children should be supervised to ensure that they do not play with the appliance.
- Do not damage the power cord, do not place any heavy objects on it, do not strech it or bend it. Do not attach extension cables. Damage to the power cord may occur fire or electric shock.
- Ensure that the unit is plugged into an AC 100-240V 50/60Hz power outlet. Using higher voltage may cause the unit to malfunction or even catch fire.
- If the power plug does not fit into the socket, do not force it.
- Turn off the unit before unplugging it from power source to completely switch it off .
- Do not disconnect or connect the power cord with wet hands. It may cause an electric shock.
- Disconnect the power cord if it is not used for a long time.
- Ensure that the mains plug is always easily accessible.
- This product does not contain any parts that are serviceable by the user. In case of a fault, contact the manufacturer or authorised service department. Exposing the internal parts inside the device may endanger your life. The manufacturers guarantee does not extend to faults caused by repairs carried out by unauthorised third parties.
- Do not use this product immediately after unpacking. Wait until it warms up to room temperature before using it.
- Ensure this product is used in moderate climates only (not in tropical/subtropical climates).
- Place product on a flat, stable surface that is not subject to vibrations.
- Ensure the product and its parts is not overhanging the edge of the supporting furniture.
- To reduce the risk of fire, electric shock or damage to this product, do not expose it to direct sunlight, dust, rain and moisture. Never expose it to dripping or splashing and do not place objects filled with liquids on or near the product.
- Do not place objects filled with liquids, such as vases, on the apparatus.
- Do not install near any heat sources such as radiators, heat registers, stoves, or other apparatus (including amplifi ers) that produce heat.
- Do not place the product where the humidity is high and ventilation is poor.
- nsure a minimum distance of 5 cm around the apparatus for sufficient ventilation. Do not block any ventilation openings of this product. Always ensure that the ventilation openings are not covered with items such as newspapers, tablecloths, curtains, etc.
- NEVER let anyone, especially children, push anything into holes, slots or any other openings in the unit’s casing as this could result in a fatal electric shock.
- Storms are dangerous for all electric appliances. If the mains or aerial wiring is struck by lightning, the appliance might get damaged, even if it is turned off . You should disconnect all the cables and connectors of the appliance before a storm.
Maintenance
- Unplug the power cable from the power source before cleaning the appliance.
- Use a soft and clean rag to clean the outside of the unit. Never clean it with chemicals or detergent.
Power Adapter
- To disconnect the unit from the mains supply, unplug the lead from the mains socket.
- Only use the supplied mains adaptor as failure to do this may result in a safety risk and/or damage to the unit.
Batteries

- Observe the correct polarity when inserting the batteries.
- Do not expose batteries to high temperatures and do not place them on locations where the temperature might increase quickly, e.g. near the fi re or on the direct sunshine.
- Do not expose batteries to excessive radiant heat, do not throw them into the fi re, do not disassemble them and do not try to recharge un-rechargeable batteries. They could leak or explode.
- Never use diff erent batteries together or mix new and old ones.
- When the Remote Control is not to be used for a long time (more than a month), remove the battery from the Remote Control to prevent it from leaking.
- If the batteries leak, wipe away the leakage inside the battery compartment and replace the batteries with new ones.
- Do not use any batteries other than those specied.
Do not ingest battery, chemical burn hazard
- If the battery is swallowed, it can cause severe internal burns in just 2 hours and lead to death. Keep new and used batteries away from children. If the battery compartment does not close securely, stop using the product and keep it away from children. If you think batteries might have been swallowed or placed inside any part of the body, seek immediate medical attention.
Disposal of this equipment and Batteries
- Do not dispose of this product or its batteries as unsorted municipal waste. Return it to a designated collection point for the recyclingof WEEE in accordance with local law. By doing so, you will help to conserve resources and protect the environment.
- Most of the EU countries regulate the disposal of batteries by law. Contact your retailer or local authorities for more information.
- The shown above appears on electrical and electronivcal equipment and batteries (or the packaging) to remind users of this. If “Hg” or ‘Pb’ appears below the symbol, this mean that the battery cantains traces of mercury (Hg) or lead (Pb), respectively.
- Users are requested to use existing return facilities for used equipment and batteries.
CE and UKCA statement:
- Hereby, Sharp Consumer Electronics Poland sp. z o.o. declares that this audio device is in compliance with the essential requirements and other relevant provisions of RED Directive 2014/53/EU and UK Radio Equipment Regulations 2017.
The full text of the EU declaration of conformity is available by following the link www.sharpconsumer.com and then entering download section of your model and choosing “CE Statements”.
Accessories
- 1x User guide
- 1x Warranty leaflet
- 1x Remote control
- 2x AAA battery
- 1x Power adapter
- 1x AC plug for power adapter
- 4x Silicone feet
- 1x Wall mount fixings
Controls

- Indicator light
- Red: In STANDBY mode.
- Blue: In Bluetooth mode.
- Green: In LINE IN mode.
- Yellow: In Optical mode.
- Cyan: In HDMI ARC mode.
- Purple: In USB mode.
- Remote sensor
- Standby – Switch the unit be-tween ON and STANDBY mode.
- Source – Select the play function.
- Volume +/- – Increase/decrease the volume level.
Inputs/Outputs

- ARC Socket – Connect to a TV via HDMI cable.
- USB Socket – Used to connect with the USB fl ash disk.
- LINE IN Socket – Connect to an external audio device.
- OPTICAL Socket – Opticial input jack.
- DC IN Socket – Socket for connect-ing power adapter (DC 18V/2,0A).
Remote control

- – Switch the unit between ON and STANDBY mode.
- – Select the Bluetooth mode. Press and hold to activate the pairing function in Bluetooth mode or disconnect the existing paired Bluetooth device.
- – Select the play function.
- VOL +/- – Increase/decrease the volume level.
- / – Skip to previous/next track in Bluetooth/USB mode.
- – Play/pause/resume playback in Bluetooth/USB mode.
- – (MUTE) Mute or resume the sound.
- BASS +/- – Adjust bass level.
- TRE +/- – Adjust treble level.
- EQ – Select a preset sound mode.
RC OPERATIONS
The provided Remote Control allows the unit to be operated from a distance.
- Even if the Remote Control is operated within the eff ective range of 6m, remo-te control operation may be impossible if there are any obstacles between the unit and the remote control.
- If the Remote Control is operated near other products which generate infrared rays, or if other remote control devices using infra-red rays are used near the unit, it may operate incorrectly. Conver sely, the other products may operate incorrectly.
BATTERY INSTALLATION

- Press and slide the back cover to open the battery compartment of the remote control.
- Insert two AAA size batteries (included). Make sure the (+) and (–) ends of the batteries match the (+) and (–) ends indicated in the battery compartment.
- Close the battery compartment cover.
First time installation
Placement and Mounting

- A: Normal Placement (A1 – Attach the silicone feet to the bottom of the soundbar.
Place Soundbar on leveled surface in front of TV.) - B: Wall Mounting
Wall Mounting
NOTE:
- Installation must be carried out by qualifi ed personnel only. Incorrect assembly can result in severe personal injury and property damage (if you intend to install this product yourself, you must check for installations such as electrical wiring and plumbing that may be buried inside the wall). It is the installer’s responsibility to verify that the wall will safely support the total load of the unit and wall brackets.
- Additional tools (not included) are required for the installation.
- Do not overtighten screws.
- Keep this instruction manual for future reference.
- Use an electronic stud fi nder to check the wall type before drilling and mounting.

1. Drill 2 parallel holes (Ø 6mm) in the wall. The distance between the holes should be 500 mm.
– Firmly fi x one plug into each hole in the wall and then insert screws into them.
2. Leave a 4mm gap between the wall and the screw’s head. Lift the unit‘s integrated wall brackets over the heads of the screws and slot into place.
Connections

HDMI ARC input
The ARC (Audio Return Channel) function allows you to send audio from your ARC- compliant TV to your sound bar through a single HDMI connection. To enjoy the ARC function, please ensure your TV is both HDMI-CEC and ARC compliant and set up accordingly. When correctly set up, you can use your TV remote control to adjust the volume output (VOL +/- and MUTE) of the sound bar.
Connect the HDMI cable (not included) from unit‘s HDMI (ARC) socket to the HDMI (ARC) socket on your ARC com-pliant TV. Then press the remote control to select HDMI ARC.
TIPS:
- Your TV must support the HDMI-CEC and ARC function. HDMI-CEC and ARC must be set to On.
- The setting method of HDMI-CEC and ARC may diff er depending on the TV. For details about ARC function, please refer to your TV owner’s manual.
- Only HDMI cables of version 1.4 or higher can support the ARC function.
- While in HDMI ARC mode, if there’s no sound output from the unit, you may need to activate PCM signal output on your source device (eg. TV, DVD or Blu-ray player).

OPTICAL input
Use the optical cable to connect the optical input of this soundbar to the optical output of VCD, CD, VCR, DVD player.
TIPS:
While in OPTICAL mode, if there’s no sound output from the unit, you may need to activate PCM signal output on your source device (eg. TV, DVD or Blu-ray player).
LINE IN

- Use a RCA to 3.5mm audio cable (not included) to connect the TV’s audio output sockets to the LINE IN socket on the unit.
- Use a 3.5mm to 3.5mm audio cable (not included) to connect the TV’s or external audio device headphone socket to the LINE IN socket on the unit.
TIP:
When you use the headphone output on the TV set, you will be able to adjust the volume level directly using the TV remote control.
Connect to Power

- Before connecting the power adapter, ensure you have completed all other connections.
- Risk of product damage! Only use the supplied mains adaptor as failure to do this may result in a safety risk and/or damage to the unit.
- Connect the power adapter to the DC IN socket of the unit and then into a mains socket.
Basic Operation
Standby/ON
- When you fi rst connect the unit to the main socket, the unit will be in STAND-BY mode.
- Press the button on the remote cont-rol to switch the main unit ON or OFF.
- Disconnect the main plug from the main socket if you want to switch the unit off completely.
- When the unit has no input signal for over 15 minutes, it will automatically switch to Standby mode.
Select Modes
Press the button on the unit repeatedly or press the buttons on the remote control to select the desired mode.
Adjust the Volume
- Press the + / – buttons on the unit or on the remote control to adjust the volume.
- If you wish to turn the sound off , press the button on the remote control. Press the button again or press the +/- buttons on the unit or on the remo-te control to resume normal listening.
Select Equaliser (EQ) Effect
While playing, press the EQ button on the remote control to select between preset equalisers.
Each time the button is pressed it will move between the EQ functions as below: Music (recommended for listening to all types of music) – white light fl ashes 2 seconds.
Movie (recommended for use with movies) – green light fl ashes for 2 seconds. News (recommended for listening to voices) – red light fl ashes for 2 seconds. Custom (use to set personal bass/treble settings) – cyan light fl ashes 2 seconds. NOTE: Bass/Treble setting is available only in custom preset.
LINE IN/OPTICAL/HDMI ARC
- Ensure that the unit is connected to the TV or audio device.
- While in ON mode, press the button on the unit repeatedly or press the button on the remote control to select the desired mode.
- Operate your audio device directly for playback features.
- Press the +/– button to adjust the volume to your desired level.
TIP:
While in HDMI ARC/OPTICAL mode, if there’s no sound output from the unit, (indicator light fl ashing) you may need to activate PCM signal output on your source device (eg. TV, DVD or Blu-ray player).
Bluetooth Operation
Pair Bluetooth-enabled Devices
The first time you connect your Bluetooth device to this player, you need to pair your device to this player.
NOTE:
- The operational range between this player and a Bluetooth device is approximately 8 meters (without any object between the Bluetooth device and the unit).
- Before you connect a Bluetooth device to this unit, ensure you know the device’s capabilities.
- Compatibility with all Bluetooth de-vices is not guaranteed.
- Any obstacle between this unit and a Bluetooth device can reduce the operational range.
- If the signal strength is weak, your Bluetooth receiver may disconnect, but it will re-enter pairing mode automatically.
- Turn on the soundbar by pressing the standby button.
- Press the button on the unit repeatedly or button on the remote control to select the Bluetooth mode. You are in Bluetooth mode when the blue Bluetooth indicator fl ashes quickly.
- Enter the Bluetooth search mode on the device you wish to connect to the soundbar.
- Select SHARP HT-SB107 from the list. Your device and the soundbar will now be connected; the blue indicator will stop fl ashing.
- To disconnect your device, switch off the Bluetooth connection or hold down\ button, or button on the remote control for 3 seconds.
TIPS:
- Enter „0000“ for the password if necessary.
- The player will also be disconnected when your device is moved beyond the operational range.
- If you want to reconnect your device to this player, place it within the opera-tional range.
- If the device is moved beyond the operational range, when it is brought back, please check if the device is still connected to the player.
- If the connection is lost, follow the instructions above to pair your device to the player again.
Listen to Music from Bluetooth Device
- If the connected Bluetooth device supports Advanced Audio Distribution Profi le (A2DP), you can listen to the music stored on the device through the soundbar‘.
- If the device also supports Audio Video
Remote Control Profi le (AVRCP), you can use the soundbar‘s remote control to play music stored on the device.
- Pair your device with the player.
- Play music via your device (if it supports A2DP).
- Use supplied remote control to control play (if it supports AVRCP).
- To pause/resume play, press the button on the remote control.
- To skip to a track, press the / buttons on the remote control.
USB Operation
- Insert USB storage drive into the USB slot on the rear panel.
- Press button repeatedly on the unit or button on the remote control to select USB mode.
- Unit will start playing the MP3 track automatically from the connected USB drive.
If the MP3 playback does not start automatically, press button on the remote control.
- To pause/resume play, press the button on the remote control.
- To skip to a track, press the / buttons on the remote control.
- Press and hold to fast forward, to fast reverse.
- Due to the numerous diff erent fi le systems and fi le formats, compatibility with the connected memory media cannot be guaranteed.
- Depending on the size of the data medium, it may take some time for the system to be detected.
- The supported fi le format is MP3/WAV.
- External hard disks are not supported.
- Supports USB memory key up to 32GB.
Troubleshooting
To keep the warranty valid, never try to repair the system yourself. If you encounter problems when using this unit, review the following before requesting service.
No power
- Ensure that the power adaptor is properly connected to the units DC IN socket and to the mains socket.
- Ensure that there is power at the AC outlet.
- Press standby button on the remote control or soundbar to turn the soundbar on.
No sound
- Increase the volume. Press Volume Up on the remote control or on the right side of the soundbar.
- Press on the remote control to ensure the soundbar is not muted.
- Press source buttons to select a diff erent input source.
- When using either of the Digital input, if there is no audio:
- Try setting the TV output to PCM or
- Connect directly to your Blu-ray/other source, some TVs do not pass through digital audio.
Your TV may be set to variable audio output. Confi rm that the audio output setting is set to FIXED or STANDARD, not VARIABLE. Consult your TV’s user manual for more detailed information.
If using Bluetooth, ensure that the volume on your source device is turned up and that the device is not muted.
Remote control does not work
Before you press any playback control button, fi rst select the correct source. Reduce the distance between the remote control and the unit. Insert the battery with its polarities (+/-) aligned as indicated.
Replace the battery. Aim the remote control directly at the sensor on the front of the unit.
I hear buzzing or humming
Ensure all cables and wires are securely connected. Connect a diff erent source device (TV, Blu-ray player, etc) to see if the buzzing persists. If it does not, the problem may be with the original device. Connect your device to a diff erent input on the soundbar.
I can’t fi nd the Bluetooth name of this unit on my Bluetooth device
Ensure the Bluetooth function is activated on your Bluetooth device. Re-pair the unit with your Bluetooth device.
This is a 15 mins power off function, one of the ERPII standard requirement for saving power
When the unit’s external input signal level is too low, the unit will be turned off automatically in 15 minutes. Please increase the volume level of your external device.