Acer S201Hl LCD Monitor User Guide
acer S201Hl LCD Monitor User Guide

Important safety instructions
Please read the following instructions carefully.
- To clean the LCD monitor screen: Be sure that your monitor is electrically rated to operate with the AC power available in your location.
- Turn off the LCD monitor and unplug the power cord.
- Spray a non-solvent cleaning solution onto a rag and clean the screen gently.
- NEVER SPRAY OR POUR ANY LIQUID DIRECTLY ONTO THE SCREEN OR CASE.
- PLEASE DO NOT USE ANY AMMONIA OR ALCOHOL-BASED CLEANERS ON THE LCD DISPLAY SCREEN OR CASE.
- Acer will not be liable for damage resulting from use of any ammonia or alcohol-based cleaners.
- Do not place the LCD monitor near a window. Exposing the monitor to rain, moisture or sunlight can severely damage it.
- Do not apply pressure to the LCD screen. Excessive pressure may cause permanent damage to the display.
- Do not remove the cover or attempt to service this unit yourself. An authorized technician should perform servicing of any nature.
- Store the LCD monitor in a room with a temperature of -20° to 60°C (-4° to 140°F). Storing the LCD monitor outside this range may result in permanent damage.
- Immediately unplug your monitor and call an authorized technician if any of the following circumstances occur:
- Monitor-to-PC signal cable is frayed or damaged.
- Liquid spills onto the LCD monitor or the monitor is exposed to rain.
- The LCD monitor or case is damaged.
Package contents
- LCD Monitor
- AC Power Cord
- DP Cable (Optional)
- HDMI Cable (Optional)
- Remote Control
- Quick Start Guide
- VESA Adapter Mounting Kit


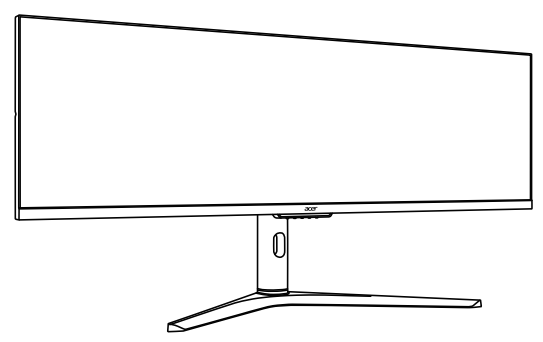
Attaching the monitor to the base
- Unpack the box.
- Take the Styrofoam with display out of the box.
- Remove the top Styrofoam.
- Tighten the base and stand arm with three screws.
- Attach the base of step 4 to the quick release notch of the LCD monitor securely.
- Flip the LCD monitor over to make it stand upright on the desk where it will be used. (Note: Do NOT press the screen to avoid damage any time.)


Connecting Your Monitor to a Computer
- Make sure both the monitor and computer are powered-OFF.
- Connect DP Cable (Only DP-input model)
- Make sure both the monitor and computer are powered-OFF.
- Connect the DP cable to the computer.
- Connect HDMI Cable (Only HDMI-input model)
- Make sure both the monitor and computer are powered-OFF.
- Connect the HDMI cable to the computer.
- Plug the power cords of your computer and your monitor into a nearby electrical outlet.

Note:
- The audio output function depends on models. Please refer to User’s Guide for more information.
- DP (1.2): 3840×1080 supports up to 120Hz in normal mode.
HDMI (2.0): 3840×1080, supports up to 120Hz.
HDMI (1.4): 3840×1080, supports up to 60Hz.
External Controls

| No. | Icon | Item | Description |
| 1 | Input button / Exit | a. Press to trigger Mode control. b. When the OSD menu is enabled, press to exit the current menu and go back one level. | |
| 2 | Mode / Enter | a. Press the key to open the Brightness control. b. When the OSD menu is enabled, press to enter to next level. | |
| 3 | Brightness / + | a. Press to toggle input sources. b. When the OSD menu is enabled, press to select or return to the previous menu. | |
| 4 | OSD functions / – | a. Press to view the OSD. b. When the OSD menu is enabled, press to select or go to the next menu. | |
| 5 | POWER | Power button | Turns the monitor on/off. Blue indicates power on. Blinking Blue indicates standby mode. |


FreeSync Premium (HDMI2/DP Only):
It can allow a FreeSync Premium supported graphics source to dynamically adjust display refresh rate based on typical content frame rates for power efficient, virtually stutter free and low-latency display.
Regulations and safety notices
FCC notice
This device has been tested and found to comply with the limits for a Class B digital device pursuant to Part 15 of the FCC rules. These limits are designed to provide reasonable protection against harmful interference in a residential installation. This device generates, uses, and can radiate radio frequency energy and, if not installed and used in accordance with the instructions, may cause harmful interference to radio communications.
However, there is no guarantee that interference will not occur in a particular installation. If this device does cause harmful interference to radio or television reception, which can be determined by turning the device off and on, the user is encouraged to try to correct the interference by one or more of the following measures:
- Reorient or relocate the receiving antenna.
- Increase the separation between the device and receiver.
- Connect the device into an outlet on a circuit different from that to which the receiver is connected.
- Consult the dealer or an experienced radio/television technician for help.
CE declaration of Conformity
Hereby, Acer Inc., declares that this LCD monitor is in compliance with the essential requirements and other relevant provisions of EMC Directive 2014/30/EU, Low Voltage Directive 2014/35/EU, and RoHS Directive 2011/65/EU and Directive 2009/125/EC with regard to establishing a framework for the setting of ecodesign requirements for energy-related product.
Notice:
In order to prevent damage to the monitor, do not lift the monitor by its base.
Notice: Shielded cables
All connections to other computing devices must be made using shielded cables to maintain compliance with EMC regulations.
Notice:
Acer monitor is purposed for video and visual display of information obtained from electronic devices.
Notice: Peripheral devices
Only peripherals (input/output devices, terminals, printers, etc.) certified to comply with the Class B limits may be attached to this equipment. Operation with non-certified peripherals is likely to result in interference to radio and TV reception.
Caution
Changes or modifications not expressly approved by the manufacturer could void the user authority, which is granted by the Federal Communications Commission, to operate this product.
Operation conditions
This device complies with Part 15 of the FCC Rules. Operation is subject to the following two conditions: (1) this device may not cause harmful interference, and (2) this device must accept any interference received, including interference that may cause undesired operation.
Notice: Canadian users
This Class B digital apparatus complies with Canadian ICES-003.

