JVC AV-H587115A LED Display User Guide

58″ Class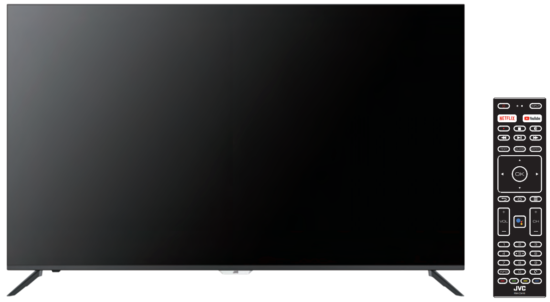


registered trademarks of HDMI Licensing Administrator, Inc.

WARNING AND PRECAUTIONS
Warning |
||
| Warning: To avoid the risk of electric shock, do not remove the cover (or back). No user-serviceable parts inside. Refer servicing to qualified service personnel. | ||


WARNING: TO PREVENT FIRE OR SHOCK HAZARDS, DO NOT EXPOSE THIS APPARATUS TO RAIN OR MOISTURE.
CAUTION: TO ENSURE PERSONAL SAFETY, OBSERVE THE FOLLOWING RULES REGARDING THE USE OF THIS UNIT.
- Operate only from the power source specified on the unit.
- Avoid damaging the AC plug and power cord.
- Avoid improper installation and never position the unit where good ventilation is unattainable.
- Do not allow objects or liquid to fall into the cabinet openings.
- In the event of mechanical damage, unplug the unit and call a service technician. Do not attempt to repair it yourself or remove the rear cover.
Changes or modifications not approved by JVC could void the warranty.
* When you don’t use this TV set for a long period of time, be sure to disconnect both the power plug from the AC outlet and antenna for your safety.
* To prevent electric shock do not use this power plug with an extension cord, receptacle, or another outlet unless the blades can be fully inserted to prevent blade exposure.
Do not attempt to service the product yourself
Caution
To prevent electrical shock, do not open the TV casing. There are no user-serviceable parts inside.
Please refer to qualified service personnel for repairs.
IMPORTANT SAFETY INSTRUCTIONS
- Read these instructions.
- Keep these instructions.
- Heed all warnings.
- Follow all instructions.
- Do not use this unit near water.
- Clean only with a dry cloth.
- Do not block any ventilation openings. Ventilation should not be impeded by covering the ventilation openings with items such as newspapers, tablecloths, curtains, etc. There must be a minimum distance of 5cm dear space around the unit at all times to ensure proper ventilation.
- Do not install near any heat sources such as radiators, heat registers, stoves, or other apparatus (including amplifiers) that produce heat.No naked flame sources such as lit candles, should be placed on or near the unit.
- Protect the power cord from being walked on or pinched particularly at plugs, convenience receptacles, and the point where they exit from the unit.
- Only use attachments/accessories specified by the manufacturer.
- Use only with a cart, stand, tripod, bracket, or table specified by the manufacturer or sold with the unit. When a cart is used, use caution when moving the cart/unit combination to avoid injury from tip-over.
- Unplug this unit during lightning storms or when unused for long periods of time.
- Refer all servicing to qualified service personnel. Servicing is required when the unit has been damaged in any way, such as power-supply cord or plug is damaged, liquid has been spilled or objects have fallen into the unit, the unit has been exposed to rain or moisture, does not operate normally, or has been dropped.
- The unit should not be exposed to dripping or splashing and no objects filled with liquids, such as vases, should be placed on the unit.
- Place the television on a stable, flat surface. Failure to do so can result in the television falling, causing injury.
- Do not allow young children to play around or on the television. Do not hang from the unit Failure to do so can result in the television falling, causing injury.
- Do not allow young children to play with the plastic bag that came with the television when you unpacked it. Failure to do so can result in suffocation, which may lead to death.
- Avoid improper installation and never position the unit where good ventilation is impossible. When installing this unit distance recommendations must be maintained between the set and the wall, as well as inside a tightly enclosed area or piece of furniture. Keep to the minimum distance guidelines shown for safe operation.
- Cautions for installation
— Do not tilt the unit left, right, or towards the back.
— Ensure the power cord is out of the path of foot traffic.
— The unit will generate a slight amount of heat during operation. Ensure that sufficient space is available around the unit to allow satisfactory cooling.
— Have two people remove the unit from the box with the screen facing away from you. It’s possible your clothing (such as a belt buckle or button) may scratch the front of the unit. Do the same when moving the unit to another location. - Make enough room for inserting and removing the power plug. Place the unit as close to the outlet as possible. The main power supply for this unit is controlled by inserting or removing the power plug. Physically disconnecting the power plug is the only way to completely disconnect the unit from the mains power source.
- Batteries must not be exposed to excessive heat such as sunshine, fire or the like.
- When this unit is connected to the wall outlet, it is always on standby even when all the LED lamps are not lit. To shut down the unit, unplug the unit from the wall outlet.
- If the supply cord is damaged, it must be replaced before further use by the manufacturer, its service agent, or a similarly qualified person in order to avoid a hazard.
- Always place the TV on furniture that can safely support the TV. Make sure the ends of the TV do not hang over the edge of the supporting furniture.
- Do not place the TV on tall furniture (for example, cupboards or bookcases) without anchoring both the furniture and the TV to a wall or other suitably strong support.
- Do not stand the TV on cloth or other materials placed between the TV and the supporting furniture.
- Where the mains plug is used as the disconnect device, the disconnect device shall remain readily operable.


WARNING Never place a television set in an unstable location. A television set may fall, causing serious personal injury or death. Many injuries, particularly to children, can be avoided by taking simple precautions such as:
- Using cabinets or stands recommended by the manufacturer of the television set.
- Only using furniture that can safely support the television set.
- Ensuring the television set is not overhanging the edge of the supporting furniture.
- Not placing the television set on tall furniture (for example, cupboards or bookcases) without anchoring both the furniture and the television set to a suitable support.
- Not placing the television set on cloth or other materials that may be located between the television set and supporting furniture.
- Educating children about the dangers of climbing on furniture to reach the television set or its controls.
If your existing television set is being retained and relocated, the same considerations as above should be applied.
WARNINGS AND CAUTIONS
| Warning
High voltages are used in the operation of this television receiver. Do not remove the cabinet back from your set. Refer servicing to qualified service personnel. | |
| Warning
To prevent fire or electrical shock hazards, do not expose the television receiver to rain or moisture. | |
| Warning
Do not drop or push objects into the television cabinet slots or openings. Never spill any kind of liquid on the television receiver. | |
| Caution
Do not block the ventilation holes in the back cover. Adequate ventilation is essential to prevent the failure of electrical components. | |
| Caution
Do not trap the power supply cord under the television receiver. | |
| Caution
Never stand on, lean on, or suddenly push the television or its stand. You should pay special attention to children. Serious injury may result if it should fall. | |
| Caution
Do not place your television on an unstable cart, stand, shelf or table. Serious injury to an individual, and damage to the television, may result if it should fall. | |
| Caution
When the television receiver is not used for an extended period of time, it is advisable to disconnect the AC power cord from the AC outlet. | |
| Caution
If the television is to be built into a compartment or similar enclosure, the minimum distances must be maintained. Heat build-up can reduce the service life of your television, and can also be dangerous. |


TECHNICAL SPECIFICATIONS
| Viewing Picture Size (Diagonal) | 58″ |
| Resolution | 3840 x 2160 |
| Aspect Ratio | 16:09 |
| Brightness | 280cd/m² |
| Contrast Ratio | 6000:1 |
| TV System | PAL-B/G, I, D/K SECAM-B/G, D/K, L DVB-T, DVB-T2 |
| Input Power Voltage | AC 100-240V 50/60Hz |
| Power Consumption | 150W |
| Signal Input | High-Definition Multimedia Interface (HDMI) x 4 AV IN x 1 RJ45 x 1 USB x 3 ANT x 1 |
| Audio Output Power(THD 10%) | 2x10W |
| Signal Output | HEADPHONE x 1 OPTICAL x 1 |
| Unit Size | 1289x260x811mm |
| Unit Size (Without Stand) | 1289x63x748mm |
| Net Weight | 14.3KG |
INSTALLATION
* Locate the TV where light does not shine onto the screen.
* Total darkness or reflection on the screen can cause eyestrain. A soft lighting environment is recommended for comfortable viewing.
* Allow ample space between the TV and wall for proper ventilation.
* Do not locate the TV in a damp or hot environment to prevent damage.
* To prevent damage whilst in use, do not cover ventilation openings.
BASE STAND ASSEMBLY INSTRUCTION
Place the TV with the display-side down on a flat surface. Ensure the table or desk you use provides a flat, totally clean surface, and use a soft cloth between the face of the TV and the table to protect the TV’s screen.
- Place the TV face down on a cloth or towel on a flat surface. Insert the stands into the grooves on the bottom of the TV, then align the screw holes on the bottom of the TV and the stands.
- Use the 4 provided screws to attach the stands to the TV.


Wall Mount Specifications
| Compatible wall-mount size | Screw size for connecting the TV to the wall mount |
| VESA 400*200 | Pan Head Screw M6 x12(mm)* |
* The length of the screw specified is only a recommendation; the actual length required can vary depending on the type of wall mount used.

- Wall Mount is not included with the TV; it needs to be purchased separately.
- Use only VESA-compatible wall mounts according to the specifications recommended for this model. Use of other wall mounts, or inappropriate installation may cause personal injuries or damage to the TV.
- Please follow all instructions from the user manual of your chosen wall mount.
| FRONT PANEL | KEYBOARD The control buttons on the TV are located on the bottom of the TV near the LED indicator. |
| 1: Remote control sensor 2: Indicator LED: RED 3: Keyboard |
1. 2. + : Increase the volume level or move right. 3. – : Decrease the volume level or move left. 4. : When TV is on standby, press to turn on. When TV is on, press to enter the menu. Use the joystick to navigate around the interface and press to enter the highlighted item. When TV is on, press and hold to put the TV on standby. 5. |


REAR AV CONNECTIONS

REAR AV CONNECTIONS (SIDE)

- RJ45: Connect the Network Interface.
- OPTICAL: Optical Digital Audio output.
- USB: Plug in your USB memory device (eg. USB stick) to play compatible files that are stored in it.
- HDMI: Connect to the HDMI output jack of up to 4 external video sources (eg. DVD player/games console /Bluray player).
- AV IN: Connect to the AV OUT jack of your external video source device(eg. DVD player)*
- ANT: Connect the antenna or 75 Ohm coaxial cable to receive the TV signal.
- HEADPHONE: Connect headphones here. Note that connecting headphones will mute the sound from the TV’s built-in speakers.
* Use the connector cable provided to convert the mini AV port to RCA inputs.
ANTENNA
Connect the ANT terminal on the back of the TV to a good-quality outdoor antenna.

Please note:
Aerial connections:IEC(female).
Input impendance:75 unbalanced.
PRESET MODE (HDMI)
| RESOLUTION | V.Freq.(Hz) | |
| 1 | 640*480 | 50/60 |
| 2 | 800*600 | 50/60 |
| 3 | 1024*768 | 50/60 |
| 4 | 1360*768 | 50/60 |
| 5 | 1280*768 | 50/60 |
| 6 | 1920*1080 | 50/60 |
| 7 | 3840*2160 | 24/25/30/60 |
AV EQUIPMENT
You can use the input terminals on the TV set rear as follows:

It can be connected to the following appliances: VCR, multi-disc player, DVD, camcorder, video game, stereo system, etc…
REMOTE CONTROL
REMOTE CONTROL
The remote control uses 2 x ‘AAA’ batteries (included). Please ensure correct polarities when inserting batteries.
This is a Bluetooth remote control. In order to use all its features including voice control, please pair it with the TV as explained in ‘Initial Setup’ in the next page.

- POWER: Press to set the TV to Standby or Power On modes.
- INPUT: Press to select the different input signal sources.
- :MUTE: Press to disable or enable the speaker sound output.
- : TEXT: Press to select the Teletext mode.
Note: Teletext functions are not available in Australia. - : GUIDE: Press to display the electronic program guide in TV mode.
- :ASPECT: Adjust the Aspect ratio of the TV.
- VOL+/-: Press to adjust the sound level.
- CH+/CH-: Press to access the next or previous channels.
- NUMERIC KEY: For direct access to channels.
- INFO: Press to display channel information.
- Colored buttons: Press to implement the relevant operations according to the prompt at the bottom of the menu in the text.


OPERATION
INITIAL SETUP
When you turn on your TV for the first time, the setup wizard will guide you through setting up basic settings. Please follow the on-screen instructions for the first time setup

Press ▼▲ to select the system language and press OK to confirm the language.
Remote Control Pairing

This step is to pair the Bluetooth remote control with your TV. Follow the on-screen instructions to pair.
Select and click OK when the remote control code ‘BT_VoiceRC_M3’ appears on the screen.
After the code is successful, you can use the Bluetooth remote control to operate the TV. If you don’t need to use the Bluetooth remote control, you can press the BACK button to skip this step.

Connect your Android phone to your TV,select “Continue ” to continue the connection, and choose “Skip” to skip this step.


Accept the Google Terms of Service to improve the product experience, and select “Accept” to accept this condition.

Allow Google to get the location information of your device to access more features, and choose “YES” to accept.

Allow to automatically send diagnostic information to Google. Choose “YES” to accept

- You will now see a screen saying your device is powered by Android TV. Press the ▶ button to select the browsing feature.
- You can get more apps from Google Play and press the ▶button to go to the next screen.
- Transfer photos and other content to the TV via the built-in Chromecast, and press OK to complete the browsing.

Press ▼ ▲ to select the country of your device and press OK to confirm.


Press OK to display the on-screen keyboard, and use the remote control to enter the 4-digit password and automatically jump to the next interface.

Confirm the password again and keep it consistent.
Use the remote control to enter the password and complete the password confirmation.
If you accidentally forget your parent’s password, please go to Setting->Devices Preference ->Reset.
Re-create the password after a reset.


Confirm the selected mode again, select “Yes ” to confirm the selected mode, and select “No” to return to the previous step.

Let this device be detected as a Google Cast device and allow Google Assistant and other services to wake this device up to respond to Cast commands, even when on standby and the screen is off.

Press ▼ ▲to select whether to search, select “Scan” to search, and select “Skip Scan” to skip the search.

Press OK to complete the setup.

Press the OK button to agree to (Disclaimer). After the setting is complete, You can watch TV.
HOME SCREEN
Press the HOME button to go to the home page
- open the google assistant start a voice search or use a keyboard search
- Among the applications installed on the TV, the icons for the favorite applications are shown inside here. (Favourite applications can be added/deleted/ order changed by users.)
2Notification: Display the notifications.
For details on the settings, see the next explanation.


INPUT SOURCE
- In the HOME interface, press ▼▲◀ ▶to select the “Inputs” icon, press OK to open the input source list, then press up to highlight an input, and press OK to switch.
- Under Live TV, press the INPUT button to display the list of input sources. You can select the desired source.


NAVIGATING THE ON-SCREEN MENU
- There are two ways to enter the setting menu. First,in Live TV, press the menu button to display TV options, press ▼ ▲ ◀ ▶ to select the settings menu, and press OK to confirm. Second, in the HOME interface, press the ▶key to select the icon of the circular settings menu, and press OK to confirm.
- Press▼ ▲the button to select what you want to be set.
- Press OK to enter the setting.


Press BACK

Network & Internet
- Press ▼▲ the button to select what you want to be set.
- Press the OK button to adjust.
- After finishing your adjustment, press the OK button to save and return to the previous menu.

CHANNEL

Auto Channel Update
Parental controls: Press ▼ ▲ the button to select the option then press the OK button to enter the sub-menu.
Audio Channel: Press ▼ ▲the button to select the option then press the OK button to enter the sub-menu.
Open source licenses: Press ▼ ▲the button to select the option then press the OK button to enter the sub-menu
.

- Enter Menu->Settings->Channel->Channels.
- Channel Scan directly enters the ATV+DTV automatic search platform interface of Antenna.

Update Scan: Automatically search for frequency points outside the station.

Analog Manual Scan: Manual ATV search station.
After inputting the frequency point, you can select to go up or down (higher or lower frequencies).
Note: ATV channels are no longer broadcast in Australia, so only DTV (digital) channels will be tuned.

Single RF Scan: DTV manual search where you select an RF channel and it will search for DTV channels near that frequency.
ACCOUNTS&SIGN IN

Sign in to your Google account, and press the UP/DOWN button to select Sign in or Skip.
APPS

In this menu, you can set the APP permissions,and read the app lists.
- Press▼ ▲ the button to select what you want to be set.
- Press the OK button to adjust.
- After finishing your adjustment, Press the BACK button to return to the previous menu.
DEVICE PREFERENCES
ABOUT

In this menu, you can read the information and settings of the TV.
- Press ▼▲the button to select what you want to set.
- Press the OK button to adjust.
- After finishing your adjustment, Press the BACK button to return to the previous menu.
DATE&TIME

Automatic date&time
Press ▼▲ the button to select the option then press the OK button to enter the sub-menu.
(Optional: Use network-provided time, Off)
Set date: Press ▼▲ the button to select the option then press the OK button to enter the sub-menu.
Set time: Press ▼▲ the button to select the option then press the OK button to enter the sub-menu.
Set time zone: Press ▼▲ the button to select the option then press the OK button to enter the sub-menu.
Use 24-hour format: Press ▼▲ the button to select the option then press the OK button to choose ON/OFF.
TIMER:

Power On Time Type: Press ▼▲ the button to select the option then press the OK button to choose ON/OFF/ONCE.
PowerOnTime: Press ▼▲ the button to select the option then press the OK button to enter the sub-menu.
Power Off Time Type: Press▼▲ the button to select the option then press the OK button to choose ON/OFF/ONCE.
Power Off Time: Press ▼▲ the button to select the option then press the OK button to enter the sub-menu.
LANGUAGE:

KEYBOARD

Current keyboard: Press ▼▲ buttontoselectthe option then press the OK button to enter the sub-menu.
Gboard Settings: Press ▼▲ the button to select the option then press the OK button to enter the sub-menu
Manage keyboards: Press ▼▲ the button to select the option then press the OK button to enter the sub-menu.
INPUTS

Inputs: Press ▼▲ the button to select the option then press the OK button to enter the sub-menu.
HDMI Control: Press ▼▲ the button to select the option then press the OK button to choose ON/OFF.
Device auto power-off: Press ▼▲ the button to select the option then press the OK button to choose ON/OFF.
TV auto power on: Press ▼▲ the button to select the option then press the OK button to choose ON/OFF.
HDMI EDID Version: show EDID version.
CEC Device List: Press▼▲ the button to select the option then press the OK button to enter the sub-menu.
POWER

Sleep Timer: Press ▼▲ the button to select the option then press the OK button to enter the sub-menu.(Optional: off, 10 minutes, 20 minutes, 30 minutes, 40 minutes, 50 minutes, 60 minutes, 90 minutes, 120 minutes).
Picture off: Press ▼▲ the button to select the option then press the OK button to turn off the TV.
Switch off timer: Press ▼▲ the button to select the option then press the OK button to enter the sub-menu. (Optional: off, 30 minutes, 60 minutes, 90 minutes, 120 minutes, 150 minutes, 180 minutes, 210 minutes, 240 minutes).
No signal Auto Power Off: Press ▼▲ the button to select the option then press the OK button to enter the sub-menu. (Optional: off, 5 minutes, 10 minutes, 15 minutes, 30 minutes, 60 minutes).
PICTURE

Picture Mode: Press▼▲ the button to select the option then press the OK button to enter the sub-menu.(Optional: user, Standard, Vivid, Sport, Movie, Game, Energy-saving).
Backlight/Brightness/Contrast/Saturation/HUE/ Sharpness:Press ▼▲ button to select the option.
Press ◀to decrease the parameter. Press ▶ to increase the parameter.
Gamma: Press▼▲ the button to select the option then press the OK button to enter the sub-menu.(Optional: Dark, middle, Bright).
Color Temperature: Press▼▲ the button to select the option then press the OK button to enter the sub-menu.
Advanced Video: Press ▼▲ the button to select the option then press the OK button to enter the sub-menu.
Color Tuner: Press ▼▲ the button to select the option, then press the OK button to enter the color tuner option
Reset to Default: Reset all settings to the factory defaults.
SOUND

Sound style: Press ▼▲ the button to select the option then press the OK button to enter the sub-menu. (Optional: user, Standard, Vivid, Sports, Movie, Music, News)
Balance: Press ▼▲ the button to select the option. press ◀to decrease the parameter. Press ▶to increase the parameter.
Sound Surround: Press ▼▲ the button to select the option then press the OK button to choose ON/OFF.
Equalizer Detail: Press ▼▲ the button to select the option then press the OK button to enter the sub-menu.
Speakers: Press ▼▲ the button to select the option then press the OK button to enter the sub-menu.(Optional: TV Speaker, External Audio System )
Digital Output: Press ▼▲ the button to select the option then press the OK button to enter the sub-menu.(Optional: Auto, Bypass, PCM, Dolby Digital Plus, Dolby Digital)
SPDIF Delay: Press ▼▲ the button to select the option. ◀to decrease the parameter.Press▶to increase the parameter.
Press Auto Volume Control: Press ▼▲ the button to select the option then press the OK button to choose ON/OFF.▼▲
Downmix Mode: Press ▼▲ the button to select the option then press the OK button to enter the sub-menu. (Optional: Stereo, Surround)
Reset to Default: Reset all settings to the factory defaults.
STORAGE

Internal shared storage: Press ▼▲ the button to select the option then press the OK button to enter the sub-menu.
Removable Storage: Press ▼▲ the button to select the option then press the OK button to enter the sub-menu.(Note: Show external devices if available)
HOME SCREEN

In this menu, you can set channels, apps, and open-source licenses.
- Press▼▲the button to select what you want to set.
- Press the OK button to adjust.
- After finishing your adjustment, Press the BACK button to return to the previous menu.
RETAIL MODE

Retail mode: Press ▼▲ the button to select the option then press the OK button to choose ON/OFF.
When turned on, the display settings are adjusted for a retail environment. Set Retail Mode to Off for regular TV viewing.
Google Assistant

In this menu, you can set searchable apps, safe search filters, block offensive words, and open-source licenses.
- Press▼▲the button to select what you want to set.
- Press the ok button to adjust.
- After finishing your adjustment, Press the BACK button to return to the previous menu.
CHROMECAST BUILT-IN

In this menu, you can read the information and settings of Chromecast.
- Press▼▲the button to select what you want to be set.
- Press the ok button to adjust.
- After finishing your adjustment, Press the BACK button to return to the previous menu.
SCREEN SAVER

Screen saver: Press ▼▲ the button to select the option then press OK button to enter the sub-menu.(Optional: Turn screen off, Backdrop, Colors).
When to Start: Press ▼▲ the button to select the option then press OK button to enter the sub-menu.(Optional: 5 minutes,15 minutes,30 minutes,1 hour,2 hours).
Put device to sleep: Press ▼▲ the button to select the option then press OK button to enter the sub-menu. (Optional: 30 minutes,1 hour,3 hours,6 hours,12 hours,Never).
Start now: Press ▼▲ the button to select the option then press OK button to enter the screen saver.
LOCATION

Location status: Press ▼▲ the button to select the option then press OK button to enter the sub-menu. (Optional: Use Wi-Fi to estimate location, Off).
USAGE & DIAGNOSTICS

Usage & diagnostics– Press ▼▲ the button to select the option then press the OK button to choose ON/OFF.
ACCESSIBILITY

Audio Description: Press ▼▲ the button to select the option then press OK button to choose ON/OFF.
Visually Impaired: Press ▼▲ the button to select the option then press OK button to enter the sub-menu.
Spoken Subtitle: Press ▼▲ the button to select the option then press the OK button to choose ON/OFF.
Captions: Press ▼▲ the button to select the option then press OK button to enter the sub-menu.
High contrast text: Press ▼▲ the button to select the option then press OK button to choose ON/OFF.
RESET
Press the OK button to enter the sub-menu.
Reset-Erase everything.
Important: This Reset will delete all the user-defined settings and downloaded apps. The TV will be restored to factory settings.
REMOTE & ACCESSORIES

In this menu, you can pair Bluetooth devices including your Bluetooth remote control.
- Press the “ MENU ” and “LEFT” buttons at the bottom of the remote control for 5 seconds.
- When the LED starts to flash, release it.The remote controller will send the pairing signal to the TV and display the information of the remote control on the right side of the screen (BT_VoiceRC_M3).
- Press the OK button to display the pairing. If the pair is displayed,the connection is successful.
- If the couldn’t pair appears, the connection fails. Wait 30 seconds and then press the “ MENU ” and “ LEFT ” buttons at the bottom of the remote control for 5 seconds to repeat the previous steps.
- Press the BACK button to return to the previous menu.
MULTIMEDIA PLAYER

In the HOME interface, select the MMP APP to display Video, Photo, Audio, and Text. After inserting the USB flash drive, you can view the corresponding files in the USB flash drive.

EPG
Under the Live TV, press the GUIDE key on the remote to open the EPG interface. Program information will be displayed, and you can operate the EPG menu through the Red/Yellow/Green/Blue key.
Under the EPG menu, you can also press the PVR key to set up a recording schedule.
RECORD
When the program is playing, press the PVR key and the program will start to record.
Note: A USB memory device must be connected to one of the USB ports in order to do any recording.
Under the Live TV, press the menu key and down to select the Record menu.
Select Record List, You can watch the recorded programs.


Open the schedule list from the Record menu, and pre-recording details will be displayed.
Multimedia Formats
| Photo format | JPEG 、JPG 、PNG 、BMP 、GIF |
| Movie format | AVI 、MKV 、MP4 、MOV 、VOB 、 DAT 、FLV 、MPG 、WMV 、TP 、 TRP 、M2T 、M2V 、M4V 、 MPEG 、3GP 、MJPEG 、TS |
| Music format | MP3 、AC3 、AAC 、WAV 、OGG 、 FLAC 、M4A 、AMR |
| Text format | TXT |
For DTV PVR
USB stick: Format: FAT32, max 64G
HDD: Format: FAT32, max 2T
For media playback
Format: FAT32/NTFS, max 2T
TROUBLESHOOTING
| Symptom | Inspection Check | |
| Picture Audio | ||
| Antenna position, direction, or connection | ||
| Electronic equipment, car/ motorcycle, fluorescent light | ||
| Volume(check if mute is activated or if the audio system connections are not correct) | ||
| The power cord is not inserted The power switch has not been turned on Contrast and brightness/volume setup Press the Standby key on the remote control for inspection | ||
| Color control | ||
| Audio or Weak channel | ||
| Change aspect to zoom | ||


File not played from a USB device
– Check that the file is in a compatible format.
Problem with internet access
– Check whether the network cable/ wifi is connected properly.

