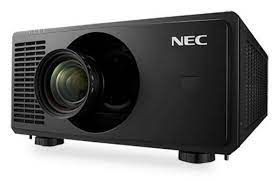
NEC NP-PX2201UL DLP Projector User Guide
NEC NP-PX2201UL DLP Projector User Guide

Quick Setup Guide
- Install the projector and mount the optional lens.

Never try to install the projector by yourself. This may result in visual impairment etc. - Connect your computer or audio video equipment to the projector.
- Connect the supplied power cord and attach the power cord stopper.
Make sure that the prongs are fully inserted into both the AC IN terminal and the wall outlet. - Remove the lens cap.
- Turn on the projector
- Press the main power switch to the ON position ( I ).
- Press the (POWER) button on the projector cabinet or the POWER ON button on the remote control.
- Select a source.
- Adjust an image size and position.
LENS SHIFT
- On the projector, press the SHIFT ▼▲◀ or ▶ button.
- On the remote control, press the SHIFT button. And press the ▼▲◀ or ▶ button.
FOCUS
- On the projector, press the FOCUS (+) or (−) button.
- On the remote control, press the FOCUS button or the ZOOM button. And press the ◀ or ▶ button. [For NP45ZL/NP46ZL/NP47ZL] You can manually adjust the edge focus in addition to the powered focus. Turn the edge focus ring clockwise or counterclockwise.
ZOOM
- On the projector, press the ZOOM (+) or (−) button.
- On the remote control, press the FOCUS button or the ZOOM button. And press the ▲ or ▼ button.
- Turn off the projector.
- Press the (POWER) button on the projector cabinet or the POWER STANDBY button on theremote control.
- Press either the (POWER) or the POWER STANDBY button again.
- Make sure the projector is in STANDBY MODE, then press the main power switch to the OFF position (○).
Was this manual helpful?
Thank you for your feedback!