Makita DML802 18V LXT Lithium-Ion Cordless L.E.D. Flashlight Instruction Manual


makita DML802 18V LXT Lithium-Ion Cordless L.E.D. Flashlight

Instructions
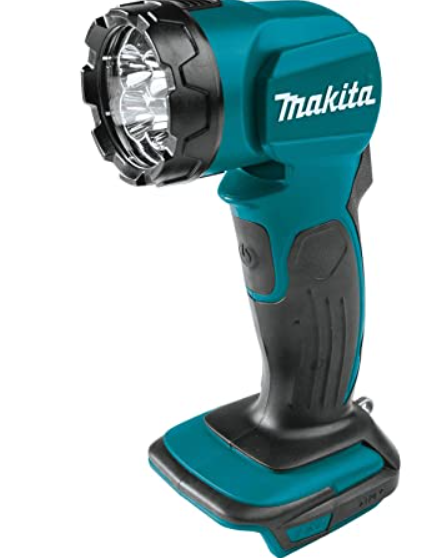
Explanation of general view
- Battery cartridge
- Red indicator
- Button
- Indicator lamps
- Check button
- Switch
- Strap hook
- Ring
SPECIFICATIONS
| Model | DML802 | |||||||||||||
| LED | 3.2 W x 1 pc | |||||||||||||
| Standard battery cartridge | BL1415 | BL1415N | BL1430/ BL1430B | BL1440 | BL1450 | BL1460B | BL1815 | BL1815N | BL1820/ BL1820B | BL1830/ BL1830B | BL1840/ BL1840B | BL1850/ BL1850B | BL1860B | |
| Voltage | 14.4 V | 18 V | ||||||||||||
| Operating time (Approx.) | 4 hours | 5 hours | 9 hours | 14 hours | 16 hours | 18 hours | 6 hours | 7 hours | 10 hours | 13 hours | 18 hours | 23 hours | 27 hours | |
|
Dimensions (with battery) |
L | 256 mm | 272 mm | 256 mm | 272 mm | |||||||||
| W | 79 mm | 79 mm | 79 mm | 79 mm | ||||||||||
| H | 99 mm | 99 mm | 116 mm | 116 mm | ||||||||||
| Net weight (with battery) | 0.63 kg | 0.82 kg | 0.68 kg | 0.93 kg | ||||||||||
- Due to our continuing program of research and development, the specifications herein are subject to change without notice.
- Specifications and battery cartridge may differ from country to country.
- Weight, with battery cartridge, according to EPTA-Procedure 01/2003
Symbols
- Read instruction manual.
- Indoor use only
- Do not stare at the operating light source.
- Only for EU countries
Due to the presence of hazardous components in the equipment, waste electrical and electronic equipment, accumulators and batteries may have a negative impact on the environment and human health.
Do not dispose of electrical and electronic appliances or batteries with household waste! In accordance with the European Directive on waste electrical and electronic equipment and on accumulators and batteries and waste accumulators and batteries, as well as their adaptation to national law, waste electrical equipment, batteries and accumulators should be stored separately and delivered to a separate collection point for municipal waste, operating in accordance with the regulations on environmental protection. This is indicated by the symbol of the crossed-out wheeled bin placed on the equipment.
IMPORTANT SAFETY INSTRUCTIONS
WARNING:
When using electric tools, basic safety precautions should always be followed to reduce the risk of fire, electric shock, and personal injury, including the following:
READ ALL INSTRUCTIONS.
- Before using battery cartridge, read all instructions and cautionary markings on (1) battery charger, (2) battery, and (3) product using battery.
- Recharge only with the charger specified by the manufacturer. A charger that is suitable for one type of battery pack may create a risk of fire when used with another battery pack.
- Use a power source with the voltage specified on the nameplate of the charger.
- Do not attempt to use a step-up transformer, an engine generator or DC power receptacle.
- After charging or before attempting any maintenance or cleaning, unplug the charger from the power source.
- This battery holder part is not waterproof. Do not use it in damp or wet locations. Do not expose it to rain or snow. Do not wash it in water.
- Do not touch the inside of the flashlight head with tweezers, metal tools, etc.
- Under abusive conditions, liquid may be ejected from the battery, avoid contact. If contact accidentally occurs, flush with water. If liquid contacts eyes, additionally seek medical help. Liquid ejected from the battery may cause irritation or burns.
- Do not short the battery cartridge:
- Do not touch the terminals with any conductive material.
- Avoid storing battery cartridge in a container with other metal objects such as nails, coins, etc.
- Do not expose battery cartridge to water or rain. A battery short can cause a large current flow, overheating, possible burns and even a breakdown.
- If electrolyte gets into your eyes, rinse them out with clear water and seek medical attention right away. It may result in loss of your eyesight.
- Be careful not to drop or strike battery.
- Do not incinerate the battery cartridge even if it is severely damaged or is completely worn out. The battery cartridge can explode in a fire.
CAUTION:
- When the tool is not in use, always switch off and remove the battery cartridge from the tool.
- Do not store the tool and battery cartridge in locations where the temperature may reach or exceed 50 °C (122 °F).
- Do not give the tool a shock by dropping, striking, etc.
- Do not expose the light to eyes continuously. It may hurt them.
- Do not cover or clog the lit tool with cloth or carton, etc. Covering or clogging it may cause a flame.
- Do not disassemble the charger or battery cartridge; take it to a qualified serviceman when service or repair is required. Incorrect reassembly may result in a risk of electric shock or fire.
- Use the tools only with specifically designated battery packs. Use of any other battery packs may create a risk of injury and fire.
- If operating time has become excessively shorter, stop operating immediately. It may result in a risk of overheating, possible burns and even an explosion.
- Do not use a damaged battery.
- If any problem develops, consult your nearest Makita Service Center or dealer. To maintain product safety and reliability, repairs, maintenance or adjustment should be carried out by Makita Authorized Service Center.
SAVE THESE INSTRUCTIONS
Tips for maintaining maximum battery life
- Charge the battery cartridge before completely discharged.
Always stop tool operation and charge the battery cartridge when you notice less tool power. - Never recharge a fully charged battery cartridge. Overcharging shortens the battery service life.
- Charge the battery cartridge with room temperature at 10 °C – 40 °C (50 °F – 104 °F). Let a hot battery cartridge cool down before charging it.
- Charge the battery cartridge once in every six months if you do not use it for a long period of time.
FUNCTIONAL DESCRIPTION
Charging
Charge the battery cartridge with the Makita charger before use.
Installing or removing battery cartridge (Fig. 1)

CAUTION
- Always switch off the tool before installing or removing of the battery cartridge.
- Hold the tool and the battery cartridge firmly when installing or removing battery cartridge. Failure to hold the tool and the battery cartridge firmly may cause them to slip off your hands and result in damage to the tool and battery cartridge and a personal injury.
To remove the battery cartridge, slide it from the tool while sliding the button on the front of the cartridge.
To install the battery cartridge, align the tongue on the battery cartridge with the groove in the housing and slip it into place. Insert it all the way until it locks in place with a little click. If you can see the red indicator on the upper side of the button, it is not locked completely.
CAUTION
- Always install the battery cartridge fully until the red indicator cannot be seen. If not, it may accidentally fall out of the tool, causing injury to you or someone around you.
- Do not install the battery cartridge forcibly. If the cartridge does not slide in easily, it is not being inserted correctly.
Indicating the remaining battery capacity
(Only for battery cartridges with “B” at the end of the model number.) (Fig. 2)
Press the check button on the battery cartridge to indicate the remaining battery capacity. The indicator lamps light up for few seconds.

NOTE
- Depending on the conditions of use and the ambient temperature, the indication may differ slightly from the actual capacity.
Lighting up the LED light (Fig. 3)

CAUTION:
- Do not look in the LED light or see the source of light directly.
Push the switch to light up the LED light. To turn off, push the switch again.
Battery protection system
The protection system is equipped, which automatically cuts off the output power for its long service life. The light goes off during operation when the remaining battery capacity gets low. This is caused by the activation of protection system and does not show the light trouble. Remove the battery cartridge from the light and charge it.
Head angle (Fig. 4)
The head angle can be adjusted in 12 stages. Adjust as desired.

Strap hook (Fig. 5, 6)
The strap hook is convenient for temporarily hanging the tool.
The strap hook can be installed on the upper or lower ring in accordance with usage.


MAINTENANCE
CAUTION
- Never use gasoline, benzine, thinner, alcohol or the like. Discoloration, deformation or cracks may result.
To maintain product SAFETY and RELIABILITY, repairs, any other maintenance or adjustment should be performed by Makita Authorized Service Centers, always using Makita replacement parts.
OPTIONAL ACCESSORIES
CAUTION:
These accessories or attachments are recommended for use with your Makita tool specified in this manual. The use of any other accessories or attachments might present a risk of injury to persons. The accessories or attachments should be used only in the proper and intended manner.
- Makita genuine battery and charger
NOTE:
Some items in the list may be included in the tool package as standard accessories. They may differ from country to country.