SEALEY DT55BCOMBO1 Mobile Dispensing Tank Instructions


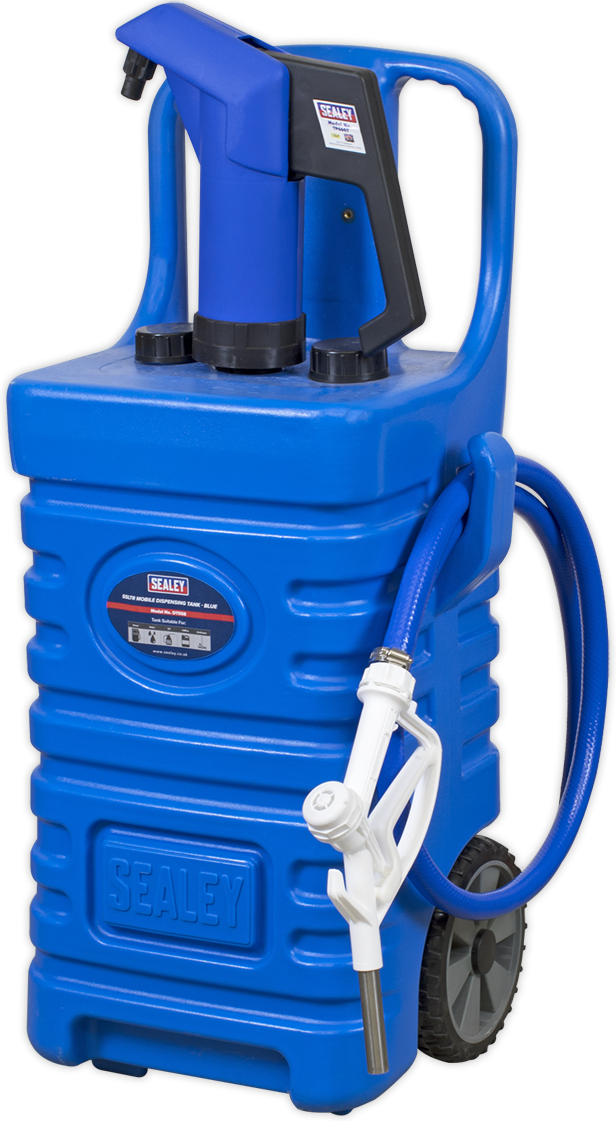
SEALEY DT55BCOMBO1 Mobile Dispensing Tank

Thank you for purchasing a Sealey product. Manufactured to a high standard, this product will, if used according to these instructions, and properly maintained, give you years of trouble free performance.
IMPORTANT: PLEASE READ THESE INSTRUCTIONS CAREFULLY. NOTE THE SAFE OPERATIONAL REQUIREMENTS, WARNINGS & CAUTIONS. USE THE PRODUCT CORRECTLY AND WITH CARE FOR THE PURPOSE FOR WHICH IT IS INTENDED. FAILURE TO DO SO MAY CAUSE DAMAGE AND/OR PERSONAL INJURY AND WILL INVALIDATE THE WARRANTY. KEEP THESE INSTRUCTIONS SAFE FOR FUTURE USE.

SAFETY
- WARNING! Ensure health & safety, local authority, and general workshop practice regulations are strictly adhered to when using this equipment.
- Familiarise yourself with product application and limitations, as well as the specific potential hazards peculiar to this product.
- Maintain the pump in good condition (use an authorised service agent).
- Replace or repair damaged parts. Use genuine parts only. Non authorised parts will invalidate the warranty.
- Ensure safety eye protection and protective clothing are worn when using this product.
- Keep the work area clean, uncluttered and ensure there is adequate lighting.
- Maintain correct balance and footing. Ensure the floor is not slippery and wear non slip shoes.
- Keep children and unauthorised persons away from the working area.
- Dispose of waste liquids in accordance with local authority regulations.
- DO NOT dismantle, tamper with or adapt the pump for any purpose other than for which it is designed.
- DO NOT use the unit if it has been dropped or mishandled, check the unit to ensure there is no damage.
- DO NOT use the pump as a handle to move the fluid drum.
- Keep the pump clean and store in a safe, dry, childproof location.
- WARNING! DO NOT allow uncontrolled discharge of fluids thus polluting the environment.
INTRODUCTION
- Extend the suction tube so it reaches the bottom of the tank. Pull it out and screw it into place on the bottom of the pump (fig.3).
- Turn the locking ring to the right until all the thread is exposed. Turn the adapter to the right until it is finger tight (fig.2).
- Place the pump assembly onto either the left or right hand side ports (fig.1). Start turning the pump assembly to the right. The adapter ring can be screwed down on its own if the pump body fowls the handles (fig.2).
- Attach the hose to the pump by pushing it onto the spout and securing it with a hose clip (fig.1).
- Attach the pump nozzle to the other end of the hose in the same way (fig.4 and 5).


OPERATION
- The nozzle can be latched open by pushing the button on the bottom of the handle (fig.5).

MAINTENANCE
- Check the tightness of all fittings regularly and tighten if necessary.
- Keep the pump unit clean to highlight any leaks which may develop in service.
TROUBLESHOOTING
| PROBLEM | PROBLEM POSSIBLE CAUSE | SOLUTION |
|
Low or no flow rate. |
Low level in source tank. | Refill the tank. |
| Air entering the pump or suction tube. | Check seals and connections. | |
| Leakage from the body pump. | Seal damaged. | Contact your authorised Sealey stockist. |
SUPPORT CENTER
Parts support is available for this product. To obtain parts, please log on to www.sealey.co.uk, email [email protected] or telephone 01284 757500
ENVIRONMENT PROTECTION
Recycle unwanted materials instead of disposing of them as waste. All tools, accessories and packaging should be sorted, taken to a recycling centre and disposed of in a manner which is compatible with the environment. When the product becomes completely unserviceable and requires disposal, drain any fluids (if applicable) into approved containers and dispose of the product and fluids according to local regulations.
Note: It is our policy to continually improve products and as such we reserve the right to alter data, specifications and component parts without prior notice.
Important: No Liability is accepted for incorrect use of this product.
Warranty: Guarantee is 12 months from purchase date, proof of which is required for any claim.
ABOUT COMPANY
- Sealey Group, Kempson Way, Suffolk Business Park, Bury St Edmunds, Suffolk. IP32 7AR
- TEL: 01284 757500
- FAX: 01284 703534
- EMAIL: [email protected]
- WEB: www.sealey.co.uk