Makita ADRM13 Cordless Radio with Lantern Instruction Manual


makita ADRM13 Cordless Radio with Lantern

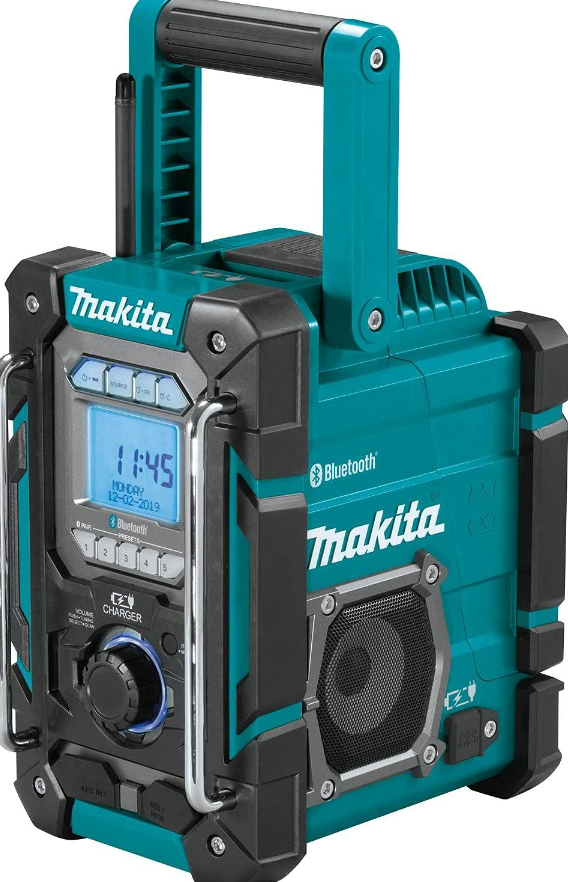
EXPLANATION OF GENERAL
- Carrying handle
- Flashlight
- Speaker
- LED Lantern
- Battery compartment
- Volume up/down button
- Mode/Lock button
- Preset down button
- Power button
- Preset up button
- Bluetooth pairing/Play/Pause button
- Tuning down/Previous track/Rewind button
- Tuning up/Next track/Fast-forward button
- Light brightness button
- Light on/off button/Light mode button
- Color temperature button
- USB charging on/off button/Charging LED indicator
- USB power supply port
- Strap buckle
LCD display
- Lock button activated
- Volume
- Low battery indicator
- Memory number
- Radiofrequency/Volume level/Bluetooth mode
- FM band
- Bluetooth status icon
Overview


IMPORTANT SAFETY
- Read this instruction manual and the charger instruction manual carefully before use. Clean only with dry cloth.
- Do not install near any heat sources such as radiators, heat registers, stoves, or other apparatus (including amplifiers) that produce heat.
- Only use attachments/accessories specified by the manufacturer.
- Battery-operated radio with integral batteries or a separate battery pack must be recharged only with the specified charger for the battery. A charger that may be sutable for one type of battery may create a risk of fire when used with another battery.
- Use battery-operated radio only with specificaly designated battery packs. Use of any other batteries may create a risk of fire.
- When battery pack is not in use, keep it away from other metal objects like: paper clips, coins, keys, nails, screws, or other small metal objects that can make a connection from one terminal to another. Shorting the battery terminals together may cause sparks, burns, or fire.
- Avoid body contact with grounded surfaces such as pipes, radiators, ranges and refrigerators. There is an increased risk of electric shock if your body is grounded.
- Under abusive conditions, liquid may be ejected from the battery, avoid contact. If contact accidentally Occurs, flush with water. If liquid contacts eyes, additionally seek medical help. Liquid ejected from the battery may cause irritation or burms.
- Do not use a battery pack or tool that is damaged or modified. Damaged or modified batteries may exhibit unpredictable behaviour resulting in fire, explosion or risk of injury,
- Clean only with dry cloth.
- Do not install near any heat sources such as radiators, heat registers, stoves, or other apparatus (including amplifiers) that produce heat.
- Only use attachments/accessories specified by the manufacturer.
- A battery operated radio with integral batteries or a separate battery pack must be recharged only with the specified charger for the battery. A charger that may be sutable for one type of battery may create a risk of fire when used with another battery.
- Use battery operated radio only with specificaly designated battery packs. Use of any other batteries may create a risk of fire.
- When battery pack is not in use, keep it away from other metal objects like: paper clips, coins, keys, nails, screws, or other small metal objects that can make a connection from one terminal to another. Shorting the battery terminals together may cause sparks, burns, or fire.
- Avoid body contact with grounded surfaces such as pipes, radiators, ranges and refrigerators. There is an increased risk of electric shock if your body isgrounded.
- Under abusive conditions, liquid may be ejected from the battery, avoid contact. If contact accidentallyOccurs, flush with water. If liquid contacts eyes, additionally seek medical help. Liquid ejected from the battery may cause irritation or burms.
- Do not use a battery pack or tool that is damaged or modified. Damaged or modified batteries may exhibit unpredictable behaviour resulting in fire, explosion or risk of injury,
SAFETY RULES
- Before using battery cartridge, read all instructions and cautionary markings on (1) battery charger, (2) battery, and (3) product using the battery.
- Do not disassemble battery cartridge.
- If operating time has become excessively shorter, stop operating immediately. It may result in a risk of overheating. possible burns and even an explosion.
- f electrolyte gets into your eyes, rinse them out with clear water and seek medical attention right away. It may result in loss of your eyesight.
- Do not short the battery cartridge:
- Do not touch the terminals with any conductive material.
- Avoid storing battery cartridge in a container with other metal objects such as nails, coins, etc.
- Do not expose battery cartridge to water or rain. A battery short can cause a large current flow, overheating, possible burns and even a breakdown.
- Do not store and use the tool and battery cartridge in locations where the temperature may reach or exceed 50°C (122°F).
- Do not incinerate the battery cartridge even if it is severely damaged or is completely worn out. The battery cartridge can explode in a fire.
- Be careful not to drop or strike battery.
- Do not use a damaged battery.
- To avoid risk, the manual of replaceable the battery should be read before use.
- Use the batteries only with the products specified by Makita. Installing the batteries to non-compliant products may result in a fire, excessive heat, explosion, or leak of electrolyte. If the tool is not used for a long period of time, the battery must be removed from the tool.
- If the tool is not used for a long period of time, the battery must be removed from the tool.
- Do not allow chips, dust, or soil stuck into the terminals, holes, and grooves of the battery cartridge. It may result in poor performance or breakdown of the tool or battery cartridge.
- Keep the battery away from children.
- During and after use, the battery cartridge may takeon heat which can cause burns or low-temperature burns.
- Do not touch the terminal of the tool immediately after use as it may get hot enough to cause burns.
- Unless the tool supports the use near high-voltage electrical power lines, do not use the battery cartridge near high-voltage electrical power lines. It may result in a malfunction or breakdown of the tool or battery cartridge.
Radiation Exposure Statement:
The product comply with the FCC portable RF exposure limit set forth for an uncontrolled environment and are safe for intended operation as described in this manual. The futher RF exposure reduction can be achieved if the product can be kept as far as possible from the user body or set the device to lower output power if such function is available. Note: This equipment has been tested and found to coacmply with the limits for a Class B digital device, pursuant topart 15 of the FCC Rules. These limits are designed to provide reasonable protection against harmful interference in a residential installation. This equipment generates, uses and can radiate radio frequency energy and, if not installed and used in accordance with the instructions, may cause harmful interference to radio communications. However, there is no guarantee that interference will not occur in a particular installation. If this equipment does cause harmful interference to radio or television reception, which can be determined by turning the equipment off and on, the user is encouraged to try to correct the interference by one or more of the following measures:
- Reorient or relocate the receiving antenna.
- Increase the separation between the equipment and receiver.
- .Connect the equipment into an outlet on a circuit different from that to which the receiver is connected.
- Consult the dealer or an experienced radio/TV technician for help.
OPERATING TIME
- The suitable battery packs for this radio are listed in the following table.
- The following table indicates the operating time on a single charge.

Recommended cord
- The cord-connected battery pack(s) listed above may not be available depending on your region of residence
- Before using the cord-connected battery pack, read the instructions and cautionary markings on them.
INSTALLATION
- Always switch off the radio before installing or removing 7the battery cartridge.
- Be careful not to drop or strike the radio. A broken shell may slash your finger or stab your body. Damaged radio may exhibit unpredictable
- behavior resulting in fire, explosion or risk of injury.
- Hold the tool and the battery cartridge firmly when installing or removing the battery cartridge.
IMPORTANT - Reduced power, distortion, stuttering sound or the flashing icon and backlight shows that the battery needs to be replaced.
- The battery cartridge is not included as a standard accessory.
Red indicator
- To install the battery cartridge, align the tongue on the battery cartridge with the groove in the housing and slip it into place. Always insert it all the way until it locks in place with a little click.
- .If you can see the red indicator as shown in the figure, it is not locked completely. Install it fully until the red indicator cannot be seen. If not, it may accidentally fall out of the radio, causing injury to you or someone around you.
- Do not use force when installing the battery cartridge. If the cartridge does not slide in easily, it is not being inserted correctly.
- To remove the battery cartridge, slide it from the radio while sliding the button on the front of the cartridge.
xGTLXT battery cartridge

Charging with USB power supply port
NOTE:
- Connect only devices which are compatible with DC 5V, 2.4A power source to the USB power supply port.
- Otherwise, it may cause a malfunction to the product.
- Connect the USB cable (not included) with the USB power supply port of the product. And then connect the other end of the cable with the device.
- .To start charging, press the USB charging on/off button to enable the charging function. The USB charging on-off button will light up green.
- When the battery power is low, the screen backlight will flash until the charging function is turned off.
- If the charging function is turned on without charging, the USB charging on/off button will flash green, and the charging function will be automatically turned off after 30 minutes.
- To stop charging, press the USB charging on/off button to disable the charging function.
- The maximum volume of the output power speaker will decrease when your USB is charging.
LISTENING TO FM RADIO
Tuning into FM stations
To tune into FM radio stations, follow these steps
- Turn on the radio using the Power button.
- Select the FM radio mode by repeatedly pressing the Mode button.
- Press and hold the Tuning up or Tuning down button to automatically tune into an FM station with a higher or lower frequency respectively. Your radio will stop scanning when it finds a station of sufficient strength.
- The display will show the frequency of the signal which has been found.
- Press the Tuning up or Tuning down button to fine-tune the frequency if needed.
- Repeat steps 3 and 4 to tune into other radio stations.
NOTE
For FM radio mode, if the radio’s reception is not good, it may be necessary to relocate your radio to a position giving better reception.
Preset memory stations
The FM radio has 9 preset stations.
- Press the Power button to turn on the radio.
- Press the Mode button to select the FM radio mode. Tune to the required radio station as previously described.
- Press and hold the Preset up or Preset down button until “M” flashes on the display.
- Press the Preset up or Preset down button to select the desired memory number.
- Press and hold the Preset up or Preset down button until “M” stops flashing on the display. The radio station is stored into the selected memory preset. The display will appear with the memory number.
- Repeat this procedure as needed for the remaining presets. Preset stations which have already beenstored may be overwritten by following the above procedure if required.
LISTENING TO MUSIC VIA
BLUETOOTH STREAMING
You need to pair your Bluetooth device with the radio before you can auto-link to play/stream Bluetooth music through the radio. Pairing creates a’bond’ so two devices can recognize each other.
Note:
- To have a better sound quality, we recommend setting the volume to more than two-thirds level on your Bluetooth device and then adjust the volume on the radio as required.
- The radio can memorize up to 8 sets of paired device, when the memory exceeds this amount, the oldest pairing history will be overwritten.
Pairing your Bluetooth device for the first time
- Press the Power button to turn on the radio. Press the Mode button to select Bluetooth mode. The Bluetooth status icon flashes on the display to show the radio is discoverable.+
- Activate Bluetooth on your device according to the device’s user manual to link to the radio. Locate the Bluetooth device list and select the device with the name of your radio (VWith some mobiles which are equipped with earlier versions than BT 2.1 Bluetooth device, you may need to input the passcode 0000″).
- Once connected, there will be a confirmation tone sound. The Bluetooth icon will cease flashing. You can simply select and play any music from your source device. Volume control can be adjusted from your source device, or directly from the radio.
- Use the controls on your Bluetooth-enabled device or on the radio to play/pause and navigate tracks.
- or otherwise, reconnecting your device with the radio may be necessary.
- Physical obstacles, other wireless devices or electromagnetic devices may affect the connection quality.
- Bluetooth connectivity performance may vary depending on the connected Bluetooth devices.Please refer to the Bluetooth capabilities of your
- device before connecting to the radio. All features may not be supported on some paired Bluetooth devices
Playing audio files in Bluetooth mode
When you have successfully connected the radio with the chosen Bluetooth device you can start to play your music using the controls on your connected Bluetooth device.
- Once playing has started, the volume can be adjusted
both on the radio using the Volume buttons and on the Bluetooth device using the volume control of the device - Use the controls on your Bluetooth device to play/pause and navigate tracks. Alternatively, control the playback using Play/Pause, Next track, and Previous track buttons on your radio.
- Press and hold the Fast-forward or Rewind button to move through the current track. Release the button when the desired point is reached.
Note: - Some player applications or devices may not respond to all of these controls.
- Some mobile phones may temporarily disconnect from the radio when you make or receive calls. Some devices may temporarily mute their Bluetooth audiostreaming when they receive text messages, emails offor other reasons unrelated to audio streaming. Such behavior is a function of the connected device anddoes not indicate a fault with the radio.
Playing a previously-paired Bluetooth source device
If your Bluetooth device already paired with the radio previously, the unit will memorize your Bluetooth device and it attempts to reconnect with a device in memory that is last connected. If the last connected device is nof available, the radio will be discoverable.
Disconnecting your Bluetooth device
- Press and hold the Bluetooth pairing button for 2-3seconds until the Bluetooth status icon flashes on the display or turn off Bluetooth on your Bluetooth device to disable the connection.
- You can also press the Mode button to select any mode other than Bluetooth mode to disable the connection.
LED LANTERN/FLASHLIGHT
- Press the Light on/off button to turn on the light.
- Select the setting as following
- Press the Light on/off button repeatedly to select different light modes.
- Press the Light brightness button to adjust the suitable light brightness.
- Press the Color temperature button to select different Galar temnfAratura

MAINTENANCE
CAUTION:
- Never use gasoline, benzene, thinner, alcohol or the like. Discoloration, deformation or cracks may result.
- Do not wash the radio with water.
