Makita DCM501 Cordless Coffee Maker Instruction Manual

Cordless Coffee Maker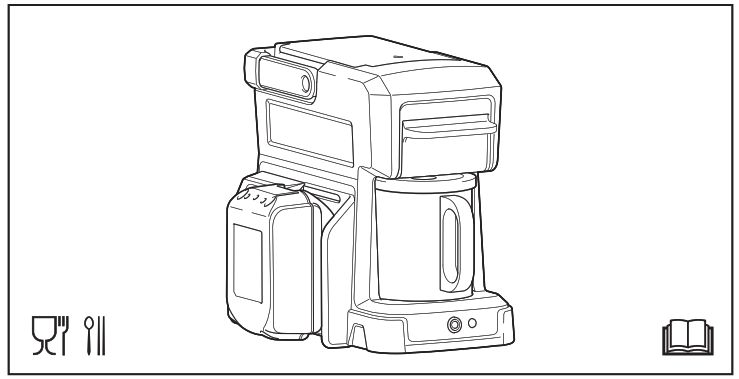


WARNING AND SAFETY RULES
- This appliance can be used by children aged from 8 years and above if they have been given supervision or instruction concerning use of the appliance in a safe way and if they understand the hazards involved. Cleaning and user maintenance shall not be made by children unless they are older than 8 and supervised. Keep the appliance and battery cartridges out of reach of children aged less than 8 years.
- Appliances can be used by persons with reduced physical, sensory or mental capabilities or lack of experience and knowledge if they have been given supervision or instruction concerning the use of the appliance in a safe way and understand the hazards involved.
- Children shall not play with the appliance.
- This appliance is intended to be used in households and similar applications such as:
– staff kitchen areas in shops, offices, and other working environment;
– farmhouses;
– by clients in hotels, motels, and other residential type environments;
– bed and breakfast type environments.
Do not use the appliance other than its intended use. - Read all instructions.
- Surfaces are liable to get hot during use. Do not touch hot surfaces.
- To protect against fire, or electric shock, do not immerse the appliance and battery in water or in any other liquid.
- Remove the battery cartridge when not in use and before cleaning.
Allow cooling before putting on or taking off parts, and before cleaning the appliance. - Do not operate any appliance with damaged battery terminals after the appliance malfunctions, or has been damaged in any manner. Return appliance to the nearest authorized service facility for examination, repair, or adjustment.
- The use of accessory attachments not recommended by the appliance manufacturer may result in fire, electric shock or injury to persons.
- Do not place on or near a hot gas or electric burner, or in a heated oven.
- Always turn off the power switch before removing the battery.
- Do not use appliances for other than intended use.
- Do not open the water tank lid during the brewing cycles.
- Scalding may occur if the filter holder/cafe pod holder is removed during the brewing cycles.
- Place the appliance on a hard, flat-level surface to avoid interruption of the airflow underneath the appliance.
- To reduce the risk of fire or electric shock, do not remove the bottom cover. No user-serviceable parts inside. Service and repair should only be performed by an authorized service center.
- Disconnect the battery cartridge from the appliance before making any adjustments, changing accessories, or storing the appliance. Such preventive safety measures reduce the risk of starting the appliance accidentally.
- Recharge only with the charger specified by the manufacturer. A charger that is suitable for one type of battery cartridge may create a risk of fire when used with another battery cartridge.
- Use appliances only with specifically designated battery cartridges.
The use of any other battery cartridges may create a risk of injury and fire. - When the battery cartridge is not in use, keep it away from other metal objects, like paper clips, coins, keys, nails, screws, or other small metal objects, that can make a connection from one terminal to another. Shorting the battery terminals together may cause burns or a fire.
- Under abusive conditions, liquid may be ejected from the battery; avoid contact. If contact accidentally occurs, flush with water. If liquid contacts the eyes, additionally seek medical help. Liquid ejected from the battery may cause irritation or burns.
- Do not use a battery cartridge or appliance that is damaged or modified. Damaged or modified batteries may exhibit unpredictable behavior resulting in fire, explosion, or risk of injury.
- Do not expose a battery cartridge or appliance to fire or excessive temperature. Exposure to fire or temperature above 130°C may cause an explosion.
- Have servicing performed by a qualified repair person using only identical replacement parts. This will ensure that the safety of the product is maintained.
- Follow all charging instructions and do not charge the battery pack or tool outside the temperature range specified in the instructions.
Charging improperly or at temperatures outside the specified range may damage the battery and increase the risk of fire. - Be careful not to spill liquid on the battery terminals. If liquid spills on the battery terminals, remove the battery.
SAVE THESE INSTRUCTIONS.
IMPORTANT SAFETY INSTRUCTIONS FOR BATTERY CARTRIDGE
- Before using the battery cartridge, read all instructions and cautionary markings on (1) battery charger, (2) battery, and (3) appliance using battery.
- Do not disassemble the battery cartridge.
- If the operating time has become excessively shorter, stop operating immediately. It may result in a risk of overheating, possible burns and even an explosion.
- If electrolyte gets into your eyes, rinse them out with clear water and seek medical attention right away. It may result in loss of your eyesight.
- Do not short the battery cartridge:
(1) Do not touch the terminals with any conductive material.
(2) Avoid storing battery cartridges in a container with other metal objects such as nails, coins, etc.
(3) Do not expose the battery cartridge to water or rain.
A battery short can cause a large current flow, overheating, possible burns, and even a breakdown. - Do not store the appliance and battery cartridge in locations where the temperature may reach or exceed 50°C (122°F).
- Do not incinerate the battery cartridge even if it is severely damaged or is completely worn out. The battery cartridge can explode in a fire.
- Be careful not to drop or strike the battery.
- Do not use a damaged battery.
- The contained lithium-ion batteries are subject to the Dangerous Goods Legislation requirements.
For commercial transports e.g. by third parties or forwarding agents, special requirements on packaging and labeling must be observed. For the preparation of the item being shipped, consulting an expert for hazardous material is required. Please also observe possibly more detailed national regulations. Tape or mask off open contacts and pack up the battery
in such a manner that it cannot move around in the packaging. - Follow your local regulations relating to the disposal of batteries.
- Use the batteries only with the products specified by Makita. Installing the batteries to non-compliant products may result in a fire, excessive heat, explosion, or leak of electrolyte.
SAVE THESE INSTRUCTIONS.
Only use genuine Makita batteries. Use of non-genuine Makita batteries, or batteries that have been altered, may result in the battery bursting causing fires, personal injury and damage. It will also void the Makita warranty for the Makita tool and charger.
Tips for maintaining maximum battery life

- Charge the battery cartridge before completely discharged.
Always stop appliance operation and charge the battery cartridge when you notice less appliance power. - Never recharge a fully charged battery cartridge.
Overcharging shortens the battery service life. - Charge the battery cartridge at room temperature at 10°C – 40°C (50°F – 104°F). Let a hot battery cartridge cool down before charging it.
- Charge the battery cartridge once every six months if you do not use it for a long period of time.
Symbols
The following show the symbols used for the appliance.
Be sure that you understand their meaning before use.
- Only EU countries


SPECIFICATIONS
| DCM501 | ||
| Rated voltage and applicable battery cartridges |
DC 18 V | BL1815N, BL1820, BL1820B, BL1830, BL1830B, BL1840, BL1840B, BL1850, BL1850B, BL1860B |
| DC 14.4 V | BL1430, BL1430B, BL1440, BL1450, BL1460B | |
| 10.8 V – 12V max |
BL1040B, BL1041B | |
| Water tank capacity |
240 ml | |
| Keep-warm function |
None | |
| Applicable cafe pod type |
60 mm | |
| Dimensions (LxWx H) |
243 x 145 x 218 mm (without battery cartridge) | |
| Weight | 1.5 kg (without battery cartridge) | |
- Following battery cartridges can be installed on this appliance however the total brewing amount will be smaller than a cup.
BL1415N, BL1020B, BL1021B: approx. 140 ml
BL1015, BL1016: approx. 100 ml - Due to our continuing program of research and development, the specifications herein are subject to change without notice.
- Specifications and battery cartridges may differ from country to country.
WARNING
Only use the battery cartridges listed above. Use of any other battery cartridges may cause injury and/or fire.
PARTS IDENTIFICATION (Fig. A)
| 1. Water tank 2. Water tank lid 3. Handle 4. Battery slot cover 5. Battery slot (for 10.8 V – 12 V max battery cartridge) 6. Battery slot (for 18 V and 14.4 V battery cartridges) 7. Filter |
8. Filter holder 9. Cafe pod holder 10. Overflow opening 11. Cup rest 12. Power lamp 13. Power switch 14. Coffee cup cover 15. Coffee cup |
PREPARATION
CAUTION
- Always switch off the appliance before installing or removing of the battery cartridge.
- Hold the top of the appliance and the battery cartridge firmly when installing or removing the battery cartridge. Failure to do so may cause them to slip off your hands and result in damage to the appliance and battery cartridge and a personal injury.
- Always install the battery cartridge fully until the red indicator cannot be seen. If not, it may accidentally fall out of the battery holder, causing injury to you or someone around you.
- Do not install the battery cartridge forcibly. If the cartridge does not slide in easily, it is not being inserted correctly.
- Always install the battery to a suitable slot for the battery cartridge to be used.
When using the appliance first time, or after a long period of storage, perform the following steps:
- Remove all packing materials from the appliance.
- Clean the appliance exterior and wash all removable parts. (refer to the “Daily cleaning“ section for removable parts)
- To clear any residue from the appliance, pour 240 ml of fresh water into the water tank and brew without ground coffee or cafe pod until the water tank gets empty. Repeat the same operation at least twice. (refer to the “Brewing” section for how to brew)
Installing or removing the battery cartridge (Fig. B)
To install the battery cartridge (17), slide the battery slot cover (16) to open the battery slot that you are going to use ((6) for 18 V or 14.4 V battery cartridge, (5) for 10.8 V – 12 V max battery cartridge). Align the tongue on the battery cartridge with the groove in the housing and slip it into place. Insert it all the way until it locks in place with a little click. If you can see the red indicator (18) on the upper side of the button (19), it is not locked completely.
To remove the battery cartridge, slide it from the appliance while sliding the button on the front of the cartridge.
Battery protection system
The appliance is equipped with a battery protection system. This system automatically cuts off power to the appliance to extend battery life.
The appliance will automatically stop during operation if the appliance and/or battery are placed under one of the following conditions:
- Overheated:
If the appliance does not start, the battery is overheated. In this situation, let the battery cool before pressing the power switch again. - Low battery voltage:
If the remaining battery capacity is too low, the appliance will not operate. The power lamp blinks in this situation. Remove and recharge the battery.
NOTE - The overheat protection works only with a battery cartridge with a star mark (Fig. J).
Indicating the remaining battery capacity (Fig. K)
(Only for battery cartridges with the indicator)
Press the check button (21) on the battery cartridge to indicate the remaining battery capacity. The indicator lamps (20) light up for a few seconds.
| Indicator lamps | Remaining capacity | ||
| 75% – 100% | |||
| 50% – 75% | |||
| 25% – 50% | |||
| 0% – 25% | |||
(For 18 V and 14.4 V batteries only) |
Charge the battery | ||
batteries only) |
The battery may have malfunctioned | ||


NOTE
- Depending on the conditions of use and the ambient temperature, the indication may differ slightly from the actual capacity.
OPERATION
To reduce the risk of scalding, follow the instructions below:

- Do not remove the filter holder/cafe pod holder during the brewing cycle. Steam builds up under the filter holder/cafe pod holder.
- When the brewing section marked with
- Be aware that hot coffee drips from the bottom of the filter holder/cafe pod holder even after the brewing cycle.
- After the brewing is finished, wait at least 5 minutes before removing the filter holder/cafe pod holder.
- If another brewing cycle is to be started, wait at least 5 minutes before supplying water to the appliance.
Otherwise, steam and hot water could be released and scalding may result. - Do not touch the plate on the bottom of the appliance during and immediately after brewing.
NOTE - For brewing, do not use any other liquid than water.
- Always use cold water for brewing. Hot water promotes the dripping speed and causes overflow from the filter holder/cafe pod holder.
- The maximum water tank capacity is 240ml. Do not pour too much water into the water tank. Excess water may come out of the overflow opening.
Brewing
- Open the water tank lid and take the water tank out.(Fig. C)
- Pour the preferred amount of fresh cold water into the water tank and install it on the appliance. (Fig. D)
Style The recommended amount of water Ground coffee (6.5 g *) 160ml Cafe pod (60 mm type) 120ml * Equals to a level of the supplied spoon.
- Close the water tank lid.
- Remove the filter holder/cafe pod holder. (Fig. E)
- Follow the procedures below according to the style of the coffee to be brewed:
Ground coffee (Fig. F)
Open the cover. Take the filter out from the filter holder. Put the preferred amount of ground coffee into the filter. Place the filter back in position and close the cover.
Cafe pod (Fig. G)
Set a cafe pod into the cafe pod holder.
– Be sure that the flat surface of the cafe pod faces up when placed.
– Do not use a torn cafe pod.
– Do not set two or more cafe pods. Hot water will overflow. - Insert the filter holder/cafe pod holder to the slot on the appliance.
If the holder/cafe pod holder cannot be inserted to the slot properly, check if the filter/cafe pod is correctly installed. - Put the cover on the coffee cup and place it on the cup rest. (Fig. H)
- Press the power switch. The power lamp lights up and the brewing cycle begins. (Fig. I) The appliance will automatically turn off the power when the brewing cycle is finished.
Press the power switch if you want to stop the brewing in the middle.
Estimated time for brewing (160 ml)
| Battery cartridge (fully charged) | Estimated time |
| 18 V (with BL1830B) | approx. 5 min. |
| 14.4 V (with BL1430B) | approx. 5 min. |
| 10.8 V – 12 V max (with BL1041B) | approx. 7 min. |
MAINTENANCE
WARNING
- When servicing is required, ask a Makita authorized service center that deals with genuine replacement parts. The use of any other parts may create a hazard or cause product damage.
- To avoid serious personal injury, always remove the battery cartridge from the unit when cleaning or performing any maintenance.
- Do not immerse the appliance and battery in water or other liquids.
Daily cleaning
NOTICE
- Never use gasoline, benzene, thinner, alcohol, or the like when cleaning plastic parts. Discoloration, deformation, or cracks may result. After the appliance is cooled, use clean clothes to remove dirt, dust, oil, grease, etc.
- Do not use abrasive cleaners or scouring pads.
- Do not dry the inside of the appliance with a cloth, as lint may remain.
Proper maintenance will ensure years of service for your appliance. Clean the appliance after every use to maintain quality coffee flavor.
- Remove the battery from the appliance and allow the appliance to cool.
- Wipe the exterior with a soft cloth moistened with water.
- Remove the filter holder (with filter) or the cafe pod holder from the appliance. Wash the removed parts with soapy water. After that, rinse them with water.
- Allow the appliance and all parts to dry completely.
Removing scales inside the appliance
Through the use of the appliance, a water scale will build up in the piping inside. Water scale hinders the water flow and prolongs the dripping time as the result. If the dripping time has become longer than before, clean the inside piping with citric acid.
- Take the water tank out and pour 240 ml of water into it.
- Add 5 g of citric acid commercially available into the water and stir it up.
- Install the water tank into the appliance.
- Remove the filter holder/cafe pod holder from the appliance.
- Put a cap on the cup rest.
- Press the power switch.
- After the dripping is finished, take the water tank and the coffee cup out and rinse them with water.
- Pour 240 ml of water to the water tank and install it into the appliance.
- Put the coffee cup on the cup rest.
- Press the power switch and wait until the dripping is finished.
Repeat steps 8 to 10 if you taste or smell citric acid.
Repeat the above procedures if the dripping still takes time.
Transportation / Storage
- Use the handle when carrying the appliance. When folding the handle, be careful not to get your fingers pinched.
- To prevent fire or burning, allow the appliance to cool down completely before you carry or store it.
- Do not store the discharged battery for long periods, as it can shorten its service life.
- The supplied spoon can be stored in the back side of the water tank lid. To store, slide the end of the spoon into the hooks. (Fig. M)
To maintain product SAFETY and RELIABILITY, repairs, any other maintenance or adjustment should be performed by Makita Authorized Service Centers, always using Makita replacement parts.
OPTIONAL ACCESSORY
- These accessories or attachments are recommended for use with your appliance specified in this manual. The use of any other accessories or attachments might present a risk of injury to persons. Only use accessory or attachment for its stated purpose.
If you need any assistance with more details regarding these accessories, ask your local Makita Service Center. - Makita genuine battery and charger
- Cafe pod for Makita coffee maker
NOTE - Some items in the list may be included in the appliance package as standard accessories. They may differ from country to country.
Makita Europe N.V.
Jan-Baptist Vinkstraat 2, 3070 Kortenberg, Belgium
Makita Corporation
3-11-8, Sumiyoshi-cho, Anjo, Aichi 446-8502 Japan
www.makita.com
DCM501-AT15L-1710
CRE