Bosch GHG 18V-50 Professional Heat Gun Instruction Manual


Safety instructions
Read all the safety information and instruc-tions. Failure to observe the safety informa-tion and follow instructions may result in elec-tric shock, fire and/or serious injury.Save all warnings and instructions for future reference.This heat gun is not intended for use by children or persons with physical, sensory or mental limita-tions or a lack of experience or knowledge. This heat gun can be used by children aged 8 or older and by persons who have physical, sensory or mental limitations or a lack of experience or knowledge if a person responsible for their safety supervises them or has in-structed them in the safe opera-tion of the heat gun and they understand the associated dangers. Otherwise there is a risk of operating errors and injury.
- Supervise children during use, cleaning and maintenance. This will ensure that children do not play with the heat gun.
- Handle the heat gun with care. The heat gun produces intense heat which increases the risk of fire and explosion.
- Take particular care when working in the vicinity of flammable materials. The hot airflow or hot nozzle may ignite dust or gases.
- Do not work with the heat gun in potentially explosive areas.
- Do not aim the hot airflow at the same area for pro-longed periods. Working with plastic, paint, varnish or similar materials may produce easily flammable gases.
- Please be aware that heat is directed to covered flam-mable materials, which may ignite.
- Safely place the heat gun on the storage surfaces after use and let it cool completely before packing it away. The hot nozzle can cause damage.
- Do not let children use the heat gun unsupervised when it is switched on.
- Store idle heat guns out of the reach of children. Do not allow persons unfamiliar with the heat gun or these instructions to operate the tool. Heat guns can be dangerous in the hands of untrained users.
- Do not expose the heat gun to rain or wet conditions. Water entering a heat gun increases the risk of electric shock.
- Always wear safety goggles. Safety goggles reduce the risk of injury.
- Remove the rechargeable battery before adjusting the tool settings, changing accessories, or storing the heat gun. This safety measure prevents the heat gun from being started accidentally.Keep your work area well-ventilated. The gas and steam produced during work are often harmful to one’s health.
- Wear protective gloves and do not touch the nozzle while it is hot. There is a risk of burns.
- Do not direct the airflow at persons or animals.
- Do not use the heat gun as a hair dryer. The outgoing airflow is considerably hotter than that of a hair dryer.
- Do not allow foreign objects to enter the heat gun.
- The distance between the nozzle and the workpiece depends on the material you are working on (metal, plastic, etc.) and the intended working method. Al-ways test the amount of air and temperature first.
- Do not open the battery. There is a risk of short-circuit-ing.
- In case of damage and improper use of the battery, va-pours may be emitted. The battery can set alight or ex-plode. Ensure the area is well ventilated and seek medical attention should you experience any adverse effects. The vapours may irritate the respiratory system.
- If used incorrectly or if the battery is damaged, flam-mable liquid may be ejected from the battery. Contact with this liquid should be avoided. If contact accident-ally occurs, rinse off with water. If the liquid comes into contact with your eyes, seek additional medical attention. Liquid ejected from the battery may cause ir-ritation or burns.
- The battery can be damaged by pointed objects such as nails or screwdrivers or by force applied externally. An internal short circuit may occur, causing the battery to burn, smoke, explode or overheat.
- When the battery is not in use, keep it away from pa-per clips, coins, keys, nails, screws or other small metal objects that could make a connection from one terminal to another. A short circuit between the battery terminals may cause burns or a fire.
- Only use the battery with products from the manufac-turer. This is the only way in which you can protect the battery against dangerous overload.
- Only charge the batteries using chargers recommen-ded by the manufacturer. A charger that is suitable for one type of battery may pose a fire risk when used with a different battery.
- Protect the battery against heat, e.g. against continuous intense sunlight, fire, dirt, water and moisture. There is a risk of explosion and short-circuiting.

Product Description and Specifications

Please observe the illustrations at the beginning of this oper-ating manual.
Intended Use
The heat gun is intended for deforming and welding plastic, removing coats of paint and heating heat shrink plastic tubes. It is also suitable for soldering and tinning, melting ad-hesive bonding and thawing water pipes.
The heat gun is only intended for handheld, supervised use.
- Do not use the heat gun in potentially explosive areas or in the presence of flammable materials or dusts.
Product Features
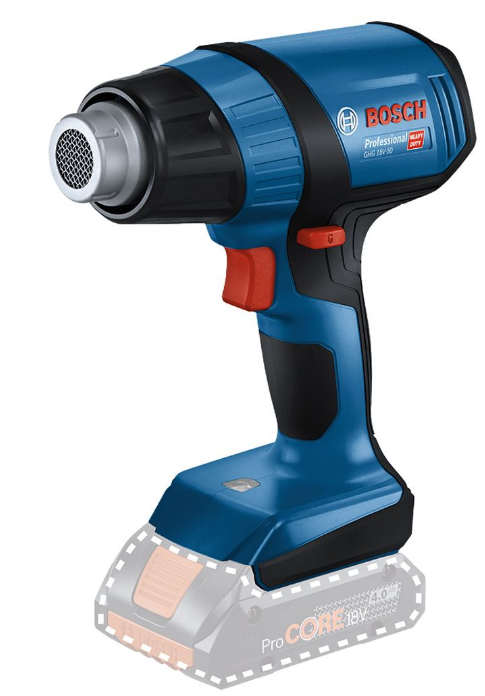
The numbering of the product features refers to the repres-entation of the heat gun on the graphics page.
- Nozzle
- Heat shield, removable
- Power level setting
- Unlocking switch
- On/off switch
- LED worklight
- Battery charge indicatora)
- Battery release buttona)
- Rechargeable batterya)
- Surface nozzlea)
- Angle nozzlea)
- Reflector nozzlea)
- Reducing nozzlea)
- Heat shrink plastic tubea
Accessories shown or described are not included with the product as standard. You can find the complete selection of accessories in our accessories range.
Technical Data

- At an ambient temperature of 20 °C
- Depends on battery in use
- imited performance at temperatures <0 °C
Noise/vibration information
Typically, the A-weighted sound pressure level of the heat gun is less than 70 dB(A). Vibration total values ah (triax vector sum) and uncertainty K: ah < 2.5 m/s2, K = 1.5 m/s2.
Rechargeable battery
Inserting the Battery
- Do not use force to insert the rechargeable battery. The rechargeable battery is designed so that it can only be inserted into the heat gun in the right position.Push the charged battery into the battery holder until it clicks into place.
- The lithium-ion battery is protected against deep discharge by “Electronic Cell Protection (ECP)”. A protective circuit switches the heat gun off when the rechargeable battery is drained.
- Follow the instructions on correct disposal.
- Removing the Battery
- To remove the rechargeable battery, press the battery re-lease button and pull the battery out. Do not use force to do this.
- Battery charge indicator The green LEDs on the battery charge indicator indicate the state of charge of the rechargeable battery. For reasons of safety, you can call up the state of charge only when the heat gun is off. Press the button for the battery charge indicator or to show the state of charge. This is also possible when the re-chargeable battery is removed.
- If no LED lights up after pressing the button for the battery charge indicator, then the rechargeable battery is defective and must be replaced.
Battery model GBA 18V


Battery model ProCORE18V


Operation
- Remove the rechargeable battery before changing ac-cessories or storing the heat gun. This safety measure prevents the heat gun from being started accidentally.
Creation of Smoke During Initial Use
A coating protects the metal surfaces from corrosion ex-works. This protective layer evaporates during initial use. The heat gun may display discolourations on the nozzle (1) due to the production process. These do not count as dam-age; the functioning of the heat gun is not affected.
Selecting a Power Setting
With the output level setting (3) you can choose between two different output levels. The LED worklight flashes briefly while switching:
- Setting 300 °C
With this setting, you can, for instance, thaw water pipes or process heat shrink plastic tubes. Upon switching on, this temperature is reached in less than 6 s. With a fully charged 8 Ah rechargeable battery, the runtime is up to 21 min. - Setting 500 °C
With this setting, you can, for instance, remove paint or soft-solder.The specifications on heating-up time refer to measurements at room temperature. - Switching On
To switch on, first press the unlocking switch (4) and then the on/off switch (5). After starting, you can release the un-locking switch (4). The unlocking switch (4) does not have to be pressed again during operation. Upon starting the heat gun, the LED worklight (6) switches on and illuminates the work area. - Switching Off
To switch off the tool, release the on/off switch (5). Switch off the heat gun at the rechargeable battery (9) to al-low it to cool down. - Restart Protection
If the rechargeable battery (9) is removed from the heat gun while in operation and the on/off switch (5) is still being held down when it is reinserted, the restart protection will activ-ate. The LED worklight (6) flashes and the heat gun does not start. Release the on/off switch (5) and switch the heat gun back on as usual. - Overheat Protection for the Rechargeable Battery
If the rechargeable battery (9) gets too hot during operation, the output is reduced. The LED worklight (6) flashes slowly for as long as the on/off switch (5) is pressed. If the heat gun continues to be operated and the temperat-ure in the rechargeable battery increases further, the heat gun will switch itself off.
Reduced Output
The heat gun is compatible with all available 18 V Bosch Pro-fessional rechargeable batteries. When operating the heat gun with rechargeable batteries smaller than the recommended 4 Ah, however, the heat gun will not reach full power at the 500 °C setting (the temperat-ure is not reached and the air volume is reduced). In order to show that the heat gun is working only with reduced output, the LED worklight (6) flashes slowly several times upon switching on.
LED Displays
The LED worklight (6) is also used as an LED status indic-ator.If there is a permanent internal error in the heat gun (the heat gun does not start or switches off when it is already in operation), please contact customer service.
Practical advice
Note: Do not position the nozzle (1) too close to the work-piece that you are using the power tool on. The resulting air blockage can lead to the heat gun overheating.
Removing the heat shield
When working in particularly tight spaces, you can remove the heat shield (2) by turning it.Caution: Nozzle is hot! Working without the heat shield increases the risk of burns.To remove or put on the heat shield (2), switch the heat gun off and let it cool down.
Example applications (see figures A–D)
Images of example applications can be found on the graphics pages. The distance between the nozzle and the workpiece de-pends on the material you are working on (metal, plastic etc.) and the intended working method. The optimum temperature for each application can be de-termined by a practical test. Always test the amount of air and temperature first. Start at a greater distance and a lower power setting. Then adjust the distance and power setting according to requirements. If you are unsure what material you are working on or what effect the hot air might have on it, first test the effect on a concealed area.You can work without accessories for all examples of work. However, using the recommended accessories will simplify the work and considerably increase the quality of the result. You can use all nozzles that are available as accessories from Bosch with this heat gun.
- Take care when changing the nozzle. Do not touch the nozzle while it is hot. Let the heat gun cool down and wear protective gloves during changeover. The heat from the nozzle can cause burns.
- Heat-shrinking (see figure A) Fit the reflector nozzle (12) (accessory). Choose the dia-meter of the heat shrink plastic tube (14) (accessory) suit-able for the workpiece. Evenly heat the heat shrink plastic tube until it fits closely against the workpiece. Removing varnish/loosening adhesives(see figure B)
- Fit the surface nozzle (10) (accessory). Briefly soften the varnish with hot air and remove it with a clean spatula. Long heat exposure burns the varnish and makes removal more difficult.
- Many adhesives can be softened using heat. By heating ad-hesives, you can break connections or remove excess adhes-ive.
- Thawing frozen water pipes (see figure C)
- Before applying heat to the pipe, check it is in fact a water pipe. Water pipes and gas pipes often look identical from the outside. Gas pipes must under no cir-cumstances be heated.Fit the angle nozzle (11) (accessory). Gradually heat the frozen points of the pipe, starting at the outlet and moving back towards the inlet. Take great care when warming plastic pipes and pipe con-nections to avoid causing damage.
- Soft Soldering (see figure D) Fit the reducing nozzle (13) (accessories).
- If you are using solder without flux, apply soldering grease or paste to the solder joint. Heat the solder joint and apply the solder. The solder must be melted by the temperature of the workpiece.
- If necessary, remove the flux after the solder joint has cooled down.
Maintenance and Service
Maintenance and Cleaning
- Remove the rechargeable battery from the heat gun before carrying out any work on the air pump (e.g. maintenance, tool change, etc.) as well as when trans-porting and storing the heat gun.
- Keep the heat gun and the ventilation slots clean in or-der to work safely and well.
After-Sales Service and Application Service
Our after-sales service responds to your questions concern-ing maintenance and repair of your product as well as spare parts. You can find explosion drawings and information on spare parts at: www.bosch-pt.com
The Bosch product use advice team will be happy to help you with any questions about our products and their accessor-ies. In all correspondence and spare parts orders, please always include the 10‑digit article number given on the nameplate of the product.
Transport
The contained lithium-ion batteries are subject to the Dan-gerous Goods Legislation requirements. The batteries are suitable for road-transport by the user without further re-strictions. When shipping by third parties (e.g.: by air transport or for-warding agency), special requirements on packaging and la-belling must be observed. For preparation of the item being shipped, consulting an expert for hazardous material is re-quired.
Dispatch battery packs only when the housing is undam-aged. Tape or mask off open contacts and pack up the bat-tery in such a manner that it cannot move around in the packaging. Please also observe the possibility of more de-tailed national regulations.
Disposal
Heat guns, rechargeable batteries, accessories and packaging should be fed into environmentally friendly recycling.Do not throw heat guns and rechargeable bat-teries/non-rechargeable batteries in the do-mestic waste.
Only for EU countries:
Heat guns that are no longer usable (in line with European Directive 2012/19/EU) and defective or used rechargeable batteries/non-rechargeable batteries (in line with European Directive 2006/66/EC) must be collected separately and fed into environmentally friendly recycling.
Only for United Kingdom:
According to Waste Electrical and Electronic Equipment Regulations 2013 (2013/3113) and the Waste Batteries and Accumulators Regulations 2009 (2009/890), power toolsthat are no longer usable must be collected separately and disposed of in an environmentally friendly manner. Battery packs/batteries: