JVC LT-GN27225A LED Monitor User Guide

User Guide


Important Notice:
Please retain the original packaging for Warranty purposes. Please return with ALL supplied accessories.
The supplier reserves the right to make changes at any time without prior notice.
Warning and Precautions
Warning: To avoid the risk of electric shock, do not remove the cover (or back).
No user-serviceable parts inside.
Refer servicing to qualified service personnel.

WARNING: TO PREVENT FIRE OR SHOCK HAZARDS, DO NOT EXPOSE THIS APPARATUS TO RAIN OR MOISTURE.
CAUTION: TO ENSURE PERSONAL SAFETY, OBSERVE THE FOLLOWING RULES REGARDING THE USE OF THIS UNIT.
- Operate only from the power source specified on the unit.
- Avoid damaging the AC plug and power cord.
- Avoid improper installation and never position the unit where good ventilation is unattainable.
- Do not allow objects or liquid to fall into the cabinet openings.
- In the event of mechanical damage, unplug the unit and call a service technician. Do not attempt to repair it yourself or remove the rear cover.
Changes or modifications not approved by JVC could void the warranty.
* When you don’t use this monitor for a long period of time, be sure to disconnect the power plug from the AC outlet for your safety.
* To prevent electric shock do not use this power plug with an extension cord, receptacle, or another outlet unless the blades can be fully inserted to prevent blade exposure.
Do not attempt to service the product yourself
Caution
To prevent electrical shock, do not open the monitor casing.
There are no user-serviceable parts inside.
Please refer to qualified service personnel for repairs.
Warning and Precautions
WARNINGS
- Ensure at least a 10 cm gap around the product for ventilation. An internal temperature rise may cause a fire and damage the product.
- The ventilation should not be impeded by covering the ventilation openings with items such as newspapers, clothes, curtains, etc.
- When installing the product on a cabinet or shelf, make sure that the bottom edge of the front of the product is not protruding.
- Do not install the product within the reach of young children.
- Do not place objects containing liquid (vases, pots, bottles, etc.) or metallic objects on top of the product.
- If the product falls or the exterior is damaged, power off the product, remove the power cord and contact Customer Service.
- Do not place the power cord or product near heat sources such as direct sunlight, heat, or a hot object such as a stove.
- The monitor must not be exposed to dripping or splashing and no objects filled with liquids, such as vases, shall be placed on the unit.
- Always handle the monitor with care when moving it. Don’t put any pressure on the screen as it is fragile.
- Do not install the product in a vehicle or a place exposed to dust, moisture (water drips, etc.), oil, or smoke.
- Installing the product in an unusual place (a place exposed to a lot of fine dust,
chemical substances, extreme temperatures, or a significant presence of moisture, or a place where the product will operate continuously for an extended period of time) may seriously affect its performance. - If the product generates a strange noise, a burning smell, or smoke, remove the power cord immediately and contact Customer Service.
- Looking at the screen too close for an extended period of time can deteriorate your eyesight.
- Rest your eyes for at least 5 minutes for every 1 hour of product use.0
- Disconnect the power cord from the power socket if you do not plan on using the product for an extended period of time (vacation, etc.).
- To move the product, first disconnect all the cables from it, including the power cable.
Base Installation Instructions
The Stand Base must be securely installed as shown below unless using an external mount.
VESA100 x100mm ,M4 Screw.
Place them down on a flat surface, onto a towel or blanket to avoid damaging the screen
- Align the screw holes on the back of the monitor with the ones on the Support Pole and use the screws (4 pieces PM4 x 5mm) to attach the Pole to the monitor.
- Fix the Cover over the Screw Compartment.
- Attach the Base to the Support Pole using the screw (1 piece PM4 x 10mm) and the Rubber Pad as shown.
- Assembly is complete. The monitor can now be placed on a stable, flat surface.


Accessories

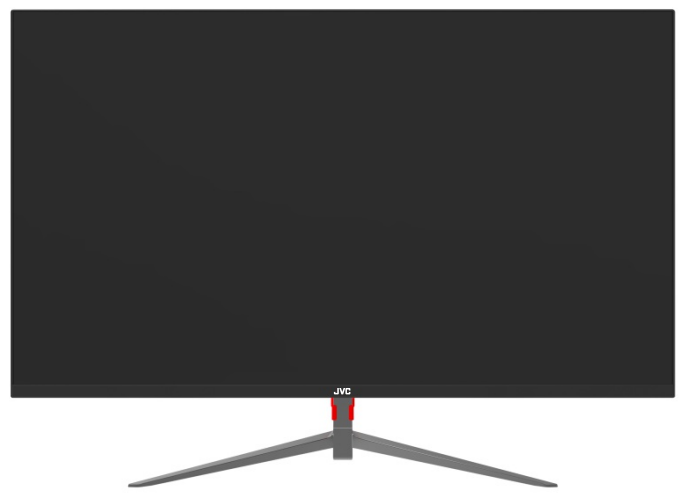
Product Overview

Ports

| HDMI | Connect to a device using an HDMI cable. |
| DP(DISPLAY PORT) | Connect to a PC or other source device using the provided Display Cable. |
| AUDIO OUT | Connect to an audio output device such as headphones or earphones. |
| USB | DC 5V, 1A power output for charging devices |
| DC 12V/4A | Connect to the AC/DC adapter. |
Button Functions

Note: The Multifunction Button has several functions. Press it or move in the correct direction as shown to perform the desired function.
- Power
Press and hold for a few seconds to turn the monitor on or to switch it to shutdown status. - Power Indicator
When the monitor is on, the indicator light will be blue. When the monitor is in Standby mode,the indicator light will be red and when the monitor is off, the indicator light will be off. - EXIT
Push to the left to select input sources or to exit the current menu. - DOWN
Select and adjust the OSD items ( Decrease the value). - Menu
Push to the right to bring up the OSD menu. - UP
Select and adjust the OSD items ( Increase the value).
1. Push to the right to access the main menu.
2. Push up or down to scroll through the main function options.
3. Push to the right again to enter the selected sub-menu. Push up or down to adjust the desired options.
4. Push to the left to return to the main menu.
Operation Menu Functions (OSD)

Main Menu |
Sub-Menu | Option | Description |
| Brightness | Brightness | 0-100 | Adjust display brightness |
| Contrast | 0-100 | Adjust display contrast | |
| ECO | Standard, RTS, FPS, TEXT, Movie, Game |
Set vertical mode | |
| DCR | On/Off | Turn DCR (Dynamic Contrast Ratio) function On/Off | |
| HDR Mode | AUTO, OFF,2084 | Turn HDR function auto/off/2048 | |
| MPRT2 | On/Off | Turn the MPRT2 function On/Off | |
| Image.Setup | H.Position | 0-100 | Adjust the horizontal postition |
| V.Position | 0-100 | Adjust the vertical postition | |
| Clock | 0-100 | Adjust the clock setting | |
| Phase | 0-100 | Adjust the clock phase setting | |
| Aspect | 16:9,4:3 | Set aspect ratio | |
| Low Blue Light | 0-100 | Adjust the Low Blue Light setting | |
| Color Setup | Color Temp | Warm, Cool,User | Adjust color temperature |
| Red | 0-100 | Customize RGB components | |
| Green | 0-100 | ||
| Blue | 0-100 | ||
| OSD Setup | Language | English, Fran~ais, DEUTSCH,(kt # , Italiano,ESPA 0NOLO,PORTUGU ES,TURKCE,POL SKI, N EDERLAN Ds, E $%. 83 |
Set OSD language |
| OSD H.Positon | 0-100 | Adjust the horizontal postition | |
| OSD V.Positon | 0-100 | Adjust the vertical postition | |
| OSD TIMEOUT | 0-60 | Set how long the OSD remains | |
| TRANSPARENCY | 0-100 | Adjust the OSD transparency value | |
| RESET | RESET | N/A | Reset OSD settings to factory default; press the Menu button to confirm |
| Other Setup | Signal Source | DP/HDMI | Set input source |
| MUTE | On/Off | Turn the MUTE function On/Off | |
| Volume | 0-100 | Adjust Volume | |
| Freesync | On/Off | Turn Freesync On/Off. Press the menu to confirm | |
| OD | On/Off | Turn Over Drive function On/Off |
Standard Signal Mode Table
| Synchronization | Horizontal Frequency | 30- 81 kHz |
| Vertical Frequency | 50-75Hz | |
| Resolution | Optimum Resolution | 1920 x Hz |
| Maximum Resolution | 1920 x Hz |
If a signal that belongs to the following standard signal modes is transmitted from your PC, the screen will automatically be adjusted. If the signal transmitted from the PC does not belong to the standard signal modes, the screen may be blank even though the power LED turns on. In such a case, change the settings according to the following table by referring to the graphics card user manual.
| Resolution | Horizontal Frequency (kHz) | Vertical Frequency (Hz) | Pixel Clock (MHz) | Sync Polarity (HIV) |
| IBM, 720 x 400 | 31.469 | 70.087 | 28.322 | -/+ |
| VESA, 640 x 480 | 31.469 | 59.94 | 25.175 | -/- |
| MAC, 640 x 480 | 35 | 66.667 | 30.24 | -/- |
| VESA, 640 x 480 | 37.861 | 72.809 | 31.5 | -/- |
| VESA, 640 x 480 | 37.5 | 75 | 31.5 | -/- |
| VESA, 800 x 600 | 35.156 | 56.25 | 36 | +/+ |
| VESA, 800 x 600 | 37.879 | 60.317 | 40 | +/+ |
| VESA, 800 x 600 | 48.077 | 72.188 | 50 | +/+ |
| VESA, 800 x 600 | 46.875 | 75 | 49.5 | +/+ |
| MAC, 832 x 624 | 49.726 | 74.551 | 57.284 | -/- |
| VESA, 1024 x 768 | 48.363 | 60.004 | 65 | -/- |
| VESA, 1024 x 768 | 56.476 | 70.069 | 75 | -/- |
| VESA, 1024 x 768 | 60.023 | 75.029 | 78.75 | +/+ |
| VESA, 1152 x 864 | 67.5 | 75 | 108 | +/+ |
| MAC, 1152 x 870 | 68.681 | 75.062 | 100 | -/ |
| VESA, 1280 x 720 | 45 | 60 | 74.25 | +/+ |
| VESA, 1280 x 800 | 49.702 | 59.81 | 83.5 | -/+ |
| VESA, 1280 x 1024 | 63.981 | 60.02 | 108 | +/+ |
| VESA, 1280 x 1024 | 79.976 | 75.025 | 135 | +/+ |
| VESA, 1440 x 900 | 55.935 | 59.887 | 106.5 | -/+ |
| VESA, 1600 x 900 | 60 | 60 | 108 | +/+ |
| VESA, 1680 x 1050 | 65.29 | 59.954 | 146.25 | -/+ |
| VESA, 1920 x 1080 | 67.5 | 60 | 148.5 | +/+ |
| VESA, 1920 x 1080 | 177.7 | 120 | 279.8 | +/+ |
| VESA, 1920 x 1080 | 213.2 | 144 | 335.7 | +/+ |
| VESA, 1920 x 1080 | 244.3 | 165 | 384.7 | +/+ |
- Horizontal Frequency
The time required to scan a single line from the left to the right side of the screen is called a horizontal cycle. The reciprocal number of a horizontal cycle is called horizontal frequency. Horizontal frequency is measured in kHz. - Vertical Frequency
Repeating the same picture dozens of times per second allows you to view natural pictures. The repeat frequency is called “vertical frequency” or “refresh rate” and is indicated in Hz. - This product can be set to only one resolution for each screen size to obtain the optimum picture quality due to the
nature of the panel. Using a resolution other than the specified resolution may degrade the picture quality.
To avoid this, it is recommended that you select the optimum resolution specified for your product. - Some resolutions listed in the table above may not be available depending on graphics card specifications.
Technical Features
| Display | 68.5 cm (27″) |
| Aspect Ratio | 16:09 |
| Resolution | |
| Brightness | 250 cd/m° |
| Contrast | 3000:1 Dynamic Contrast |
| Viewing Angle | 178(H); 178 (V) |
| Menu OSD | Multi-Language |
| Input Terminals | HDMI DP AUDIO-OUT USB DC |
| Power | DC 12V/4A |
| Consumption | <48W |
| Unit Size(incl.stand) | 614x179x435mm |
| Net Weight | 3.5kg |
| VESA | 100x100mm |
| Failures | Possible solutions | |
| The power the indicator does not work. |
• Make sure the power is switched on. • Make sure the power cord is connected. | |
| The plug-and-play function does not work. |
• Make sure the PC matches the plug-and-play function. • Make sure the display card matches the plug-and-play function. | |
| Dim image. | • Adjust the brightness and contrast. | |
| Unsteady image or picture ruffling. | • Some nearby electric equipment may cause electronic interference. | |
| The indicator lamp of the power works (flickers)but there is no image on the display. |
• Check to see whether the power of the computer is switched on. • Check to see if the computer’s graphics card is inserted correctly. • Check to see if the monitor’s signal cable is properly connected to the computer. • Check the plug of the monitor’s signal cable and confirm that each pin is not deformed. • Tap any key on keyboard of the PC to power up if the PC is in standby mode. • Look at the power indicator on the PC keyboard and confirm whether the computer is working correctly. | |
| Colour loss (red, green, blue) | • Check the signal cable of the display and confirm that each pin is not curved. | |
| Chromatic aberration in the picture (the white color doesn’t look white) | • Adjust the RGB color or reselect the color temperature | |