Bosch PCH6A5B9.Y Built-in Gas Hob Instructions


BOSCH PCH6A5B9.Y Built-in Gas Hob
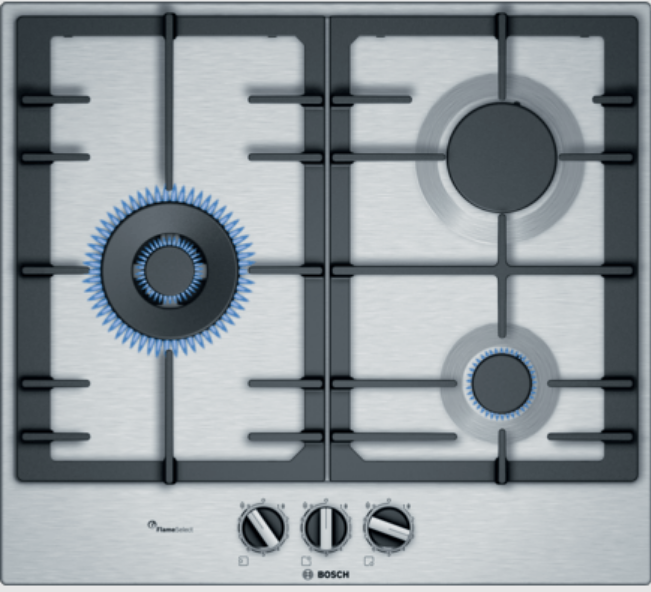

MODEL

| 1 | Component | |
| Pan support | – | |
| Control knob | – | |
| Economy burner | 1.00 kW | |
| Standard-output burner | 1.75 kW | |
| High-output burner | 3.00 kW | |
| Mini-wok multi-crown burner | 3.30 kW | |
| Wok multi-crown burner | 4.00 kW | |
| Dual-wok multi-crown burner | 4.60 kW | |
| 1 The images shown in these instructions are for guid- ance only. | ||
| Recommended diameter of the cookware (cm) | Nozzle | Max. consump- tion (g/h) |
| 16 – 12 | 50 | 73 |
| 22 – 14 | 66 | 127 |
| 26 – 20 | 87 | 218 |
| 30 – 22 | 90 | 240 |
| 30 – 22 | 98 | 290 |
| 30 – 22 | 96 – 45 | 334 |
Safety
Observe the following safety instructions.
General information
- Read this instruction manual carefully.
- Keep the instruction manual and the product information safe for future reference or for the next owner.
- Do not connect the appliance if it has been damaged in transit.
Intended use
The appliance can only be used safely if it is correctly installed according to the safety in-structions. The installer is responsible for en-suring that the appliance works perfectly at its installation location.
Only use this appliance:
- For cooking purposes.
- Under supervision. Never leave the appli- ance unattended when cooking for short periods.
- In a private household and in a domestic environment.
- Up to an altitude of max. 2000 m above sea level.
Do not use the appliance:
- On boats or in vehicles.
- as a room heater.
- with an external timer or a remote control.
- Outdoors.
Restriction on user group
This appliance may be used by children aged 8 or over and by people who have reduced physical, sensory or mental abilities or inad-equate experience and/or knowledge, provided that they are supervised or have been instructed on how to use the appliance safely and have understood the resulting dangers.
Do not let children play with the appliance. Children must not perform cleaning or user maintenance unless they are at least 15 years old and are being supervised.
Keep children under the age of 8 years away from the appliance and power cable.
Safe use
WARNING ‒ Risk of explosion!
Escaping gas may cause an explosion. WHAT TO DO IF YOU SMELL GAS OR IF THERE ARE FAULTS IN THE GAS INSTALLATION
- Immediately shut off the gas supply or close the gas cylinder valve.
- Immediately extinguish all naked flames and cigarettes.
- Do not operate any light switches or appli-ance switches.
- Do not pull any plugs out of any sockets.
- Do not use any telephones or mobile phones within the building.
- Open windows and ventilate the room.
- Call the after sales service or the gas sup-plier.
- Escaping gas may cause an explosion. Small amounts of gas can collect over a longer period of time and ignite.
- Close the safety valve for the gas supply when the appliance is out of use for pro-longed periods. Escaping gas may cause an explosion. If the liquefied gas bottle is not upright, liquefied propane/butane can enter the appliance. In-tense darting flames may therefore escape from the burners. Components may become damaged and start to leak over time so that gas escapes uncontrollably.
- Always use liquefied gas bottles in an up-right position.
WARNING ‒ Risk of suffocation!
Using the gas cooking appliance leads to a build-up of heat, moisture and combustion products in the room where the appliance is installed.
- Ensure that the kitchen is sufficiently ventil-ated, in particular when operating the gas cooking appliance.
- If the appliance is used intensively and for prolonged periods, ensure that there is ad-ditional ventilation so that the combustion products are safely fed to the outside, e.g. if using existing ventilation equipment, set a higher performance level and, at the same time, ensure that the air is replaced with fresh air in the room where the appliance is installed.
- Consult specialist personnel when installing additional ventilation equipment.
WARNING ‒ Risk of fire!
Leaving fat or oil cooking on an unattended hob can be dangerous and may lead to fires.
- Never leave hot oil or fat unattended.
- Never attempt to extinguish a fire using water; instead, switch off the appliance and then cover with a lid or a fire blanket.
The appliance becomes very hot.
- Never place flammable objects on the cooktop or in its immediate vicinity.
- Never store any objects on the cooktop.
The appliance will become hot.
- Do not keep combustible objects or aero-sol cans in drawers directly underneath the hob.
- Never store or use combustible materials (e.g. spray cans or cleaning agents) under the appliance or in its immediate vicinity.
Hob covers can cause accidents, for example due to overheating, catching fire or materials shattering.
- Do not use hob covers.
When gas burners are in operation without any cookware placed on them, they can build up a lot of heat. The extractor hood above it may become damaged or catch fire. - Only operate the gas burners with cook-ware on them.
The appliance becomes very hot, fabrics and other objects may ignite.
- Keep fabrics (e.g. garments or curtains) away from the flames.
- Never reach over the flames.
- Do not place combustible objects (e.g. tea towels or newspapers) on, next to or be-hind the appliance.
Escaping gas may ignite.
- If the burner does not ignite after 15 seconds, turn the control knob to the “Off” position and open the door or window in the room. Wait at least one minute be-fore igniting the burner again.
- In the event of the burner flames being ac-cidentally extinguished, turn off the burner control and do not attempt to re-ignite the burner for at least one minute.
Food may catch fire.
- The cooking process must be monitored. A short process must be monitored continu-ously.
WARNING ‒ Risk of burns!
The accessible parts can become hot during operation.
- Small children should be kept away from the appliance.
Hob protective grilles may cause accidents.
- Never use hob protective grilles.
Empty cookware becomes extremely hot when set on gas burners that are operating. - Never heat up empty cookware.
The appliance becomes hot during operation. - Allow the appliance to cool down before cleaning.
WARNING ‒ Risk of electric shock!
Incorrect repairs are dangerous.
- Repairs to the appliance should only be carried out by trained specialist staff.
- Only use genuine spare parts when repair-ing the appliance.
- If the power cord of this appliance is dam-aged, it must be replaced by the manufac-turer, the manufacturer’s Customer Service or a similarly qualified person in order to prevent any risk.
If the appliance or the power cord is dam-aged, this is dangerous.
- Never operate a damaged appliance.
- Never pull on the power cord to unplug the appliance. Always unplug the appliance at the mains.
- If the appliance or the power cord is dam-aged, immediately unplug the power cord or switch off the fuse in the fuse box and turn off the gas supply.
- Call customer services. → Page 11 An ingress of moisture can cause an electric shock.
- Do not use steam- or high-pressure clean-ers to clean the appliance.
The insulation on cables of electrical appli-ances may melt if it touches hot parts of the appliance.
- Never bring electrical appliance cables into contact with hot parts of the appliance.
WARNING ‒ Risk of injury!
Faults or damage to the appliance and re-pairs that have not been carried out correctly are dangerous.
- Never switch on the appliance if there is a fault with it.
- If the appliance is faulty, unplug the mains plug or switch off the fuse in the fuse box. Shut off the gas supply and call the after sales service.
- Always have repairs carried out to the ap-pliance and damaged gas lines replaced by trained, specialist personnel.
Cookware that is not the right size, or that is damaged or incorrectly positioned may cause serious injuries.
- See the notes on cookware.
When switching on the burner, sparks are generated in the ignition plugs. - Never touch the ignition plugs while the burner is being lit.
If a control knob is too stiff to turn or it is loose, it must no longer be used.
- Contact our after-sales service immediately to have the control knob repaired or re-placed.
WARNING ‒ Risk of suffocation!
Children may put packaging material over their heads or wrap themselves up in it and suffocate.
- Keep packaging material away from chil-dren.
- Do not let children play with packaging ma-terial.
Children may breathe in or swallow small parts, causing them to suffocate.
- Keep small parts away from children.
- Do not let children play with small parts.
Preventing material damage
ATTENTION!
A build-up of heat may damage the appliance.
- Never cover the stainless steel hob, for example with aluminium foil or oven protectors.
- Only use the accessories specified.
Heat can cause damage to adjacent appliances or kit-chen units. If the appliance is in operation for an exten-ded period, heat and moisture will be generated. - Open a window or switch on an extractor hood lead-ing to the outside.
A build-up of heat may damage the appliance.
- Do not use two burners or heat sources to heat one single item of cookware.
- Do not use griddle plates, clay pots, etc. for a long time at full power.
A build-up of heat may damage the controls.
- Do not use a large item of cookware on burners that are close to the control knobs.
If a control knob is in the wrong position, this could lead to malfunctions.
- Always turn the control knob to the “Off” position when the appliance is not being used.
Handling the cookware roughly may damage the sur-face of the appliance.
- Handle the cookware on the hob carefully.
- Do not place any heavy objects on the hob.
Acidic liquids, such as lemon juice or vinegar, may damage the surface of the appliance.
- Do not leave acidic liquids on the hob.
Environmental protection and saving energy
Saving energy
If you follow these instructions, your appliance will use less energy. Choose a burner roughly the same size as your pan. Centre the cookware on the hob.
Tip: Cookware manufacturers often give the upper diameter of the saucepan. It is often larger than the base diameter.
- Unsuitable cookware or incompletely covered cooking zones consume a lot of energy. Cover saucepans with suitable lids.
- Cooking without a lid consumes considerably more
energy.
Lift lids as infrequently as possible.
- When you lift the lid, a lot of energy escapes.
Use a glass lid. - You can see into the pan through a glass lid without having to lift it.
Use cookware that is suitable for the quantity of food.
- Large items of cookware containing little food need more energy to heat up.
Cook with only a little water.
- The more water that is contained in the cookware, the more energy is required to heat it up.
Turn down to a lower power level early on. - If you use an ongoing power level that is too high, you will waste energy.
Product Information according (EU) 66/2014 can be found on the attached appliance pass and online on the product page for your appliance.
Disposing of packaging
The packaging materials are environmentally compatible and can be recycled.
- Sort the individual components by type and dispose of them separately.
Familiarising yourself with your appliance
Control knob
You can use the control panel to configure all functions of your appliance and to obtain information about the operating status. You can use the control knobs to set the flame height to different power levels.

| Display | Meaning |
| Burner assigned to the control knob. | |
| Burner off. | |
| 9 | Highest power setting and electric ignition of the burner. |
| 1 | Lowest power setting. |
Dual-wok multi-crown burner
With the dual-wok multi-crown burner, you can regulate the inner and outer flames independently of each other.

| Power level | Meaning |
| 9 | Inner and outer flame on full power. |
| 4 | Outer flame on minimum, inner flame on full power. |
| 3 | Inner flame on full power. |
| 1 | Inner flame on minimum power. |
Burner
You can find an overview of the parts of the burner here.

- Burner cover
- Burner cup
- Thermocouple for the flame monitoring
- Ignition plug
Pan supports
Insert the pan supports correctly. Place the cookware correctly on the pan supports. Never place the cookware directly on the burner. Always carefully remove the pan supports. When moving a pan support, the pan supports next to it may also move.
Tip: You can remove the metal residue that remains when some items of cookware are moved on the pan support by cleaning it properly.
Accessories
You can buy accessories from the after-sales service, from specialist retailers or online. Only use original accessories, as these have been specifically designed for your appliance. Accessories vary from one appliance to another. When purchasing accessories, always quote the exact product number (E no.) of your appliance. You can find out which accessories are available for your appliance in our catalogue, in the online shop or from our after-sales service. www.bosch-home.com
| Accessories | Description | Use |
| Additional wok grid | |
¢ Only use on the multi-crown burner. ¢ Always use for cookware with a rounded base. ¢ Recommended in order to extend the ser- vice life of the appliance. |
| Additional espresso maker grid | |
¢ Only use on the burner with the lowest power setting. ¢ Use with cookware with a diameter smal- ler than 12. |


| Accessories | Description | Use |
| Simmer cap | |
¢ Secure this above the economy burner cap. ¢ Use only with the lowest power setting of the burner. ¢ Place the cookware on the pan support, never directly on the simmer cap. |
| Simmer plate | |
¢ For cooking on a low heat. ¢ Use the economy burner or the standard- output burner. If there are several stand- ard-output burners, it is preferable to use the rear or front-right burner. ¢ Place it on the pan support with the bumps facing up – never place it directly on the burner. |


Basic operation
Igniting a gas burner
The hob has automatic ignition of the burners.
WARNING ‒ Risk of fire!
Escaping gas may ignite.
- If the burner does not ignite after 15 seconds, turn the control knob to the “Off” position and open the door or window in the room. Wait at least one minute before igniting the burner again.
- In the event of the burner flames being accidentally extinguished, turn off the burner control and do not attempt to re-ignite the burner for at least one-minute.
ATTENTION!
If you turn the control knob directly between position and 1, malfunctions may occur.
- For this reason, never turn directly from position to position 1 or vice versa.
- Press the control knob for the selected burner and turn it anti-clockwise to the highest level. Keep the control knob pressed in. a For all of the burners, sparks are generated and the flame ignites.
- Wait a few seconds and release the control knob.
- Turn the control knob to the required position.
- If the burner does not ignite, turn the control knob to the off position and repeat the steps described above. This time, hold the control knob down for longer (up to 10 seconds).
Note:
Take the following information into account to ensure that the appliance works correctly:
- The burner parts → Page 7 and the pan supports → Page 7 must be inserted correctly.
- Do not swap the burner caps around.
- It is important to keep the appliance clean. Clean the ignition plugs regularly with a small, non-metallic brush. Take care to prevent the ignition plugs from suffering any heavy knocks.
- The burner holes and grooves must be clean to ensure a correct flame.
Safety system
The safety system (thermocouple) interrupts the flow of gas if the burners accidentally go out. To ignite the burner, you must activate the system that enables the gas flow.
- Ignite the burner without releasing the control knob.
- The flame ignites.
- Press and hold the control knob for a further four seconds.
Igniting a gas burner manually
In the event of a power cut, you can light the burners manually.
- Press the control knob for the selected burner and turn it anti-clockwise to the highest level.
- Hold a lighter or a flame (lighter, match, etc.) against the burner
Switching off a burner
- Turn the control knob clockwise to
Normal behavior during operation
This behavior is normal for the appliance:
- Slight hissing noise from the ignited burner.
- Release of odours when using the appliance for the first time. These odours disappear after a short time.
- An orange flame is normal. This is due to dust in the environment, spilled liquids, etc.
- Popping noise a few seconds after the burner is switched off. This is caused by switching on the safety system.
Cookware
This information has been provided to help you save energy and avoid damaging your cookware.
Suitable cookware
Only use cookware with a suitable diameter. The cookware must not protrude over the edge of the cooktop. Never use small cookware on large burners. The flames must not touch the sides of the cookware. Only use cookware with a rounded base on the multi-crown burner.
- The hob must have a multi-crown burner and additional wok grid.
- The additional wok grid must be correctly inserted.
Using cookware
The selection and positioning of the cookware affectsthe safety and energy efficiency of your appliance.
WARNING ‒ Risk of fire!
Flammable objects may ignite.
- Maintain a distance of at least 50 mm between the cookware and flammable objects.
Note: When using some items of cookware, a temporary, slight deformation of the stainless steel cooking surface may occur. This is normal and does not affect the functionality of the appliance.
Do not use deformed cookware. Only use cookware with a thick, flat base.
- Deformed cookware is not stable on the hob and may tip over. Place the cookware right in the center of the burner.
- The cookware may tip over if it is not placed in the center of the burner. Place the cookware correctly on the pan supports.
- The cookware may tip over if you place it directly on the burner.
Recommended settings for cooking
You can use the control knobs on the appliance to set flame height incrementally to different power levels from 1 to 9. The cooking times and power levels may vary depending on the type of food, its weight, and quality, on the type of gas used, and on the material from which the cookware is made.
Tips
- Cooking tips
- When cooking soups, creams, lentils or chick peas, add all of the ingredients to the cookware at the same time.
- For pan-fried dishes, heat the oil up first. As soon as you have started frying, keep the temperature constant and adjust the power level as required.When preparing several portions, wait until the relevant temperature has been reached again. Turn the food regularly.
- To reduce the cooking time:
- Use a pressure cooker to cook creams and pulses. If you are using a pressure cooker, follow the manufacturer’s instructions.
- The water must be boiling before you add pasta, rice or potatoes. Then adjust the power level in order to continue boiling.
- Always use a lid when cooking rice and potatoes.
| Power level | Preparing meals |
| 9 | ¢ Bringing water to the boil ¢ Baking in a bain-marie: Sponge, blanc- mange, bread pudding. ¢ Frying at a high temperature: Asian dishes. |
| Power level | Preparing meals |
| 7-9 | ¢ Starting the cooking process: Pasta, soups, creams, paella, pulses, rice pud- ding. ¢ Deep-fat frying in oil: Tempura veget- ables, croquettes, chips, potato om- elettes, escalope, frozen food, baked items. ¢ Frying with a little oil: French omelette, steak, well-done sirloin steak, stro- gonoff. ¢ Frying, searing: Vegetables, meat. |
| 4-6 | ¢ Continuing the cooking process: Pasta, soups, creams, paella, pulses, rice pud- ding. ¢ Deep frying with a little oil: Ham- burgers, sausages, grilled salmon, ris- soles. ¢ Stew, pot roast: Ragout, goulash, rata- touille. ¢ Cooking at a medium temperature: Cheese sauce, béchamel, carbonara, Neapolitana sauce, blancmange, crepes. ¢ Defrosting: Frozen food. |
| 3-1 | ¢ Finishing cooking: Paella rice, pulses, rice pudding. ¢ Steaming: Fish, vegetables. ¢ Heating and keeping warm: Ready-to- eat meals. |
| 1 | Melting: Butter, chocolate, butter, gelatine, honey, caramel. |
Cleaning and servicing
To keep your appliance working efficiently for a long time, it is important to clean and maintain it carefully.
Cleaning product
You can obtain suitable cleaning products from after-sales service or the online shop.
ATTENTION!
Unsuitable cleaning products may damage the surfaces of the appliance.
- Do not use harsh or abrasive detergents.
- Do not use steel wool.
- Do not use a knife or sharp objects to remove dried-on food remnants from the hob.
- Do not use knives or sharp objects to clean the con-nection between the metal and the glass or alu-minium plate wit.
- Do not use steam-cleaning appliances.
Cleaning the appliance
ATTENTION!
When the control knob is removed while cleaning the appliance, humidity may get in and damage the interiorof the appliance.
- When cleaning the appliance, do not remove the controls.
- Allow the appliance to cool down.
- Clean using a sponge and soapy water.
- Dry with a soft cloth.
Tip: Remove spilled liquids immediately. This prevents food remains from sticking, and the time and effort re-quired for subsequent cleaning is reduced.
Cleaning the burners
After each use, clean the surface of the burner parts.This prevents food remains from burning on.
ATTENTION!
The burner parts can be damaged if you clean them ina the dishwasher.
- Do not clean the burner parts in a dishwasher.
Note: Read the information on the cleaning agents.
- Allow the appliance to cool down.
- Clean using a non-metallic brush and soapy water.
- Completely dry the appliance. If there are waterdroplets or damp areas at the start of cooking, thismay damage the enamel.
- Insert the burner parts. Ensure that the burner capsare correctly positioned on the flame spreader.
Cleaning the pan supports
Note: Read the information on the cleaning agents
ATTENTION!
The pan supports can be damaged if you clean themin the dishwasher.
- Do not clean the pan supports in the dishwasher.
- Allow the appliance to cool down.
- Carefully remove the pan supports.
- Clean using a non-metallic brush and soapy water. Carefully clean the area around the rubber pads. If the rubber pads come loose, the pan support may scratch the hob.
- Let the appliance dry completely. If there are water droplets or damp areas at the start of cooking, this may damage the enamel.
- Insert the pan supports correctly.
Multi-crown burner and stainless steel surfaces
High temperatures may lead to the multi-crown burner and the stainless steel surfaces becoming discolored.This is normal.
Clean these areas with a stainless steel cleaner after each use.
Tip: Regularly use the cleaning agent that is available from our technical after-sales service.
ATTENTION!
Stainless steel cleaners may remove screen-printed displays.
- You should therefore not use stainless steel cleanerin the area around the control knob.
Troubleshooting
You can rectify minor faults on your appliance yourself. Read the troubleshooting information before contacting after-sales service. This will avoid unnecessary costs.
WARNING ‒ Risk of injury!
Improper repairs are dangerous.
- Repairs to the appliance should only be carried out by trained specialist staff.
- If the appliance is defective, call Customer Service
WARNING ‒ Risk of electric shock!
Incorrect repairs are dangerous.
- Repairs to the appliance should only be carried out by trained specialist staff.
- Only use genuine spare parts when repairing theappliance.
- If the power cord of this appliance is damaged, it must be replaced by the manufacturer, the manufacturer’s Customer Service or a similarly qualified person in order to prevent any risk.
Malfunctions
| Fault | Cause and troubleshooting |
| The general electrical operation is impaired. | The circuit breaker is faulty. ▶ Check the circuit breaker in the fuse box. |
| The circuit breaker or one of the residual-current circuit breakers has been triggered. ▶ In the fuse box, check whether the circuit breaker or one of the residual-current circuit breakers has been triggered. | |
| The mains plug of the power cord is not plugged in. ▶ Connect the appliance to the power supply. | |
| There has been a power cut. ▶ Check whether the lighting in your kitchen or other appliances are working. | |
| Automatic ignition is not working. | Food remnants or dirt are located between the ignition plug and the burner. ▶ Clean the space between the ignition plugs and burners. |
| Burner parts are wet. ▶ Carefully dry the burner parts. | |
| The burner parts are positioned incorrectly. ▶ Correctly position the burner parts. | |
| The appliance is not earthed or has not been connected correctly, or the earth cable is damaged. ▶ Contact an electrician. | |
| The burner flame is not uniform. | The burner parts are positioned incorrectly. ▶ Correctly position the burner parts. |
| Openings on the burner are soiled. ▶ Clean and dry the openings on the burner. | |
| The gas does not ap- pear to be flowing normally or there is no gas being pro- duced at all. | The gas supply has been shut off by the intermediate valves. ▶ Open the intermediate valves. |
| The gas cylinder is empty. ▶ Replace the gas cylinder. | |
| There is a smell of gas in the kitchen. | The control knob is open. ▶ Close the control knob. |
| The gas cylinder has not been connected correctly. ▶ Ensure that the gas cylinder has been connected correctly. | |
| The gas pipe to the appliance is leaking. 1. Close the main gas tap. 2. Ventilate the room. 3. Immediately call an authorised installer, who can inspect the gas system and issue an in- stallation certificate. 4. Do not use the appliance until you are sure that gas is not leaking from the installation or the appliance. | |
| The burner switches off as soon as you re- lease the control knob. | Control knob not pressed down long enough. 1. Keep the control knob pressed down for a few seconds after ignition. 2. Press the control knob down firmly. |
| Openings on the burner are soiled. ▶ Clean and dry the openings on the burner. |
Customer Service
Detailed information on the warranty period and term warranty in your country is available from our after-sales service, your retailer or on our website. If you contact Customer Service, you will require the product number (E-Nr.) and the production number(FD) of your appliance The contact details for Customer Service can be found in the enclosed Customer Service directory or on our website.
Product number (E-Nr.) and production number (FD)
You can find the product number (E-Nr.) and the production number (FD) on the appliance’s rating plate.
The rating plate can be found:
- on the appliance certificate.
- on the lower section of the hob.
Make a note of your appliance’s details and the Customer Service telephone number to find them again quickly.
Disposal
Disposing of old appliance
Valuable raw materials can be reused by recycling.
- Unplug the appliance from the mains.
- Cut through the power cord.
- Dispose of the appliance in an environmentally friendly manner.
Information about current disposal methods are available from your specialist dealer or local authority.
This appliance is labelled in accordance with European Directive 2012/19/EU concerning used electrical and electronic appliances (waste electrical and electronic equipment – WEEE). The guideline determines the framework for the return and recycling of used appliances as applicable throughout the EU.