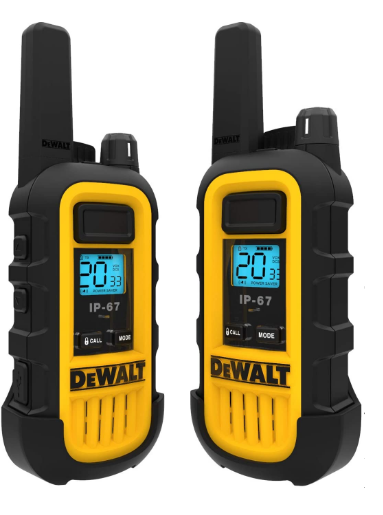
Dewalt DXFRS265 Two-Way Radio Owner’s Manual


Before operating the radio, please read all safety and operating instructions. Save all instructions in a safe place for future reference.
Definitions: Safety Alert Symbols and Words
This instruction manual uses the following safety alert symbols and words to alert you to hazardous situations and your risk of personal injury or property damage.
- DANGER: Indicates an imminently hazardous situation which, if not avoided, will result in death or serious injury.
- WARNING: Indicates a potentially hazardous situation which, if not avoided, could result in death or serious injury.
- CAUTION: Indicates a potentially hazardous situation which, if not avoided, may result in minor or moderate injury.
(Used without word) Indicates a safety related message. - NOTICE: Indicates a practice not related to personal injury which, if not avoided, may result in property damage.
- WARNING: Read all safety warnings and all instructions. Failure to follow the warnings and instructions may result in electric shock, fire and/or serious injury.
- WARNING: Never modify the product or any part of it. Damage or personal injury could result.
- WARNING: To reduce the risk of injury, read the user guide.
If you have any questions or comments about this or any product, call DEWALT toll free at: (866) 208-1654.

- Antenna
- Up Button
- Down Button
- Call/Lock Button
- Microphone
- Speaker
- Charging Contacts
- USB Charge Jack
- Channel/Code/Roger Beep Button
- Vibra Alert Button
- LED Indicator
- VOX Indicator (Blue LED)
- VOX Button
- Talk Button
- Power On/Off / Volume Knob
- External Speaker /Microphone Jack
- Battery Compartment
- Battery Door Screws
- Belt Clip
- Wrist Strap Connection
Important Safety Instructions
- Only accessories included in this package or specified by the manufacturer should be used with the radio. The 5V micro-USB charging input is compatible with most high quality micro-USB chargers that fully conform to the USB standards.
- Do not use cleaners or solvents to clean the exterior of the radio. Use only a damp or dry cloth.
- Do not attempt to service the radio yourself. Removing the cover will void the warranty. Changes or modifications not expressly approved by DEWALT may void the user’s authority granted by the FCC to operate this device and should not be made.
- Do not plug the wall adaptor into the power outlet if the outlet is wet.
- Do not use any portable radio that has a damaged antenna. If a damaged antenna comes into contact with your skin, a minor burn can result.
- Do not place your radio in the area over an air bag or in the air bag deployment area. If a radio is placed in the air bag deployment area and the air bag inflates, the radio may be propelled with great force and cause serious injury to the occupants of the vehicle.
- WARNING: Important Safety Instructions for Battery Read All Instructions
- Do not incinerate the battery even if it is severely damaged or is completely worn out.
- Do not discard battery in a fire. The battery pack can explode in a fire.
- Do not replace battery in any area labeled “Hazardous Atmosphere”. Any sparks created in a potentially explosive atmosphere can cause an explosion or fire.
- Do not disassemble, crush, puncture, shred, or otherwise attempt to change the form of your battery.
- Do not allow conductive materials such as jewelry, keys, or beaded chains to touch exposed battery terminals.
- Do not dry a wet or damp battery with an appliance or heat source, such as a hair dryer or microwave oven.
- A small leakage of liquid from the battery cells may occur under extreme usage or temperature conditions. This does not indicate a failure. Do not open, deform or mutilate the battery as there may be corrosive materials which can cause damage to eyes or skin and may be toxic if swallowed. However, if the outer seal is broken and this leakage gets on your skin:
- Wash quickly with soap and water.
- Neutralize with a mild acid such as lemon juice or vinegar.
- If battery liquid gets into your eyes, flush them with clean water for a minimum of 10 minutes and seek immediate medical attention.
This product uses Lithium Polymer Battery. Do not transport package if damaged, a fire hazard could exist.
For more information, please call our customer support line at (866) 208-1654.
Recycle Battery
Local, state or federal laws may prohibit disposal of batteries in ordinary trash. Consult your local waste authority for information regarding available recycling and/or disposal options.
Product Service & Support
For any questions about operating this new DEWALT branded product, PLEASE CONTACT US FIRST… do not return this product to the retail store. The contact information for support will vary depending on the country in which you purchased and utilize the product. To obtain warranty service or other information for products purchased from DEWALT itself or through its authorized reseller or agent and utilized in the U.S.A., please call our consumer support line at (866) 208-1654. You will receive instructions on how to ship the products at your expense to an our Authorized Service Center. To obtain service, you must include: (a) a copy of your receipt, bill of sale or other comparable proof of purchase; (b) a written description of the problem; and, most importantly; (c) your address and telephone number. For further information needed on its features, please visit DEWALT.COM for frequently asked questions and the electronic manual. ©2020 Altis Global Limited, Atlanta, GA USA.
WARNING
- Exposure to high volume sound levels may cause temporary or permanent damage to your hearing. Although there is no single volume setting that is appropriate for everyone, you should always use your radio with the volume set at low level and avoid prolonged exposure to high volume sound levels.
- Set the volume control in a low position and use as low a volume as possible.
- Avoid turning up the volume to block out noisy surroundings. Whenever possible, use your radio in a quiet environment with low background noise.
- Limit the amount of time you use headsets or earpiece at high volume levels.
- When using the radio without a headset or earpiece, do not place the radio’s speaker directly against your ear.
- Observe all signs and instructions that require an electrical device or RF radio product to be switched off in designated areas, such as gas/refueling stations, hospitals, blasting areas, potentially explosive atmospheres, or aircraft.
- If you experience a skin irritation after using this product, discontinue use and seek medical attention.
- If the product or charger: overheats; has a damaged cord or plug; has been dropped or damaged; has been dropped into water, disconnect any charger from its power supply, discontinue use of the product.
- Never use your radio outdoors during a thunderstorm. Keep the radio out of reach of babies and young children.
- NEVER hold the radio so that the antenna is very close to, or touching exposed parts of the body, especially the face or eyes, while transmitting. The radio will perform best if the microphone is around 2 inches (5 cm) away from the lips and the radio is vertical.
Electromagnetic Interference
Nearly every electronic device is susceptible to electromagnetic interference (EMI) if inadequately shielded, designed, or otherwise configured for electromagnetic compatibility. Turn off your radio in any facility where posted notices instruct you to do so. These facilities may include hospitals or health care facilities that may be using equipment that is sensitive to external RF energy.
- When instructed to do so, turn off your radios when on board an aircraft. Any use of a RF device must be in accordance with applicable laws, regulations and airline crew instructions.
- Some radios may interfere with some hearing aids. In the event of such interference, you may want to consult your hearing aid manufacturer or physician to discuss alternatives.
- If you use any other personal medical device, consult the manufacturer of your device to determine if it is adequately shielded from RF energy. Your doctor or physician may be able to assist you in obtaining this information.
Important
CAUTION
- NEVER short the terminals of the battery pack.
- DO NOT push the PTT button when not actually desiring to transmit.
- DO NOT modify the transceiver for any reason.
- AVOID using or placing the transceiver in direct sunlight or in areas with temperatures exceed –20° C ~ +50° C / –5° F ~ +120° F.
- KEEP the transceiver from the heavy rain, and NEVER immerse it in water.
- The use of battery packs/chargers not included in this package may impair transceiver performance and invalidate the warranty.
Changes or modifications not expressly approved by DEWALT, may void the user’s authority granted by the FCC/IC to operate this radio and should not be made. To comply with FCC/IC requirements, transmitter adjustments should be made only by or under the supervision of a person certified as technically qualified to perform transmitter maintenance and repairs in the private Land Mobile and Fixed Services as certified by an organization representative of the user of those services. - Replacement of any transmitter component (crystal, semiconductor, etc.) not authorized by the FCC/IC equipment authorization for this radio could violate FCC/IC rules.
- Use of this radio outside the country where it was intended to be distributed is subject to government regulations and may be prohibited.
IMPORTANT NOTICE:
FCC Rules
WARNING: Changes or modifications to this unit not expressly approved by the party responsible for compliance could void the user’s authority to operate the equipment.
This device complies with Part 15 of the FCC Rules. Operation is subject to the following two conditions: 1) This device may not cause harmful interference, and 2) this device must accept any interference received,including interference that may cause undesired operation.
NOTE: This equipment has been tested and found to comply with the limits for a Class B digital device, pursuant to Part 15 of the FCC Rules. These limits are designed to provide reasonable protection against harmful interference in a residential installation. This equipment generates, uses and can radiate radio frequency energy and, if not installed and used in accordance with the instructions, may cause harmful interference to radio communications.
However, there is no guarantee that interference will not occur in a particular installation. If this equipment does cause harmful interference to radio or television reception, which can be determined by turning the equipment off and on, the user is encouraged to try to correct the interference by one or more of the following measures:
- Reorient or relocate the receiving antenna.
- Increase the separation between the equipment and receiver.
- Connect the equipment into an outlet on a circuit different from that to which the receiver is connected.
- Consult the dealer or an experienced radio/TV technician for help.
Safety Information for Radios
Your wireless handheld portable transceiver contains a low power transmitter. When the talk button is pushed, it sends out radio frequency (RF) signals. The device is authorized to operate at a duty factor not to exceed 50%. In August 1996, the Federal Communications Commissions
Making Life Easier and Safer
Staying in touch is convenient and easy when using your radio. Some of the many uses you will discover include:
Communicating with others while hiking, biking, and working; keeping track of family and friends at a crowded public event; checking with travel companions; connecting with neighbors; arranging meeting spots with others while shopping at the mall, talking with your colleagues in warehouse or jobsite.
Secure your radio while on the go.
Carrying your radio with you is easy when using the belt clip.
The belt clip easily attaches to your belt, purse, or backpack (Fig 2).

Features
- 22 Channels with Preset privacy codes
- User Adjustable Privacy Codes (38 CTCSS codes)
- Hands-Free Operation (VOX)
- Vibra Alert
- Speaker/ Microphone Jack
- Roger Beep Selectable On/Off
- Call Alert
- Button Lock
- Battery/Power Saver
- Keystroke Tones
- Low Battery Audible Alert
- Auto Squelch
- IP67 Water Proof and Dust Proof Rating
| Standby mode | Green LED fashes every 5 seconds |
| When battery low | Red LED fashes every 5 seconds |
| When you press and hold Talk button and the Radio is transmitting | Green LED on |
| During VOX feature enabled | Blue LED fashes every 5 seconds |
| During Privacy Code setting | Red and Green fashes alternatively. |
| Power off the radio during charging | |
| Under charging | Solid Red (No fash) |
| Fully charge | Solid Green (No fash) |
Caring for Your Radio
Your radio will give you years of trouble-free service if cared for properly. Handle the radio gently. Keep the radio away from dust. Never put the radio in water or in a damp place. Avoid exposure to extreme temperatures.
Installing Batteries (Battery already pre-installed) To install or replace batteries: Fig. 3

- Remove Belt clip by releasing the belt clip latch and slide the Belt clip upward (Fig. 3).
- Using a flat head screw driver or edge of a coin (a quarter may be used), remove the 2 screws securing the back battery panel (Fig. 4).
- Open the battery compartment cover, connect the connector of the battery to the socket of the radio inside the battery compartment in proper polarity (Fig. 5).
- Place the battery inside battery compartment and align the wires as shown. (Note: Wires are required to be tucked into the battery compartment completely and carefully. If any object interfere the O-ring, its sealing performance will be affected.) (Fig. 6)
- Place the battery compartment cover, screw down the screws mildly. (Screw nuts may be damaged if overtighten)
- Re-attach the Belt clip.
To charge batteries in radio:
- Check to see that the batteries have been inserted properly.
- Insert the cable into the charge jack located at the right side of the radio (Fig. 7).
- Plug the cable into USB-compatible power port.
Only use the supplied rechargeable batteries and desktop charger for recharging your DEWALT radio.
Please charge new batteries for 6 hours for first time of use. DEWALT recommends your radio is turned off while being charged.
NOTE: The radio is resistant to water and rain splashes only when the battery cover, headset accessory and micro-USB ports are sealed. Open the battery compartment door or headset port/USB charge cover only when the radio is dry. Use of a headset accessory should be in dry environments only. The micro-USB cable and plug is not waterproof. Do not expose the charger to rain or snow. Charge the radios only in a dry location. The battery door must be tightly closed with the screw to maintain the weatherproof seal of the radio.
Operation
Using Your Radio
For charging radios in an OPTIONAL desktop charger:

- Insert the provided adaptor into the charger compartment (Fig. 8).
- Insert radio(s) into the desktop charger as shown (Fig. 9).
- Insert the micro-USB cable into jack on back of the charger.
- Plug the cable into a USB-compatible power port. For pluggable equipment, the socket-outlet shall be installed near the equipment and shall be easily accessible.
If charging light is not on, check the position of radio. Radio should be upright. The charge indicator light on desktop charger will stay on (Red) as long as the radio is in the charging well, and the light will go off when the
charging is complete.
Note: To charge a single radio, you can bypass the desktop charger and simply insert the micro-USB’s connector directly into the charge jack located at the right of the radi
The radio will have Red LED indicator ON while charging.
DEWALT recommends your radio be turned off while charging.
Note: If the charging LED still is OFF when the radio inserted completely.
- Check if there is output from power source first and check if the radio has battery that is inserted correctly.
- Check for contact contamination or corrosion:
- Remove the radio from the charger.
- Inspect the charging contacts on radio for contamination or corrosion. Clean the charging contacts using a dry cloth.
- Inspect the charging contacts in the charger pocket for contamination or corrosion. If contamination or corrosion are found, remove power from the charger and clean the charging contacts using a dry cloth.
- Try replacing the battery. If the fault no longer exists, then take the faulted battery out of service.
Quick Start
- Turn On/Off VOL Knob (Fig. 10) clockwise to turn the radio on and counter clockwise to turn the radio off.
- Select a desired channel.
Note: Both radios must be tuned to the same channel/privacy code to communicate. - Press and hold the Talk button while speaking into the microphone.
- When finished talking, release the Talk button and listen for
Turning on Your Radio
Turn On/Off VOL Knob (Fig. 10) clockwise to turn the radio on and counterclockwise to turn the radio off.

- In the ON position, the radio chirps. After that, the current channel number and user adjusted privacy code setting (if any) prompted. Your radio is now in Standby mode, ready to receive transmissions. The radio is always in Standby mode except when the Talk or Call/Lock buttons are pressed.
- In Standby mode, Green LED flashes every 5 seconds (Fig. 11).

Battery Low
When battery power is low, Red LED flashes every 5 seconds. Voice prompt “Please charge” will be heard approximately 30 minutes before device automatically powers off. Your batteries should be recharged. It normally takes about 6 hours to fully charge batteries.
Auto Battery Save
If there are no transmissions within 10 seconds, the radio will automatically switch to Battery Save mode. This will not affect the radio’s ability to receive incoming transmissions.
Communicating with Another Person
- Press and hold the Talk button (Fig. 12).
- Position the microphone about two inches (5 cm) from your mouth, speak in a normal voice (Fig. 13).
- Release the Talk button when you are finished talking and listen for a response.

You cannot receive incoming calls while pressing the
Talk button.
Note: Both radios must be tuned to the same channel
and privacy code to communicate.
Note: This radio is equipped with default Privacy Code on each channel for minimizing unwanted signals from others. See page 9 to 10 for procedures changing your radio from default Privacy Code to a different Privacy Code or disabling Privacy Code.
Listening for a Response
Release the Talk button to receive incoming transmissions. Your radio is always in Standby mode while the Talk or Call buttons are not pressed.
To Adjust Volume
- Rotate On/Off VOL Knob (Fig. 10) clockwise to increase the volume.
- Rotate On/Off VOL Knob (Fig. 10) counterclockwise to decrease volume.
Do not hold the radio close to your ear. If the volume is set to an level, it could hurt your ear.
Call Button
Press and release the Call/Lock button (Fig. 15).
The other person will hear a three second call tone. This tone is used only to establish voice communications.


Lock Function
The Lock function locks the Up, Down, CH/CODE/ Roger Beep, VOX and Vibra Alert buttons to prevent accidental operation.
To turn the lock on or off:
- Press and hold the Call/Lock button for two seconds. (Fig. 16)
A double beep sound is used to confirm your lock on or off request. When in Lock mode, a 3 beeps warning shows that the related buttons would not be operated.

Range
Your range will vary depending on terrain and conditions.
In flat, open country your radio will operate at maximum range (Fig. 17).
Buildings and foliage in the path of the signal can reduce the range of the radio (Fig. 18).
Dense foliage and hilly terrain will further reduce the range of the radio (Fig. 19).
On Channels 8 through 14, your radio automatically switches to low power, which will limit the range the radio can communicate.

Auto Squelch
Your radio will automatically shut off weak transmissions and unwanted noise due to terrain, conditions limit.
Current Channel Number Checking

- During Standby mode, press and release the CH/CODE button (Fig. 20), the current channel number and user adjusted privacy code setting (if any) prompted.
- After the current channel number prompted, choose one of the following.
- Press the Up or Down button to change channel number.
- Press the Talk button to return to Standby mode.
- Do not press any buttons for 6 seconds, the current channel number prompted again, and then return to Standby mode.
Voice Prompt Messages about Channels and Privacy codes
| Voice Prompt Message | Meaning |
| “Channel N* ” | The current channel is still preset with default privacy code system and code number. See Channel and Default Privacy Code Table on page 9. |
| “Channel N* , Code M* ” | The current channel had been assigned with an user selected CTCSS code number M*. |
| “Channel N* , Code Off” | No privacy code was set on the current channel, and allows all signals to be heard on a channel with any CTCSS or DCS privacy code. |
Remarks: N is a channel number from 1 to 22; M is a CTCSS code number from 1 to 38.
- Note: Both radios must be tuned to the same channel / privacy code to communicate.
- Note: See Page 11 for resetting all the channels and privacy code setting to factory default.
To Select a Channel
The radio has 22 Channels that preset with customized privacy codes, see Channel and Default Privacy Code Table on page 9.

- During Standby mode, press and release the CH/CODE button (Fig. 21), the current channel number and user adjusted privacy code setting (if any) prompted.
- After the current channel number prompted, press the Up or Down button to select a channel (Fig. 22). Or press and hold the Up or Down button for fast skipping.
- When the desired channel selected, choose one of the following.
- Press the Up or Down button to change a new channel number.
- Press the Talk button to enter the new setting and return to Standby mode.
- Do not press any buttons for 6 seconds to enter the new setting, the current channel number prompted again, and then return to Standby mode.
Note: Both radios must be tuned to the same channel / privacy code to communicate.
Note: See Page 13 for frequency allocations charts.
Note: See Page 11 for resetting all the channels and privacy code setting to factory default.
Privacy Codes
Your radio incorporates two advanced coded squelch systems that can help to reduce interference from other users on any given channel. CTCSS
(Continuous Tone Coded Squelch System) provides 38 privacy codes and DCS (Digitally Coded Squelch) provides privacy codes for factory default channel preset. The CTCSS (Continuous Tone Coded Squelch System) can be used on all channels.
For ease of use and to reduce interference from other users, the 22 channels of your radio have been customized, see Channel and Default Privacy Code Table.
Channel and Default Privacy Code Table
| Channel | Privacy Code | |
| Type | Number | |
| 1 | CTCSS | 1 |
| 2 | CTCSS | 11 |
| 3 | CTCSS | 22 |
| 4 | CTCSS | 33 |
| 5 | DCS | 1 |
| 6 | DCS | 11 |
| 7 | DCS | 22 |
| 8 | DCS | 33 |
| 9 | DCS | 44 |
| 10 | DCS | 55 |
| 11 | DCS | 66 |
| Channel | Privacy Code | |
| Type | Number | |
| 12 | DCS | 77 |
| 13 | CTCSS | 1 |
| 14 | CTCSS | 11 |
| 15 | CTCSS | 22 |
| 16 | CTCSS | 33 |
| 17 | DCS | 1 |
| 18 | DCS | 11 |
| 19 | DCS | 22 |
| 20 | DCS | 33 |
| 21 | DCS | 44 |
| 22 | DCS | 55 |
Note: You can change your radio Privacy Codes in order to work with other radios with different privacy codes or radio without privacy codes. See page 10 for procedures.
Set CTCSS Privacy Codes To select a CTCSS privacy code:
- During Standby mode, press and release the CH/CODE button to select a desired channel (Fig. 23).
- Within 5 seconds, press and hold the CH/CODE button until the current code number prompted and the Red and Green LED flash alternatively. The following messages may be prompted:
- “Channel Code Memory” means the current channel is still preset with default privacy code system and code number. See Channel and Default Privacy Code Table on page 9, or
- The current CTCSS Code Number, or
- “Code Off” means no privacy code is set on the current channel, and allows all signals to be heard on a channel.
- After the current code number prompted, press the Up or Down button to select CTCSS code number; Or press and hold the Up or Down button for fast skipping (Fig. 24).
- When the desired CTCSS code number selected, choose one of the following.
- Press the Up or Down button to change a new CTCSS code number.
- Press the Talk button to enter the new setting and return to Standby mode.
- Press the CH/CODE button to enter the new setting and return to Channel Selection mode.
- Do not press any buttons for 6 seconds to enter the new setting, the current channel number and privacy code setting (if any) prompted again, and then return to Standby mode.


Note: To successfully communicate using a privacy code, both the sending and receiving radios must be tuned to the same channel and to the same privacy code number (CTCSS or DCS). Each channel will remember the last privacy code system and number you select.
Note: The privacy code OFF is not a privacy code, but allows all signals to be heard on a channel that is set to 0 on both the CTCSS and DCS systems.
Note: See Page 11 for resetting all the channels and privacy code setting to factory default.
Reset all channels with factory default privacy codes
- Press and hold the CH/CODE button (Fig. 25) and turn the Power ON/OFF Knob (Fig. 26) to turn on the radio simultaneously.
- 4 consecutive beeps following with a message “Code Memory OFF” prompted, all the channels on the radio has been reset to factory default privacy codes successfully. Current channel would become channel 1 as default also.

See Channel and Default Privacy Code Table on page 9.
Roger Beep Confirmation Tone
Your listener will hear an audible tone when you release the Talk button. This alerts the other party that you finished talking and it is OK for them to speak.
To turn roger beep on or off:
- During Standby mode, press and release the CH/CODE button twice (Fig. 27), and the current Roger Beep status is prompted.
- Press the Up or Down button to select Roger Beep On or Off (Fig. 28).
- Choose one of the following.
- Press the CH/CODE button to enter the new setting and return to Standby mode.
- Press the Talk button to enter the new setting and return to Standby mode.
- Do not press any buttons for 6 seconds to enter the new setting and return to Standby mode.

Voice Activated Transmit (VOX)
In VOX mode, your radio can be used “hands-free,” automatically transmitting when you speak. You can set the VOX sensitivity level to fit the volume of your voice and avoid transmissions triggered by background noise.
To turn VOX mode on:
- During Standby mode, press and hold the VOX button until the current VOX status and the current VOX Sensitivity Level are prompted (Fig. 29).
- Once the VOX is turned on, Blue LED flashes every 5 seconds (Fig. 30).

To turn VOX mode off:
While VOX feature is ON, press and hold the VOX button to turn off the VOX mode (Fig. 29).
To set VOX sensitivity:
- While VOX feature is ON, press and release the VOX button to change VOX Sensitivity Level (Fig. 29), and the latest VOX Sensitivity Level is prompted.
Note: The current VOX sensitivity level is prompted, the value would be from 1 to 3. VOX 3 is the most sensitive level and VOX 1 is the least sensitive level.
Vibra Alert
Your radio can alert you to incoming signals by sounding an audible call an audible tone with Vibra Alert.
To turn Vibration Alert feature on:

- During Standby mode, press and hold the Vibra Alert button (Fig. 31) until there is a long vibration for 2 seconds.
- Once the Vibration Alert feature is ON, you may check if there are 2 successive vibrations feedback when press and release the Vibra Alert button in Standby mode.
To turn Vibration Alert off:
While Vibra Alert feature is ON, press and hold the Vibra Alert button to turn off the Vibra Alert.
Note: Vibra Alert will be suspended during charging.
Key Tone
Key Tone is an audible tone which will sound each time a button is pressed.
General Specifications
Frequency Allocation and Compatibility
- Channel No. for 22 Channel Models
- Frequency in MHz
- Power Output

Warranty & Trademark Acknowledgment
Limited Lifetime Warranty on Radio
DEWALT warrants to the original consumer purchaser only that this product and the component parts thereof, will be free from defects in workmanship and materials. DEWALT will, repair or replace, at its sole option and discretion, this product or any defective parts. DEWALT’ liability hereunder shall be limited to repair or replacement of the defective part or parts, and such correction shall constitute a fulfillment of all of DEWALT’ warranties hereunder.
This limited lifetime warranty is only valid for the original consumer purchaser in limited jurisdictions and is not transferrable. This limited lifetime warranty will automatically terminate if this product is sold or otherwise transferred to another party. The product must be purchased from DEWALT or an authorized dealer or the warranty is void. This limited lifetime warranty is valid only for products purchased and utilized in specific jurisdictions.
Please visit our website at DEWALT.COM for a list of jurisdictions wherein this lifetime limited warranty is valid.
This limited lifetime warranty does not apply to accessories and consumables and does not cover damage due to misuse, abuse, negligence, acts of God, accident, commercial use or modification of, or to any part of this product. This warranty does not cover damage due to improper operation, maintenance or installation; ordinary wear and tear; or attempted alterations or repairs by anyone other than DEWALT or someone authorized by DEWALT to do warranty work. Any unauthorized alterations or repairs will void this warranty. This limited lifetime warranty does not cover product sold AS IS or WITH ALL FAULTS. This limited lifetime warranty is invalid if the factory applied serial number or date stamp has been altered, defaced or removed from this product. This limited lifetime warranty does not cover product purchased or utilized in a jurisdiction not covered.
The procedure for obtaining service and support, and the applicability of this warranty, will vary depending on the country or jurisdiction in which you purchase and utilize the product. For details on obtaining product service, support and other warranty information please visit
DEWALT.COM
This warranty gives you specific legal rights, and you may also have other rights which vary from state to state and country to country.
EXCEPT AS EXPRESSLY SET FORTH IN THIS WARRANTY, DEWALT MAKES NO OTHER WARRANTIES, EXPRESSED OR IMPLIED, INCLUDING ANY IMPLIED WARRANTIES OF MERCHANTABILITY AND FITNESS FOR A PARTICULAR PURPOSE. DEWALT EXPRESSLY DISCLAIMS ALL WARRANTIES NOT STATED IN THIS LIMITED WARRANTY. ANY IMPLIED WARRANTIES THAT MAY BE IMPOSED BY LAW ARE LIMITED TO THE TERMS OF THIS EXPRESSED WARRANTY.
LIMITATION OF REMEDIES AND DAMAGES. REPAIR OR REPLACEMENT AS PROVIDED UNDER THIS WARRANTY IS THE EXCLUSIVE REMEDY OF THE CONSUMER. DEWALT SHALL NOT BE LIABLE FOR ANY INCIDENTAL OR CONSEQUENTIAL DAMAGES, INCLUDING BUT NOT LIMITED TO ATTORNEYS’ FEES AND/OR COSTS OF LITIGATION, FOR BREACH OF ANY EXPRESS OR IMPLIED WARRANTY ON THIS PRODUCT. DEWALT IS NOT LIABLE FOR ANY DAMAGES CAUSED BY THE PRODUCT OR BY THE PRODUCT TO PERFORM, INCLUDING ANY LOST PROFITS, LOST SAVINGS, INCIDENTAL DAMAGES, OR CONSEQUENTIAL DAMAGES. DEWALT IS NOT LIABLE FOR ANY CLAIM MADE BY A THIRD PARTY OR MADE BY YOU FOR A THIRD PARTY. THIS LIMITATION APPLIES WHETHER DAMAGES ARE SOUGHT, OR A CLAIM MADE, UNDER THIS WARRANTY OR AS A TORT CLAIM (INCLUDING NEGLIGENCE OR STRICT PRODUCT LIABILITY), A CONTRACT CLAIM, OR ANY OTHER CLAIM. THIS LIMITATION CANNOT BE WAIVED OR AMENDED BY ANY PERSON. THIS LIMITATION OF LIABILITY WILL BE EFFECTIVE EVEN IF DEWALT OR AN AUTHORIZED REPRESENTATIVE OF DEWALT HAS BEEN ADVISED BY YOU OF THE POSSIBILITY OF ANY SUCH DAMAGES.
Some states and countries do not allow limitations on how long an implied warranty lasts and do not allow the exclusion or limitation of incidental or consequential damages, so the above limitations may not apply to you. This warranty gives you specific legal rights, and you may also have other rights which vary from state to state and country to country.
Provided that the product was purchased from DEWALT itself or through its authorized reseller or agent and utilized in the U.S.A., DEWALT will, without charge, repair or replace, at its option, defective products, products or component parts upon delivery to the authorized DEWALT Authorized Service Center, accompanied by proof of the date of first customer purchase, such as a duplicated copy of a sales receipt.
You must pay any initial shipping charges required to ship the product for warranty service, but the return charges, to an address in the U.S.A, will be at DEWALT’ expense, if the product is under warranty.
For Products Purchased Outside the U.S.A.
Please contact your authorized local reseller or agent for warranty information.
Trademark Acknowledgment
DEWALT® and the DEWALT Logo are trademarks of the DEWALT Industrial Tool Co., or an affiliate thereof and are used under license.
The yellow/black color scheme is a trademark for DEWALT power tools & accessories.
© 2020 DEWALT
U.S. & Canada Only
Made in CHINA
Product Manufactured by:
Altis Global Limited, Atlanta, GA USA.
For product, service or warranty information contact us at: DEWALT.COM (866)208-1654