Electrolux ECF9214X 60cm fixed extractor hood User Manual


ECF9214X ECF9214K
ECF6214X ECF6214K
ECF9214B ECF6214B
User Manual

Warning
This appliance can be used by children aged 8 years and above and persons with reduced physical, sensory or mental capabilities or lack of experience and knowledge if they have been given supervision or instruction concerning the use of the appliance in a safe way and understand the hazards involved. Children shall not play with the appliance. Cleaning and user maintenance shall not be made by children without supervision.
If the supply cord is damaged, it must be replaced by the manufacturer, its service agent, or similarly qualified persons in order to avoid a hazard.
There is a fire risk if cleaning is not carried out in accordance with the instructions;
CAUTION: Accessible parts may become hot when used with cooking appliances.
the air must not be discharged into a flue that is used for exhausting fumes from appliances burning gas or other fuels regulations concerning the discharge of air have to be fulfilled.
Warning: Failure to install the screws or fix the device in accordance with these instructions may result in electrical hazards.
In certain circumstances, electrical appliances may be a dangerous hazard.
- Do not check the status of the filters while the cooker hood is operating.
- Do not touch the light bulbs after appliance use.
- Do not disconnect the appliance with wet hands.
- Avoid free flame, as it is damaging for the filters and a fire hazard.
- Constantly check food frying to avoid the overheated oil may become a fire hazard.
- Disconnect the electrical plug prior to any maintenance.
- Children don’t recognize the risks of electrical appliances. Therefore use or keep the appliance only under the supervision of adults and out of the reach of children.
- Don’t use this product outdoor.
- This appliance is not intended for use by persons (including children) with reduced physical, sensory or mental capabilities, or lack of experience and knowledge unless they have been given supervision or instruction concerning use of the appliance by a person responsible for their safety. Children should be supervised to ensure that they do not play with the appliance.
- There shall be adequate ventilation of the room when the range hood is used at the same time as appliances burning gas or other fuels.
- There is a fire risk if cleaning is not carried out in accordance with instructions.
- Do not flam under the range hood.
- The discharge air must not be discharged into a flue which is used for exhausting fumes from appliances burning gas or other fuels.
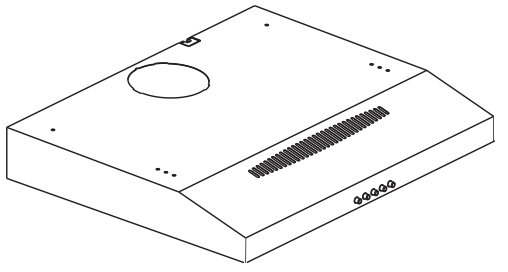
DESCRIPTION

| Ref | Q’ty | Components |
| 1 | 1 | Air outlet base Ass |
| 2 | 1 | Hood body Ass |
| 3 | 1 | Wind housing Ass |
| 4 | 1 | LED lamp |
| 5 | 1 | Transparent lamp board |
| 6 | 2 | Charcoal filter |
| 7 | 2 or 3 | 2 Alu filters for 60cm model 3 Alu filters for 90cm model |
Dimension(mm)

The hood may be installed in the filtering or the ducting version.
Filtering version (Fig.1): The hood aspirates the kitchen air saturated with fumes and odor. Purifies it through the grease filters and charcoal filters and returns clean air into the room. For constant efficiency, the carbon filters must be replaced periodically.
Ducting version (Fig.2): The hood aspirates the kitchen air saturated with fumes and odor, passes it through the grease filters, and expels it to the outside through an outlet pipe. With this version, carbon filters are not required. Decide from the outset on the type of installation (filtering or ducting). For greater efficiency, we recommend you install the hood in the ducting version (if possible).

INSTALLATION
Before beginning installation, to remove the metal filter/s (Fig.3), in line with the handle, push the stop inwards and pull the filter down.

Before fixing, the outlet pipe for air evacuation to the outside must be installed. Use an outlet pope with: – minimum indispensable length; -Minimum possible bends (maximum angle of bend:90°); -certified material (according to the state); an as smooth as possible inside. It is also advisable to avoid any drastic changes in pipe cross-section (recommended diameter: 125mm).
Drill the hole in the wall for the air outlet (133 mm diameter) referring to Fig.7 where the measurements for the various possibilities are indicated.
Prepare a suitable power supply. For the electrical connection, follow the instructions on page 6,
Proceed with fixing the hood: Based on your requirements, you can fit the hood on the wall or on a wall unit of your kitchen. IMPORTANT: Respect the distance between the hob and lower part of the hood which must be at least 650 cm.
INSTALLATION IN DUCTING VERSION:
Make sure the air outlet Ais opening(Fig 4).
CHECK THAT THE DUCTING LEVER IS IN THE RIGHT POSITION.: The lever is found on the motor unit and must be positioned no the symbol (P) in the case of installation in ducting version (Fig.5 ).
Also, remember that the use of charcoal filters is not necessary with the ducting version; if these are fitted, remove them(Fig.6 ).
INSTALLATION IN FILTERING VERSION:
Openings A on the hood (Fig.4) must be closed since the air is re-circulated into the room through the front vents.
we CHECK THAT THE FILTERING LEVER IS IN THE RIGHT POSITION: The lever is found on the motor unit and must be positioned on the symbol (Q) in the case of installation in the filtering version (Fig.5). Also remember that charcoal filters must be used in the case of the filtering version; check to see whether such filters are already fitted; if necessary, proceed to fit as Fig6.

Fixing to the wall:
Drill a hole of 133 mm diameter in the wall unit (Fig.7). check the position of the power outlet and consider where the power cable will run, since a hole might have to be made in the wall unit to accommodate it. Draw a line on the wall in a vertical line with your hob. Mark the 4 holes to be drilled in the wall, respecting the distances indicated in Fig.7; Make the 4 holes and fit the 4 screw anchors provided. Take 2 of the screws provided (Fig. 9G) and insert them in the 2 screw anchors without screwing them down completely. Hang the hood on the 2 screws; Working from inside the hood, tighten the 2 screws completely. Now proceed with final fixing by fitting the other 2 screws H (Fig10). Connect a flexible tube to the hood outlet adapter. Make the electrical connection
Fitting under wall unit:
Before fixing the hood to the unit, drill a hole of about 133mm diameter in the wall unit (Fig.8). In any case, check the position of the power outlet and consider where the power cable will run. Drill 4 holes in the wall unit, respecting the distance indicate in Fig.8. Push the hood up against the wall unit and insert the 4 screws operating from inside the wall unit. Connect a flexible tube to the hood outlet adapter. Make the electrical connection.
Electrical connection:
Electrical wiring must be done by a qualified person(s) in accordance with all applicable codes and standards. Turn off electrical power at the service entrance before wiring. If the supply cord is damaged, it must be replaced by the manufacturer, its service agent or similarly qualified persons in order to avoid a hazard. Do not use the plug and an extension cord other than the ones initially supplied with the hood. The earthing of this hood is compulsory. Do not remove the ground prong of the plug.


OPERATION
Depending on the model, the unit is equipped with the following controls:
Controls as : A = Light switch; B = Fan speed |; C = Fan speed II; D = Fan speed III; E = On/off.

LED LAMPS
This range hood requires LED lamps
*Max wattage: 2W
Voltage range: 220-240V
Dimensions: diameter 98mm
WARNING: Always switch off the electrical supply before carrying out any operation on the appliance. This LED lamp should be replaced by a qualified person.
To change bulbs:
- Remove the lamp cover:
- Kick off the normal bulbs by hand.
- Replace with 2W Max LED lamp. Do not touch the replacement bulb with bare hands.

MAINTENANCE AND CLEANING
Switch off or unplug the appliance from the main supply before carrying out any maintenance work.
Aluminum type metal filter
They are metal grid filters (as shown in Fig.3): the filters must be periodically cleaned, depending on the extent of operation ( at least every four weeks).
Wash the filter with a neutral detergent.
To remove the filters, first of all, push down the filters.


Charcoal filter
The carbon filters must be periodically replaced depending on the extent of operation-on average every 6 months. To remove the carbon filters, proceed as follows.

CONSUMER CARE CENTER
| Thailand Consumer Care Tel : (+66 2) 725 9000 Electrolux Thailand Co., Ltd. Electrolux Building 14th Floor 1910 New Phetchaburi Road, Bangkapi, Huai Khwang, Bangkok 10310 Office Tel : (+66 2) 7259100 Office Fax : (+66 2) 7259299 Email: |
Singapore Consumer Care Center Tel: (+65) 6727 3699 Electrolux S.E.A. Pte Ltd. 351 Braddell Road #01-04, 351 On Braddell Singapore 579713 Email: |
| Indonesia Hotline service: 08041119999 PT. Electrolux Indonesia Electrolux Building JI.Abdul Muis No.34, Petojo Selatan, Gambir Jakarta Pusat 10160 Email: SMS & WA : 0812.8088.8863 |
Philippines Consumer Care Center Toll Free: 1-800-10-845-CARE(2273) Consumer Care Hotline:(+63 2)845-CARE(2273) Electrolux Philippines,Inc. Unit B 12F Cyber Sigma Bldg, Lawton Avenue, McKinley West,Taguig, Philippines 1634 Trunkline:+63 2 737-4757 Website:www.electrolux.com.ph Email:wecaregelectrolux.com |
| Vietnam Consumer Care Center Toll-Free 1800-58-88-99 Tel: (+84 28) 39105465 Electrolux Vietnam Ltd. Unit 1&2, 1OF Sofic Tower, #10 Mai Chi Tho Street, Thu Thiem Ward, Thu Duc City, Ho Chi Minh City, Vietnam |
Malaysia Consumer Care Center Tel: 1300-88-11-22 Electrolux Home Appliances Sdn. Bhd. Corporate Office Address: Unit T2-7, 7th Floor, Tower 2, PJ33, No. 3, Jalan Semangat, Seksyen 13,46200 Petaling Jaya, Selangor. Office Tel : (+60 3) 7843 5999 Office FaX : (+60 3) 7955 5511 Consumer Care Center Address: Lot C6, No. 28, Jalan 15/22, Taman Perindustrian Tiong Nam, 40200 Shah Alam, Selangor Consumer Care Center Fax : (+60 3) 5524 2521 Email: |
| HONG KONG SERVICE HOTLINE: (+852) 3193 9888 DCH ELECTRICAL APPLIANCES SERVICE CENTRE 4/F, DCH BUILDING, 20 KAI CHEUNG ROAD, KOWLOON BAY, HONG KONG EMAIL: WEBSITE: www.electrolux.com.hk |
The Thoughtful Design Innovator.
Do you remember the last time you opened a gift that made you say, “Oh! How did you know? That’s exactly what | wanted!” That’s the kind of feeling that we at Electrolux seek to evoke in everyone who chooses or uses one of our products. We devote time, knowledge, and a great deal of thought to anticipating and creating the kind of appliances that our customers really need and want.
This kind of thoughtful care means innovating with insight. Not design for design’s sake, but design for the user’s sake. For us, thoughtful design means making appliances easier to use and tasks more enjoyable to perform, freeing our customers to experience the ultimate 21st-century luxury: ease of mind. Our aim is to make this ease of mind more available to more people in more parts of their everyday lives, all over the world.
The “Thinking of you” promise from Electrolux goes beyond meeting the needs of today’s consumers. It also means we’re committed to making appliances safe for the environment—now and for future generations. Electrolux. Thinking of you.
Share more of our thinking at
www.electrolux.com