Epson C6000A Color Inkjet Label Printer User Manual

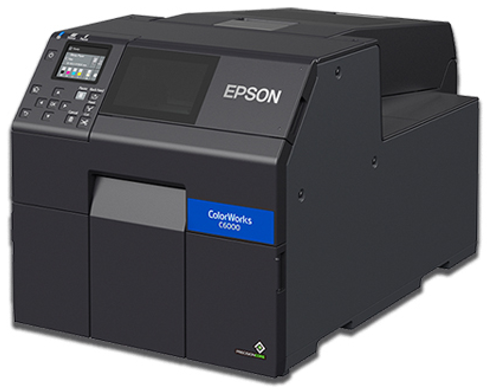
for EPSON C6000A
USER MANUAL


Please keep the original packaging in case you need to return the unit.
If we receive the system in non-original packaging, the warranty may be void.
The label unwinder specifically designed for the Epson C6000A color label printer can handle rolls up to 127mm (5”) media wide and has an outside diameter up to 250mm (10”). The unit is equipped with a fixed 3” core holder. An external power supply 100/240VAC – 2.5A

INSTALLATION
| STEP 1
Connect together both plates and lean the printer. Place carefully the printer into the lock guides. | |
| STEP 2
On the back side, place, and screw the unwinder equipped with its own included plate (A). Do not tighten the knobs until the unwinder will be properly aligned to the printer. | |
| STEP 3
Load both roll of media and outer disk onto the core holder. Tighten the core through the knob. | |
| STEP 4
Re-install the additional support. | |
| STEP 5
Keeping the media underneath the tension arm, turn on the unwinder and feed the media into the printer. Please look at the printer’s user manual and follow the detailed procedure on how to load the media into the printer. | |
| STEP 6
Once the media is loaded into the printer, slide left and right the unwinder to find the correct alignment between the two units and tighten the knobs. |


FUNCTIONING
Push this button to turn On or Off the unit.
INCREASE SPEED
Push this button to increase the rotation speed.
DECREASE SPEED
Push this button to decrease the rotation speed.

WORKING CONDITIONS
- When the printer forwards the media for printing, the tension arm goes up, the device unwinds the media. The green led is on.
- When the tension arm is in the middle position, the device is idle. Both yellow and green LEDs are on.
- When the printer backward the media, the tension arm goes down, and the device rewinds it. The yellow led is on.
- When the unit is operating but the media is not loaded or it runs out, the tension arm reaches the lowest position and after a few seconds the unit will stop by itself, both LEDs blink and it beeps.
USER MANUAL
Label Rewinder
for EPSON C6000A
Please keep the original packaging in case you need to return the unit.
If we receive the system in non-original packaging, the warranty may be void.
The label rewinder specifically designed for the Epson C6000A color label printer can handle rolls up to 127mm (5”) media wide and has an outside diameter up to 250mm 10”). The unit is equipped with a fixed 3” core holder. An external power supply 100/240VAC – 2.5A
INSTALLATION
| STEP 1
Connect together both plates and lean the printer. Place carefully the printer into the lock guides. | |
| STEP 2
On the front side, place, and screw the rewinder equipped with its own included plate (B). Do not tighten the knobs until the rewinder will be properly aligned to the printer. | |
| STEP 3
Load the empty cardboard core onto the core holder. | |
| STEP 4
Keeping the printed media underneath the tension arm, stick the end on the cardboard core. | |
| STEP 5
Slide the outer disk onto the core holder and keep it close to the media edge. Tighten the knob and reinstall the additional support. Once the media is loaded on the rewinder, slide left and right the rewinder to find the correct alignment between the two units and tighten the knobs. |


FUNCTIONING

ON-OFF
Push this button to turn On or Off the unit.
INCREASE SPEED
Push this button to increase the rotation speed.
DECREASE SPEED
Push this button to decrease the rotation speed.
LABEL FACE-OUT
Turn the unit off. Keep pushing the “FACE OUT” button, and push and release the “ON-OFF” button while the green lead turns on and off. The unit is now ready to operate.
LABEL FACE-IN
Turn the unit off. Keep pushing the “FACE IN” button, and push and release the “ON-OFF” button while the yellow lead turns on and off. The unit is now ready to operate.
WORKING CONDITIONS
- When the printer forwards the media for printing, the tension arm goes down, the device rewinds the media. The green led is on.
- When the tension arm is in the middle position, the device is idle. Both yellow and green LEDs are on.
- When the printer backward the media, the tension arm goes up, and the device unwinds it. The yellow led is on.
When the unit is operating but the media is not loaded or it runs out, the tension arm reaches the lowest position and after a few seconds the unit will stop by itself, both LEDs blink and it beeps.
SMART SOLUTIONS FOR THE LABELING INDUSTRY
Label rewinder, label unwinder, electronic label dispenser, and more…


– FOR MORE INFO CONTACT
www.ipsiscan.com
