Bosch PMD82D31 Built-in gas hob User Manual


Bosch PMD82D31 Built-in gas hob

Safety
Observe the following safety instructions.
General information
- Read this instruction manual carefully.
- Keep the instruction manual and theproduct information safe for future reference or for the next owner.
- Do not connect the appliance if it has been damaged in transit.
Intended use
This appliance is designed only to be built into kitchen units. Read the special installation instructions.
The appliance can only be used safely if it is correctly installed according to the safety instructions. The installer is responsible for ensuring that the appliance works perfectly at its installation location.
Only use this appliance:
- To prepare meals and drinks.
- Under supervision. Never leave the appliance unattended when cooking for short periods.
- In private households and in enclosed spaces in a domestic environment.
- Up to an altitude of max. 2000 m above sea level.
Do not use the appliance:
- On boats or in vehicles.
- as a room heater.
- with an external timer or a remote control.
Restriction on user group
This appliance may be used by children aged 15 or over and by people who have reduced physical, sensory or mental abilities or inadequate experience and/or knowledge, provided that they are supervised or have been instructed on how to use the appliance safely and have understood the resulting dangers.
Children must not play with the appliance.
Children must not perform cleaning or user maintenance unless they are at least 15 years old and are being supervised.
Keep children under the age of 15 years away from the appliance and power cable.
Safe use
WARNING ‒ Risk of suffocation! Children may put packaging material over their heads or wrap themselves up in it and suffocate.
- Keep packaging material away from children.
- Do not let children play with packaging material. Children may breathe in or swallow small parts, causing them to suffocate.
- Keep small parts away from children.
- Do not let children play with small parts.
The use of a gas cooking appliance results in the production of heat and moisture in the room in which it is installed. Ensure that the kitchen is well ventilated: keep natural ventilation holes open or install a mechanical ventilation device (mechanical extractor hood). Prolonged intensive use of the appliance may call for additional ventilation, for exampleopening of a window, or more effective ventilation, for example increasing the level of mechanical ventilation where present.
WARNING ‒ Risk of explosion!
Escaping gas may cause an explosion. WHATTO DO IF YOU SMELL GAS OR IF THERE ARE FAULTS IN THE GAS INSTALLATION
- Immediately shut off the gas supply or close the gas cylinder valve.
- Immediately extinguish all naked flames and cigarettes.
- Do not operate any light switches or appliance switches.
- Do not pull any plugs out of any sockets.
- Do not use any telephones or mobile phones within the building.
- Open windows and ventilate the room.
- Call the after-sales service or the gas supplier.
Escaping gas may cause an explosion. Small amounts of gas can collect over a longer period of time and ignite - Close the safety valve for the gas supply when the appliance is out of use for prolonged periods.
Escaping gas may cause an explosion. If the liquefied gas bottle is not upright, liquefied propane/butane can enter the appliance. In-tense darting flames may therefore escapefrom the burners. Components may become damaged and start to leak over time so thatgas escapes uncontrollably. - Always use liquefied gas bottles in an up-right position.
WARNING ‒ Risk of fire!
Leaving fat or oil cooking on an unattendedhob can be dangerous and may lead to fires.
- Never leave hot oil or fat unattended.
- Never attempt to extinguish a fire using wa-ter; instead, switch off the appliance andthen cover with a lid or a fire blanket.
The appliance becomes very hot. - Never place flammable objects on thecooktop or in its immediate vicinity.
- Never store any objects on the cooktop.
The appliance will become hot. - Do not keep combustible objects or aero-sol cans in drawers directly underneath thehob.
- Never store or use combustible materials(e.g. spray cans or cleaning agents) underthe appliance or in its immediate vicinity.
- The appliance becomes very hot, fabrics andother objects may ignite.
- Keep fabrics (e.g. garments or curtains)away from the flames.
- Never reach over the flames.
- Do not place combustible objects (e.g. teatowels or newspapers) on, next to or behind the appliance.
Food may catch fire. - The cooking process must be monitored. Ashort process must be monitored continuously.
Escaping gas may ignite. - If the burner does not ignite after15 seconds, turn the control knob to the”Off” position and open the door or windowin the room. Wait at least one minute before igniting the burner again.
- In the event of the burner flames being accidentally extinguished, turn off the burner control and do not attempt to re-ignite the burner for at least one minute.
When gas burners are in operation without any cookware placed on them, they can build up a lot of heat. The extractor hood above it may become damaged or catch fire. - Only operate the gas burners with cookware on them.
WARNING ‒ Risk of electric shock!
Incorrect repairs are dangerous.
- Repairs to the appliance should only be carried out by trained specialist staff.
- Only use genuine spare parts when repairing the appliance.
- If the power cord of this appliance is damaged, it must be replaced by the manufacturer, the manufacturer’s Customer Serviceor a similarly qualified person in order top revent any risk.
If the appliance or the power cord is damaged, this is dangerous. - Never operate a damaged appliance.
- Never pull on the power cord to unplug the appliance. Always unplug the appliance at the mains.
- If the appliance or the power cord is damaged, immediately unplug the power cord or switch off the fuse in the fuse box and turn off the gas supply.
- Call customer services. → Page 11
An ingress of moisture can cause an electric shock. - Do not use steam- or high-pressure cleaners to clean the appliance.
The insulation on cables of electrical appliances may melt if it touches hot parts of the appliance. - Never bring electrical appliance cables in contact with hot parts of the appliance.
WARNING ‒ Risk of burns!
The hob becomes hot during use.
- Care should be taken to avoid touching the heating elements.
- Metallic objects such as knives, forks, spoons and lids should not be placed on the hob as they can become hot.
Empty cookware becomes extremely hot when set on gas burners that are operating. - Never heat up empty cookware.
The appliance becomes hot during operation. - Allow the appliance to cool down before cleaning.
WARNING ‒ Risk of injury!
The product is assembled by the factory.Users are not allowed to assemble or modify the structure. In case of failure, lack of spare parts or replacement of spare parts, please contact the after-sales service or local dealer,and do not purchase spare parts by yourself for replacement.
Faults or damage to the appliance and repairs that have not been carried out correctly are dangerous.
- Never switch on the appliance if there is a fault with it.
- If the appliance is faulty, unplug the mains plug or switch off the fuse in the fuse box.Shut off the gas supply and call the aftersales service.
- Always have repairs carried out to the appliance and damaged gas lines replaced by trained, specialist personnel.
Cracks or fractures in the glass surface aredangerous.
- All of the burners and each electrical heat-ing element switch off immediately and dis-connect the appliance from the power sup-ply.
- Shut off the gas supply.
- Do not touch the surface of the appliance
- Do not use the appliance.
- Call the customer service.
Strong temperature fluctuations may causethe glass to break. - When using the hob, avoid draughts and spilling cold liquids.
The production process and characteristics of tempered glass determine that there may bea very small probability of spontaneous breakage. - Wear protective gloves.
- Call customer service.
Cookware that is not the right size, or that is damaged or incorrectly positioned may cause serious injuries. - See the notes on cookware.
An appliance with a cracked or broken sur-face can cause cuts. - Do not use the appliance if it has a cracked or broken surface.
When switching on the burner, sparks are generated in the ignition plugs. - Never touch the ignition plugs while the burner is being lit.
Avoiding property damage
ATTENTION!
A build-up of heat may damage the appliance.
- Use only the original accessories specified.
If there is strong wind interference when using the gas hob, the burner flames may be affected and the hob may not work properly.
Heat can cause damage to adjacent appliances or kitchen units. If the appliance is in operation for an extended period, heat and moisture will be generated. - Open a window or switch on an extractor hood leading to the outside.
Moisture ingress may damage the control knobs. - Do not use wet sponges or cloths.
If a control knob is in the wrong position, this could lead to malfunctions. - Always turn the control knob to the “Off” position when the appliance is not being used.
Environmental protection and saving energy
Disposing of packaging
The packaging materials are environmentally compatible and can be recycled.
- Sort the individual components by type and dispose of them separately.
Saving energy
If you follow these instructions, your appliance will useless energy.
| Cover saucepans with suitable lids. |
Cooking without a lid con- sumes far more energy. |
| Lift the lid as infrequently as possible when stewing or braising. |
When you lift the lid, a lot of energy escapes. |
| Select a suitable pan ac- cording to the amount of ingredients. | More energy will be con- sumed when using a large pan to heat a small amount of food. |
| Cook with an appropriate amount of water. | The more water in the pan, the more energy is required to heat it up. |
Applicable standards
BS EN30-1-1:2008
Technical specifications
| Product no. | PMD83D31AX | PMD83D51AX | PMD82D31AF |
| Gas type | LPG | LPG | TG |
| Rated gas pressure | 2900 Pa | 2900 Pa | 1000 Pa |
| External dimensions (WxDxH) |
780 x 450 x 150 mm | 760 x 466 x 150 mm | 780 x 450 x 150 mm |
| Cut-out dimensions (WxD) | 700 x 400 mm Rounded corners 4 x R20 mm |
700 x 400 mm Rounded corners 4 x R20 mm |
700 x 400 mm Rounded corners 4 x R20 mm |
| Net weight | 14.0 kg | 11.8 kg | 12.5 kg |
| Gross weight | 16.3 kg | 14.0 kg | 15.0 kg |
| Rated heat input (left/ centre/right) |
4.9 kW / 2.0 kW / 4.9 kW | 4.9 kW / 2.0 kW / 4.9 kW | 5.0 kW / – / 5.0 kW |
| Rated voltage | 220-240 V~ | 220-240 V~ | 220-240 V~ |
| Product number | PMD83D31AF | PMD83D51AF | PMD93D31AF |
| Gas type | TG | TG | TG |
| Rated gas pressure | 1000 Pa | 1000 Pa | 1000 Pa |
| External dimensions (WxDxH) |
780 x 450 x 150 mm | 760 x 466 x 150 mm | 920 x 510 x 150 mm |
| Cut-out dimensions (WxD) | 700 x 400 mm Rounded corners 4 x R20 mm |
700 x 400 mm Rounded corners 4 x R20 mm |
880 x 455 mm Rounded corners 4 x R15 mm |
| Net weight | 14.0 kg | 11.5 kg | 17.5 kg |
| Gross weight | 16.3 kg | 14.0 kg | 21.3 kg |
| Rated heat input (left/ centre/right) |
5.0 kW / 2.0 kW / 5.0 kW | 5.0 kW / 2.0 kW / 5.0 kW | 5.0 kW / 2.0 kW / 5.0 kW |
| Rated voltage | 220-240 V~ | 220-240 V~ | 220-240 V~ |
Familiarising yourself with your appliance
Appliance
You can find an overview of the parts of your appliance here.
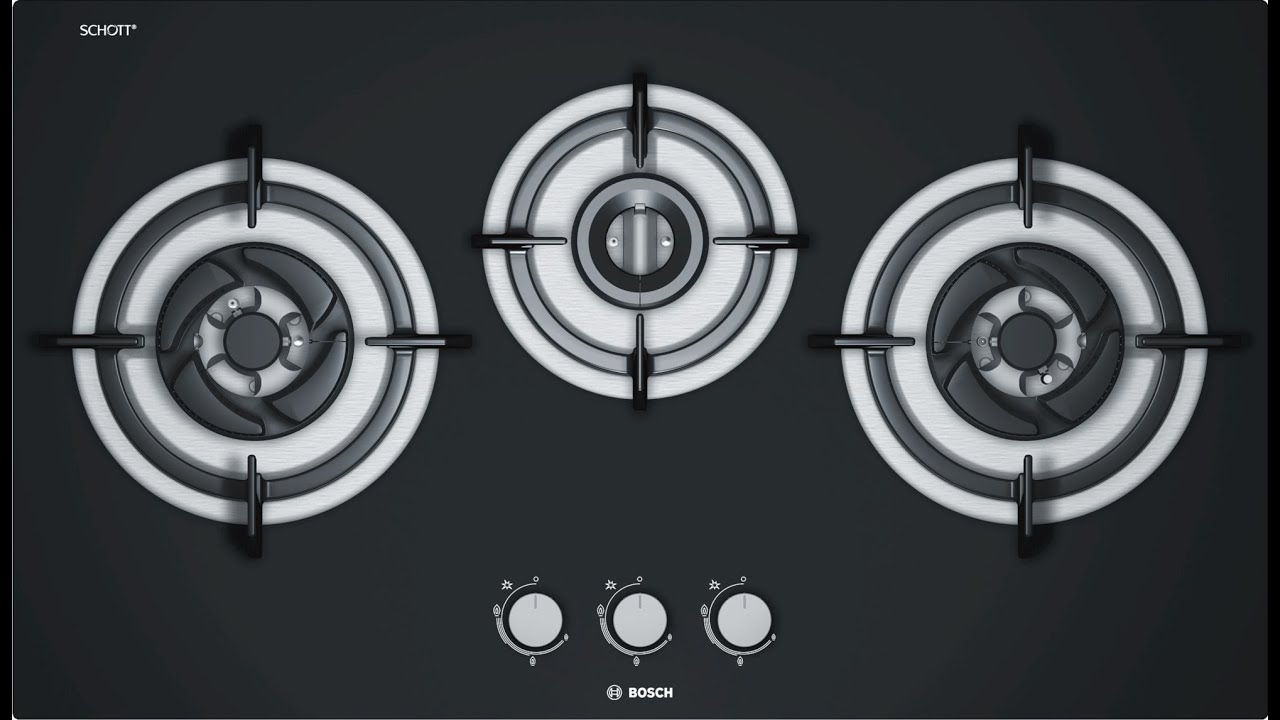
PMD82D31..


- A/Pan support
- B/Burner
- C/Control knob
- D/Small burner
Control knob
You can use the control panel to configure all functions of your appliance and to obtain information about the operating status.

Burner
You can find an overview of the parts of the burner here.

- Burner cover
- Burner ring
- Burner head
- Ignition plug
- Thermocouple for the flame monitoring
Small burner
You can find an overview of the parts of the burner here

- Burner cover
- Burner head
- Ignition plug
- Thermocouple for the flame monitoring
Using cookware
The selection and positioning of cookware affects the safety and energy efficiency of your appliance.
WARNING ‒ Risk of fire!
Flammable objects may ignite.
- Maintain a distance of at least 50 mm between the cookware and flammable objects.
Do not use rim based or convex based vessels on the hotplate.
Using cookware that is a suitable size, the diameter of the pot bottom on the pan support is 160-320 mm, and the diameter of the pot bottom on the small pan support is 120-220 mm. Use the auxiliary pan support as needed.
Do not use deformed cookware. Deformed cookware is not stable on the hob and may tip over. Use cookware with a thick, flat base.

- Position the cookware in the middle of the burner, otherwise, it may tip over.
- Do not position large cookware on the burners close to the controls.
- The controls may be damaged due to overheating.


Basic operation
Placing the burner parts
You can find out how to correctly position the burner parts here.
- Ensure that the burner parts are clean and dry.
- Ensure that the individual parts of the burners are fitted in their exact position and are straight; otherwise, this may result in ignition problems or problems during operation.
- Install the burner head so that the thermocouple and spark plug are located in the corresponding slots of the burner head.
- The catching pin on the outer ring cap must fit into the corresponding slot on the burner head.
- The catching pin on the inner ring cap must fit into the corresponding slot on the burner head.


Using suitable cookware
- Only use cookware with a suitable diameter.
- Ensure that the cookware does not protrude over the edge of the cooktop
Starting the hob
Your hob features automatic fast ignition.
Note: Ensure that there is no leakage before operation.
- Place a suitable pan on the pan support.
- Choose the corresponding burner control knob.Press and turn it anti-clockwise to the ignition position.
- The burner ignites automatically.
- Turn the control knob anti-clockwise to the position you require.
- The power of the burner flame will change accordingly.
Starting the hob after safety switch-off
Requirement: The safety device shuts off the gas sup-ply to the burner if the flame is unintentionally extin-guished.
- Turn the control knob to turn off the hob.
- Restart the hob as normal.
Switching off the hob
- Turn the knob clockwise to the OFF position.
- The appliance electronics shut off the gas supply.
Cleaning and servicing
To keep your appliance working efficiently for a long time, it is important to clean and maintain it carefully.
Cleaning products
You can obtain suitable cleaning products from after-sales service or the online shop.
ATTENTION!
Unsuitable cleaning products may damage the surfaces of the appliance.
- Do not use harsh or abrasive detergents.
- Do not use cleaning products with a high alcohol content.
- Do not use hard scouring pads or cleaning sponges.
- Do not use any special cleaners for cleaning the appliance while it is hot.
- Only use glass cleaners, glass scrapers or stainless steel care products if recommended in the cleaning instructions for the relevant part.
- Wash sponge cloths thoroughly before use.
Cleaning the stainless steel surfaces
- Observe the information regarding the cleaning agents.
- Clean using a sponge cloth and hot soapy water in the direction of the finish.
- Dry with a soft cloth.
- Apply a thin layer of the stainless steel cleaning product with a soft cloth.
Tip: You can obtain stainless steel cleaning products from after-sales service or the online shop.
Cleaning the control knob
ATTENTION!
Moisture ingress may damage the control knobs.
- Do not use wet sponges or cloths.
- Observe the information regarding the cleaning agents.
- Clean using a slightly damp sponge cloth and hot soapy water.
- Dry with a soft cloth.
Cleaning the pan support manually
WARNING ‒ Risk of burns!
The appliance becomes hot during operation.
- Allow the appliance to cool down before cleaning.
- Carefully remove the pan support.
- Soak the pan support in the sink.
- Clean the pan support using a scrubbing brush and washing-up liquid.
- Rinse the pan support rinse with clean water.
- Dry the pan support with a kitchen towel.
Discoloration of the burners
After long use, the brass burner parts become darker due to natural oxidation. This discoloration does not affect their usability
Cleaning the burners
Clean the burners at least once a month. Clean the burners whenever there is dirt on the surface or the flame is uneven.
- Wait until the burner cap has cooled before carefully removing it.
- Remove dirt and carbon deposits from the burner openings using a steel needle and wipe with soapy water.
- Clean the spark plug and thermocouple with a soft brush and wipe with soapy water.
Do not knock the spark plug when cleaning. - Dry the components completely.
Water droplets or damp patches on the hob at the start of cooking may damage the burners. - Carefully reinstall all of the components.
Note: The warranty will be invalidated if the face plateis scratched or a burner is deformed due to improper installation.
Using cleaning gel for burnt-on dirt
For hard-to-remove, burnt-on dirt, you can order a cleaning gel from our online shop, from your specialist retailer or via our after-sales service.
- Follow the instructions on the cleaning product.
- Remove the pan supports and the burner parts
- ATTENTIO
!On the burner parts, the controls and the aluminum surfaces, the cleaning gel leads to damage- Only use the cleaning gel on the pan supports and stainless steel surfaces.
Apply the cleaning gel to the burnt-on dirt.
- Only use the cleaning gel on the pan supports and stainless steel surfaces.
- If necessary, let the dirt soak overnight
Troubleshooting
You can rectify minor faults on your appliance yourself.Read the troubleshooting information before contacting after-sales service. This will avoid unnecessary costs.
WARNING ‒ Risk of injury!
Improper repairs are dangerous.
- Repairs to the appliance should only be carried out by trained specialist staff.
- If the appliance is defective, call Customer Service.
WARNING ‒ Risk of electric shock!
Incorrect repairs are dangerous.
- Repairs to the appliance should only be carried out by trained specialist staff.
- Only use genuine spare parts when repairing the appliance.
- If the power cord of this appliance is damaged, it must be replaced by the manufacturer, the manufacturer’s Customer Service or a similarly qualified person in order to prevent any risk.
Malfunctions


Customer Service
If you have any queries on use, are unable to rectify faults on the appliance yourself or if your appliance needs to be repaired, contact Customer Service. Detailed information on the warranty period and terms of warranty in your country is available from our aftersales service, your retailer or on our website. If you contact Customer Service, you will require the product number (E-Nr.) and the production number (FD) of your appliance.
The contact details for Customer Service can be found in the enclosed Customer Service directory or on our website.
Product number (E-Nr.) and production number (FD)
You can find the product number (E-Nr.) and the production number (FD) on the appliance’s rating plate. Make a note of your appliance’s details and the Customer Service telephone number to find them again quickly.
Installation instructions
Observe this information when installing the appliance
Safe installation
Follow these safety instructions when installing the appliance. The appliance can only be used safely if it is correctly installed according to the safety instructions. The installer is responsible for ensuring that the appliance works perfectly at its installation location.
WARNING ‒ Risk of injury! Parts that are accessible during installation may have sharp edges and may lead to cutting injuries.
- Wear protective gloves
WARNING ‒ Risk of fire!
The gas hob becomes very hot, other objects may ignite.
- The gas hob should be installed at distance of at least 1 m to the kitchen ceiling.
WARNING ‒ Risk of explosion!
Escaping gas may cause an explosion.
- Only a licensed professional may connect the appliance.
- Switch off the power and gas supply before carrying out any work on the appliance.
- For the installation, observe the currently valid building regulations and the regulations of the local electricity and gas suppliers.
- After connecting the appliance to the gas supply, always check the connection for leak tightness. The manufacturer accepts no responsible for any gas leakage caused by a third party due to gas installation.
Escaping gas may cause an explosion or result in poisoning. - Ensure that the installation area is well ventilated.
- Make sure that there is a door leading to the open air or a window that can be opened.
This appliance is not connected to a combustion products evacuation device. It shall be installed and connected in accordance with current installation regulations. Particular attention shall be given to the relevant requirements regarding ventilation.
WARNING ‒ Risk of suffocation!
Children may put packaging material over their heads or wrap themselves up in it and suffocate.
- Keep packaging material away from children.
- Do not let children play with packaging material.
ATTENTION!
Prior to installation, ensure that the local distribution conditions (nature of the gas and gas pressure) and the adjustment of the appliance are compatible.
The adjustment conditions for this appliance are stated on the label (or data plate).
Information about the installation room
For safe operation, observe the following information regarding the installation room.
- This appliance complies with appliance class 3 for installation in a kitchen cupboard.
- Install the appliance in accordance with the installation diagram.
- Ensure that the wall behind the appliance is made of non-combustible material.
- This appliance must not be installed on boats or in vehicles.
Ventilation
For the installation of the cabinet of built-in cooking appliance, the hole-opening shall conform to the ventilation requirement and be through to the atmosphere.
Otherwise, the deposition of leaked gas may lead to explosion. The cooktop ventilation pipe opening should be a minimum of 100 cm².

Gas connection instructions
Please observe these precautions to ensure safe and reliable connection of the appliance.
- For the installation, observe the currently applicable building regulations and the regulations of the local gas suppliers.
- Ensure that the information on the rating plate regarding the gas type and gas pressure complies with the local connection conditions.
- The gas connection must be arranged so that the shut-off valve is accessible.
The appliance comes with two connection elbows (appliance- side G½”).
Select the right version according to the country:
- ISO 228 G 1/2 cylindrical
- EN 10226 R 1/2 conical
Use one of the supplied connection elbows and the corresponding seal to connect the appliance to a fixed power cable or a gas safety hose.
The safety gas hose should not exceed a length of 2 ·m, and must have no connectors.
Please pay attention to the instructions regarding the safety gas hose:
- The gas safety hose must not come into contact with moving parts of the fitted unit (e.g. drawers) or be routed in areas where it could become trapped or damaged.
- The gas safety hose must not come into contact with a hob, oven, dishwasher, refrigerator, washing machine, hot water pipes, radiator or any other appliance installed next to or below the gas hob.
- The gas safety hose must not be subject to rubbing, vibrations, kinking or any other kind of deformation. It should be checked along its entire length with the hob in the installation position.
Information about the electrical connection
In order to safely connect the appliance electrically, observe this information.
WARNING ‒ Risk of electric shock!
It must always be possible to disconnect the appliance from the electricity supply. The appliance must only be connected to a protective contact socket that has been correctly installed.
- The mains plug of the mains power cable must be easily accessible after installation of the appliance.
- If this is not possible, an all-pole isolating switch must be integrated into the permanent electrical installation according to the conditions of overvoltage category III and according to the installation regulations.
- The permanent electrical installation must only be wired by a professional electrician. We recommend installing a residual-current circuit breaker (RCCB) in the appliance’s power supply circuit. Sharp-edged or hot components inside the appliance may damage the connection cable.
- Do not kink or trap the connection cable.
- Do not route the connection cable along hot surfaces. Incorrect repairs are dangerous.
- Repairs to the appliance should only be carried out by trained specialist staff.
- Only use genuine spare parts when repairing the appliance.
- If the power cord of this appliance is damaged, it must be replaced by the manufacturer, the manufacturer’s Customer Service or a similarly qualified person in order to prevent any risk.
- Ensure that the information on the rating plate regarding the output and voltage complies with the local connection conditions.
- The appliance corresponds to protection class 1. You should therefore only use the appliance with a protective earth connection.
- Do not connect the appliance to the power supply during installation.
- Ensure that the protection against contact is guaranteed during installation.
- Only a qualified electrician may connect appliances without a plug. They are subject to the requirements of the local electricity provider.
- Do not use the appliance with an external timer or a remote control.
- The appliance must only be connected using the power cable provided.
Included in delivery
After unpacking all parts, check for any damage in transit and completeness of the delivery.
Two-burner model:


Checking the unit
▶ Check whether the kitchen unit worktop is strong and level.
Worktop thickness ·>16mm, width ≥550mm.
Preparing the unit
Requirement: The unit is suitable for installation.
- Note: Check the technical specifications of the appliance and select the cavity dimensions corresponding to the model.
Make a cut-out in the worktop, depending on the installation position. - Ensure that the worktop has sufficient load-bearing capacity and stability.
Use a heat- and humidity-resistant reinforcing material for any substructure. - Ensure that the fitted unit is still stable after the cutouts have been made.
- Remove any shavings.

Installing the appliance
- Lift the hob horizontally and slowly place it into the opening in the worktop until the edge of the hob is fully in contact with the worktop.
Connecting a non-metallic gas hose
Requirement: The gas hose must meet the requirements.
- Note: Please read the installation instructions for the gas hose carefully and install in strict accordance with the regulations.
Use the connection elbow and corresponding seal to connect the appliance to the gas hose. - Connect the other end of the gas hose to the gas valve.
- The connection between the gas hose and gas pipeline must be secured by a compression nut or pipe clamp.
- Perform a gas leak test.

Gas leak test
Use soapy water to test for leaks
- Use a soft brush dipped in soapy water to coat the connecting section of the gas pipeline.
- Open the gas valve and carefully observe whether bubbles form.
If bubbles form, close the gas valve immediately. - Adjust the leaking connecting section.
- Repeat the above steps until there are no air bubbles on the connecting section.
Connecting the appliance to the electricity supply
- Insert the mains plug of the appliance’s power cable in a socket nearby.
- Check the mains plug is inserted properly.
- The appliance is now ready for use.
Power cable
The power cable is fixed on the right of the appliance.
Make sure it is safety and grounded when you use it.
The socket should be away from the gas and air inlet, and it is recommended to be fixed on the right side of the appliance.

Thank you for buying a Bosch Home Appliance!
Register your new device on MyBosch now and profit directly from:
- Expert tips & tricks for your appliance
- Warranty extension options
- Discounts for accessories & spare-parts
- Digital manual and all appliance data at hand
- Easy access to Bosch Home Appliances Service
Free and easy registration – also on mobile phones:
www.bosch-home.com/welcome
Looking for help? You’ll find it here
Expert advice for your Bosch home appliances, help with problems or a repair from Bosch experts.
Find out everything about the many ways Bosch can support you:
www.bosch-home.com/service
Contact data of all countries are listed in the attached service directory.
Robert Bosch Hausgeräte GmbH
Carl-Wery-Straße 34
81739 München
GERMANY
www.bosch-home.com