Bosch D-tect 120 Professional Digital Wall Floor Scanner Panel Instruction Manual
D-tect 120 Professional Digital Wall Floor Scanner Panel
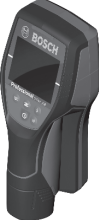

D-tect 120 Professional
Robert Bosch Power Tools GmbH
70538 Stuttgart
GERMANY
www.bosch-pt.com
1 609 92A 212 (2016.10) T / 206
Manual original


Safety Notes
Read and observe all instructions. The integrated
protections in the measuring tool may
be compromised if the measuring tool is not
used in accordance with the instructions
provided.
SAVE THESE INSTRUCTIONS FOR FUTURE REFERENCE.
▶ Have the measuring tool repaired only through qualified
specialists using original spare parts. This ensures
that the safety of the measuring tool is maintained.
▶ Do not operate the measuring tool in explosive environments,
such as in the presence of flammable liquids,
gases or dusts. Sparks can be created in the measuring
tool which may ignite the dust or fumes.
▶ For technological reasons, the measuring tool cannot
ensure 100 % certainty. To rule out hazards, safeguard
yourself each time before drilling, sawing or routing in
walls, ceilings or floors by means of other information
sources, such as building plans, pictures from the construction
phase, etc. Environmental influences, such as
humidity or closeness to electrical devices, can influence
the accuracy of the measuring tool. Surface quality and
condition of the walls (e.g., moisture, metallic building materials,
conductive wallpaper, insulation materials, tiles)
as well as the amount, type, size and position of the objects
can lead to faulty measuring results.
Battery tool use and care
▶ Recharge only with the charger specified by the manufacturer.
A charger that is suitable for one type of battery
pack may create a risk of fire when used with another battery
pack.
▶ Use power tools only with specifically designated battery
packs. Use of any other battery packs may create a
risk of injury and fire.
▶ When battery pack is not in use, keep it away from
other metal objects, like paper clips, coins, keys, nails,
screws or other small metal objects, that can make a
connection from one terminal to another. Shorting the
battery terminals together may cause burns or a fire.
▶ Under abusive conditions, liquid may be ejected from
the battery; avoid contact. If contact accidentally
occurs, flush with water. If liquid contacts eyes, additionally
seek medical help. Liquid ejected from the battery
may cause irritation or burns.
▶ Do not open the battery pack. Danger of short-circuiting.
Protect the battery pack against heat, e.g.,
against continuous intense sunlight, fire,
water, and moisture. Danger of explosion.
▶ In case of damage and improper use of the battery
pack, vapours may be emitted. Provide for fresh air and
seek medical help in case of complaints. The vapours
can irritate the respiratory system.
▶ Use the battery only in conjunction with your Bosch
product. This measure alone protects the battery against
dangerous overload.
▶ The battery can be damaged by pointed objects such as
nails or screwdrivers or by force applied externally. An
internal short circuit can occur and the battery can burn,
smoke, explode or overheat.
Product Description and Specifications
Please unfold the fold-out page with the representation of the
measuring tool and leave it unfolded while reading the operating
instructions.
Intended Use
The measuring tool is intended for the detection of objects in
walls, ceilings and floors. Depending on the material and condition
of the base material, it is possible to detect metal objects,
joists, water-filled plastic pipes, conductors and cables.
The measuring tool meets the requirements in accordance
with EN 55011.
Product Features
The numbering of the product features shown refers to the illustration
of the measuring tool on the graphic page.
1 Marking aid, top
2 LED
3 Display
4 Marking aid, left and right
5 Audio signal button
6 On/Off button
7 Button for operating mode Concrete
8 Button for operating mode Universal
9 Button for operating mode Drywall
10 Grip area
11 Slot for battery pack or AA battery adapter
12 Unlocking button for battery or AA battery adapter
13 Battery pack*
14 Sensor area
15 Serial number
16 AA battery adapter sealing cap*
17 AA battery adapter cover*
18 AA1 battery adapter
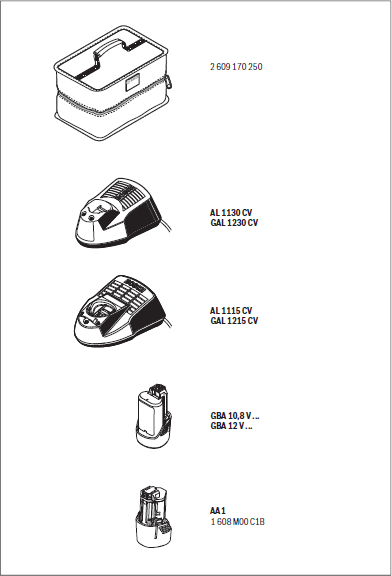
*Accessories shown or described are not part of the standard delivery
scope of the product. A complete overview of accessories
can be found in our accessories program.
Display Elements
a Indication of the object type “Live conductor”
b Battery indicator
c Switched-off audio signal indicator
d “Interference by radio waves” indicator
e Battery temperature control indicator
f Warning-function indicator
g “Service required” indicator
h Measuring indicator
i “Centre cross” indicator of the object’s centre
j Movement indicator
k Orientation arrows to determine the object’s centre
Technical Data
Universal Detector D-tect 120 Article number 3 601 K81 3.. Max. detection depth*
– Concrete operating mode
– Metal objects
– Cables and water-filled plastic pipes – Universal operating mode
– Drywall operating mode
120 mm (100 mm typical) 120 mm (100 mm typical) 60 mm
60 mm
60 mm
Measuring accuracy to the object’s centre* ±10 mm Minimum distance between two adjacent objects* 50 mm Operating temperature –10 … +40 °C Storage temperature –20 … +70 °C Automatic switch-off after approx. 5 min max. humidity for the detection of objects 90 % relative humidity (non-condensing) max. humidity for the classification of power cables 50% relative humidity Weight according to EPTA-Procedure 01:2014 0.50 kg
Batteries (alkali-manganese) Battery pack (lithium-ion) Battery life
– Batteries (alkali-manganese) – Battery pack (lithium-ion)
4 x 1.5 V LR6 (AA) (with battery adapter) 10.8 V/12 V
5 h
5 h
Recommended batteries GBA 10,8V … GBA 12V …
Recommended chargers AL 11.. CV GAL 12.. CV
* Depending on size and type of object as well as material and condition of the base material
The measuring tool can be clearly identified with the serial number 15 on the type plate.
▶ In terms of accuracy and scanning depth, the measurement result can be inferior in case of unfavourable surface quality of the base material.
1 609 92A 212 | (12.10.16) Bosch Power Tools
OBJ_BUCH-2149-003.book Page 15 Wednesday, October 12, 2016 12:52 PM
English | 15
Assembly
The measuring tool can be operated either with a battery pack 13 or with AA batteries.
▶ Remove the batteries/rechargeable batteries from the measuring tool when not using it for longer periods. When storing for longer periods, the batteries/rechargeable batteries can corrode and self-discharge.
Battery Charging (see figure C)
▶ Use only the battery chargers listed on the accessories page. Only these battery chargers are matched to the lithiumion battery pack that can be used in your measuring tool.
Note: The battery supplied is partially charged. To ensure full capacity of the battery, completely charge the battery in the battery charger before using your power tool for the first time. The lithium-ion battery can be charged at any time without re
ducing its service life. Interrupting the charging procedure does not damage the battery.
The “Electronic Cell Protection (ECP)” protects the lithium ion battery pack against deep discharging. When the battery pack is discharged, the measuring tool is switched off by a protective circuit.
▶ Following the automatic shut off of the measuring tool, do not continue to press the On/Off button. The battery can be damaged.
To remove the battery 13 press the unlocking buttons 12 and pull the battery back and out of the measuring tool. Do not ex ert any force.
Observe the notes for disposal.
Inserting the battery
Note: Use of battery packs not suitable for the measuring tool can lead to malfunctions of or cause damage to the measuring tool.
Insert the charged battery 13 into the handle until you feel it engage and it is flush with the handle.
Inserting/removing AA battery adapter (see figure D)
▶ The AA battery adapter is only intended for the use in cer tain Bosch measuring tools and cannot be used with other power tools.
Inserting AA battery adapter
Place the cover 17 into the slot 11 . Place the batteries on the sealing cap 16 as per the illustration. Next, slide the sealing cap 16 over the batteries until you feel it engage and it is flush with the handle.
Removing AA battery adapter
Press the unlocking buttons 12 of the sealing cap 16 and pull the sealing cap downwards to remove it. Take care that the batteries do not fall out. Hold the device with the battery compartment facing
upward. Remove the batteries. To remove the in side cover 17 , reach into the cover and pull it out of the measuring tool by applying light pressure to the side wall.
Rechargeable battery/battery indicator
The rechargeable battery/battery indicator b always displays the current battery status:
Battery fully charged
Battery has 2/3 of its capacity or less
Battery has 1/3 of its capacity or less
Battery has 10% capacity or less
Change battery
Operation
▶ Protect the measuring tool against moisture and direct sun light.
▶ Do not subject the measuring tool to extreme tempera tures or variations in temperature. As an example, do not leave it in vehicles for longer periods. In case of large variations in temperature, allow the measuring tool to ad just to the ambient temperature before putting it into oper ation.
▶
Hold the measuring tool at the intended grip area 10 only, so as not to influence the measurement.
▶
Use or operation of transmitting systems, such as WLAN, UMTS, radar, transmitter masts or microwaves, in the close proximity can influence the measuring function.
▶ The measuring values can be impaired through certain ambient conditions. These include, e.g. the proximity of devices that produce strong electric, magnetic or electromagnetic fields, moisture, metallic building materials, foil-laminated insulation materials or conductive wallpaper or tiles. Therefore, also observe other in formation sources (e.g. construction plans) before drilling, sawing or routing into walls, ceilings or floors.
Initial Operation
Switching On and Off
Check the measuring tool before each use. In the following cases, safe function can no longer be ensured:
– The measuring indicator
h
constantly deflects, even though you hold the tool in the air.
– The measuring indicator does not deflect, even though you keep a finger in the sensor area.
– The device has visible damage or loose components inside the measuring tool.
– Safe function is ensured only when one of the operating mode selector buttons lights up.
▶ Before switching the measuring tool on, make sure that the sensor area 14 is not moist. If required, dry the measuring tool using a soft cloth.
▶ If the measuring tool was subject to an extreme temperature change, allow it to adjust to the ambient temperature before switching on.
To switch on the measuring tool, press the On/Off button 6 .
To switch off the measuring tool, press the On/Off button 6 again.
Bosch Power Tools 1 609 92A 212 | (12.10.16)
OBJ_BUCH-2149-003.book Page 16 Wednesday, October 12, 2016 12:52 PM 16 | English
When no button on the measuring tool is pressed for approx. 5 minutes and when no objects are detected, the measuring tool automatically switches off to save the battery.
Switching the Audio Signal On/Off
The audio signal can be switched on/off with the audio signal button 5 . When the audio signal is switched off, the dis play 3 indicates the information c .
Method of Operation (see figure B)
The measuring tool checks the base material of the sensor area 14 in measurement direction A. Objects are detected that differ from the material of the wall.
Always move the measuring tool over the base material applying light pressure, without lifting it off or changing the pressure. The measuring tool can be moved in any direction B.
Operation Modes
As soon as the measuring tool is switched on, you can switch between different operating modes.
By selecting the operating modes, you can adjust the measuring tool to different wall materials and, if required, suppress unwanted objects.
If the wall material is not known, you should begin with the Universal mode.
The selected operating mode is indicated by the illuminated button.
Universal (preset)
The operating mode “ Universal ” is suitable for most applications in masonry. Metal objects, wa ter-filled plastic pipes, electrical lines and cables are indicated. Cavities in building brick or empty
plastic pipes with a diameter of less than 2 cm may not be dis played. The maximum measuring depth is 6 cm.
Concrete
The operating mode “ Concrete ” is especially suit able for applications in reinforced concrete. Re bars, metal pipes, water-filled plastic pipes, electrical lines and cables are indicated. The maximum measuring depth is 12cm.
Drywall
The operating mode “ Drywall ” is suitable for de tecting joists, metal supports, electrical lines and cables in drywalls (wood, plasterboard, etc.). Water-filled plastic pipes are also indicated.
Empty plastic pipes are normally not detected. The maximum measuring depth is 6 cm.
Measuring Procedure
Locating objects
Position the measuring tool on/against the surface being in spected.
If there is already an object below the measuring tool when it is placed down, the LED 2 lights up red if there is sufficient signal strength, the measuring indicator h deflects and a signal sounds.
If an object has not yet been detected when the measuring tool is placed down, the procedure indicator j is dis played and the LED 2 lights up yellow. Move the measuring
tool over the surface without lifting it off, until the procedure indicator j disappears. The LED 2 then lights up green at plac es where the measuring tool has not detected an object. When the measuring tool approaches an object, the deflec tion in the measuring indicator h increases and the LED 2 lights up red. The deflection decreases when the measuring tool moves away from an object.
With small or deep-lying objects, the LED 2 can continue to light up yellow and the signal does not sound.
Determining the object’s centre
If an object is detected, the LED 2 lights up red and, if there is sufficient signal strength, the orientation arrows k for deter mining the object’s centre are displayed. To specifically lo cate the object’s centre, move the measuring tool in the direction of the orientation arrows k . If the orientation arrows are not displayed, an object may nevertheless be located in the immediate vicinity.
The measuring indicator h indicates the maximum deflection when it is positioned over the centre of an object, the LED 2 lights up red and, if there is sufficient signal strength, the cen tre cross i is displayed. To determine the object’s centre more accurately, note the square which is shown in the immediate vicinity of the object’s centre in addition to the centre cross i if there is sufficient signal strength.
Wider objects in the base material can be identified by a continuous, high amplitude of the measuring indicator h . The LED 2 lights up red.
▶ Always pay attention to all the signals of the measuring tool (LED, measuring indicator, orientation arrows). To rule out hazards, safeguard yourself before you drill, saw or rout in walls, by means of other information sources. Since the measuring results can be influenced by ambient conditions or the wall material, there may be a hazard even though the indicator does not indicate an object in the sensor range (there is no signal sound and the LED 2 lights up green).
Power Cable
If a live wire is detected, the display 3 also indicates a . The LED 2 flashes red and the signal sounds with a quick tone sequence.
Notes:
“Live” conductors are indicated in any operating mode. “Live” conductors can be detected easier when power consumers (e.g. lamps, machines) are connected to the sought conductor and switched on.
Under certain conditions (such as below metal surfaces or behind surfaces with high water content), “live” conductors cannot be securely detected. The signal strength of a “live” conductor depends on the position of the cable. There
fore, apply further measurements in close proximity or use other information sources to check if a “live” conductor exists.
1 609 92A 212 | (12.10.16) Bosch Power Tools
OBJ_BUCH-2149-003.book Page 17 Wednesday, October 12, 2016 12:52 PM
Static electricity can lead to electric lines being indicated in accurately, e.g. over a large area, or not at all. To improve the indication, place your free hand flat on the wall next to the measuring tool, in order to remove the static electricity.
▶ Hold the measuring tool at the intended grip area 10 only, so as not to influence the measurement.
Marking Objects
If required, detected objects can be marked. Perform meas urement as described. Once you have found the boundaries or the centre of an object, mark the location you were search
ing for at the top marking aid 1 and the side marking aid 4 . Connect both points with a vertical and horizontal line. The object is located at the intersection of the lines.
Troubleshooting – Causes and Corrective Measures
Working Advice
Temperature Control
Note: If the device is lifted off the wall, a signal may be shown temporarily.
When the temperature control indicator e lights up, the battery of the measuring tool is not within the operating temperature range or was subject to large variations in temperature. Change the battery or wait until it has once again reached the operating temperature range.
Warning Function
When the display 3 indicates f and g , send the measuring tool to an authorized customer service agent. The measuring tool is no longer functional.
Error Cause Corrective Measure Measuring tool cannot be switched on. Battery pack empty Battery Charging Batteries empty Replace batteries
Measuring tool switched on but does not react Remove and reinsert rechargeable batteries/batteries “Service required” Measuring tool has a fault Send measuring tool to customer ser vice agent “Battery temperature has fallen short of/exceeded battery temperature range” Wait until the permitted temperature range of the battery has been reached or change the battery “Stong radio signal detected” If possible, remove the interfering radio waves, e.g. WLAN, UMTS, radar, transmitter masts or microwaves.
Maintenance and Service
Maintenance and Cleaning
▶ Check the measuring tool each time before use. In case of visible damage or loose components inside the measuring tool, safe function can no longer be ensured.
Keep the measuring tool clean and dry at all times to ensure proper and safe working.
Do not immerse the measuring tool in water or other fluids. Wipe away debris or contamination with a dry, soft cloth. Do not use cleaning agents or solvents.
In order not to affect the measuring function, decals/stickers or name plates, especially metal ones, may not be attached in the sensor area 14 on the front or back side of the measuring tool.
After-sales Service and Application Service Our after-sales service responds to your questions concern ing maintenance and repair of your product as well as spare parts. Exploded views and information on spare parts can al so be found under:
www.bosch-pt.com
Bosch’s application service team will gladly answer questions concerning our products and their accessories. In all correspondence and spare parts orders, please always include the 10-digit article number given on the nameplate of the product.
Great Britain
Robert Bosch Ltd. (B.S.C.)
P.O. Box 98
Broadwater Park
North Orbital Road
Denham
Uxbridge
UB 9 5HJ
At www.bosch-pt.co.uk you can order spare parts or arrange the collection of a product in need of servicing or repair. Tel. Service: (0344) 7360109
E-Mail:
Bosch Power Tools 1 609 92A 212 | (12.10.16)
OBJ_BUCH-2149-003.book Page 18 Wednesday, October 12, 2016 12:52 PM 18 | Français
Ireland
Origo Ltd.
Unit 23 Magna Drive
Magna Business Park
City West
Dublin 24
Tel. Service: (01) 4666700
Fax: (01) 4666888
Australia, New Zealand and Pacific Islands
Robert Bosch Australia Pty. Ltd.
Power Tools
Locked Bag 66
Clayton South VIC 3169
Customer Contact Center
Inside Australia:
Phone: (01300) 307044
Fax: (01300) 307045
Inside New Zealand:
Phone: (0800) 543353
Fax: (0800) 428570
Outside AU and NZ:
Phone: +61 3 95415555
www.bosch.com.au
Republic of South Africa
Customer service
Hotline: (011) 6519600
Gauteng – BSC Service Centre
35 Roper Street, New Centre
Johannesburg
Tel.: (011) 4939375
Fax: (011) 4930126
E-Mail:
KZN – BSC Service Centre
Unit E, Almar Centre
143 Crompton Street
Pinetown
Tel.: (031) 7012120
Fax: (031) 7012446
E-Mail:
Western Cape – BSC Service Centre
Democracy Way, Prosperity Park
Milnerton
Tel.: (021) 5512577
Fax: (021) 5513223
E-Mail:
Bosch Headquarters
Midrand, Gauteng
Tel.: (011) 6519600
Fax: (011) 6519880
E-Mail:
Disposal
Measuring tools, accessories and packaging should be sorted for environmental-friendly recycling.
Do not dispose of measuring tools and batteries/rechargea ble batteries into household waste!
Only for EC countries:
According to the European Guideline
2012/19/EU, measuring tools that are no
longer usable, and according to the Europe
an Guideline 2006/66/EC, defective or used
battery packs/batteries, must be collected
separately and disposed of in an environ
mentally correct manner.
Batteries no longer suitable for use can be directly returned at:
Great Britain
Robert Bosch Ltd. (B.S.C.)
P.O. Box 98
Broadwater Park
North Orbital Road
Denham
Uxbridge
UB 9 5HJ
At www.bosch-pt.co.uk you can order spare parts or arrange the collection of a product in need of servicing or repair. Tel. Service: (0344) 7360109
E-Mail:
Subject to change without notice.