Philips HD5416 Filter Coffee Maker User Manual


User manual


Introduction
Congratulations on your purchase and welcome to Philips! To fully benefit from the support that Philips offers, register your product at www.philips.com/welcome.
Important safety information
Read this important information carefully before you use the appliance and save it for future reference.
Danger
– Never immerse the appliance in water or any other liquid.
Warning
- Check if the voltage indicated on the appliance corresponds to the local mains voltage before you connect the appliance.
- Connect the appliance to an earthed wall socket.
- Do not use the appliance if the plug, the mains cord, or the appliance itself is damaged.
- If the main cord is damaged, you must have it replaced by Philips, a service center authorized by Philips, or similarly qualified persons in order to avoid a hazard.
- This appliance can be used by children aged 8 years and above and by persons with reduced physical, sensory or mental capabilities or lack of experience and knowledge if they have been given supervision or instruction concerning the use of the appliance in a safe way and if they understand the hazards involved. Cleaning and user maintenance shall not be made by children unless they are older than 8 and supervised. Keep the appliance and its cord out of reach of children aged less than 8 years.
- Children shall not play with the appliance.
- Do not let the main cord hang over the edge of the table or worktop on which the appliance stands.
- Only use this appliance for its intended purpose to avoid potential hazards or injury.
Caution
- Always flush the appliance with fresh water before first use.
- Do not place the appliance on a hot surface and do not let the main cord come into contact with hot surfaces.
- Do not place the appliance in a cabinet when in use.
- Unplug the appliance before you clean it and if problems occur during brewing.
- Always clean the appliance after the appliance cools down.
- During brewing and until you switch off the appliance, the filter holder, the lower part of the appliance, the hotplate, and the jug filled with coffee is hot.
- Do not put the jug on a stove or in a microwave to reheat coffee.
- This appliance is intended to be used in household and similar applications such as farmhouses, bed and breakfast-type environments, staff kitchen areas in shops, offices, and other working environments, and by clients in hotels, motels, and other residential types of environments.
- Always return the appliance to a service center authorized by Philips for examination or repair. Do not open the appliance or attempt to repair the appliance yourself.
- The heating element surface is subject to residual heat after use.
- Unless otherwise indicated, all packaging material in the box is made of recycled paper; see the PAP marking on the box.
- You may hear a clicking sound at the beginning and end of the brewing cycle. This is totally normal, and it is due to the valve being opened or closed to control the boiled water drain or stop into the funnel.
Electromagnetic fields (EMF)
This Philips appliance complies with all applicable standards and regulations regarding exposure to electromagnetic fields.
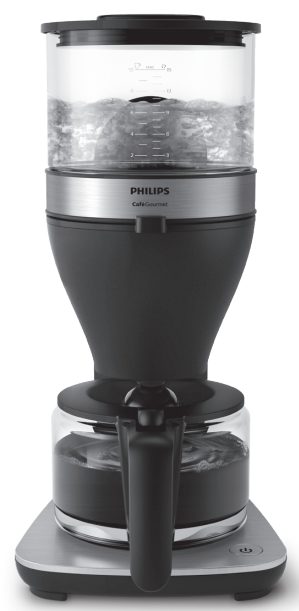
Device overview (Fig. 1)
- Inner filter
- Outer filter holder
- Jug lid
- Glass jug
- Hotplate
- On/off button
- Power plug
- Water tank
- Water tank lid
Before first use
Note: Do not place a paper filter with ground coffee in the inner filter.
Note: Always flush the appliance with fresh water before first use.
- Clean the inner filter, and glass jug (Fig. 2).
- Remove the water tank lid (Fig. 3).
- Fill the water tank with the MAX indication (Fig. 4).
- Put the water tank lid back onto the water tank (Fig. 5).
- Place the glass jug on the hotplate (Fig. 6).
- Put the plug into the wall outlet (Fig. 7).
- Press the on/off button to switch on the appliance, and the light in the on/off button lights up (Fig. 8).
Warning: During brewing and until you switch off the appliance, the water tank, filter holder, the hotplate, and the glass jug filled with coffee are hot. - Let the appliance run until the water tank is empty (Fig. 9).
Note: After brewing, a small amount of water may remain in the water tank. This is normal and safe on our food-grade stainless steel plate. - Press the on/off button to switch off the appliance.
- Empty the glass jug (Fig. 10).
Brewing coffee
- Remove the water tank lid (Fig. 3).
- Fill the water tank with the required amount of fresh cold water (Fig. 4).
Note: Do not exceed the maximum capacity. - Put the water tank lid back onto the water tank (Fig. 5).
- Open the filter (Fig. 11).
- Take a paper filter (type 1×4 or no. 4) and fold the sealed edges to prevent tearing and folding (Fig. 12).
- Put the paper filter in the filter (Fig. 13).
- Put ground coffee in the paper filter (Fig. 14).
Note: Use filter-fine ground coffee. If you grind the coffee yourself, do not grind it so fine that it is almost powder-like. - Close the filter (Fig. 15).
- Place the glass jug on the hotplate (Fig. 6).
NOTE: After brewing, the hotplate keeps the coffee at the right temperature. - Put the plug into the wall outlet (Fig. 7).
- Press the on/off button to switch on the appliance, and the light in the on/off button lights up (Fig. 8).
Warning: During brewing and until you switch off the appliance, the water tank, filter holder, the hotplate, and the glass jug filled with coffee are hot. - Let the appliance run until the water tank is empty (Fig. 9).
Note: After brewing, a small amount of water may remain in the water tank. This is normal and safe on our food-grade stainless steel plate. - Remove the glass jug when the brewing is completed (Fig. 16).
- Pour the coffee into a cup (Fig. 17).
Note: 40 minutes after keeping warm for the coffee, the appliance switches off automatically for extra safety and to save energy.
Tip: If you want your coffee to stay hot longer, pour it into an insulated jug.
Drip stop function
The drip stop function enables you to remove the jug from the coffeemaker before the brewing process is finished. When you remove the jug, the drip stop function stops the flow of coffee into the jug.
Note: The brewing process does not stop when you remove the jug. If you do not put the jug back into the appliance within 20 seconds, the filter overflows.
Cleaning
Caution: Always unplug the appliance before you start to clean it.
Caution: Never immerse the appliance in water.
Caution: Always clean the appliance after the appliance cools down.
- Clean the outside of the coffeemaker with a moist cloth (Fig. 18).
- Clean the inner filter and the coffee jug in hot water with some washing-up liquid.
- Wipe the water tank with a clean and soft cloth after the appliance cools down.
Caution: Regular descaling keeps the inside of the water tank clean.
Descaling
Descale the coffeemaker when you notice excessive steaming or when the brewing time increases. It is advisable to descale the coffeemaker every two months. Only use white vinegar to descale, as other products may cause damage to the appliance.
Warning: Never use vinegar with an acetic acid content of 8 % or more, natural vinegar, powder descalers, or tablet descalers to descale the appliance, as this may cause damage.
- Fill the water tank up to MAX indication with white vinegar (4 % acetic acid) (Fig. 19).
- Open the filter (Fig. 11).
- Take a paper filter (type 1×4 or no. 4) and fold the sealed edges to prevent tearing and folding (Fig. 12).
- Put the paper filter in the filter (Fig. 13).
- Put the plug into the wall outlet (Fig. 7).
- Press the on/off button to switch on the appliance, and the light in the on/off button lights up (Fig. 8).
Warning: During brewing and until you switch off the appliance, the water tank, filter holder, the hotplate, and the glass jug filled with coffee are hot. - Let the appliance run until the water tank is empty (Fig. 9).
Note: After brewing, a small amount of water may remain in the water tank. This is normal and safe on our food-grade stainless steel plate. - Empty the glass jug and remove the paper filter with the scale residues (Fig. 20).
- Fill the water tank with fresh cold water to MAX indication (Fig. 4).
- Switch on and let the appliance complete the brewing process (Fig. 9).
- Empty the jug (Fig. 10).
Note: repeat steps 9, 10, and 11 until the water that comes out of the appliance no longer tastes or smells of vinegar.
Ordering accessories
To buy accessories or spare parts, visit www.philips.com/parts-and-accessories or go to your Philips dealer. You can also contact the Philips Consumer Care Center in your country (see the international warranty leaflet for contact details).
Warranty and support
If you need information or support, please visit www.philips.com/support or read the international warranty leaflet.
Recycling
– This symbol means that this product shall not be disposed of with normal household waste (2012/19/EU) (Fig. 21).
– Follow your country‘s rules for the separate collection of electrical and electronic products. Correct disposal helps prevent negative consequences for the environment and human health.
Troubleshooting
This chapter summarises the most common problems you could encounter with the appliance. If you are unable to solve the problem with the information below, visit www.philips.com/support for a list of frequently asked questions, or contact the Consumer Care Centre in your country.
| Problem | Solution |
| The appliance does not work. | • Plug in and switch on the appliance. • Make sure that the voltage indicated on the appliance corresponds to the local mains voltage. • Fill the water tank with water. |
| Water leaks out of the appliance. | • Do not fill the water tank beyond the MAX level. |
| The appliance takes a long time to brew coffee. |
• Descale the appliance. |
| The appliance produces a lot of noise and steam during the brewing process. |
• Make sure that the appliance is not blocked by scale. If necessary, descale the appliance. |
| Coffee grounds end up in the jug. | • Do not put too much ground coffee in the filter. • Make sure you put the jug on the hotplate with the spout facing into the appliance (i.e. not pointing sideways). • Use the right size of paper filter (type 1×4 or no. 4). • Make sure the paper filter is not torn. |
| The coffee is too weak. | • Use the right proportion of coffee to water. • Make sure the paper filter does not collapse. • Use the right size of paper filter (type 1×4 or no. 4). • Make sure there is no water in the jug before you start to brew coffee. |
| The coffee does not taste good. | • Do not leave the jug with coffee on the hotplate too long, especially not if it only contains a small amount of coffee. |
| The coffee is not hot enough. | • Make sure that the jug is properly placed on the hotplate. • Make sure that the hotplate and the jug are clean. • We advise you to brew more than three cups of coffee to ensure that the coffee has the right temperature. • We advise you to use thin cups because they absorb less heat from the coffee than thick cups. • Do not use cold milk straight from the refrigerator. • If your coffeemaker has an insulated jug, preheat the insulated jug with hot tap water before you start brewing coffee. |
| There is less coffee in the jug than expected. | • Make sure you place the jug properly on the hotplate. If the jug is not placed properly on the hotplate, the drip stop prevents the coffee from flowing out of the filter. |
| The filter overflows while the appliance is brewing coffee. | • Check if you placed the filter into the appliance properly. If the filter is not in the correct position, the drip stop does not work, which may cause the filter to overflow. • If you remove the jug from the appliance for more than 20 seconds during brewing, the filter starts to overflow. |
3000.066.8378.2 (15/03/2022)

