Premier T2000 Touchless Top Load Water Dispenser Owner’s Manual


PREMIER T2000 Touchless Top Load Water Dispenser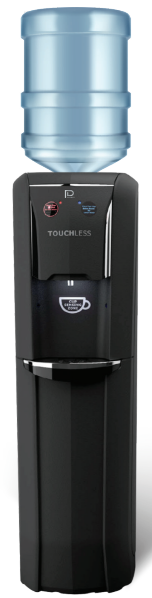

SAFETY INSTRUCTIONS
WARNING :
Please read all of the instructions before use. To reduce the risk of fire, electrical shock, or injury when using your water dispenser, follow these basic precautions:
- Read all instructions before using the water dispenser.
- Never clean parts with flammable fluids. The fumes can create a fire hazard or explosion.
- Do not store or use gasoline or any other flammable vapors and liquids in the vicinity of this or any other water dispenser. The fumes can create a fire hazard or explosion.
Operating Safety
- Before operating the water dispenser to the power source, let it stand upright for approximately 2 hours. This will reduce the possibility of a malfunction in the cooling system from handling during transportation.
- Use only 3 or 5-gallon water bottles.
- Keep gasoline or any other flammable vapors and liquids away from the water dispenser.
- Clean up any spills that may occur.
- This water dispenser dispenses hot water at a high-temperature range which could cause bodily harm. Extreme caution should be bused when dispensing hot water.
- Carefully lift or carry the water dispenser by the sides of the dispenser. Never carry the water dispenser with the bottle installed. Such action may damage the unit and will void the product warranty.
- This water dispenser is intended for water dispensing only. Do not use other liquids.
- For indoor use only. Do not place unit in an area that may freeze.
- Install the unit on a flat level surface.
- Do not locate the water dispenser in direct sunlight or next to a heat source. Always maintain 4” (10cm) of clearance around water dispenser for proper air circulation.
- Never transport the dispenser laying down.
- Do not place water dispenser in an enclosed space or cabinet.
- Never allow children to dispense hot water without proper and direct supervision. Unplug unit to prevent unsupervised use by children.
Electrical Safety
- This water dispenser should be properly grounded for your safety. The power cord of this water dispenser is equipped with a three-prong plug and should only be used with three prong wall outlets to minimize the possibility of electrical shock.
- Plug the water dispenser into an exclusive properly installed-grounded wall outlet. Do not under any circumstances cut or remove the third (ground) prong from the power cord.
- This water dispenser requires a standard 110/120-volt. 60Hz electrical outlet with three-prong ground.
- The power cord should be secured behind the water dispenser and not left exposed or dangling to prevent accidental injury.
- Do not use an adapter plug or extension cord with this water dispenser.
- To protect against electric shock, do not immerse cord, or any other part of the water dispenser in water or other liquids. Improper use of the grounded plug can result in the risk of electrical shock. If the power cord is damaged; have it replaced by a licensed electrician.
PRODUCT OVERVIEW

OPERATION
Locating the Water Dispenser
CAUTION :
The hot water tank must be filled with water before turning hot tank switch to the ON position. Due to the Touchless Feature and safety features built-in to this unit, for initial use of Hot Water, you must ensure that the Hot Water Tank is filled . This is done by activating the hot water before turning on the Hot Water button. (refer to Dispensing of Hot Water section of the owners manual)
DO NOT PLUG IN THE POWER CORD OR TURN ON THE UNIT
Place the water dispenser upright on a flat surface. Position the water dispenser so that there is about 10cm (4”) of clearance from the wall on the back and on both sides.
- Place the water dispenser in an area that is:
- Not humid and has a room temperature less than 26°C (79°F)
- Close to an electrical power outlet
- Away from the heat of direct sunlight and any heating appliance.
- Well ventilated and able to safely support the weight of the water dispenser of a 3/5 gallon bottle of water filled.
- Dust and dirt free.
SET UP INSTRUCTIONS
Do not plug in the water dispenser into an electrical outlet or turn on the unit until water has begun to dispense from the hot cold water spots. Failure to follow this warning may cause the water dispenser to overheat. Use a clean cloth to wipe the cap and shoulder of the 3 or 5-gallon bottle.
- Install drip tray below the dispensing nozzle.
- Install the 3/5 gallon bottle and allow the cold reservoir to fill by inverting the 3/5 gallon bottle and aligning the bottle cap with the feed tube. Pierce the bottle cap by applying slight downward pressure on the bottle.
DO NOT REMOVE CAP FROM BOTTLE! THE CAP WILL RESEAL ITSELF WHEN THE BOTTLE IS REMOVED. - Plug the water dispenser into a 3 Prong 11Ov grounded electrical outlet
- Turn on the White Touchless function switch ON (#7) which is located on the back the water dispenser.
DO NOT TURN ON THE HOT TANK SWITCH AT THIS TIME. - Wait for the bottle to fill the cold and hot reservoirs. This may take about 4-5 minutes.
- Ensure that there is Hot Water in the tank.
- Activate the hot water child safety lock function by hovering your hand or cup/glass above/near the Child Lock sensor (#3) for 2 seconds. The hot water LED light will begin to flash.
- Within 5 seconds, place the cup/glass in the Touchless Dispensing Zone (#5). If the hot tank is full, water will begin to flow
IMPORTANT NOTE: Hot water function has an auto shut-off feature. If the glass/cup is within the dispensing zone, 12 oz of water will fill the cup. - You may need to repeat steps 6a and 6b until the hot tank is full and water starts to flow freely from the hot tank.
DO NOT TURN THE HOT TANK POWER SWITCH ON UNTIL YOU CONFIRM THERE IS WATER FLOW FROM THE HOT TANK!
- Once you have confirmed there is water flow from the hot tank, check to confirm there are no water leaks, then turn the RED hot water button ON -located on the back of the water dispenser (#6)
CAUTION: Hot tank must be filled with water before turning hot tank switch to the ON position. - Allow the water dispenser time to reach the optimum cold and hot temperature settings (about 30 minutes).
OPERATING YOUR WATER DISPENSER
Dispensing Cold Water
The blue LED light will be on to indicate that the cold water has been chilled to the optimum cold water temperature.
- Place a glass in the Touchless Sensing Zone’ (#5) to dispense cold water. Cold Water is defaulted to stop at 12 Oz. If you desire less water than 12 oz, simply remove the glass from the Touchless Sensing Zone.
- If additional cold water is desired, simply remove your glass briefly from the Touchless Sensing Zone to automatically restart cold water dispensing.
Dispensing Hot Water
This unit is equipped with a 2-step child lock feature to prevent accidental dispensing of hot water
- To dispense hot water, activate the Child Lock sensor (#2) Hover your hand or cup over the Child Lock Sensor (#2) for approximately 2 seconds. The RED LED indicator will begin to flash.
- Next, within 5 seconds, place the cup in the Touchless Dispensing Zone’ (#5). Hot water will immediately begin to flow. Hot Water is defaulted to auto stop after dispensing of 12 Oz (355mL). If you require less hot water, simply remove your cup from the Touchless Dispensing Zone (#5)
- If more hot water is desired, simply remove your cup and repeat step 1&2 above.
WARNING: Hot water can start to flow when the RED LED is flashing. Always use with caution and do not place your hand or other body parts near the hot water dispenser.
RINSING, CLEANING AND DRAINING
Before cleaning, turn the hot water button OFF (#6) and unplug the power cord.
- Clean and sanitize frequent touch areas with sanitizing wipes daily.
IMPORTANT: TURN OFF THE BLACK TOUCHLESS BUTTON (#6) LOCATED ON THE BACK OF THE WATER DISPENSER BEFORE CLEANING TO PREVENT THE WATER DISPENSER FROM ACCIDENTAL DISPENSING OF WATER DURING CLEANING. - Clean all plastic parts a minimum of 2-4 times a year.
The Drip tray and cabinet can be cleaned with any non-abrasive household cleaner. To prevent damage to plastic parts, avoid abrasive cleaning aids such as steel wool etc.
IMPORTANT:
FOR BEST TASTE AND UNIT PERFORMANCE, IT IS RECOMMENDED THAT THE UNIT BE CLEANED EACH TIME THE WATER BOTTLE IS REPLACED. USE A CLEAN, SOFT CLOTH AND MILD DISHWASHING LIQUID. EMPTY AND LEAN THE DRIP TRIP AS REQUIRED. CLEAN THE COLD RESERVOIR AT LEAST ONCE EVERY 3 MONTHS. DO NOT IMMERSE THE WATER DISPENSER IN WATER. AVOID ABRASIVE CLEANING AIDS SUCH AS STEEL WOOL. DO NOT USE BLEACH.
To Clean the Outside of the Unit
Use a disinfectant such as a mild dishwashing liquid and warm water to wipe down the outside of the water dispenser.
STORING THE WATER DISPENSER
If the water dispenser is not to be used for an extended period of time, then proceed as below. Before storage:
- Unplug the power cord from the electrical outlet
- Drain the water from the water dispenser
- Store the water dispenser in an upright position
MAINTENANCE
- Temperature Control (Cold Control): The thermostat is set to deliver water at approximately 7°C. For colder water, adjust the screw on the thermostat clockwise (#8). For less cool water adjust the screw on the thermostat counter-clockwise (#8)
- Temperature Control (Hot Control): The thermostat is set to deliver water at approximately 85°C-92°C and is not adjustable.
- Condenser: The condenser must be maintained free of dust and lint to ensure optimum cooling performance. The condenser must be regularly inspected and cleaned with a brush.
- Drip Tray: The drip tray should be emptied and cleaned regularly. To remove, Pull tray forward from the cabinet.
- Replacing Water Bottle: Dispense some water until air bubbles rise in bottle after each replacement to ensure proper operation.
CAUTION: Turn off Hot tank switch before draining the hot tank. Water can be extremely hot. Allow the water dispenser to stand for one hour before draining to allow the hot tank to cool. - Annual inspection: Electric connections will form oxide layers over time and lead to more localized heat on the electrical connectors and wiring. Change out any connector with signs of degradation, like yellowed, browned, or charred color connectors immediately and ensure the connectors get re-installed tightly and securely.

TROUBLESHOOTING
| PROBLEM | SOLUTION |
|
Water not dispensing: |
1. Ensure the cooler is plugged in, and the black Touchless function button is ON(#7) |
| 2. Check to ensure that there is water in the 3/5 gallon bottle. | |
| 3. The cold water reservoir is frozen. Remove the bottle to check for the frozen reservoir. Unplug cooler to allow the reservoir to thaw. Turn cold control ¼ turn counter-clockwise. Plug cooler back in. If the reservoir freezes again, either cold control is defective or cooler is low on refrigerant. | |
| 4. The bottle may have a leak. The water level in the reservoir is too high, and not allowing air to enter the bottle for proper water flow. Remove the bottle and drain approximately one cup of water from the reservoir. Install a new bottle. | |
| 5. Possible defective dispensing solenoid valve. Contact customer service | |
|
Water is not cold |
1. The cooler is set in direct sunlight or too close to the heat source. |
| 2. Check the cold thermostat setting. Turn cold control clockwise all the way and then counter-clockwise ¼ turn, at about 10 o’clock position. Run and wait for 24hrs before another adjustment, clockwise 1/16 turn each time. | |
| 3. A defective cold control or the compressor is low on refrigerant. Contact customer service | |
|
Water is not hot |
1. Verify switch on the back of cooler is in the “On” position. The switch will light up when hot control is activated. |
| 2. A defective hot control or heat band. | |
| Not Cooling or Not Heating: | Contact customer service |
| Vibrating Noise: | Some operating noise from the compressor and hot tank is normal. |
|
Hot water is boiling |
1. Possible air pocket in hot tank. Dispense hot water to bleed off any trapped air. |
| 2. Mineral build-up in the hot tank. | |
| 3. Defective hot control. |
SPECIFICATIONS
| FEATURE | T2000 |
| Type | Top Load |
| Cooling | Compressor |
| Operation | Touchless Operation |
| Dispenses | Hot, Cold Water |
| 2 Step Child Lock | Yes |
| Hot Water Temperature | 85-92°C |
| Cold Water Temperature | 6-12°C |
| Hot Tank Capacity | 2.0L |
| Cold Tank Capacity | 3.8L |
| Heating/Cooking (w) | 450W/70W |
| Tank | Stainless Steel |
| Bottle Size | 3 and 5 Gallon |
| Dimensions | 10″ x 12.4″ x 42.9″ (254 x 315 x 1090mm) |
| Weight | 30.6lbs (13.9kg) |
| Power Supply | 110V, 60 Hz |
| Certification | cETLus |
LIMITED 1-YEAR WARRANTY
Royal Sovereign International Inc. and its affiliated companies (“Royal Sovereign”) warrant to the original Purchaser (“Purchaser”) of this product, that if this product if assembled and operated in accordance to the Owner’s Manual accompanying it, then for a period of one (1) year from the date of purchase, all parts in unit shall be free from defects in material and workmanship.
The Limited Warranty does not cover any failures or operating difficulties due to normal wear and tear, accident, abuse, misuse, alteration, misapplication, improper installation or improper maintenance or service by the Purchaser or any third party, or failure to perform normal and routine maintenance on the dispenser, as set out in the Owner’s Manual. In addition, the Limited Warranty does not cover damages to the finish, such as scratches, dents, discoloration or rust after purchase. Returned products will not be accepted without a Return Authorization number. To request a Return Authorization number, please visit us at www.royalsovereign.com. All transportation costs for the return of damaged products or parts will be the responsibility of the Purchaser. Return defective products, in original packaging, to the address below. Upon repair or replacement the product will be returned to the original Purchaser, freight or postage prepaid. Royal Sovereign requires reasonable proof of your date of purchase from an authorized retailer or distributor. Therefore, the Purchaser should keep your receipt, invoice, or canceled check from the original purchase. The limited warranty shall be limited to the repair or replacement of parts which prove defective under normal use and service within the warranty period. Royal Sovereign SHALL HAVE NO LIABILITY WHATSOEVER TO PURCHASER OR ANY THIRD PARTY FOR ANY SPECIAL, INDIRECT, PUNITIVE, INCIDENTAL, OR CONSEQUENTIAL DAMAGES. This Limited Warranty gives the Purchaser specific legal rights, the Purchaser may have other rights which may vary from jurisdiction to jurisdiction. Some jurisdictions do not allow the exclusion or limitation of incidental or consequential damages or limitations on how long an applied warranty lasts, so the above limitations or exclusions may not apply to you.
RS International Canada Inc 191 Superior Blvd. Miissauga Ont L5T 2L6 Canada
Tel: 866-961-6673
www.royalsovereign.ca
Premier is distributed by Royal Sovereign