Dell OptiPlex 7090 Ultra User Guide
AJAX Wireless Smart Plug and Socket User Manual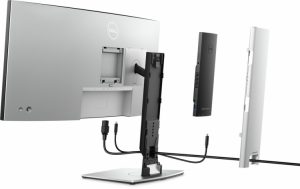

Installation overview

Device drivers must be updated when you reinstall the operating system using either a CD, DVD, USB key, or when you are facing networking, graphics, sound or other hardware-related problems. Dell recommends that you install or update device drivers if you have performed a factory reset of your Dell computer using the Dell Backup and Recovery application or other factory-reset methods. This ensures that you have the latest device drivers installed on your computer and that the devices function optimally.


Installing or updating device drivers may lead to the following improvements:
- Increases in system performance
- Patched security risks
- Expanded compatibility
- Fixed device issues
- Support for new features
However, if your computer is operating normally and there are no driver issues or updates being prompted by Windows, driver updates may be unnecessary. Updating drivers unnecessarily may create new problems. Review the importance of each driver update on the Dell Drivers & Downloads page before assessing the need to continue with an update.
2. Introduction
It is always recommended to re-image on a newly-installed operating system and not from any previous image-build. Ensure BIOS settings, including SATA configurations and modes, are appropriately set and the latest drivers and applications are used when re-imaging the computer.


3. Order of Reinstallation
To achieve optimal performance, install the drivers and applications in the following sequence:
- BIOS.Enables the operating system to be loaded into the memory and enables the initial setup process on your computer
- Windows 10 operating system:
The operating system controls the system’s hardware to be a base on which other software can operate on. - Intel chipset driver:
Allows Windows to communicate and adjust settings on components on the system board. - . Critical Microsoft Quick Fix Engineering (QFE) updates:
Microsoft updates that fix and optimize the operating system. - Intel Rapid Storage Technology (IRST) driver and APPX:
Enables and enhances data storage virtualization for the storage drives installed in the computer. - . Graphics driver:
- Enhances and optimizes video performance.
- Enables and provides additional functionality not included in the native Microsoft VGA driver, including:
- User-customizable power management features
- Portability and behavioral profiles
- Multiple-monitor support
- Audio driver: Enables and enhances the audio controller
- Networking and communication drivers, which include
- Wireless Local Area Network (WLAN) adapter driver: Enables and enhances the wireless adapter
- Bluetooth driver: Enables and enhances the Bluetooth adapter.
- Intel Management Engine Components Installer and Intel Manageability and Security Status Application: Intel
Management Engine driver enable advance manageability features. - Dell Client Command Suite.
Dell Client Command Suite is the new name of our industry leading Client Systems Management tools. These toolsmake Dell commercial client system the world’s most manageable client devices. For more information refer Dell Client Command Suite.
4. Updating or resetting the BIOS
Flashing the BIOS:
It is recommended to flash the BIOS when an update is available or when you replace the system board. To flash the BIOS:
- Turn on your computer.
- Go to www.dell.com/support.
- Click Product support, enter the Service Tag of your computer, and then click Submit.
- Click Drivers & downloads > Find it myself.
- Select the operating system installed on your computer.
- Scroll down the page and expand BIOS.
- . Click Download to download the latest version of the BIOS for your computer.
- After the download is complete, navigate to the folder where you saved the BIOS update file.
- Double-click the BIOS update file icon and follow the instructions on the screen.
Clearing CMOS settings
In the event that flashing your computer with the latest BIOS update results in your computer being unable to boot, a BIOS
reset is necessary. Clearing the CMOS settings will reset the BIOS to factory settings. For more information about clearing the
CMOS settings, see your computer’s Service Manual.
Trusted Platform Module (TPM) security
TPM must be enabled in the BIOS setup program for it to be deployed on the computer. Follow these steps to enable and
configure the TPM:
- Turn on or restart your computer.
- Press F2 when the Dell logo is displayed on the screen to enter the BIOS setup program. The BIOS setup program is displayed.
- On the left pane, select Security > TPM Security > Clear TPM.
- Select or clear any of the following options to enable or disable it, respectively:
- TPM state (Enabled or Disabled):
Enabled: The BIOS will enable the TPM during POST and it can be accessed by the operating system.
Disabled: The BIOS will not enable the TPM during POST and it cannot be accessed by the operating system. - TPM On: The TPM is enabled and activated.
- Clear: The BIOS clears the information stored in the TPM.
- TPM state (Enabled or Disabled):
- Save the settings and exit.
5. Reinstalling the operating system
The Windows 10 (64-bit) operating system is validated for use on this computer. You can reset or reinstall the operating system under different scenarios. For more information about reinstalling the operating system, see the knowledge base article SLN297920 at www.dell.com/support. Before attempting a reinstall of your operating system, Dell recommends that you backup all data as described in the Microsoft knowledge base article.
6. Reinstalling drivers and applications
Drivers and applications are software that enables Windows 10 to communicate with the hardware devices and software in your computer. Devices such as video and sound cards require drivers to function correctly within Windows, and enable users to adjust hardware settings. Windows 10 includes drivers for most devices, but device-specific drivers may have to be downloaded and installed separately. Dell recommends that you download the device drivers for your Dell computer from Drivers & Downloads.
Applications must be downloaded and installed separately. Dell recommends that you download the required applications for your Dell computer from the Dell Download Center.
Displaying drivers and applications on your computer
- Turn on your computer.
- Go to www.dell.com/support.
- Click Product support, enter the Service Tag of your computer, and then click Submit.
NOTE: If you do not have the Service Tag, use the auto-detect feature or manually browse for your computer model. - Click Drivers & downloads > Find it myself.
- Select the Windows operating system installed on your computer to get a list of the drivers and applications available on your computer.
7. Reinstallation sequence for drivers and applications
Driver installation is critical after reinstalling the Windows operating system on your Dell computer. Install the drivers in the correct sequence for your computer to function correctly. In some scenarios, you may have to reinstall or update the device driver if you are encountering issues with a specific device.
For more information, see the Dell knowledge-base article SLN148687 at www.dell.com/support.

Intel chipset device software
The Windows operating system may not include the updated Intel chipset device software for Dell computers. The Intel chipset device software is available on Dell’s support site www.dell.com/support.
Downloading and installing the chipset driver
- Turn on your computer.
- Go to www.dell.com/support.
- Click Product support, enter the Service Tag of your computer, and then click Submit.
- Click Drivers & downloads.
- Scroll down the page and expand Chipset in Category.
- Click Download to download the chipset driver for your computer.
- After the download is complete, navigate to the folder where you saved the chipset driver file.
- Double-click the chipset driver file icon and follow the instructions on the screen.

Critical Microsoft Quick Fix Engineering (QFE) updates
Dell recommends installing all the latest available QFE updates from the latest Windows Service Pack. Service packs are automatically downloaded and installed when Windows Updates are enabled and can also be manually-downloaded and installed from the Microsoft support site.
Intel Rapid Storage Technology (IRST)
The IRST software package enables and enhances high-performance Serial ATA (SATA) and SATA RAID capabilities for supported operating systems. The IRST software package provides an added protection against data loss in the event of a hard-drive failure.
Starting from Intel Tiger Lake platform, the IRST driver supports the hardware platform with Volume Management Device (VMD) feature. In order to access the storage devices mapped under VMD controller, please refer the following procedures, or the OS cannot be found in the child devices under VMD controller.
Begin Windows 10 Setup by booting from Windows 10 OS installation media. Installation procedures are as below:
- Use the “load driver” mechanism when prompted.
- Insert a USB key, where the driver that you wish to install is located.
- Select the driver INF file. If correct, the proper Intel controller for your system will be shown.
- Continue the driver install and then finish the Windows 10 installation.
Downloading and installing the IRST driver
- Turn on your computer.
- Go to www.dell.com/support.
- Click Product support, enter the Service Tag of your computer, and then click Submit.
- Click Drivers & downloads.
- Scroll down the page and expand Serial ATA in Category.
- Click Download to download the IRST driver for your computer.
- After the download is complete, navigate to the folder where you saved the IRST driver file.
- Double-click the driver file icon and follow the instructions on the screen.
Downloading and installing the IRST APPX
- Turn on your computer.
- Go to www.dell.com/support.
- Click Product support, enter the Service Tag of your computer, and then click Submit.
- Click Drivers & downloads.
- Scroll down the page and expand Serial vedio ATA in Category.
- Click Download to download the IRST APPX for your computer.
- After the download is complete, navigate to the folder where you saved the IRST APPX file.
- Double-click the driver file icon and follow the instructions on the screen.
Graphics
The Windows operating system includes the VGA-graphics driver only. For optimal-graphics performance, install the Dellgraphics driver applicable to your computer from www.dell.com/support.
Downloading and installing the Dell audio driver
- Turn on your computer.
- Go to www.dell.com/support.
- Click Product support, enter the Service Tag of your computer, and then click Submit.
- Click Drivers & downloads.
- Scroll down the page and expand Audio in Category.
- Click Download to download the audio driver for your computer.
- After the download is complete, navigate to the folder where you saved the audio driver file.
- Double-click the audio driver file icon and follow the instructions on the screen.
Audio
The Windows operating system does not include the audio driver recommended by Dell. Install the HD audio driver available for download from www.dell.com/support.
Wireless Local Network (WLAN) drivers and applications
The Windows 10 operating system does not provide native-device driver support for WLAN controllers on Dell computers. To obtain wireless network functionality, install the relevant WLAN drivers from the Dell support site. WLAN applications, which provide additional features including enterprise authentication enhancements, can also be installed from the Dell support site.
Downloading and installing the Wi-Fi driver
- Turn on the computer.
- Go to www.dell.com/support.
- Click Product support, enter the Service Tag of your computer, and then click Submit.
- Click Drivers & downloads.
- Scroll down the page and expand Network in Category.
- Click Download to download the Wi-Fi driver for your computer.
- After the download is complete, navigate to the folder where you saved the Wi-Fi driver file.
- Double-click the Wi-Fi driver file icon and follow the instructions on the screen.
Downloading and installing the Intel Management Engine components Installer
- Turn on the computer.
- Go to www.dell.com/support.
- Click Product support, enter the Service Tag of your computer, and then click Submit.
- Click Drivers & downloads.
- Scroll down the page and expand Chipset in Category.
- Click Download to download the Wi-Fi driver for your computer.
- After the download is complete, navigate to the folder where you saved the Wi-Fi driver file.
- Double-click the Wi-Fi driver file icon and follow the instructions on the screen.
Intel Management Engine driver
Intel Management Engine driver enable advance manageability features. To obtain manageability functionality, install the relevant Intel ME drivers from the Dell support site.
Downloading and installing the Intel Manageability and Security status application
- Turn on the computer.
- Go to www.dell.com/support.
- Click Product support, enter the Service Tag of your computer, and then click Submit.
- Click Drivers & downloads
- Scroll down the page and expand Chipset in Category.
- Click Download to download the software package for your computer.
- After the download is complete, navigate to the folder where you saved the Wi-Fi driver file.
- Double-click the file icon and follow the instructions on the screen.
8. NET Framework
The .NET Framework is a software framework from Microsoft, which is bundled with Windows operating systems. The .NET Framework is intended to be used by applications created for the Windows 10 platform.
9. Getting help and contacting Dell
Self-help resources
You can get information and help on Dell products and services using these self-help resources
Table 1. Self-help resources
| Self-help resources | Resource location |
| Information about Dell products and services | www.dell.com |
| My Dell app | |
| Tips | |
| Contact Support | In Windows search, type Contact Support, and press Enter |
| Online help for operating system | www.dell.com/support/window |
| Access top solutions, diagnostics, drivers and downloads, and learn more about your computer through videos, manuals and documents. | Your Dell computer is uniquely identified by a Service Tag or Express Service Code. To view relevant support resources for your Dell computer, enter the Service Tag or Express Service Code at www.dell.com/support. |
| For more information on how to find the Service Tag for your computer, see Locate the Service Tag on your computer | |
| Dell knowledge base articles for a variety of computer concerns |
|


Contacting Dell
To contact Dell for sales, technical support, or customer service issues, see www.dell.com/contactdell.

Contact Support
To contact Dell for sales, technical support, or customer service issues, see www.dell.com/contactdell.
packing slip, bill, or Dell product catalog.