Dell Small Form Factor Cable Cover Installation Guide


DELL Small Form Factor Cable Cover

Notes, cautions, and warnings
NOTE: A NOTE indicates important information that helps you make better use of your product.
CAUTION: A CAUTION indicates either potential damage to hardware or loss of data and tells you how to avoid the problem.
WARNING: A WARNING indicates a potential for property damage, personal injury, or death.
Before you begin
Steps
- Save and close all open files and exit all open applications.
- Shut down your system: Click Start > Power > Shut down .
NOTE: If you are using a Linux operating system, see the documentation of your operating system for shut-down instructions. - Disconnect your system and all attached devices from their electrical outlets.
- Disconnect all attached network devices and peripherals, such as keyboard, mouse, and monitor from your system.
CAUTION: To disconnect a network cable, first unplug the cable from your system and then unplug the cable from the network device. - If the system unit or the adapter is being installed on the monitor:
- Disconnect the power and all the display cables from the monitor.
- Remove the stand from the monitor and place the monitor on a clean and soft surface.
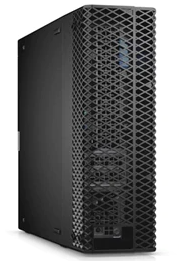
Precision 3450 Small Form Factor Cable Cover
The cable cover for the Precision 3450 Small Form Factor system protects the ports and organize cables that are connected to the system unit.
Steps
- Follow the instructions in before you begin.
- NOTE: Images that are shown below may vary depending on your system configuration.
Route the cables through the slot on the cable cover and connect the cables to their respective ports. - Align the cable cover retaining hooks into the slots on the Precision 3450 Small Form Factor chassis.
CAUTION: Take care not to bend or break the delicate plastic hooks. - Gently press down on the cable cover until it clicks into place.
- Slide the latch to lock the cable cover in place.


NOTE: For added security, use the Kensington cable lock to secure the system unit.
After installing the accessory
Steps
- Replace all screws and ensure that no stray screws remain.
- Connect any external devices, peripherals, or cables you removed before working on your system.
- Connect your system and all attached devices to their electrical outlets.
- Turn on your system.
Getting help and contacting Dell
Self-help resources
You can get information and help on Dell products and services using these self-help resources:
Table 1. Self-help resources
| Self-help resources | Resource location |
| Information about Dell products and services | www.dell.com |
| My Dell | |
| Tips | |
| Contact Support | In Windows search, type Contact Support, and press Enter. |
| Online help for operating system | www.dell.com/support/windows www.dell.com/support/linux |
| Access top solutions, diagnostics, drivers and downloads, and learn more about your computer through videos, manuals and documents. | Your Dell computer is uniquely identified by a Service Tag or Express Service Code. To view relevant support resources for your Dell computer, enter the Service Tag or Express Service Code at www.dell.com/support. For more information on how to find the Service Tag for your computer, see Locate the Service Tag on your computer. |
| Dell knowledge base articles for a variety of computer concerns | 1. Go to www.dell.com/support. 2. On the menu bar at the top of the Support page, select |
Contacting Dell
To contact Dell for sales, technical support, or customer service issues, see www.dell.com/contactdell.
NOTE:
- Availability varies by country/region and product, and some services may not be available in your country/region.
- If you do not have an active Internet connection, you can find contact information about your purchase invoice, packing slip, bill, or Dell product catalog.
