Asus Webcam User Manual
ASUS Webcam User Manual
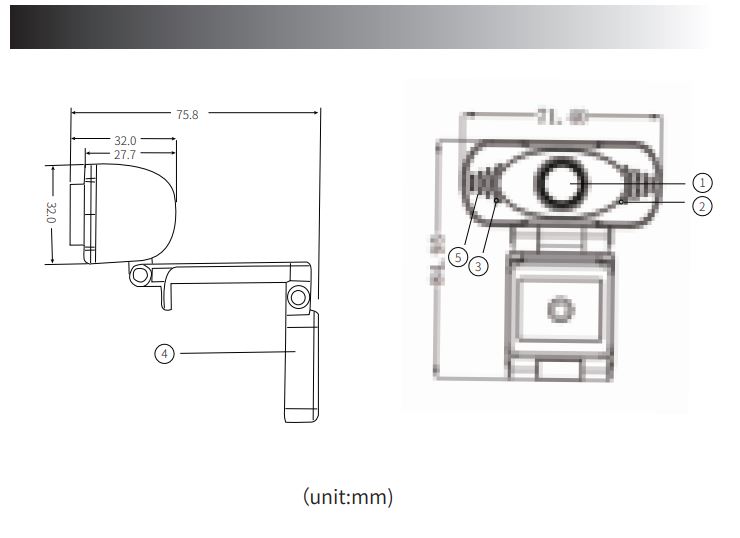

- Lens
- Power indicator
- Signal indicator
- .Multi-function bracket
- MIC
Setting up your webcam
- Place your webcam
Designed for the way you like to make a video call, place the webcam where you want it-on the monitor or the desktop.
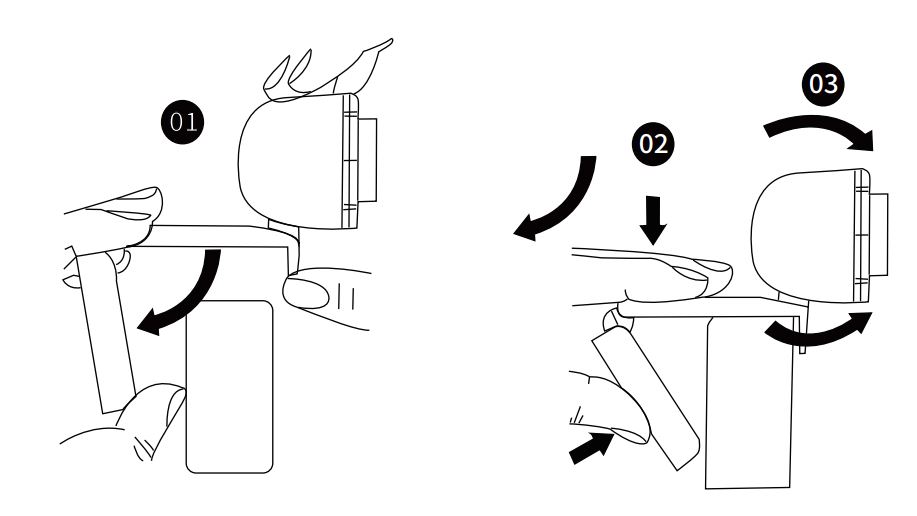

Grasp the webcam as shown and open clip base with your other hand. Mount the webcam, making sure the foot on the clip base is flush with the back of your monitor.

2.Connetct your webcam
Plug your webcam into USB interface of PC or TV STB. Wait about 1 minute, webcam will install automatically.
Getting start with video calling
To take advantage of video calling, both you and the person you call must install video-calling application such as , Yahoo! @Messenger, windows or Gmail. As well as a USB camera and video calling application, both callers need;
- A computer with speaker(or a headset)and a microphone (your webcam has built-in microphone);
- A broadband Internet connection(e.g. DSL, T1 or cable);
- Please check your preferred video calling application requirements.(Requirements may vary between different applications but usually a minimum of 2Mbps upload speed is required);
Q&A:
Q:How do I know if my camera is recognized by the operating system?
A: Connect the camera in any USB2.0/3.0 port. Once the camera is connected, it takes few more moments before the camera is recognized. To ensure the camera has installed correctly, check the following; Under Control Panel>System and Security>Device Manager.
Q: How do I know if my video calling application can use my webcam?
A: All video application have an option setting to review the audio and video device. Using the video application review the followings: The Audio selection to ensure the USB2.0 camera Microphone is selected. If not change the selection to the USB2.0 camera. The Video selection to ensure the USB2.0 camera is selected. If not change the selection to the USB2.0 camera.