D-Link Dual Band Wireless AC1750 ADSL2+ Modem Router Installation Guide


D-Link Dual Band Wireless AC1750 ADSL2+ Modem Router
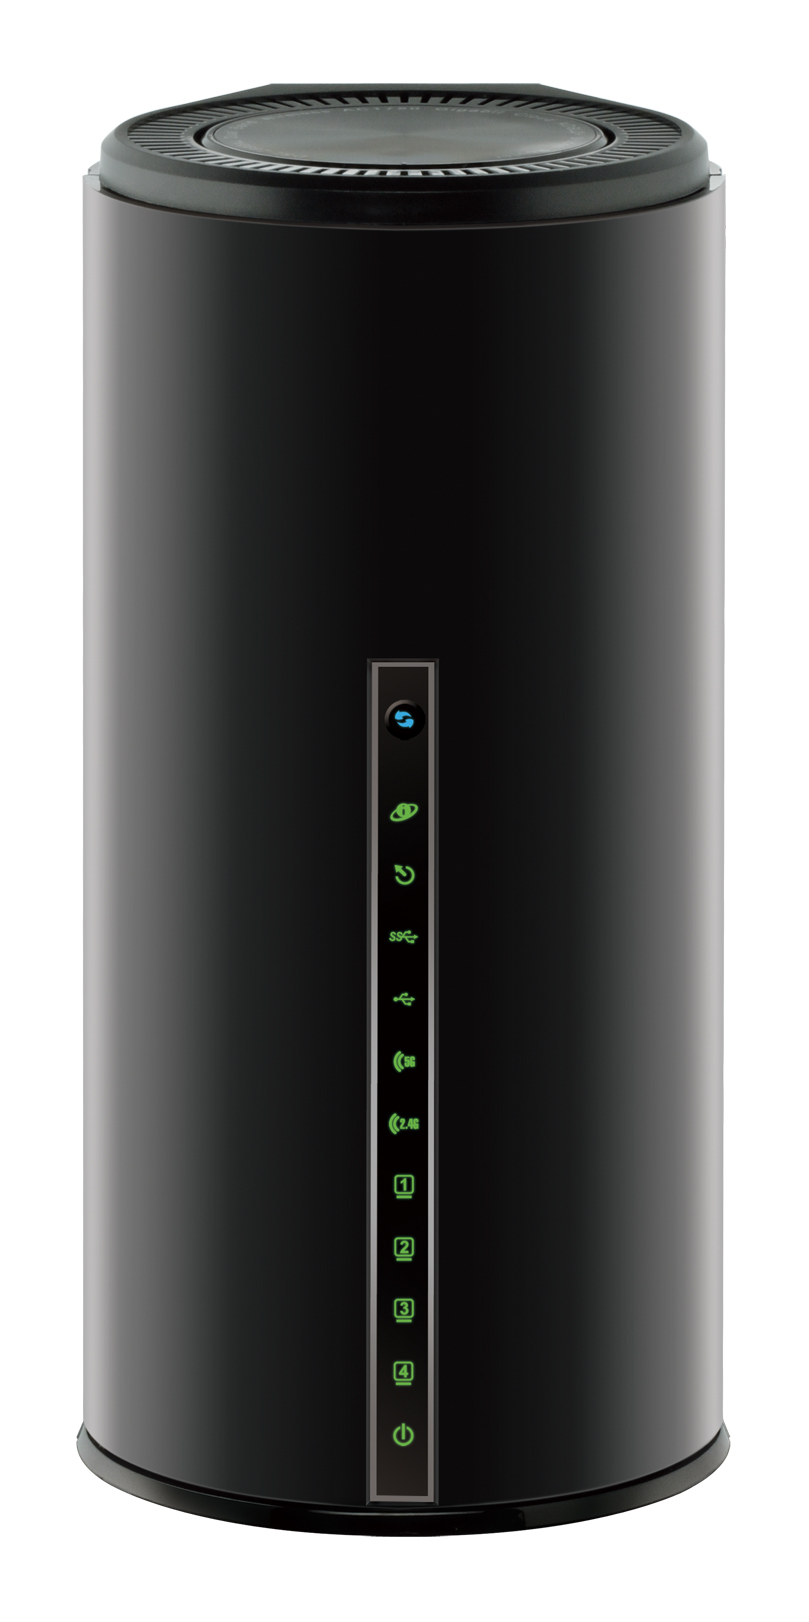

Hardware Overview

| 1 | WPS Button & LED | The light will blink during the WPS process. |
| 2 | Internet LED | A solid green light indicates a proper connection to your broadband service. |
| 3 | ADSL LED | A solid green light indicates a proper connection to the ADSL enabled telephone line. |
| 4 | USB 3.0 & 2.0 LEDs | A solid green light indicates a connection to a USB device. |
| 5 | 2.4G Wireless LED | A solid green light indicates that the wireless segment is ready. The light will blink during data transmission. |
| 6 | 5G Wireless LED | A solid green light indicates that the wireless segment is ready. The light will blink during data transmission. |
| 7 |
LAN (1~4) LEDs |
A solid amber light indicates a connection to a Gigabit Ethernet device while a green light indicates a connection to a 10/100 device. The LED will blink during data transmission. |
| 8 | Power LED | A solid green light indicates a proper connection to the power supply. |
| 9 | ADSL Port | Connect to an ADSL enabled telephone line and the supplied microfilter/splitter. |
| 10 | USB 3.0 & 2.0 Ports | Connect USB devices such as printers, scanners or storage. |
| 11 | LAN (1~4) Ports | Connect Ethernet devices such as computers, switches, and game consoles. |
| 12 | WiFi Button | Press for three seconds to enable/disable wireless networks. |
| 13 | Power Button | Press to turn on or off the device. |
| 14 | Power Port | Connect the supplied power adapter. |
Minimum Requirements
Internet Requirements:
- An activated ADSL telephone line and account with an Internet provider
Web-based Configuration Requirements:
Device with the following:
- An installed Ethernet adapter or wireless adapter
Supported Browsers:
- Internet Explorer 7 or higher
- Safari 4 or higher
- Chrome
- Firefox
mydlink™ Requirements (optional):
- iPhone/iPad/iPod Touch (iOS 3.0 or higher)
- Android device (1.6 or higher)
- Web Browser Requirements:
- Internet Explorer 7 or higher
- Safari 5 or higher
- Chrome
- Firefox
Note: To learn more about mydlink, visit www.mydlink.com.au or www.mydlink.co.nz. If you experience issues registering this Modem Router with your mydlink account, try performing a hard reset by using an unfolded paperclip to press and hold the reset button for 10 seconds while the Modem Router is powered on.
Before you Start
Internet Provider Account Details – If you are using an Australian or New Zeleand ADSL connection, you will need your user name and password. If you do
not have this information, contact your Internet provider. Do not proceed until you have this information.
Connect your Modem Router
- Connect your existing Phone cable from the telephone outlet to the LINE port on the Microfilter and your telephone handset into the PHONE port.
- Connect the Phone cable from the DSL port on the Microfilter to the ADSL port of the modem router.
- Connect the Ethernet cable from the LAN port of the modem router to the Ethernet port on your computer.
- Plug the power adapter into your modem router and connect to an available power outlet.
- After the modem router has powered up, verify that the Power and ADSL LEDs are both lit.
- Continue with the Configuration section on the other side of this document.


Configuration
Web Browser Setup
- Open a web browser (e.g., Internet Explorer, Chrome, Firefox, or Safari) and enter the IP address of the router (http://192.168.1.1). The default username and pasword will be admin and admin respectively.
- When the Welcome screen appears, click Next to start the wizard.
- Enter your User Name and Password as provided by your Internet Provider, click Next to continue.
- Enter a new Wi-Fi Network Name (SSID) as well as a Wi-Fi Password (also known as a passphrase) for both the 2.4Ghz and 5Ghz networks available in this modem router, click Next to continue.
- Enter a new Password and Verify Password to secure your modem router, click Next to continue.
- Select your Time Zone from the list, click Next to continue.
- If you want to register the router with the mydlink service, please refer to step below. If you do not wish to register your modem router with the mydlink service click Skip.
Note: Setting up “mydlink” is optional and not required for the modem router to function. - Select Yes, I have a mydlink account then click Next to complete the registration of your device to your mydlink account. Otherwise if you are a new user, then please select No, I want to register and login with a new mydlink account to complete the registration process.
Click Sign up to complete the registration and the Setup Wizard. Congratulations! You have completed the modem router installation.


mydlink™ Lite App
- Scan the code below or search “mydlink lite” (App Store or Google Play) to download the mydlink™ Lite app to your iPhone, iPad, or Android device.
- Once your app is installed, you may now log in to your mydlink account that was registered in the Setup Wizard.
- Once you have successfully logged in to you account you will be able to see all of the mydlink enabled devices that have been registered to your account.
- Select the device you wish to access and then configure options as required.

Congratulations! You can now manage the modem router remotely.
Troubleshooting
How do I connect my wireless devices to the DSL-2890AL modem router?
- Open your wireless network utility that displays available wireless networks.
- Select the Wi-Fi Network name you assigned in the wizard and connect.
Note: If you did not run the setup wizard or you reset the router to its default settings, refer to the label on the router for the default Wi-Fi Network Name and Wi- Fi Password.
You can also connect using WPS:
- Press the WPS button on the DSL-2890AL for three seconds.
- Within one minute press the WPS button on your wireless device.
- Allow up to two minutes to connect.
Note: Some devices may require you to log in to a utility to start the WPS process. Refer to the user manual of the device you want to connect to the router if you do not know how to start the WPS process.
How do I change the wireless settings on the DSL-2890AL modem router?
- Open a web browser (e.g. Internet Explorer, Chrome, Firefox, or Safari) and enter the IP address of the router (http://192.168.1.1).
- At the login screen, type in admin for the user name and enter the router password you created in the wizard (admin by default).
- Go to Setup > Wireless Settings > Manual Wireless Network Setup to create a new Wi-Fi network name (SSID) and Wi-Fi password.
Documentation available at http://www.dlink.com.au/DSL-2890AL
Technical Support
Having trouble installing your new product? D-Link’s website contains the latest user documentation and software updates for D-Link products. Australian and New Zealand customers can contact D-Link Technical Support through our website.
Australia
Internet: http://support.dlink.com.au
New Zealand
Internet: http://support.dlink.co.nz
Copyright ©2013 D-Link Corporation/D-Link Australia Pty Ltd. All rights reserved. D-Link and the D-Link logo are registered trademarks of D-Link Corporation or its subsidiaries in Australia and other countries. iPhone, iPad, and iPod touch are registered trademarks of Apple Inc. Android is a trademark of Google, Inc. Other trademarks are the property of their respective owners. Maximum wireless signal rate derived from IEEE Standard 802.11g and 802.11n specifications. Actual data throughput will vary. Network conditions and environmental factors, including volume of network traffic, building materials and construction, and network overhead, lower actual data throughput rate. Environmental factors will adversely affect wireless signal range. Product specifications, size and shape are subject to change without notice, and actual product appearance may differ from that depicted on the packaging. Visit www.dlink.com.au for more details.
