Asus ROG XG-Station 2 User Guide
ASUS ROG XG-Station 2 User Guide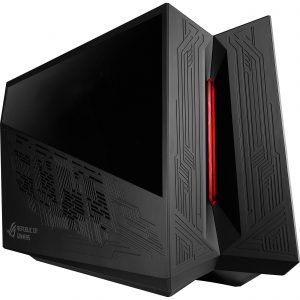

Safety Precautions
The following safety precautions will increase the life of the ROG XG-Station 2. Follow all precautions and instructions. Except as described in this manual, refer all servicing to qualified personnel. Do not use damaged power cords, accessories, or other peripherals. Do not use strong solvents such as thinners, benzene, or other chemicals on or near the surface.

- DO NOT place on uneven or unstable work surfaces. Seek servicing if the casing has been damaged.
- DO NOT place or drop objects on top and do not shove any foreign objects into the ROG XG-Station 2.
- DO NOT expose to dirty or dusty environments. DO NOT operate during a gas leak.
- DO NOT expose to strong magnetic or electrical fields.
- DO NOT leave the ROG XG-Station 2 on your lap or any part of the body to prevent discomfort or injury from heat exposure. DO NOT expose to or use near liquids, rain, or moisture. DO NOT use the modem during electrical storms.
- DO NOT carry or cover a ROG XG-Station 2 that is powered ON with any materials that will reduce air circulation such as a carrying bag.
- SAFE TEMP: This ROG XG-Station 2 should only be used in environments with ambient temperatures between 5°C (41°F) and 40°C (104°F)
- Never attempt to disassemble and reassemble ROG XG-Station 2. Only ASUS-authorized technicians should repair the device.

Installation requirements
To ensure a successful installation of the ROG XG-Station 2, your computer must meet the following requirements:
- A Notebook PC with Thunderbolt’ 3 (updated to the latest firmware)
- Microsoft Windows’ 10 (64 bit)
- Refer to www.asus.com for the complete Notebook PC QVL (Qualified Vendors List)
Specifications Summary
| Model | ROG XG STATION 2 |
| Connection to PC | Thunderbolt’ 3 |
| Ethernet connection Input / Output | Gigabit Lan 10/100/1000 Mbps |
| 4 x USB 3.0 ports | |
| Additional USB | 1 x USB 3.0 Type B port |
| RGB Lighting Control | ASUS ROG AURA supported |
| Power Supply | 600W 80 Plus Gold Power Supply |
| Dimension | Length: 456mm; Width: 158mm; Height 278mm |
| Weight | 5.1KG |
| Graphics Card Support | Provides support for a single full-length, 2.5 slot, PCI-Express x16 graphics card: – NVIDIA*GeForce GTX 900 series and newer – AMD Radeon R9 series and newer |
| Graphics output | Defined by the graphics card installed |
| Accessories | 1x USB 3.0 Type-B cable ‘I x Thunderbolr 3 Type-C cable lx Power cord Important product information guides |
Hardware Introduction
- USB 3.0 port
- LAN port
- Power (DC) input port
- USB 3.0 Type-B port
- Thunderbolt™ type-C port

Hardware installation
To install the ROG XG-Station 2:
- Slide the spring lock to an unlocked position, then open the ROG XG-Station 2.
- Remove the screw that secures the metal bracket to the ROG XG Station 2, then remove metal bracket.
- Align and insert the graphics card into the PCI-E slot.
- Secure the metal bracket with the screw you remove earlier, then connect the power cables to the graphics Card.
- Connect the AC power cord to the ROG XG-Station 2 and into a 100V-240V power source, then press the power button to turn on the ROG XG-Station 2.The plasma tube will light up.
- Close the ROG XG-Station 2, then connect the bundled Thunderbolt”‘ 3 Type-C cable to your Notebook PC and the ROG XG-Station 2.
- Power on your Notebook PC and the LEDs in the ROG XG-Station 2 will light up.
- Install the corresponding drivers for your graphics card. to remove the graphics card, press the release tab on the side of the PCI-E slot, then remove the graphics card.
- Your graphics card may become extremely hot after operating for a period of time, please be careful when removing the graphics card.


Hardware customization
To customize the lighting effects of your ROG XG-Station 2, visit www.asus.com and download the ASUS ROG AURA software.