JVC LT-65N7115A 65″ Class LED TV User Guide

LT-65N7115A 65″ Class


Warning


WARNING: TO PREVENT FIRE OR SHOCK HAZARDS, DO NOT EXPOSE THIS APPARATUS TO RAIN OR MOISTURE.
CAUTION: TO ENSURE PERSONAL SAFETY, OBSERVE THE FOLLOWING RULES REGARDING THE USE OF THIS UNIT.
- Operate only from the power source specified on the unit.
- Avoid damaging the AC plug and power cord.
- Avoid improper installation and never position the unit where good ventilation is unattainable.
- Do not allow objects or liquid into the cabinet openings.
- In the event of trouble, unplug the unit and call a service technician. Do not attempt to repair it yourself or remove the rear cover.
Changes or modifications not approved by JVC could void the warranty.
- When you don’t use this TV set for a long period of time, be sure to disconnect both the power plug from the AC outlet and antenna for your safety.
- To prevent electric shock do not use this power plug with an extension cord, receptacle or another outlet unless the blades can be fully inserted to prevent blade exposure.
Do not attempt to service the product yourself
Caution
To prevent electrical shock, do not open the TV casing. There are no user-serviceable parts inside.
Please refer to qualified service personnel for repairs.
Important Safety Instructions
- Read these instructions.
- Keep these instructions.
- Heed all warnings.
- Follow all instructions.
- Do not use this apparatus near water.
- Clean only with dry cloth.
- Do not block any ventilation openings. Ventilation should not be impeded by covering the ventilation openings with items such as newspapers, table-cloths, curtains etc. There must be a minimum distance of Scm clear space around the unit at all times to ensure proper ventilation.
- Do not install near any heat sources such as radiators, heat registers, stoves, or other apparatus (including amplifiers) that produce heat. No naked flame sources, such as Id candles, should be placed on or near the unit.
- Protect the power cord from being walked on or pinched particularly at plugs, convenience receptacles, and the point where they exit from the apparatus.
- Only use attachments/accessories specified by the manufacturer.
- Unplug this apparatus during lightning storms or when unused for long periods of time.
- Refer all servicing to qualified service personnel. Servicing is required when the apparatus has been damaged in any way, such as power-supply cord or plug is damaged liquid has been spilled or objects have fallen into the apparatus, the apparatus has been exposed to rain or moisture, does not operate normally, or has been dropped.
- Apparatus should not be exposed to dripping or splashing and no objects filled with liquids, such as vases, should be placed on the apparatus.
- Place the television on a stable, fiat surface. Failure to do so can result in the television falling, causing injury.
- Do not allow young children to play around or on the television. Do not hang from the unit. Failure to do so can result in the television falling, causing injury.
- Do not allow young children to play with the plastic bag that came with the television when you unpacked it. Failure to do so can result in suffocation, which may lead to death.
- Avoid improper installation and never position the unit where good ventilation is When installing this unit, distance recommendations must be maintained between the set and the wall, as well as inside a tightly enclosed area or piece of furniture. Keep to the minimum distance guidelines shown for safe operation.
- Cautions for installation
-Ensure the power cord is out of the path of foot traffic.
-The unit will generate a slight amount of heat during operation. Ensure that sufficient space is available around the unit to allow satisfactory cooling.
-Have two people remove the unit from the box with the screen facing away from you. It’s possible your clothing, (such as a belt buckle or button) may scratch the front of the unit Do the same when moving the unit to another location. - Make enough room for inserting and removing the power plug Place the unit as close to the outlet as possible. The main power supply for this unit is controlled by inserting or removing the power plug. Physically disconnecting the power plug is the only way to completely disconnect the unit from the mains power source.
- Batteries shall not be exposed to excessive heat such as sunshine, fire or the like. To preserve our environment, dispose of used batteries according to your local laws or regulations.
- When this unit is connected to the wall outlet, it is always on standby even when all the LED lamps are not lit. To shut down the unit, unplug the unit from the wall outlet.
- If the supply cord is damaged, it must be replaced before further use by the manufacturer, its service agent or similarly qualified persons in order to avoid a hazard.
- Always place the TV on furniture that can safely support the TV. Make sure the ends the TV do not overhang the edge of the supporting furniture.
- Do not place the TV on tall furniture (for example, cupboards or bookcases) without anchoring both the furniture and the TV to a wall or other suitably strong support.
- Do not stand the TV on cloth or other materials placed between the and the supporting
- Where the mains plug is used as the disconnect device, the disconnect device shall remain readily operable.
- Water and moisture: Do not use the product near water,for example,near a bathtub, washbowl, kitchen sink, or laundry tub, in a wet basement,or near a swimming pool,etc.
- Never place a television set in an unstable location. A television set may fall, causing serious personal injury or death. Many injuries, particularly to children, can be avoided by taking simple precautions such as:
-Using cabinets or stands recommended by the manufacturer of the television set.
-Only using furniture that can safely support the television set.
-Ensuring the television set is not overhanging the edge of the supporting furniture.
-Not placing the television set on tall furniture (for example, cupboards or bookcases) without anchoring both the furniture and the television set to a suitable support.
-Not placing the television set on cloth or other materials that may be located between the television set and supporting furniture.
-Educating children about the dangers of climbing on furniture to reach the television set or its controls.


If your existing television set is being retained and relocated, the same considerations as above should be applied.
Assembling the Stand
Stand Installation
NOTE:
- Make sure the AC cord is not connected to an AC outlet.
- Before beginning, this process, make sure that you have a clean, safe, and cushioned space to work at to avoid any damage to the unit.
- Do not touch or press the TV screen, the glass might break under pressure.
- Carefully place the TV screen face-down on a clean, cushioned surface.
- Insert and secure the stands (R and L) with 1 screw (supplied) on each side as shown. Screw size:M6 x 20 mm
- Important: Insufficient tightening or incorrect installation of the stand will not support your TV correctly, and could result in damage or injury from tip-over.


Package contents
1 x 65″ 4K UHD LED TV
2 x Base Stands
2 x Screws
1 x Remote Control
2 x AM Batteries
1 x Instruction Manual
1 x Quick Start Guide
1 x Warranty Card
1 x 3.5mm to RCA connector cable
Getting started
Fitting the stand
Before you can install your TV set, you need to fit the stand. Alternatively, you can mount it on the wall. A Phillips screwdriver is needed to perform the installation.
Setting up the TV set
Place your TV set on a flat, stable surface (e.g. a table or a specially designed TV stand). Make sure that all cables are laid simply and safely and do not represent a trip hazard. The device must be connected to a mains socket using the mains cable. This mains socket must be easily accessible so that the mains plug can be removed immediately in the event of an emergency.
Fitting the batteries into the remote control
The remote control uses 2 x ‘AAN batteries (included).
- Turn the remote control over with its underside facing upwards, insert a finger into the recess, and push the battery compartment cover in the direction of the arrow. Remove the battery compartment cover.
- Insert the batteries supplied into the remote control. Make sure that you insert the batteries correctly with the polarity as shown inside the battery compartment.
- Replace the battery compartment cover and push in the opposite direction to the arrow until it clicks into place.

Notes on Using Batteries:
The use of the wrong type of batteries may cause chemical leakage and/or explosion. Please note the following:
- Always ensure that the batteries are inserted with the + and – terminals in the correct direction as shown in the battery compartment.
- Different types of batteries have different characteristics. Do not mix different types.
- Do not mix old and new batteries. Mixing old and new batteries will shorten battery life and/or cause chemical leakage.
- Replace batteries as soon as they stop working.
- Chemicals that leak from batteries may cause skin irritation. If any chemical matter seeps out of the batteries, wipe it up immediately with a dry cloth.
- The batteries may have a shorter life expectancy due to storage conditions. Remove the batteries whenever you anticipate that the remote control will not be used for an extended period.
- The batteries (battery pack or batteries installed) shall not be exposed to excessive heat such as sunshine, fire or the like.
CAUTION:
- It may result in an explosion if batteries are replaced incorrectly.
- Only replace batteries with the same or equivalent type.
Overview-Front Panel

- Remote sensor/Standby indicator
– Standby indicator is Red in Standby mode.
– Standby indicator is off when the TV is turend on.
Overview-Back Panal - POWER Button :
1. LAN: Network port
2. HDMI ports
3. Antenna socket
4. 2xUSB 2.0 ports
5. Mini AV input *
6. Headphone out
7. Optical Audio Out
* Note: Use the connector cable provided to convert the 3.5mm mini AV port to RCA inputs.


Remote control
Definition of the buttons on remote control:
| Buttons | Description | |
| Power | Turn on/switch TV to standby | |
| Mute | Mute or restore sound | |
| Number | Number buttons | |
| Info | Display program information | |
| EPG | Launch Electronic Program Guide | |
| Settings | Display System Settings Menu | |
| Source | Select signal source | |
| Direction/ OK | Press the direction buttons to select menu options or settings. Press OK to select or confirm menu item. | |
| Menu | Display main menu | |
| Back | Return to last viewed program | |
| NETFLIX | Goes to NETFLIX homepage | |
| YouTube | Open YouTube App | |
| Goes to prime video homepage. | ||
| Google Play | Goes to Google Play homepage. | |
| Voice | Activate Voice command function. See ‘Pairing the Remote Control’ section. | |
| Volume | Adjust the volume | |
| Program | Select the next or previous program (channel). | |
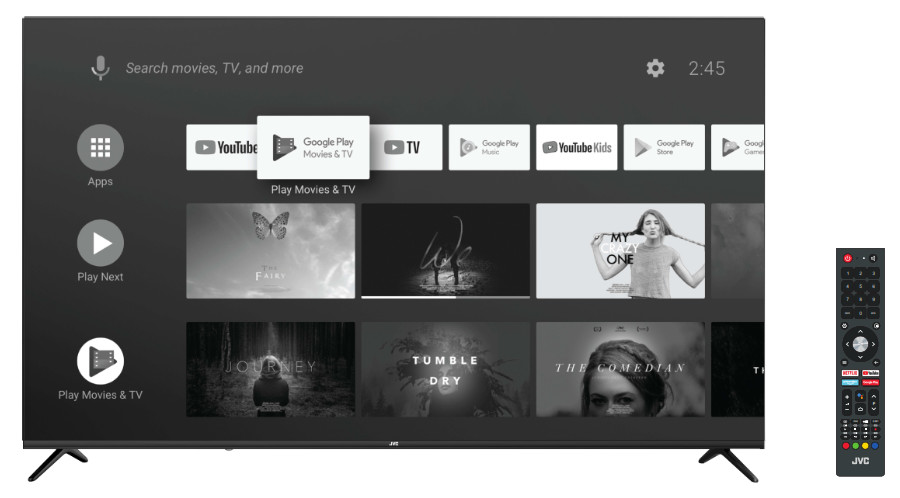
| Home | Open Android TV Homepage | |
| USB | Press to enter USB mode. | |
| Audio | Select audio languages and audio channels. | |
| TTX | Show or hide Teletext* | |
| Subtitle | Select subtitle | |
| Color | Use in accordance with the Operation interface instructions |


Teletext is not available in Australia.
| Buttons | Description | |
| Media: | ||
| Start playback(in media mode), /Press to enter the MIX mode in the Teletext “ | ||
| Pause (in Media/PVR mode) /Press to start time shift function (in DTV mode) | ||
| Stop the playback (in Media/PVR mode),/ Hold the Teletext page on display, press again to release.* | ||
| Press • button to start recording (In DTV mode). /Change size of Teletext screen in display mode.* | ||
| Skip to the beginning of the previous. (in media mode). /Go to the index page.* | ||
| Skip to the beginning of the next. (in media mode). / Reveal the hidden information of some Teletext pages.* | ||
| Reverse playback rapidly. (in media mode). / Enter subtitle mode or subpage.” | ||
| Advance playback rapidly. (in media mode). / Cancel the Teletext but not exit Teletext.* | ||


Pairing the Remote Control with the TV:
- Press and hold the Back button and the – button (Reduce Volume button) at the same time. Red light flashes indicating that the pairing process has begun.
- Let go of the buttons and wait for the prompt of a successful pairing.
- Press the Voice button; a login dialog box pops up. Log in to your Google account details and follow the on-screen instructions.
- Now you can use the voice function. Press the Voice button and say your command.
Connecting antenna, Internet, and external devices
Connecting the TV
antenna or cable TV

You can connect the cable from your indoor or outdoor antenna or cable TV to the antenna socket.
Connecting the network cable (LAN connection)
| You can also establish an Internet connection via WiFi. |


Connecting external equipment with HDMI interface
HDMI is the abbreviation for “High Definition Multimedia Interface” and allows the digital transmission of both audio and video signals over the same cable.
In order to play the audio and video signal fed in from the external device on the TV, select the signal source as appropriate.

Connecting USB device
The TV has USB 2.0 ports for connection with appropriate mass storage devices.

Connecting headphones
You can connect headphones or an analogue playback device to the socket marked with a headphones symbol.
Connecting an external device with AV output
Connect external devices via the AV IN jack directly to TV by using a Mini AV cable.
In order to play the audio and video signal fed in from the external device on the TV, select the signal source “AV.

Sending the TV’S digital audio signal to external audio equipment via the Optical Out port.

Getting started
Powering the TV set on and off
Powering on
Check that the TV is in standby mode. This means the mains cable must be connected to a working mains socket. Then press the power button on the device or the
Powering off
To power the TV off, either press the Power button on the device or press the


First Time Setup
When you turn on the TV for the first time,the Initial Setup Menu will appear on the screen, The items of this menu also exist in other menus, so you are able to change the values after you set them up.
- Language and country settings: Press the up/down button to select the language and country.
– Quick Setup: Press the up/down button to select “continue” to connect to an Android phone or tablet or skip. Press the ok button to confirm.
– Network Settings: Press the up/down button to select one of the networks
or select “skip” to skip the network settings. The “skip” option is at the bottom of the list. Press ok button to confirm
– Log in to the Google account: Press the up/down button to select “Sign In”(click on the Google account as prompted) or select “Skip” to skip the setting.
– Terms of Service: Contains the Google Terms of Service, Google Privacy Policy,
Google Play Terms of Service instructions, and only click “Accept” to enter the next setting.
– Location: Press the up/down button to select “Yes” to enable the positioning function or “No” to disable the positioning function.
– Help improve Android performance: Whether to send emergency reports, devices and app usage data to Google. Press the up/down button to select “Yes”, send or select “No”, and do not send.
- Set the TV device name: Press the up/down button to select the name provided in the table, or you can customise a name (by clicking “Enter custom name” at the bottom of the list).
– Android TV features browsing: Browse the features of this TV device.
– Set the password lock: Enter the password for four digits (must be a number, non-numeric cannot be entered, enter “0000” is invalid) and then confirm the password
- Select TV mode Tress the up/down button to select “Home” or “Retail”
- Channel Scan: Press the up/down button to select “Scan” or “Skip Scan”
How to access Help Menu on the TV
The Help feature offers a lot of information about your TV operation. To use the Help feature, press the Home button, and then use the arrow and OK buttons to access the Help menu. You can find how to troubleshoot from the list or keyword search.
If you update APK, the Help feature and information will be updated.
Note: Use the Arrow and OK buttons to move through the menu and make selections.
Step 1
Press the Home button on the remote control. Select ‘Al PONT’ from the options.

Step 2
Select ‘Help’ from the options.
Step 3
Select the desired Help topic. Note: The password for the Specs section is 3138.
You can use the arrow and OK buttons to make a selection.

After use
Cleaning
Never spill or spray any type of liquid into the unit. Only use a clean, dry cloth for cleaning the casing. Never use abrasives or harsh detergents. When very dirty, use a slightly dampened cloth. Clean the screen with a special cleaning cloth for screens.
Storage when not in use
If you do not plan to use the device for an extended period of time, unplug the power cord from the socket and remove the batteries from the remote control. Make sure that the storage temperature is between -15 °C and 45 °C and the relative humidity does not exceed 90%.
Transport
If you wish to move the device a short distance, proceed as follows to transport the device:
- Disconnect the device from the mains.
- Remove all cables connected to the device.
- If you wish to move the device outside your building, demount the base and the optional side supports or the mounted wall-bracket by reversing the procedure.
- Pack the N set up carefully. Take special care to ensure the corners of the casing and the screen are well protected.
- Take the TV set and its accessories to its new location and recommission it.
Troubleshooting
You can solve the most common problems yourself using the solutions below. If the problem persists after checking the suggested solutions, please contact Customer Service.
Note: There is also a built-in Help app available on this TV. To access this, go toHome -> Al PONT -> HELP and choose the desired help topic.
General problems
The TV set will not switch on.
- Plug the power cable of the TV set into a working mains socket.
- Replace the batteries in the remote control.
- Unplug the plug of the power cable from the mains socket, wait approx. 30 seconds and plug the power cable back in. The device should then work normally.
The remote control does not work
- Is there an obstruction between the remote control and the sensor on the N?
- Replace the batteries.
- Make sure that the remote control sensor is not exposed to direct sunlight.
TV reception problems
No picture
- Are all the connection cables to external signal sources properly connected?
- Is the connection cable to the external signal source damaged?
- Have you selected the correct signal source on the TV set?
- Is the antenna plugged in properly? Is the antenna cable damaged?
- Is the antenna cable plug firmly connected?
- Have you selected the correct signal source on the TV set?
- Have you already executed a channel search at your present location?
Poor picture
- Is the antenna plugged in? Adjust the antenna.
- Check that the channel is tuned properly.
- Adjust the picture settings, such as brightness, colour, sharpness.
No sound
- Is the sound muted? Press the
- Is the volume turned down? Press the


No colour
- Adjust the colour setting.
- Check that the channel is tuned properly.
Multimedia playback problems
File is not played back
- Check that the USB mass storage device contains compatible files.
Problems with playback from external devices
No sound
- Check that the audio cable is properly connected or damaged.
- Make sure that you have selected the correct signal source on your TV set.
Sound is distorted or humming
- Clean the connector plugs.
- Replace the connection cable to the external device.
Problems with online services (Smart TV)
If you are using a cable network connection (LAN)
- Check that the network cable is properly connected.
- Check whether the network cable is damaged.
- Check whether you can access the intemet from another device on the network
- It is possible that the server for the selected service is temporarily down.
- Check the network settings on the TV set. If you are using a wireless network
- Check whether you can access the intemet from another device on the wireless network.
- It is possible that the server for the selected service is temporarily down.
- Check the network settings on the TV set.
| Display | 65 inch |
| Aspect Ratio | 16:9 |
| Resolution | 3840×2160 |
| Brightness | 330 cd/m2 |
| Contrast | 4000:1 Dynamic Contrast |
| Viewing Angle | 170(H); 170(V) |
| Menu OSD | Multi-Language |
| Audio | 2x 8 W |
| Input Terminals | ANT AV LAN HDMIx3 USBx2 |
| Output Terminals | OPTICAL AUDIO OUT HEADPHONE JACK |
| Power | AC 100-240V— 50/60Hz |
| Consumption | 185 W |
| Unit Size | 1452.1×239.8×895.1mm (LxWxH) |
| Unit Size (without stand) | 1452.1×89.5×834.7mm (LxWxH) |
| Net Weight | 17.8kg |
Register your product at jvctv.com.au/warranty-registration