Panasonic F-PZT175H Air Purifier Instruction Manual


OPERATING INSTRUCTIONS
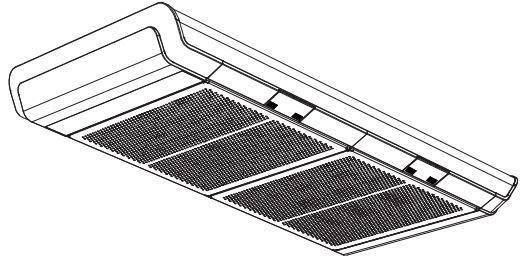
Air Purifier
Model No.F-PZT175H
This product is for indoor use only.

Warranty card attached
Thank you very much for purchasing this Panasonic product. Please read these operating instructions carefully before operation and maintenance.
Also, be sure to read the “SAFETY PRECAUTIONS” section (P.2 ~4) before use. Failure to comply with instructions could result in injury or property damage.
Make sure that the correct information is written on the warranty card, including the date of purchase and the name of the distributor. Keep the warranty card in a safe place along with the operating instructions for future reference.
SAFETY PRECAUTIONS
Please strictly follow
- Disconnect power supply before maintenance.
- For cleaning see “maintenance“.
- This product is not intended for use by persons (including children) with reduced physical, sensory or mental capabilities, or lack of experience and knowledge unless they have been given supervision or instruction concerning the use of the product by a person responsible for the safety. Children should be supervised to ensure that they do not play with the product.
- The safety precautions should be strictly followed in order to prevent injury or damage to properties.
- The following symbols differentiate the levels of danger or injury that may result if the product is
not used correctly as instructed.
Those things shown in this column indicate that there is the possibility of causing death or severe injury.

Those things shown in this column indicate that there is the possibility of causing minor injury or damage to properties.
- The following symbols are used to indicate the type of instructions that need to be followed. (The symbols given below are examples)


- Do not insert your fingers, metallic objects, or others into the air inlet, air outlet or gaps.
(Otherwise, you may be hurt by the inner units with the possibility of electric shock or injury.) - Do not let the product get wet, such as spray water on the product during cleaning.
(Otherwise, the product may short circuit with the possibility of fire or electric shock.) - Keep the battery out of reach of children and infants. (If the battery is swallowed, seek medical help immediately.)
- Do not put the battery into fire or heat, break, modify it. (If the insulation or exhaust value is damaged, the battery may become hot, crack.)
(Otherwise, the product may catch fire or malfunction, thus resulting in fire or electric shock.)
→Contact the dealer for repair.
(Otherwise, electric shock, fire, or smoke may occur.) <Examples of abnormality/malfunction>

- If any switches do not work.
- If the circuit breaker is tripped or when a fuse blows.
- If you notice a burning smell or an abnormal sound or vibration.
- If there are any other abnormalities or malfunctions.
→Please stop using the product immediately and disconnect the power, and contact the dealer to check and repair.
- Do not operate this product in places where indoor fumigation-type insecticides are being used.
(Chemical residue may build up inside the product and discharge from the air outlet, and cause damage to health.)
→Ventilate the room with fresh air thoroughly after using insecticides before operating the product.
- Do not clean the product with gasoline or other volatile mixture solvents, and avoid contacting with spray insecticides.
(Otherwise, the product may crack or short circuit with the possibility of injury, fire, or electric shock.)
SAFETY PRECAUTIONS
Please strictly follow
(Otherwise, these may be absorbed into the product with the possibility of fire.)

- Keep the room well-ventilated when using the product together with a burner.
(Otherwise, carbon monoxide poisoning may occur.) - This product cannot remove carbon monoxide.
OPERATING REQUIREMENTS
- Do not put any obstacles at the inlet and outlet of the product.
(Otherwise, it may affect product performance.) - Do not place any objects on the product.
(Otherwise, an operation error or malfunction may be caused.)
PRODUCT FEATURES
The efficient “composite and deodorizing filter” and “large air volume” design, brings you fresh and clean air
- The efficient composite and deodorizing filter strongly filter out PM2.5 and formaldehyde
- Four sensors are equipped: a dirt sensor, an odor sensor, a light sensor, and a human activity sensor
- The PM2.5 concentration reading display keeps you updated with the indoor PM2.5 pollution level
- Remote control is supplied for touch screen operation
- Equipped with the technology for thorough purification
- The clean air volume for formaldehyde (CADR ) is higher than 400 m 3 /h and formaldehyde thus decoration pollutants like formaldehyde can be removed.
About nanoe®

- nanoe ® is a microparticle ion wrapped in water by the latest technology.
- With nanoe ® technology, the effects of sterilization
- creates a conducive environment for hydrated skin.
<airborne fungi> The result is of a 4-hour test in a closed space of 25 m ³, instead of in actual application space.
<adhered bacteria> The result is of an 8-hour test in a closed space of 23 m ³, instead of in actual application space. - Test organization: Kitasato Research Center of Environmental Sciences
- Test method: directly expose and measure the fungi count collected in a test space of 25 m
- Sterilization method: release nanoe®
- Target: airborne fungi
- Test outcome: eliminated 99% and above in 4 hours Test number 24_0301_1
- Test organization: Japan Food Research Laboratories
- Test method: measure the bacteria count adhered on the fabric in a test space of 23 m³
- Sterilization method: release nanoe®
- Target: bacteria adhered on the standard fabric
- Test outcome: eliminated 99% and above in 8 hours [Test number 13044083003-01] (With one type in a variety of bacteria to test)
- Test organization: Panasonic Corporation Analysis Center
- Test method: measure the allergens adhered on the fabric in a test space of 23 m ³with ELISA
- Inhibiting method: release nanoe®
- Target: pollen allergens
- Test outcome: inhibited 88% and above in 8 hours [BAA33-130402-F01]
- 3Test organization: Japan Food Research Laboratories
- Test method: measure the fungi count adhered on the fabric in a test space of 23 m³
- Sterilization method: release nanoe®
- Target: adhered fungi
- Test outcome: confirmed the effect after 8 hours [Test number 13044083002-01]
- Test organization: Panasonic Corporation Analysis Center
- Test method: conduct verification by using 6-phase odor intensity in a test space of 23 m³
- Deodorizing method: release nanoe®
- Target: adhered cigarette odor
- Test outcome: odor intensity dropped to 1.2 after 2 hours [BAA33-130125-D01]

|
nanoe® and the nanoe® mark are trademarks of Panasonic Corporation.
MAIN PARTS IDENTIFICATION

Dirt sensor and Odor sensor
Dirt sensors can detect air pollutants such as PM2.5(0.3 µm ~ 2.5 µm particles), etc.
Odor sensors can detect odors such as smoke, etc.
The sensitivity of the sensor can be adjusted. (P.19)
Control panel

Light sensor
Detects the indoor brightness by the light sensor, and automatically adjusts the brightness of the indicators and the air volume. (P. 20)
Filter replacement indicator
The indicator lights indicate you need to replace the composite and deodorizing filter. (P 17 ~ 18)
Clean sign
Show the air pollution levels detected by the dirt sensor and odor sensor.
Blue: Indicates clean
Purple: Indicates slight dirty
Red: Indicates dirty
PM2.5 indicator
This indicator lights on simultaneously whether the PM2.5 concentration/timer display window displays the PM2.5 concentration.
Air volume indicator
Indicates the current air volume status. (When the product stops operating, the control panel does not display this indicator.)
Filter cleaning indicator
This indicator lights on to indicate that you need to clean the composite and deodorizing filter. (P. 17)
PM2.5 concentration/timer display window
- Displays the PM2.5 concentration detected by the dirt sensor, which may be different from the value tested by other special devices. Please use this PM2.5 concentration value as a reference.
- When the timer is set, the timing time will be displayed. After about 15 seconds since the timer setting has been completed, it will automatically jump to display the current PM2.5 concentration
Light sensor indicator
This indicator lights on to indicate that the light sensor is sensing the indoor brightness. (When the product stops operating, the control panel does not display this indicator.)
Human sensor
When the movement of a person or pet is detected, the air volume is automatically adjusted (when the air volume is set to auto). (Not all pet movements can be detected.)The sensor sensitivity is adjustable. (P. 21)
nanoe® indicator
The indicator lights on indicate nanoe ® is being generated. nanoe ® will be generated in all operation modes except you switch off it. (P.18)
Human sensor indicator
This indicator lights on to indicate that the human activity sensor is sensing. (When the product stops operating, the control panel does not display this indicator.)
Notice
You can touch and


SETUP
Before startup
1. Fill in the label with the first date of use.
Notice
Make sure to read pages 2 to 4 before setting up the product.
Install filters
2. Installing composite and deodorizing filter.
(1)Press the front panel lock cover (2 pcs) with both fingers at
When opening the front panel lock cover, the opening angle shall not be greater than 90 degrees. Otherwise, it may get damaged.
(2)Hold the front panel locks with your finger and open the front panel (2 pcs).
(3)Lift up the front panel with both hands while holding down the guide lock with your thumbs and slowly lowering the front panel (2 pcs).(Front panel can only be opened about 15 degrees).
When opening the front panel, pay attention to the gap and corner position between the two panels to prevent your fingers from being clamped.
(4)Remove the composite and deodorizing filter (2 pcs) from the poly bag.
(5)The arrow on the composite and deodorizing filter (2 pcs) faces to the front panel and install it into the body.
When installing and removing the composite and deodorizing filter, be careful not to hit the front panel lock cover and front panel lock.
(6)Close the front panel (2 pcs) slowly.


Notice
(7)Close the front panel lock cover (2 pcs).


3. Power-on
When connecting power, the odor sensor takes this moment as the baseline for the level of cleanliness, so it is recommended when the air in the room is clean (such as when there is no cigarette smoke). (the odor sensor baseline is updated automatically depending on the level of cleanliness in the room)
- Power on, PM2.5 concentration / timer display window shows PM2.5 concentration.
- press,

OPERATION
- This product adopts touch screen operation, the contact area is as large as possible when using a finger to press (if the contact area is too small, may result in no response aftertouch).
- If power is disconnected while operating, when it is connected again, the product will automatically restart and operate in the mode it was in when power was lost.

Power off/on
Turn on or off.
Press the button to operate.
The product operates in auto air volume mode when it is used for the first time, then operates in the last mode when it was stopped.

Press the button again, the product stops operating.
Notice
When the operation is stopped with the power connected, The PM2.5 concentration/ timer display window will still show the current PM2.5 concentration.
Air volume
Select appropriate air volume for purifying the air.

(button lightsup)
Each press of the button, the air volume indicator switches in the order shown below.

(indicator lights up)
Auto(automatically adjust the air volume according to the air pollution detected by the sensor, and use appropriate air volume to purify the air.)
Silent (purifies air quietly at low speed.)
Medium speed (purifies air at medium speed. )
High speed (purifies air at high speed.)
Turbo (purifies air at the fastest speed.)
Silent Auto
One button to operate silently.

(button lights up)
Press this button to operate silently and automatically control the air volume. (The air volume indicator is off at this moment.)
- Press this button again to disable this mode.
PM2.5
Quickly remove PM2.5.

(button lights up)
Press this button to quickly remove PM2.5 and automatically control the air volume (air volume indicator is off), until the indoor PM2.5 concentration is lower than the PM2.5 concentration baseline (factory setting is 35 µ /m ³).
(At this moment, the PM2.5 mode automatically stops and switches to the previous mode operation.)
When the indoor PM2.5 concentration is lower than the PM2.5 concentration baseline, after pressing this button, PM2.5 mode will automatically stop after
approximately 1 minute and then switch to the previous mode operation.
- Press this button again to disable this mode.
Method to set up the PM2.5 concentration baseline:
When the product is stopped operating, press
(PM2.5 concentration/ timer display window)


Set PM2.5 concentration baseline to 35 µ /m³
Set PM2.5 concentration baseline to 75 µ /m³
Notice
Timer setting is disabled when operating in PM2.5 mode.
Timer
Operating at time mode

(button lights up)
Each press of the button will switch the time in the order below on the PM2.5 concentration/ timer display window. About 15 seconds after the selection is completed, the setting will be automatically saved, and the setting is completed.

2 hours timer
Stop operation automatically after 2 hours.
4 hours timer
Stop operation automatically after 4 hours.
8 hours timer
Stop operation automatically after 8 hours.
12 hours timer
Stop operation automatically after 12 hours.
Disable the timer
Notice
The PM2.5 concentration/timer display window will automatically switch to show the current PM2.5 concentration when the setting is completed.
Remote control (touch screen)
Remote control operation.
Operating methods
- The tape must be removed before use. (otherwise, the battery cannot be powered on.)
- When using, please point the signal transmitter to the product and use it within the effective range of the remote control receiver. The effective range of receiver: 5.5 m from the front of the product and within a 60-degree angle range.
- The use of the buttons on the remote control is consistent with the use of buttons on the product. (Page 11 ~ 13)
- After using the remote control, please place it on the remote control holder. (fixed by magnet)


•Battery replacement method (Panasonic CR2025 is recommended. )
- Pull out the battery holder Use your fingernail to push right at and hold it, while pulling out the battery holder at
2. - Replace the battery Insert the battery into the battery holder with the facing upward.
- Install the battery holder insert the battery holder in the remote control, press the middle position of the battery holder and push into the remote control, and you hear a “click”.


Press the middle position and push into the remote control

Safety precautions for battery use
If the battery is used incorrectly, it may generate heat and rupture, which may cause injury or product failure. Please observe the following.
(If the battery is swallowed, seek medical help immediately.)
(If the insulation or exhaust value is damaged, the battery may become hot, crack.
Notice
When discarding batteries, follows local laws and regulations.


MAINTENANCE
(Otherwise, the product might operate with the possibility of electric shock or injury.)

•Do not operate the product when the composite and deodorizing filter is removed. (The composite and deodorizing filter cannot function while it is removed. Dust will be inhaled into the product’s inner parts and causes the product breakdown. )
Notice
•Do not use detergents shown on the right.

•When using a chemically treated cloth, make sure to follow the instructions carefully.
•When maintenance, do not leave the removed parts unattended.
(Otherwise, it may cause tripping or damage.)
Cleaning method
Dirt sensor (about once every 3 months)
Wipe the dirt off the lens with a dry cotton swab
- Remove the cover of the dirt sensor as shown below.
- Wipe the lens with a dry cotton swab as shown below.

Wipe the lens periodically.
(The sensor may not function normally with an accumulation of moisture and smoke from cigarettes.)
- Do not insert a cotton swab in other parts.
- Be sure to disconnect power before cleaning.
- You can use light in order to see the lens clearly.
Body and Front panel (about once a month)
Wipe off any dust and dirt using a well
wrung-out soft cloth
Check page 8 to 10 for opening and closing methods.
•Do not wipe it with a hard cloth or hardly.
Otherwise, the surface may be damaged.
Pre-filters
(about once a month)
Wash with water
Pull out horizontally. (when installing, Inserthorizontally until it reaches the end)
Soak a soft cloth in warm water or water with a neutral kitchen detergent, then scrub to remove the stain.

Composite and deodorizing filter (When the filter clean indicator is on (about once a month))
Clean the black side (Active carbon side) with a vacuum cleaner
The Removal and installation method can be found on pages 9 to 10.
When vacuuming, do not apply too much pressure as the filter may be damaged.
The filter side is free of maintenance.
Never wash the filter with water.
After cleaning, connect the power, press,

Filter replacement
| composite and deodorizing filte | |
| Replacement period | When the filter replacement indicator lights on |

Filter replacement
- After replacing the filter, record the date installed on the label that came with the filter and attach it to the body, cover the previous date record. (Page 8 )
- Connect the power, press


Notice
- The filter which needs to exchange cannot be used again even if cleaned, please dispose of it as non-flammable garbage.
- If the product is used in a room (especially hotel) with a strong odor such as aromatic smell, cigarette smoke, or barbecue smell, these odors may adhere to the filter, when the adsorption capacity of the filter reaches saturation, the odor will also be blown out again with the wind because of excess adsorption. When there is the above situation, please clean the composite and deodorizing filter. If the situation persists, please replace the composite and deodorizing filter, even if the filter replacement indicator is off. In addition, if often used in a room with a strong odor, please open the windows to ventilate the room regularly.
When idle for a long time
- Disconnect power after turning off the product. (The product still consumes power even at rest.)
- Maintain the product as usual.
FURTHER INFORMATION
About nanoe
- nanoe®can be switched off.
During operation, press and buttons at the same time for about 3 seconds nanoe® indicator lights off) Press the buttons for about 3 seconds again to restart the nanoe®. (nanoe® cannot be set during product stops operating.) - Conditions for nanoe® generation nanoe® are generated by using the air in the room. Therefore, due to the differences in temperature and humidity nanoe® may not be generated stably. Room temperature: about 5 35 (dew-point temperature: 2 ) Relative humidity: about 30% 85%
- When nanoe®is generated, a small amount of ozone will be released. However, the quantity will be far less than the level in the natural environments such as forests, and not be harmful to human beings.
FURTHER INFORMATION
About odor sensor dirt sensor
The sensor detects air pollutants and shows the pollution level by the clean sign. In auto operation, the product can optimize the air volume for purifying the air according to the detected pollutants.
| Sensor | Sensing scope | May detect |
| Odor sensor |
|
|
| Dirt sensor |
|
|
- The sensor sensitivity is adjustable. (The factory setting is “b2” (medium sensitivity).)
When the product stops operating, touch and hold
Under such conditions, each time you touch,


Notice
- The sensor’s operation may vary depending on the indoor airflow condition if a heater is placed near the product in a room.
- The sensor is not designed to detect bacteria and viruses.
About brightness reaction
Detects the indoor brightness by the light sensor, and automatically adjusts the brightness of the indicators and the air volume.
When the room becomes dark during bedtime, the indicator goes dim or lights off, and the product runs with low air volume.
- The sensitivity of the sensor can be adjusted. (The default setting is sensitivity 1.)
When the product stops operating, press and hold for about 3 seconds. At this moment, all the control buttons and the filter replacement indicator light on, and the air volume indicator flashes.
Under such conditions, each time you press, the PM2.5 concentration/timer display window will switch once in the order as shown in the following figure. The setting will be automatically saved within about 15 seconds after the selection is completed. Now the setting is completed.

Notice
When the air volume is set to High, Mid, or Low, the air volume cannot be adjusted automatically.
| Brightness sensing mode | The indoor brightness goes down | |
| Brightness sensing 1 | Control panel | Clean sign |
| Brightness sensing 2 | Light half on | Light off |
| No brightness sensing | Light half on | Light half on |
| Light unchanged | Light unchanged | |
About human sensor
When the movement of a person or pet is detected, the air volume is automatically adjusted. When the generation of indoor dust is predicted, the product starts operating before the indoor air pollution spreads. (When the air volume is set to auto.) (Not all pet movements can be detected.)
The sensor sensitivity is adjustable. (The factory setting is “normal sensitivity”.)
When the product stops operating, press and hold
Under such conditions, each time you press, the PM2.5 concentration/timer display window will switch once in the order as shown in the following figure. The setting will be automatically saved within about 15 seconds after the selection is completed. Now the setting is completed.


Detection range
At a room temperature of 25 :
- The sensing distance is about 2.5 m
- The sensing angle is about 150°

FAQ
Please confirm the following before you put questions forward or send the product for repair.
Q1. Why is a “jee” sound from the emission outlet?
A . There is a slight sound when nanoe® X is being generated. Depends on the environment and operation mode, the sound may be a bit loud or inaudible but it is not abnormal.
Q2. Why does the clean sign light off during operation?
Since the light sensor detects that the indoor brightness goes dim, the brightness of the indicator is automatically adjusted. (P. 20)
Why has the clean sign never changed?
Q3.Such problems may occur because of the difference in sensitivity of the sensor. (P. 19)
Q4.Why is the human activity sensor indicator always on without someone or a pet moving?
When you use an electric room heater with a swing function, if the indoor temperature changes, the sensor could automatically function even if nobody is moving.
Q5.How to disable the human activity sensor?
You can disable it by setting the sensitivity of the human activity sensor. (P. 21)
Q6.Why is the human activity sensor indicator off?
- The human activity sensor does not operate within 2 minutes after the power supply is connected.
- The human activity sensor does not take effect beyond the detectable area or when it is blocked by furniture.
- The human activity sensor may fail to function when the body temperature is the same as the ambient temperature.
- Is the human activity sensor stained?
→Use a dry cotton swab to clean the human activity sensor.
TROUBLESHOOTING
If a problem is encountered, please investigate it by going through the following items.
If the problem still persists, please disconnect the power plug and contact the dealer for repair.
| Possible situation | Please confirm the following |
| 1. The clean sign remains red even when the operation continues. |
|
| 2. Automatic operation cannot be stopped |
|
| 3. The clean sign remains blue even when the air is dirty. |
|
| 4. Polluted air is difficult to be removed |
→Please clean it. If the situation persists, replace the filter with a new composite and deodorizing filter. |
| 5.The air volume is small | |
| 6. The odor from the product is unpleasant |
|
| The PM2.5concentration/ timer display window displays the letters F and two digits,.like |
•The product may be out of order. The PM2.5 concentration/ timer display window displays the letter F and two digits,. →Please disconnect the power and contact the dealer for repair. |

If any of the following cases occur, please contact the dealer immediately for repair.
SPECIFICATIONS
| Model number | F-PZT175H | |||
| Power supply | 220 V— 50 Hz | |||
| Air volume settings
|
Turbo | High | Medium | Silent |
| Power consumption (W) |
75 | 42 | 15 | 11 |
| Product dimension | Width 758 mm X Deep 220 mm X Length 1412 m | |||
| Product weight | 49 kg | |||
Note: This product cannot remove hazardous substances such as carbon monoxide from cigarette smoke.
OPTIONAL ACCESSORIES
Replacement composite and deodorizing filter

Part No.: F-ZXTS175Z
Call the dealer
- When PM2.5 Concentration / Timer display window shows the letter F with two numbers, such as
The product may be out of order.
→Please disconnect the power and contact the dealer for repair.
Panasonic Corporation
Web site: http://www.panasonic.com
© Panasonic Corporation 2020