Panasonic NN-TK714S Microwave Trim Kit Instruction Manual


Installation Instructions
Notice d’installation
| Cabinet | Trim kit |
| 24″ (596 mm) | NN-TK714S |
Read carefully and keep these installation instructions.
© Panasonic Appliances Microwave Oven (Shanghai) Co., Ltd. 2014
Important Safety Instructions

- This Trim Kit is designed for use only with the Panasonic Microwave Oven listed in the table below, for installation into a cabinet.
- The dimensions and ground clearance of the cabinet opening must be as indicated in Figure 1 on pages 6-8.
- For safe use of your microwave oven, do not alter or modify any part of this kit or the microwave oven.
- The microwave oven must be used with a properly grounded 3-prong receptacle in compliance with the National Electrical Code, as well as any applicable local regulations. Refer also to the microwave operating instructions for other safety and electrical requirements.
- The microwave oven must be unplugged from the wall receptacle before attempting the installation of this kit.
- Save these instructions for local inspection and relocation of the microwave oven.
- Use caution so that the power cord is not pinched during installation.
- The diagrams in these instructions may vary from the actual unit and is only for reference.
Trim kit Panasonic Microwave Oven Models NN-TK714S NN-SE7**S
NN-SD7**S
NN-SN7**S
NN-ST7**SParts List
Tools Needed: Measuring tape, pencil, Phillips screwdriver, Ø 2 mm ( 5/64″ ) drill
Parts Supplied
PART QUANTITY
Trim Frame 1 Left Duct 1 Base Bracket Assembly 1 Bracket 4 Catch 4 Screw 10 Strike 4 Tape 2 Installation Diagram
Trim Kit Dimensions
Width 596 mm (23½”) Height 410 mm (16⅛”) Depth (Thickness) 20 mm (¾”) Cabinet Diagram and Dimensions
Microwave Oven Preparation
Put a piece of the tape on the top of the oven and put a piece of the tape on the left of the oven and left duct.
Lower Duct Installation
Center Line of Cabinet
- Aligning the base bracket assembly
Position Base Bracket Assembly on a cabinet shelf. The front end of the Base Bracket Assembly should align flush with the front edge of the shelf. - Attaching the base bracket assembly
Cabinet Preparation
- Attaching the bracket
- Bracket assembly
- Inserting strikes
- Oven placement
- Trim frame installation
Press the left side first, and then press the right side.
(Note: Catch could be broken if over-pressing at the center area)Trim Kit Preparation
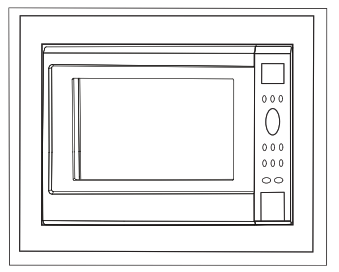
Trim Frame
Microwave Oven Installation
Complete the assembly
Trim Kit/Finishing Installation
Complete the assembly
Note: Place the trim frame with the extended lip at the bottom
F0313BE94AP
PA0514-41117 - Aligning the base bracket assembly


Was this manual helpful?
Thank you for your feedback!