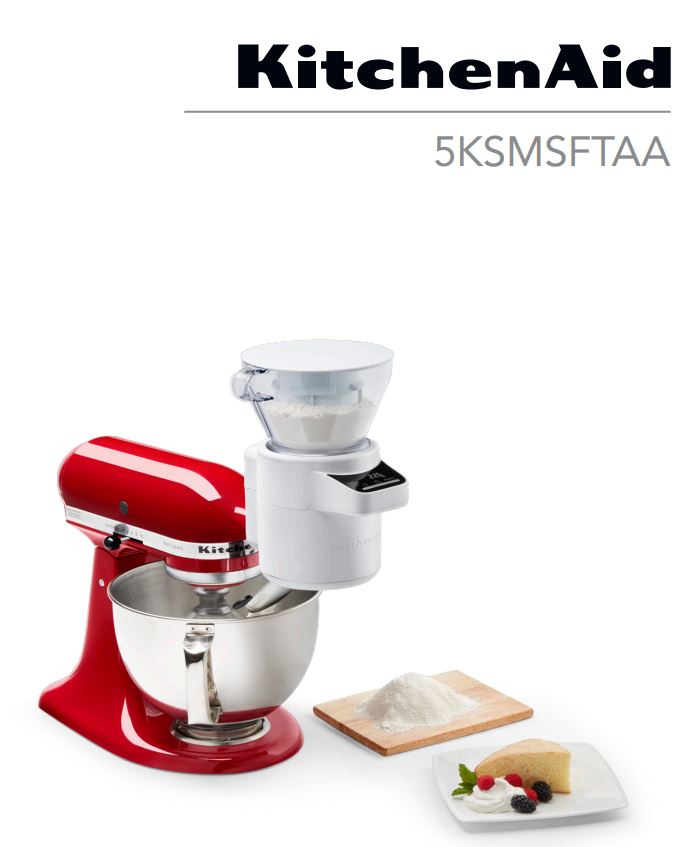
KitchenAid 5KSMSFTAA Sifter and Scale
Mixer Attachment User Guide
KitchenAid 5KSMSFTAA Sifter and Scale Mixer Attachment User Guide

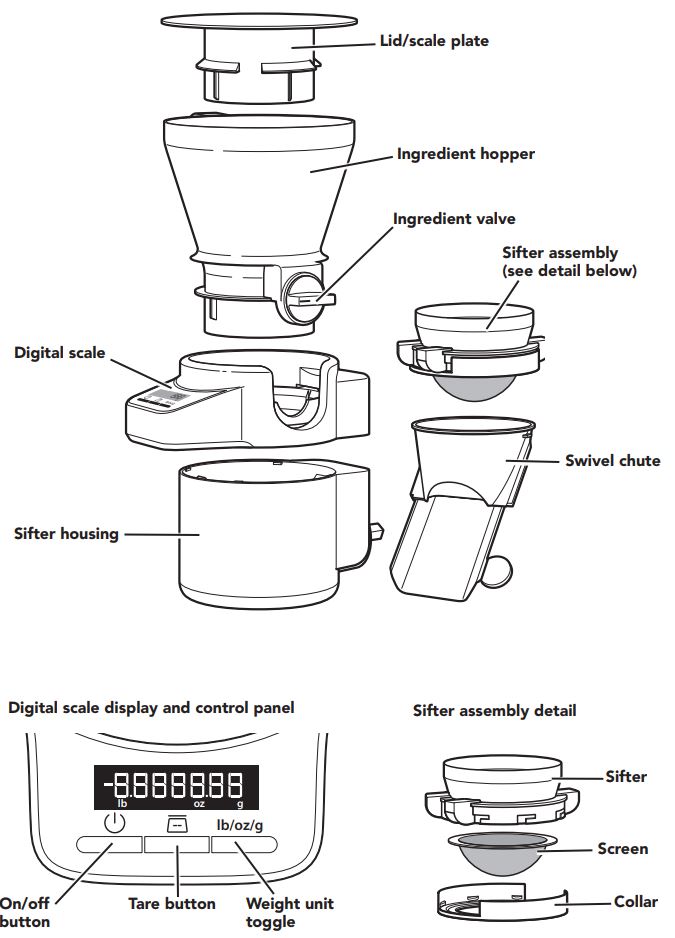
PARTS AND FEATURES
PARTS AND ACCESSORIES

SIFTER+SCALE ATTACHMENT SAFETY

IMPORTANT SAFEGUARDS
When using electrical appliances, basic safety precautions should always be followed, including the following:
- Read all instructions. Misuse of appliance may result in personal injury.
- This appliance is not intended for use by persons (including children) with reduced physical, sensory, or mental capabilities, or lack of experience or knowledge, unless they have been given supervision or instruction concerning use of the appliance by a person responsible for their safety.
- Children should be supervised to ensure that they do not play with the appliance.
- To protect against risk of electrical shock, do not put appliance in water or other liquid.
- Never leave the appliance unattended while it is in operation.
- Turn the appliance off, unplug from outlet and detach the Sifter+ Scale attachment from appliance before cleaning and when not in use. Turn the appliance off and make sure the motor stops completely before putting on or taking off parts.
- Avoid contacting moving parts. Keep hands, hair, and clothing, as well as spatulas and other utensils away from accessories during operation to reduce the risk of injury to persons and/or damage to the appliance.
- The use of attachments not recommended or sold by KitchenAid may cause fire, electric shock, or injury.
- Refer to the “Care and Cleaning” section for instructions on cleaning the surfaces in contact with food.
- Also see the Important Safeguards section included in the Stand Mixer Use and Care Guide.
- This appliance is intended to be used in household and similar applications such as: – staff kitchen areas in shops, offices or other working environments; – farmhouses; – by clients in hotels, motels and other residential type environments; – bed and breakfast type environments.
SAVE THESE INSTRUCTIONS
USING THE SIFTER+SCALE ATTACHMENT
SIFTER+SCALE CONFIGURATIONS
The Sifter + Scale attachment is compatible with all household KitchenAid Stand Mixers, including all accessory stainless steel, glass, and ceramic bowls. It is not compatible with the Precise Heat Mixing Bowl, Ice Cream Maker, or the Pouring Shield.
The Sifter +Scale attachment can be used in multiple ways: to weigh and sift ingredients while slowly feeding them into the mixer bowl or into a separate container, to weigh and feed ingredients without sifting, and to weigh ingredients on your countertop.

To weigh, sift, and slowly feed ingredients into mixer bowl or separate container: Use the complete attachment for recipes calling for ingredients to be sifted and fed slowly into the mixer bowl or a separate container.

To weigh and feed ingredients into bowl without sifting: Use the attachment without the sifter when weighing and feeding larger ingredients, such as whole oats, that do not need to be sifted. To add those ingredients slowly, you can limit the flow by using the ingredient valve.

To use as a countertop scale: Set the scale on your countertop or table and place the lid/scale plate on top.
ATTACHING THE SIFTER HOUSING TO THE STAND MIXER

ASSEMBLING THE SIFTER+SCALE ATTACHMENT

To install the swivel chute: Lower the swivel chute into the sifter housing at an angle, aligning the marks on the swivel chute with the marks above the notches on the inside of the sifter housing. Properly installed, swivel chute will be seated securely in the sifter housing and will rotate easily.
TIP: Aligning the handle tab on the chute with one of the notches as you lower the swivel chute into the sifter housing will help you to line up the marks

To install the sifter assembly: Lower the sifter into the sifter housing at an angle so that the drive shaft can be inserted into the sifter housing. Once the shaft is inserted all the way, press down on the sifter, opposite of the shaft, to click it into place.

To install the scale: Place the scale on top of the sifter housing with the digital scale display facing away from the Stand Mixer, and slightly left of center. Twist the scale counterclockwise until it locks into place.

To install the ingredient hopper: Align the ingredient valve with the corresponding notch on the scale, and lower the hopper onto the scale until fully seated.
WEIGHING AND SIFTING INGREDIENTS

Press


Before adding ingredients to the hopper, be sure the ingredient valve is in the closed position and swivel chute is pointed into the mixer bowl or an appropriate container.
NOTE: If desired, the scale and hopper can sit on the countertop, and ingredients can be added until the target weight is achieved. The full scale and hopper can then be installed onto the attachment.
OPTIONAL: Press the lb./oz./g button to choose between pounds, ounces, and grams. The default setting is grams.

Add your ingredients to the ingredient hopper until you reach the target weight.
TIP: Make sure your dry ingredients have no large or hard clumps before feeding them through the sifter. As with any sifter, large or hard clumps may not be broken up during the sifting process.

Turn on the Stand Mixer to the desired speed, then open the ingredient valve. The ingredients will be sifted and flow into the bowl according to the selected speed.
NOTE: The sifter can operate at any speed, so select the speed that works best for your recipe.
TIP: If your recipe calls for multiple dry ingredients, press
NOTE: Once you’ve weighed your ingredients, you may turn off the scale at any time by pressing


Once sifting appears to be complete, tap the housing and then the chute to release all residual ingredients.
TIPS FOR GREAT RESULTS
HELPFUL HINTS
- If the ingredients are sifting faster than desired, you can use the ingredient valve to limit the rate at which ingredients flow into the sifter.
- When releasing ingredients, it may be necessary to flip the valve back and forth 1-2 times or tap the hopper to ensure all ingredients are released.
- The maximum capacity of the scale is 1,000g / 2.2lbs / 2lbs 3oz, and the scale measures in increments of 1g / 0.002lb / 0.05oz.
- Do not feed brown sugar through the sifter, as it may clog the sifter screen.
- If ingredients become jammed in the sifter, turn the mixer off and use a spoon to clear the jam.
- Use dry ingredients only with the Sifter + Scale attachment.
- Make sure your dry ingredients have no hard or large clumps before feeding them through the sifter. As with any sifter, clumps will not be broken up during the sifting process.
- The ingredient hopper does not lock into place. If using a tilt-head Stand Mixer with the sifter attached, be sure to remove the ingredient hopper before lifting the mixer head to avoid the ingredient hopper tipping or falling off of the sifter.
- You may wish to place the lid/scale plate on top of the hopper to reduce dust when sifting.
TROUBLESHOOTING
While using the Sifter + Scale attachment, you may see the following messages displayed:
Err
The scale has exceeded its weight limit. Remove ingredients from hopper, and try again with a smaller amount.
– – – Err1
Tare error. Remove ingredients and turn off power. Then, turn power back on. If Err1 is still present, call customer service.
CARE AND CLEANING
CLEANING THE SIFTER+SCALE ATTACHMENT AND ACCESSORIES
The following parts are dishwasher-safe, top rack only: ingredient hopper, sifter assembly, swivel chute, and scale plate.
TIP: When placing the ingredient hopper on the rack, be sure it is lying on its side with the ingredient valve facing down.

Do not immerse the scale or sifter housing in water or other liquid. Wipe clean with a warm, damp cloth, and dry thoroughly with a soft cloth before re-use or storing.
To disassemble the sifter assembly: Turn the collar to the left to loosen and release the screen for cleaning, if desired.
REPLACING THE BATTERIES
The digital scale of your Sifter + Scale attachment is powered by 2 AAA batteries (included).

Flip the digital scale over, and use a Phillips-head screwdriver to remove the screw on the compartment cover. Lift the compartment cover as shown.

Replace the 2 AAA batteries in the compartment. Make sure to replace the screw when reattaching the compartment cover.
SERVICE
CUSTOMER SERVICE
In Australia:
For any questions, or to find the nearest Authorized KitchenAid Service Centre, please find our contact details below.
NOTE: All service should be handled locally by an Authorized KitchenAid Service Centre.
Toll free number: 1-800-990-990
Phone number: 02 49026500
Address Australia:
KitchenAid Australia Pty Ltd
6-8 Billbrooke Close Cameron Park NSW 2285, Australia
Phone: 1-800-990-990
Mobile: 0249026500
Email:
In New Zealand:
Website: www.kitchenaid.co.nz
Email:
Phone: 0800 881 200
In other countries:
For all product related questions and after-sales matters, please contact your dealer to obtain the name of the nearest Authorized KitchenAid Service/Customer Centre.
For more information, visit our website at:
www.KitchenAid.com.au
Specifications subject to change without notice.
